Suggested Reading: Single Sign-On (SSO)
This guide lists the actions you need to complete to configure SSO with Microsoft Azure Active Directory (AD), often called AD-SSO, as your identity provider:
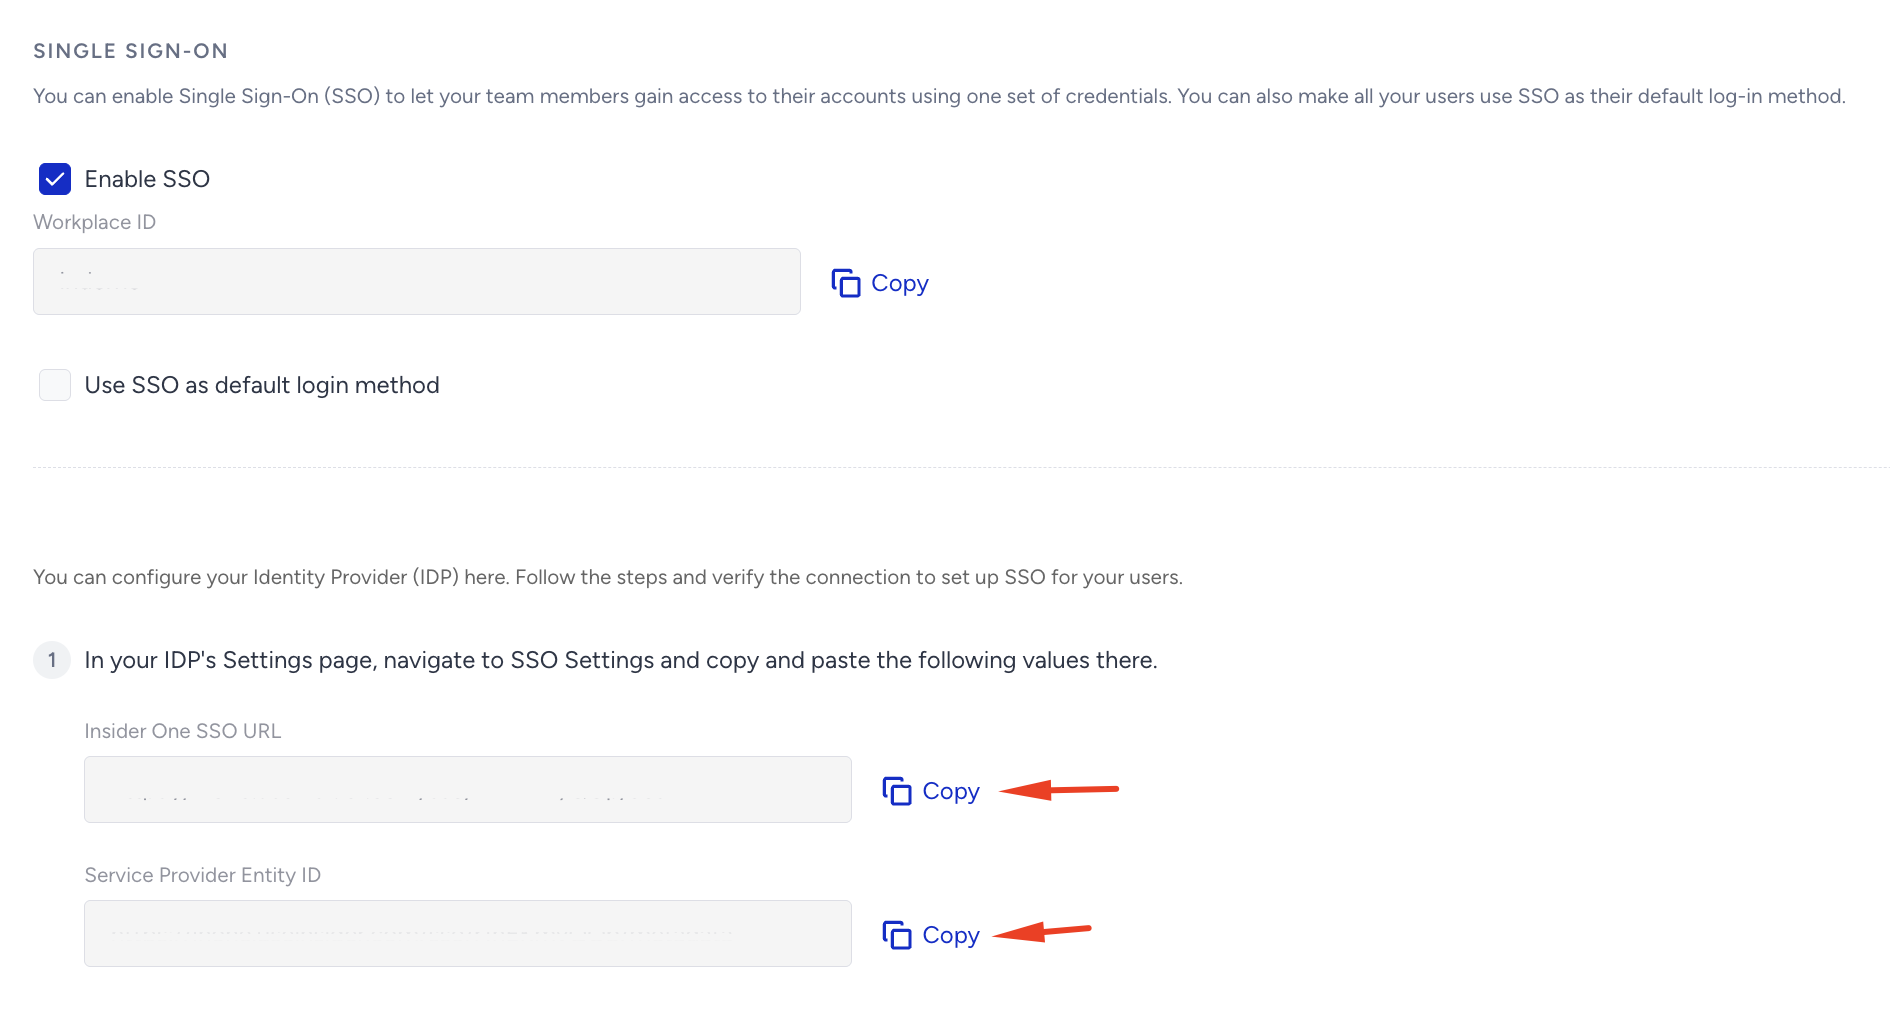
Go to Settings > Inone Settings > Security on your Inone panel.
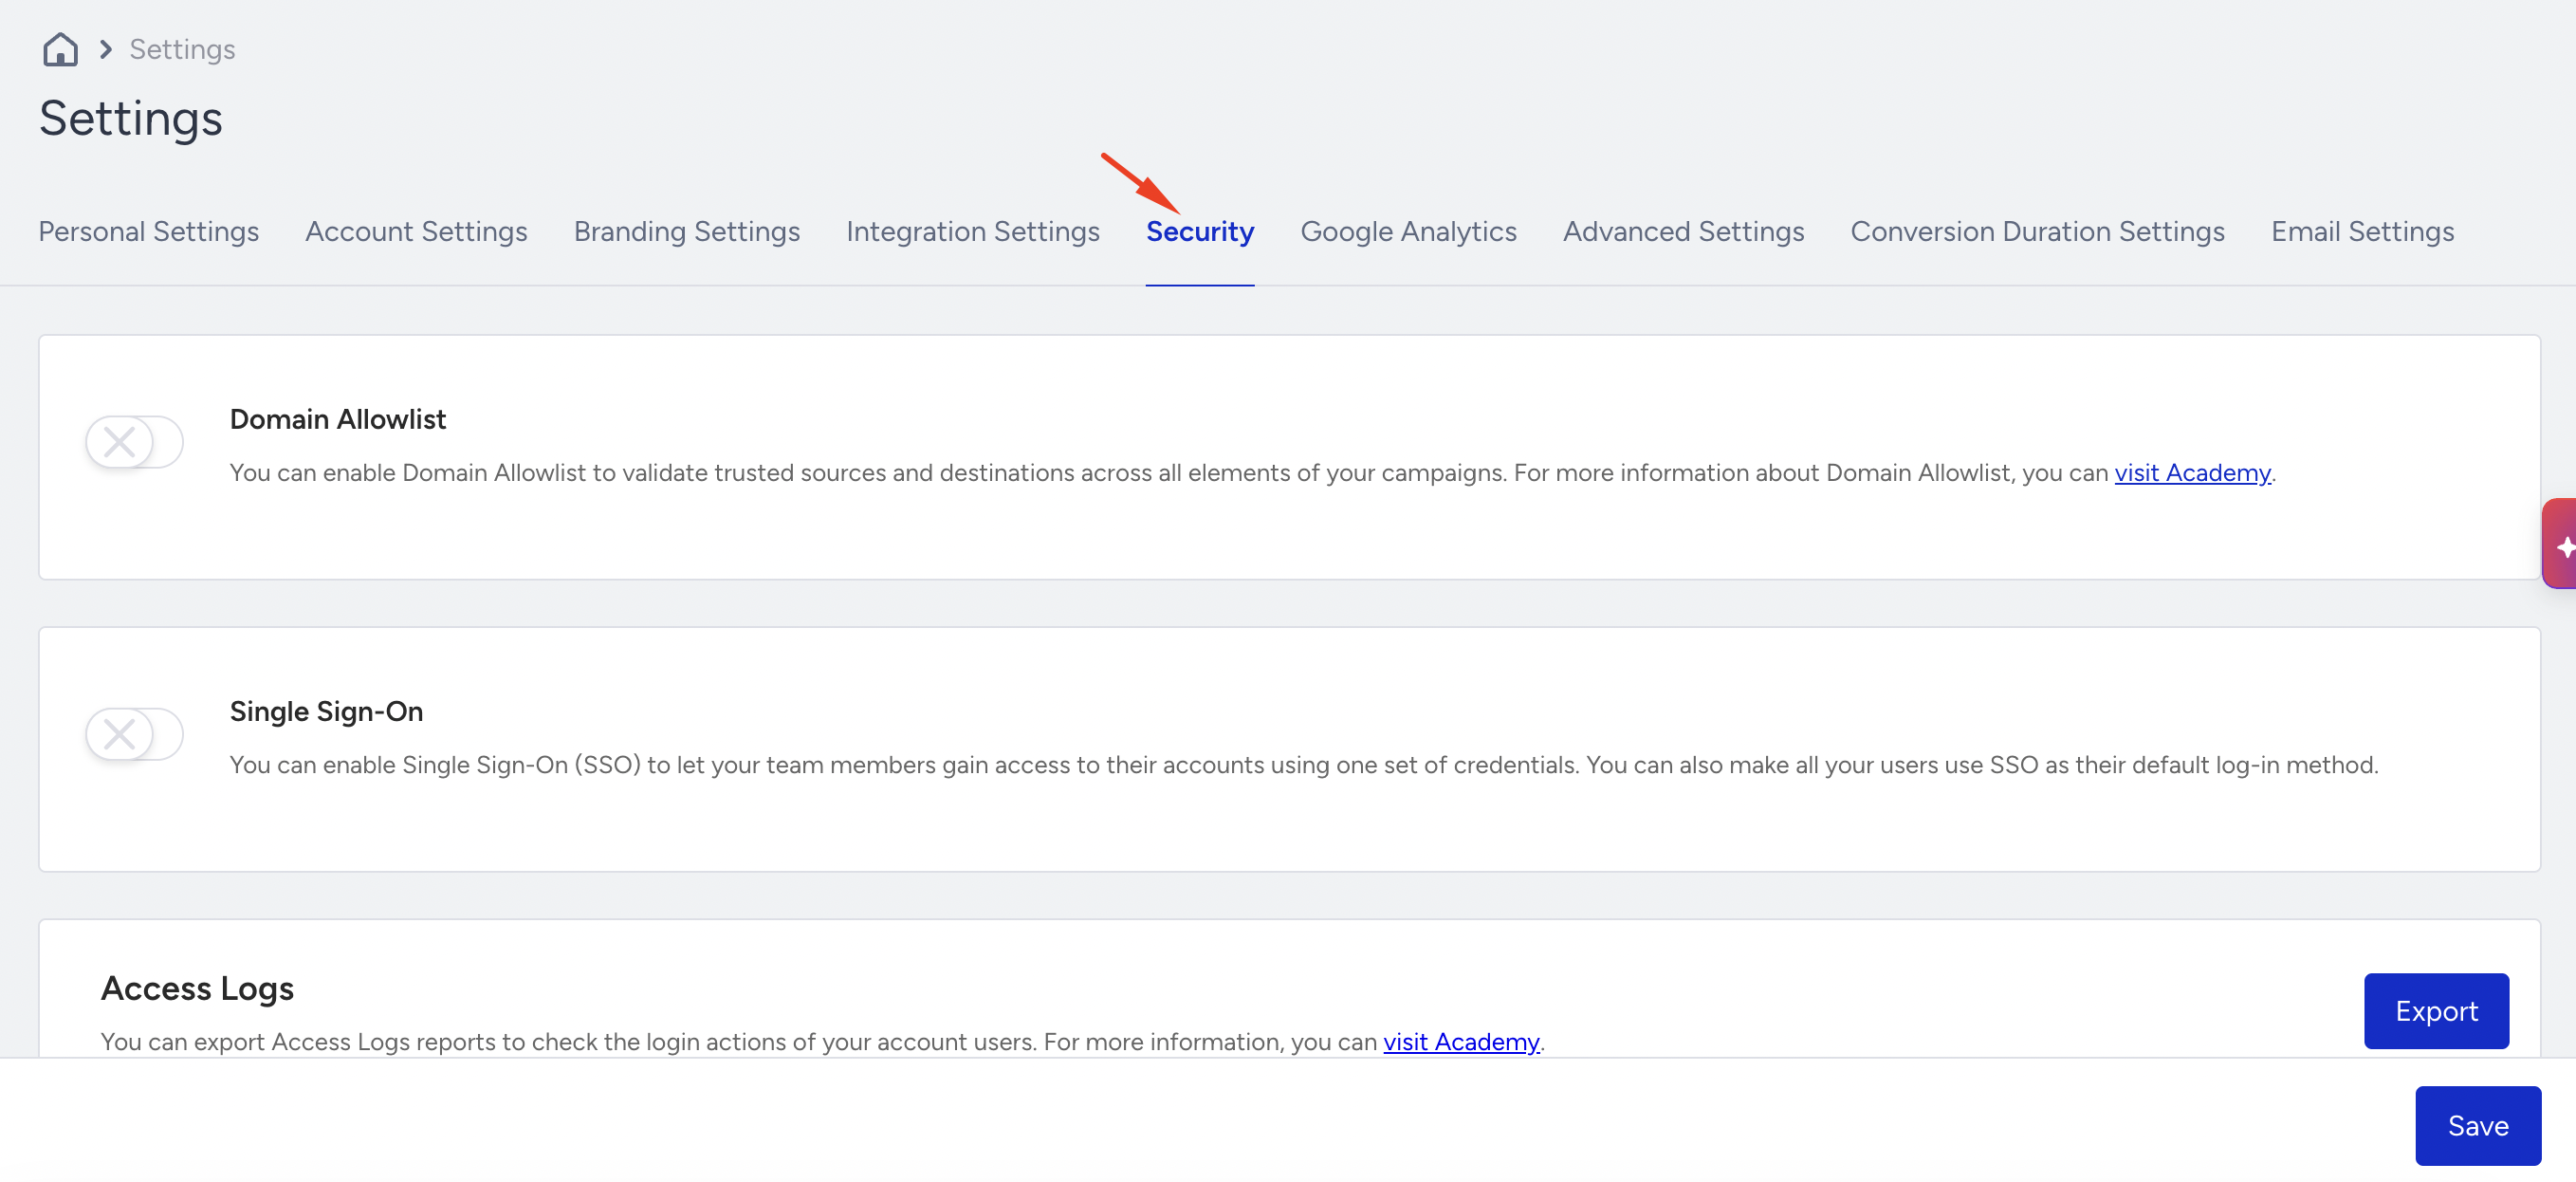
Click the "Enable SSO" checkbox to enable Single Sign-on. The workplace ID given will be the ID you use to enter the panel when first signing in with SSO. This ID is the same as the panel name.
If you want to enforce all users to enter the panel via SSO, you can check the “Use SSO as default login method” checkbox. Once you check this box, your current users will not be able to use their Insider-specific usernames and passwords.
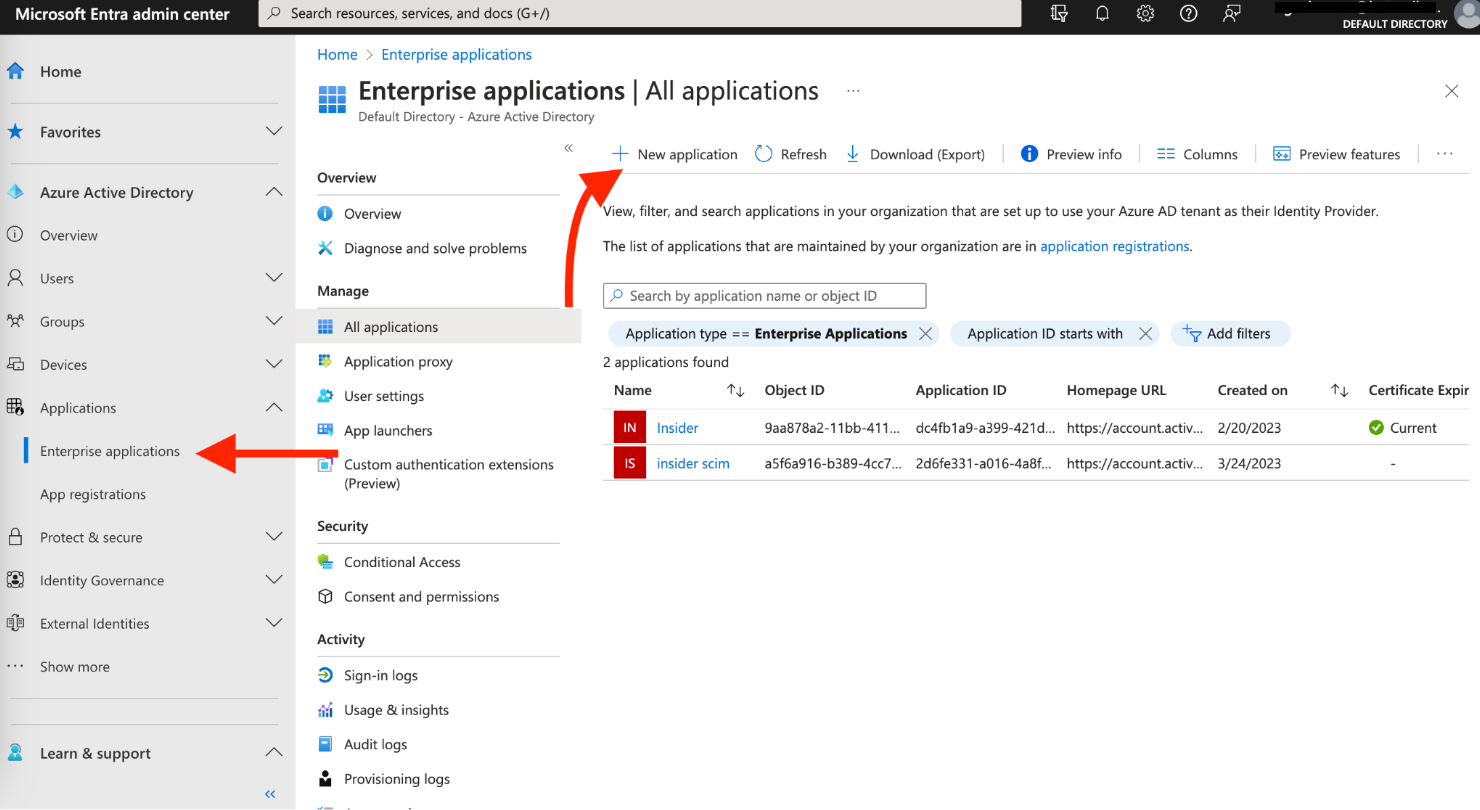
Log in to your Azure AD app and go to Applications > Enterprise Applications to click the + New application button.
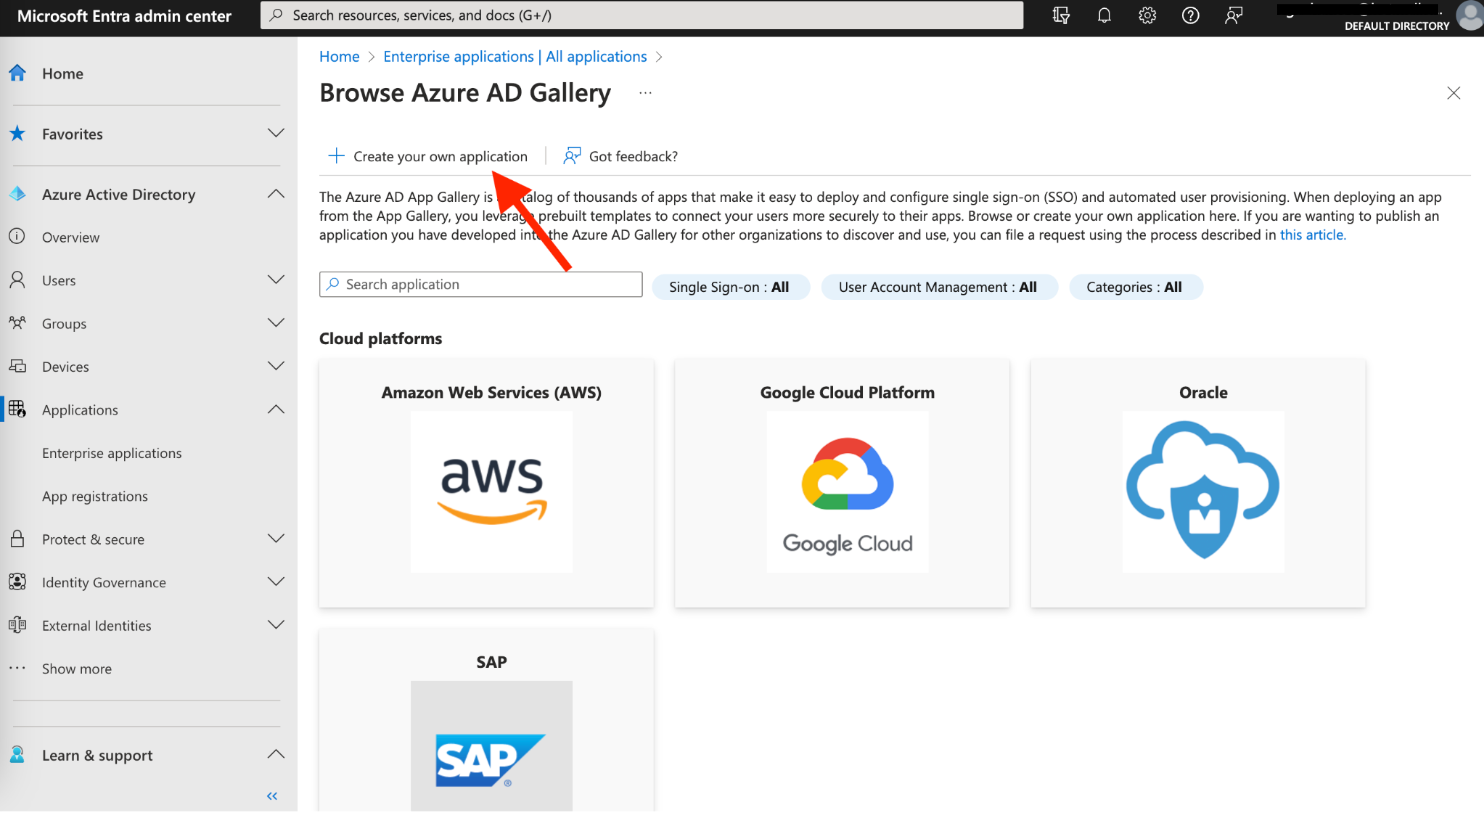
Click the + Create your own application button.
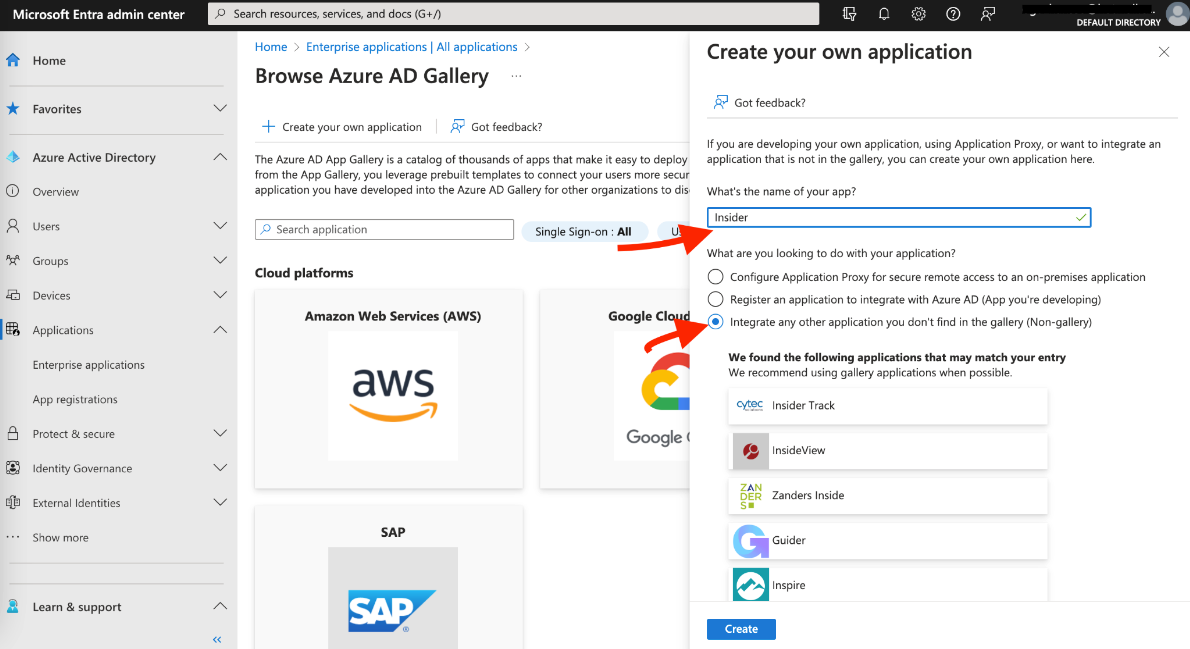
Name your app and choose the option shown below on the pop-up.
If you have multiple panels and want to assign different user roles to each, you need to create separate applications for each panel. You can name them accordingly.
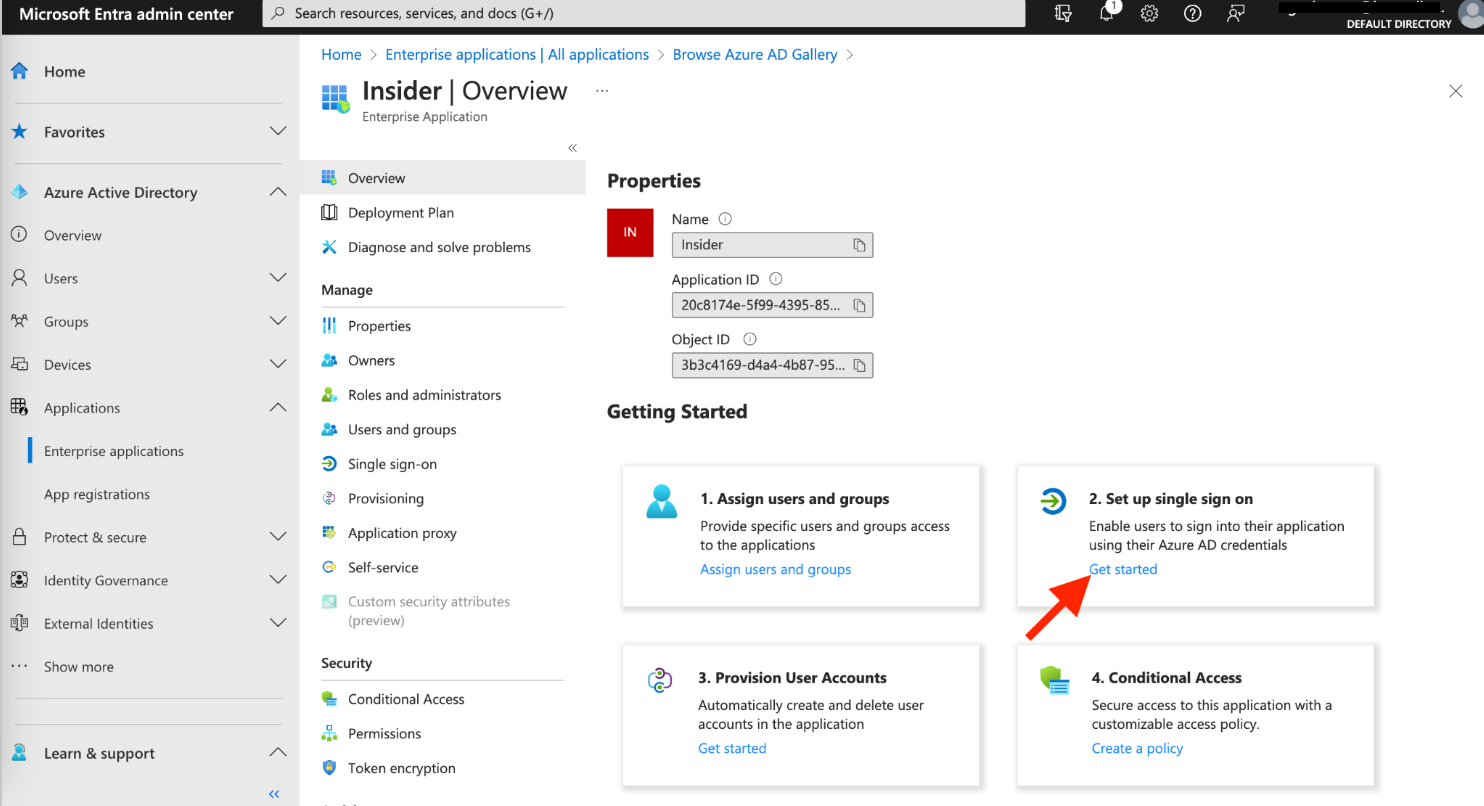
Go to the “Set up single sign-on” option.
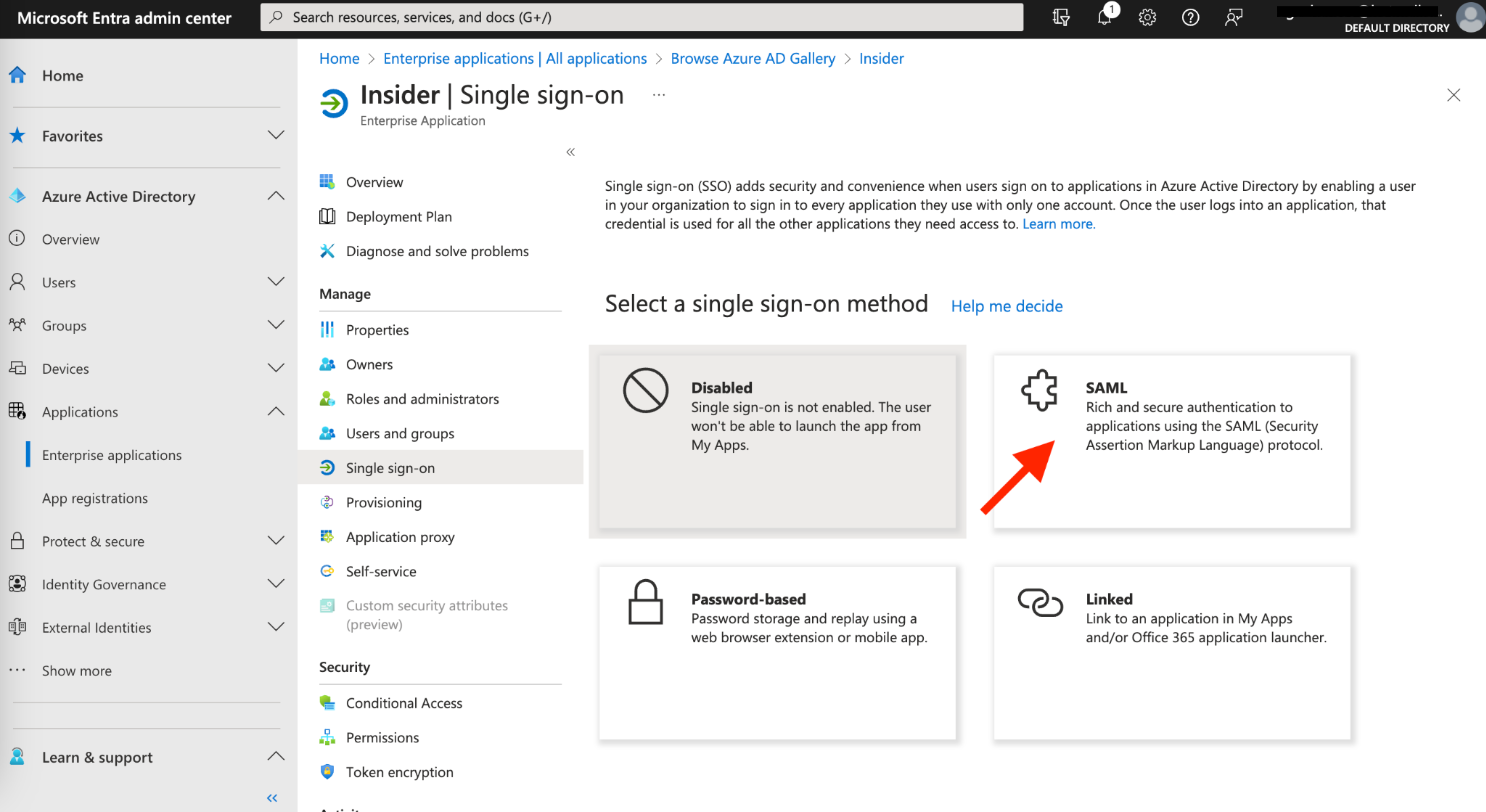
Select SAML as your single sign-on method.
On the following page, click the Edit button next to the Basic SAML Configuration.
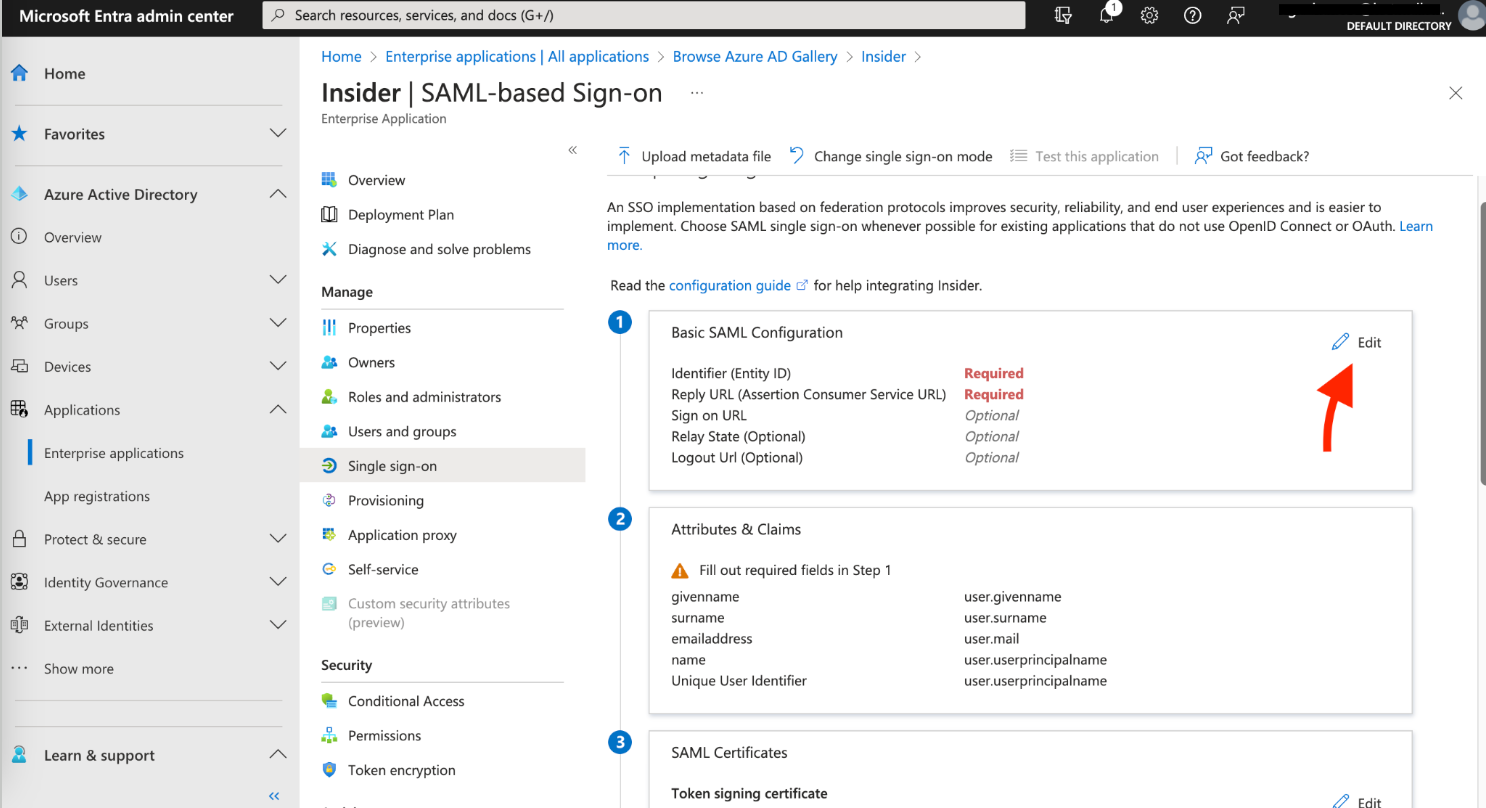
Copy the Insider SSO URL from the Insider One panel and paste it into the Reply URL (Assertion Consumer Service URL) on Azure. Copy the Service Provider Entity ID from the Insider One panel and paste it into Identifier (Entity ID).
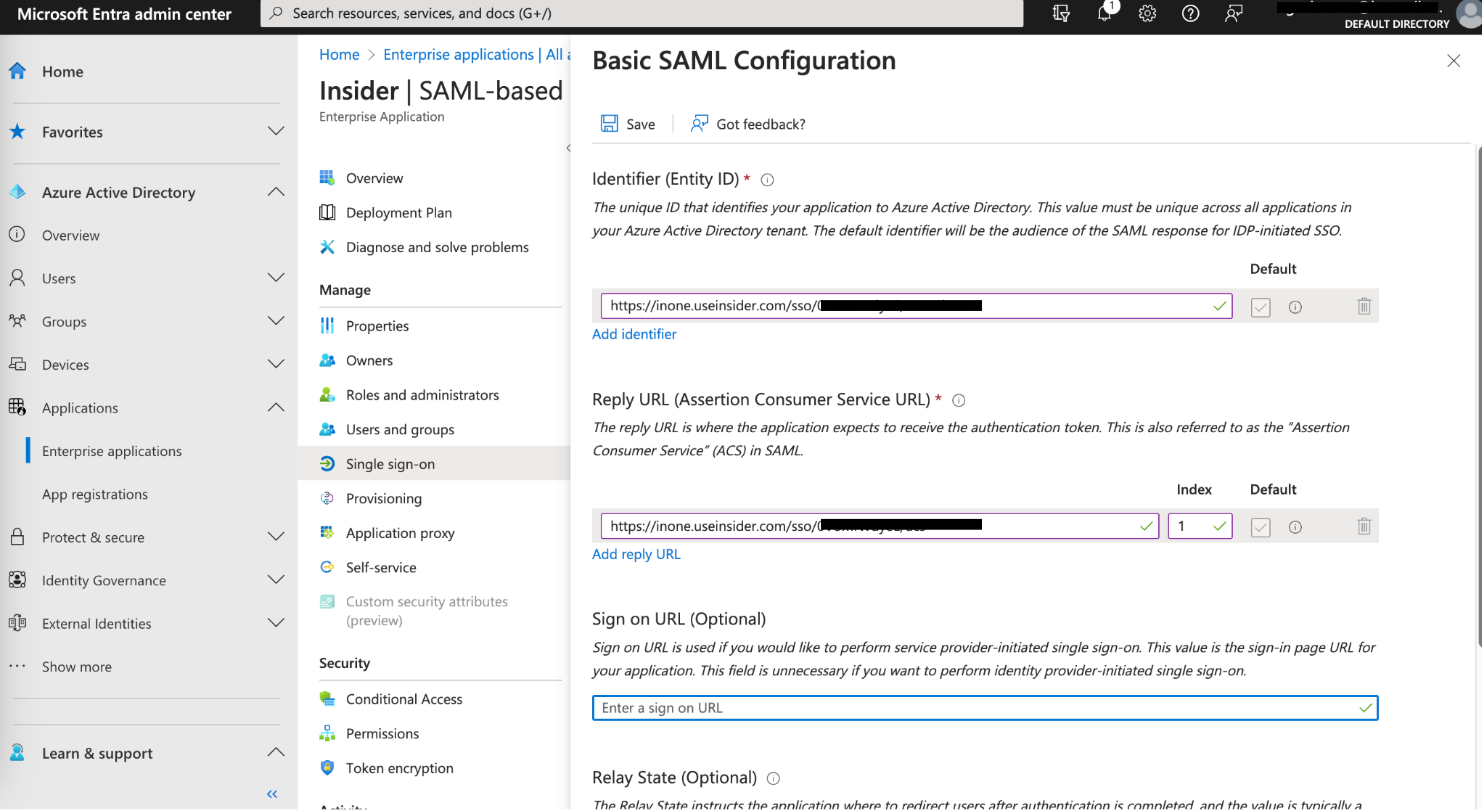
Leave the Sign on URL (Optional) and Relay State (Optional) options empty.
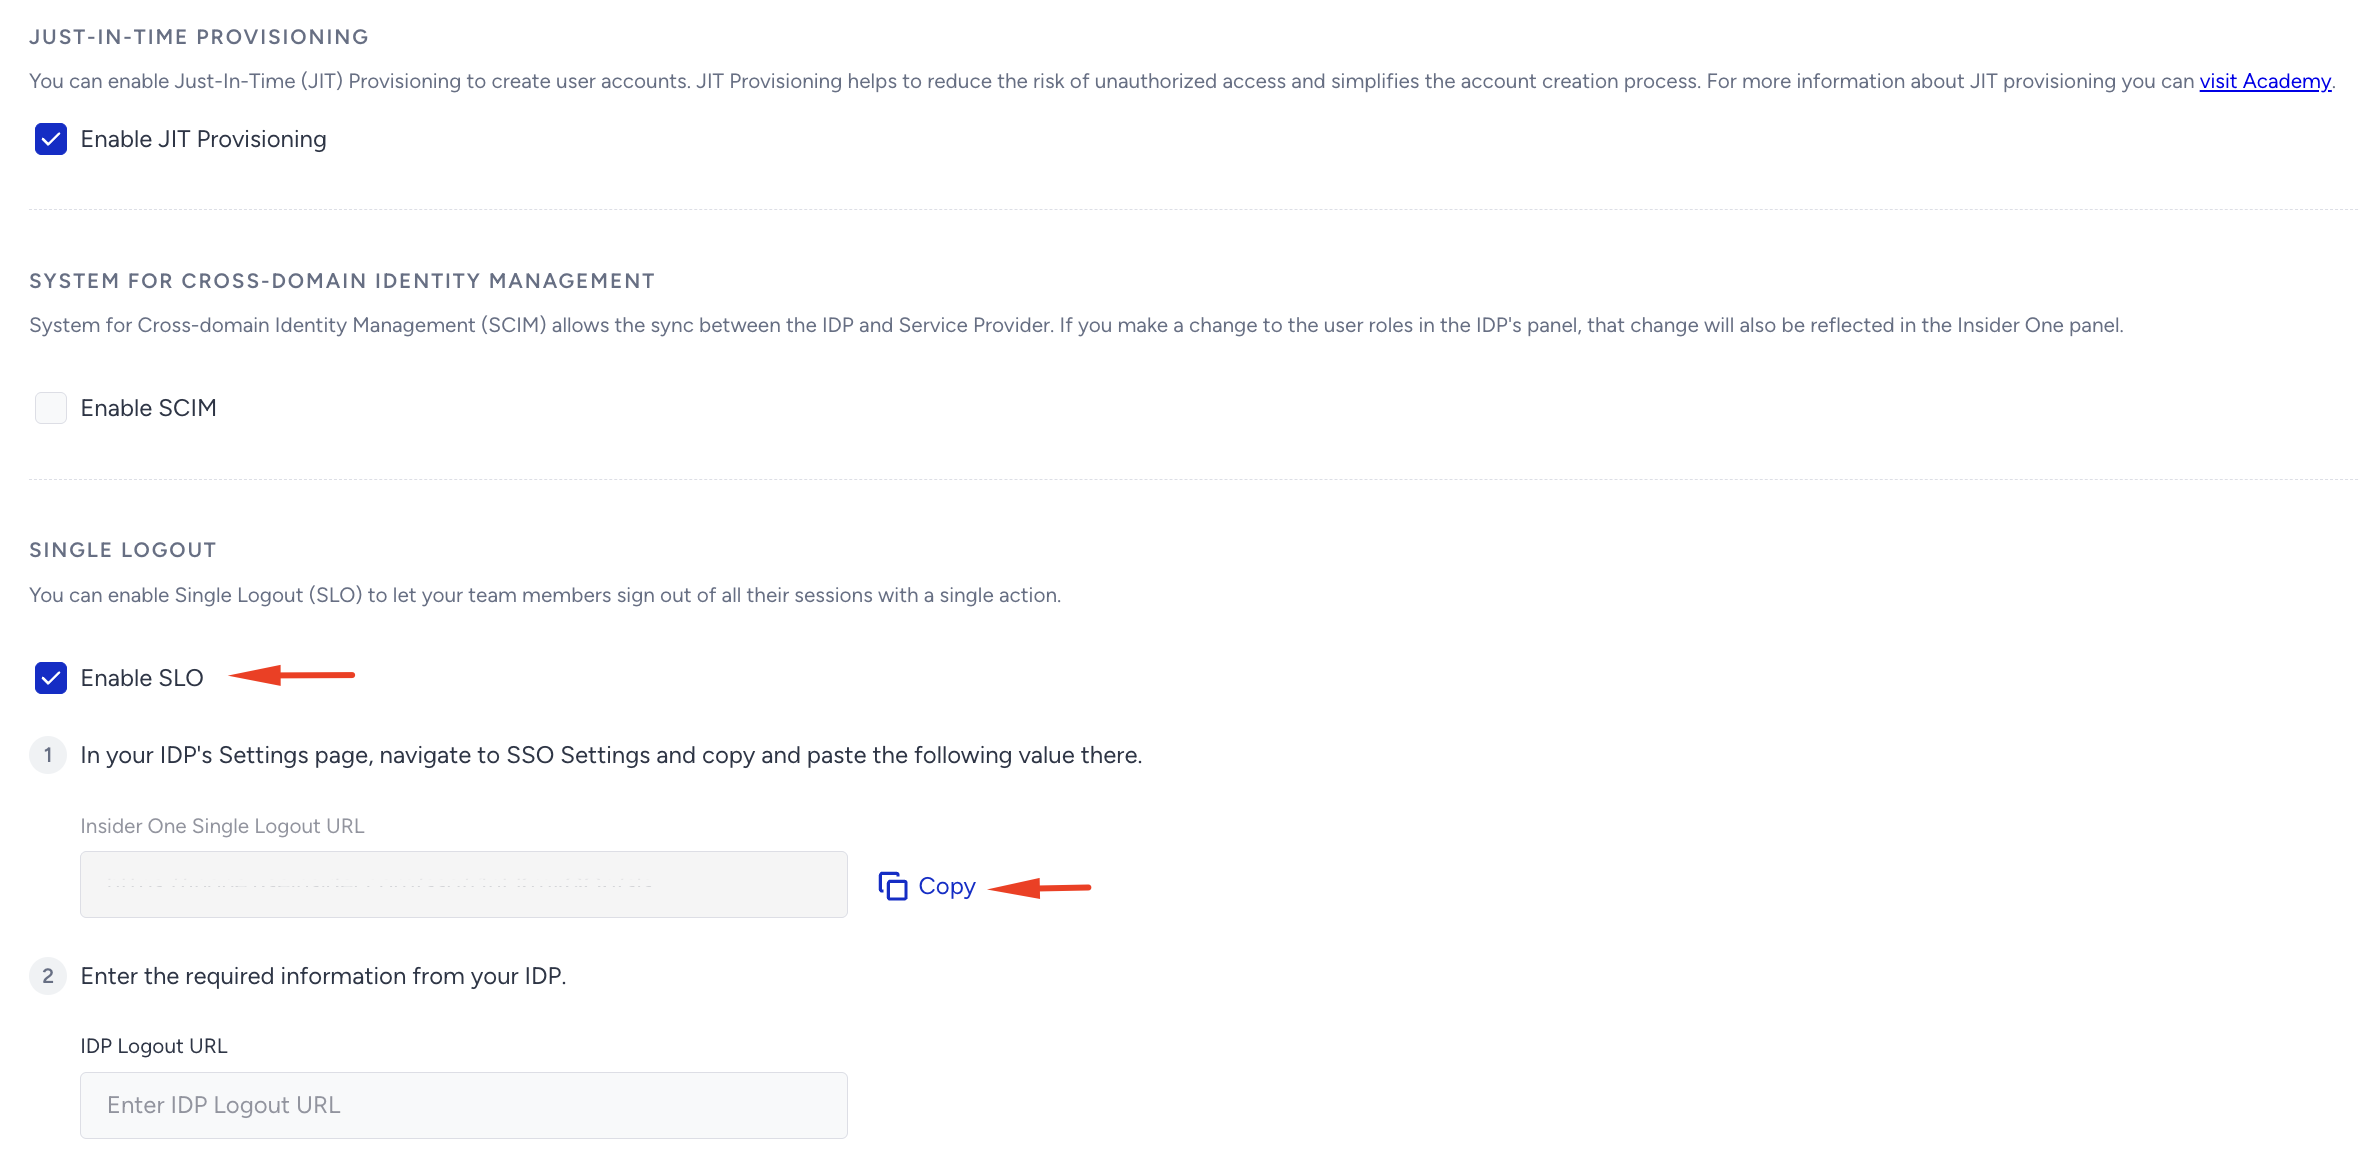
To enable Single Logout, check the "Enable SLO" box. Then copy the given Insider Single Logout URL and paste it into the Logout URL section on Azure on the same page above.
Click the Save button on Azure to complete this step.
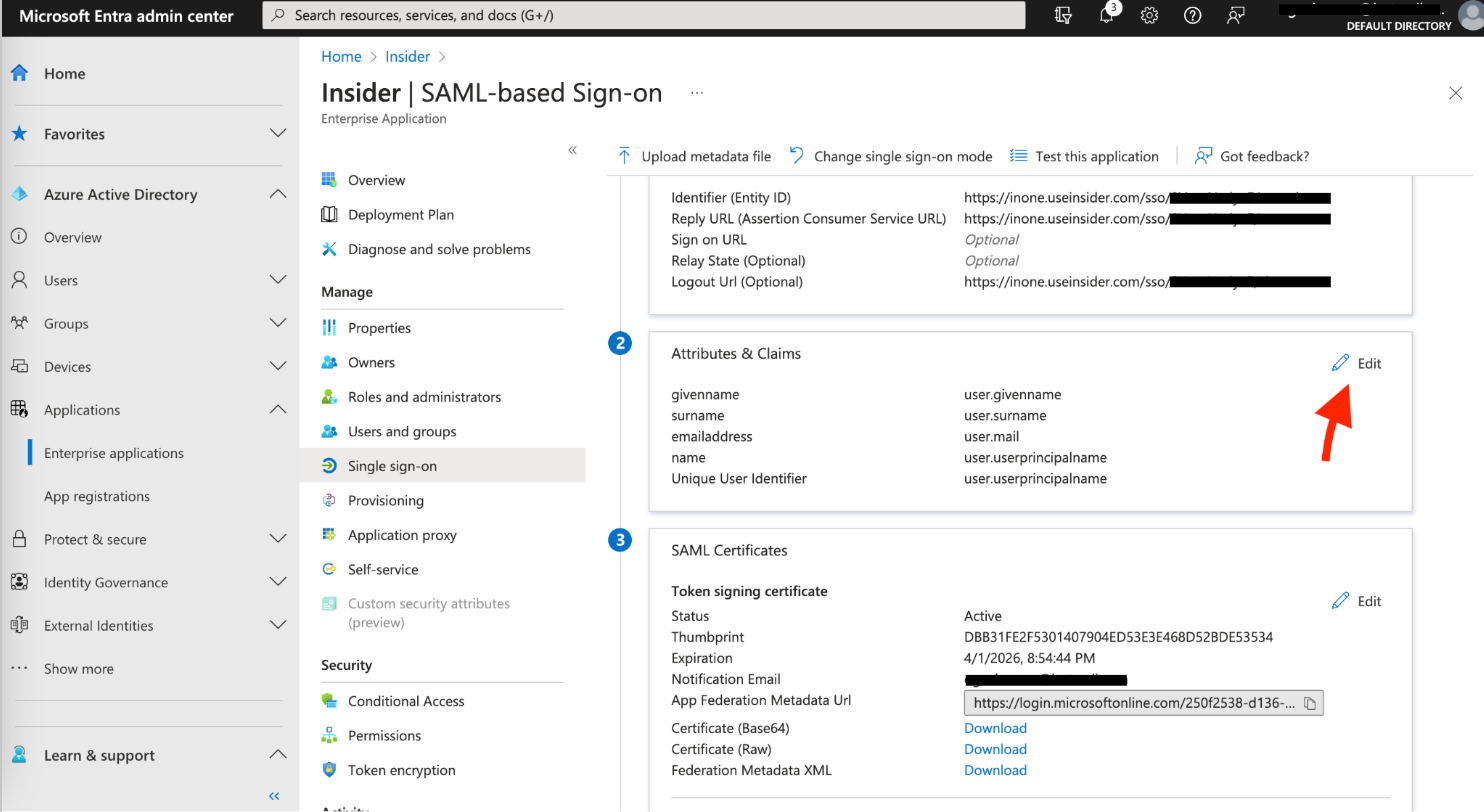
On the following page, click the Edit button next to Attributes & Claims.
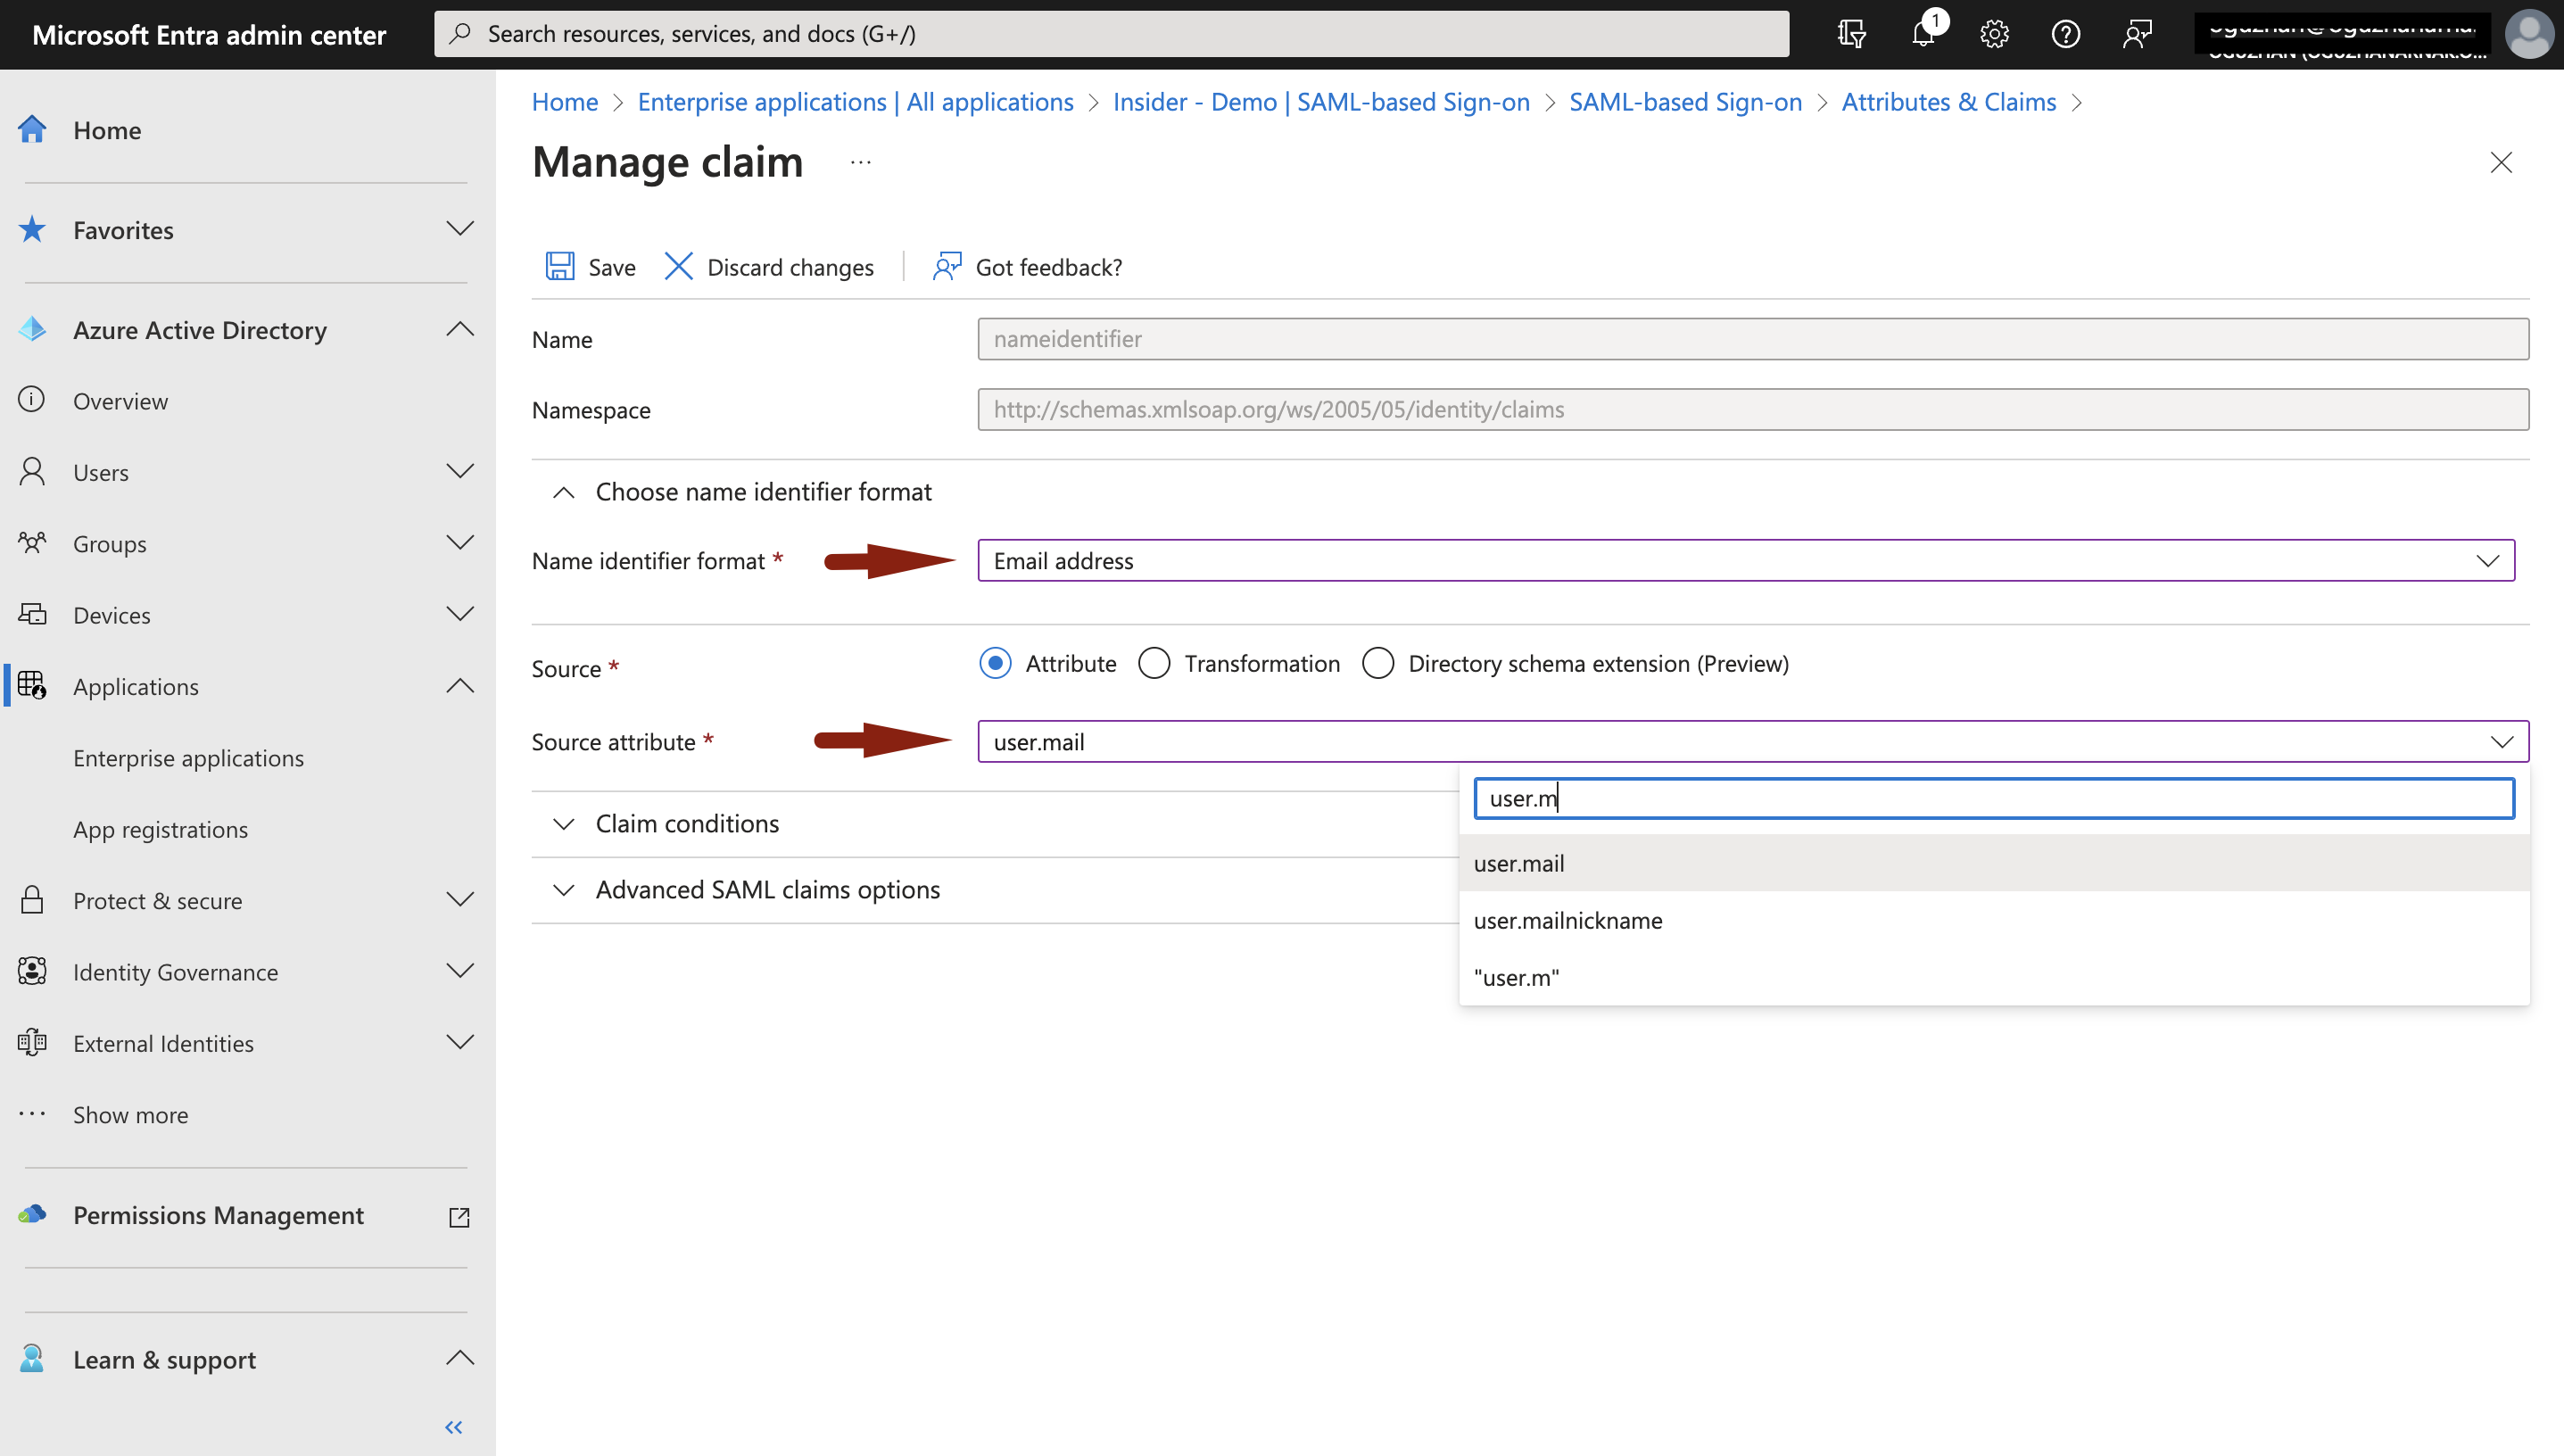
Go to Unique User Identifier (Name ID).
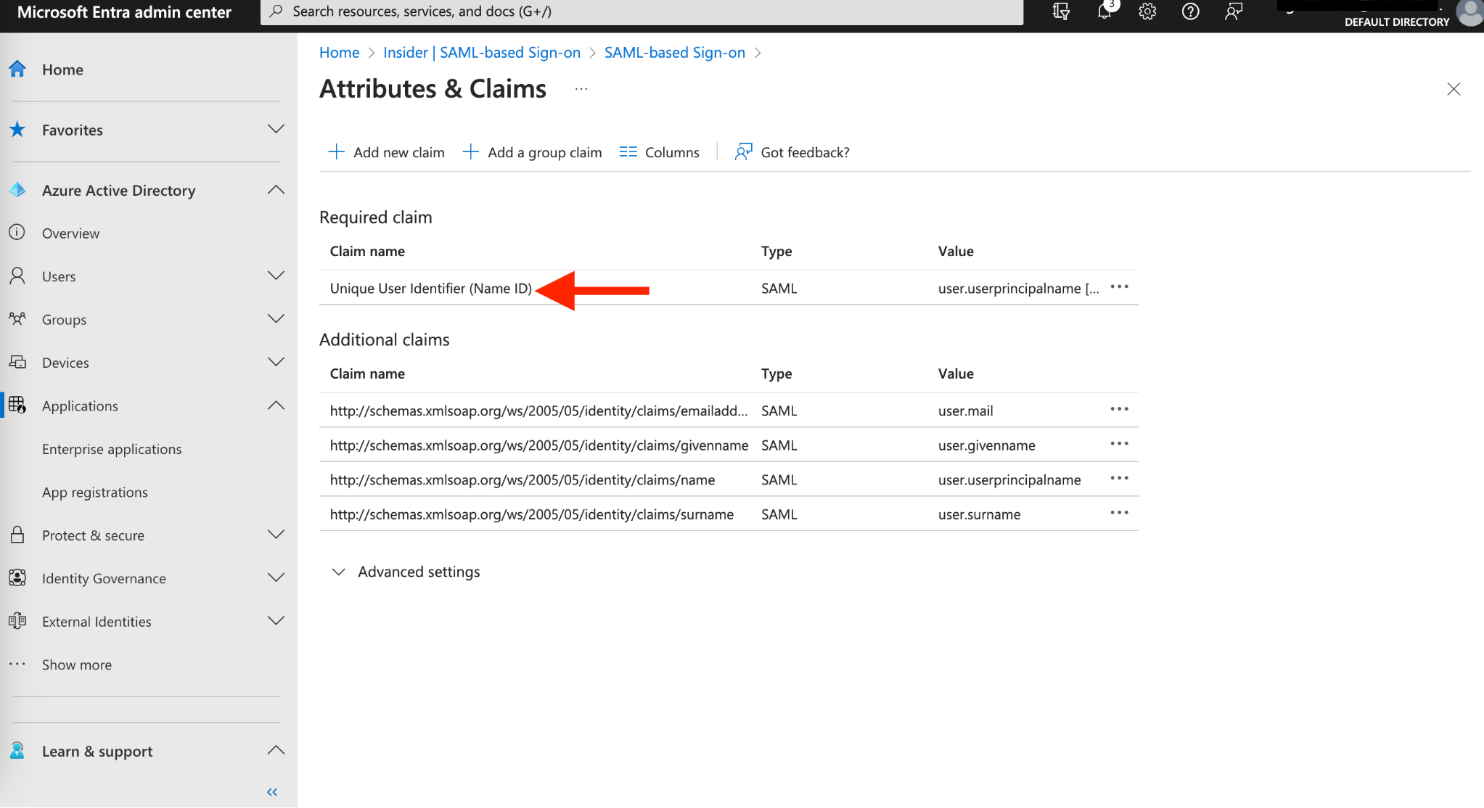
Choose email address for the Name identifier format, and user.mail for the Source attribute.
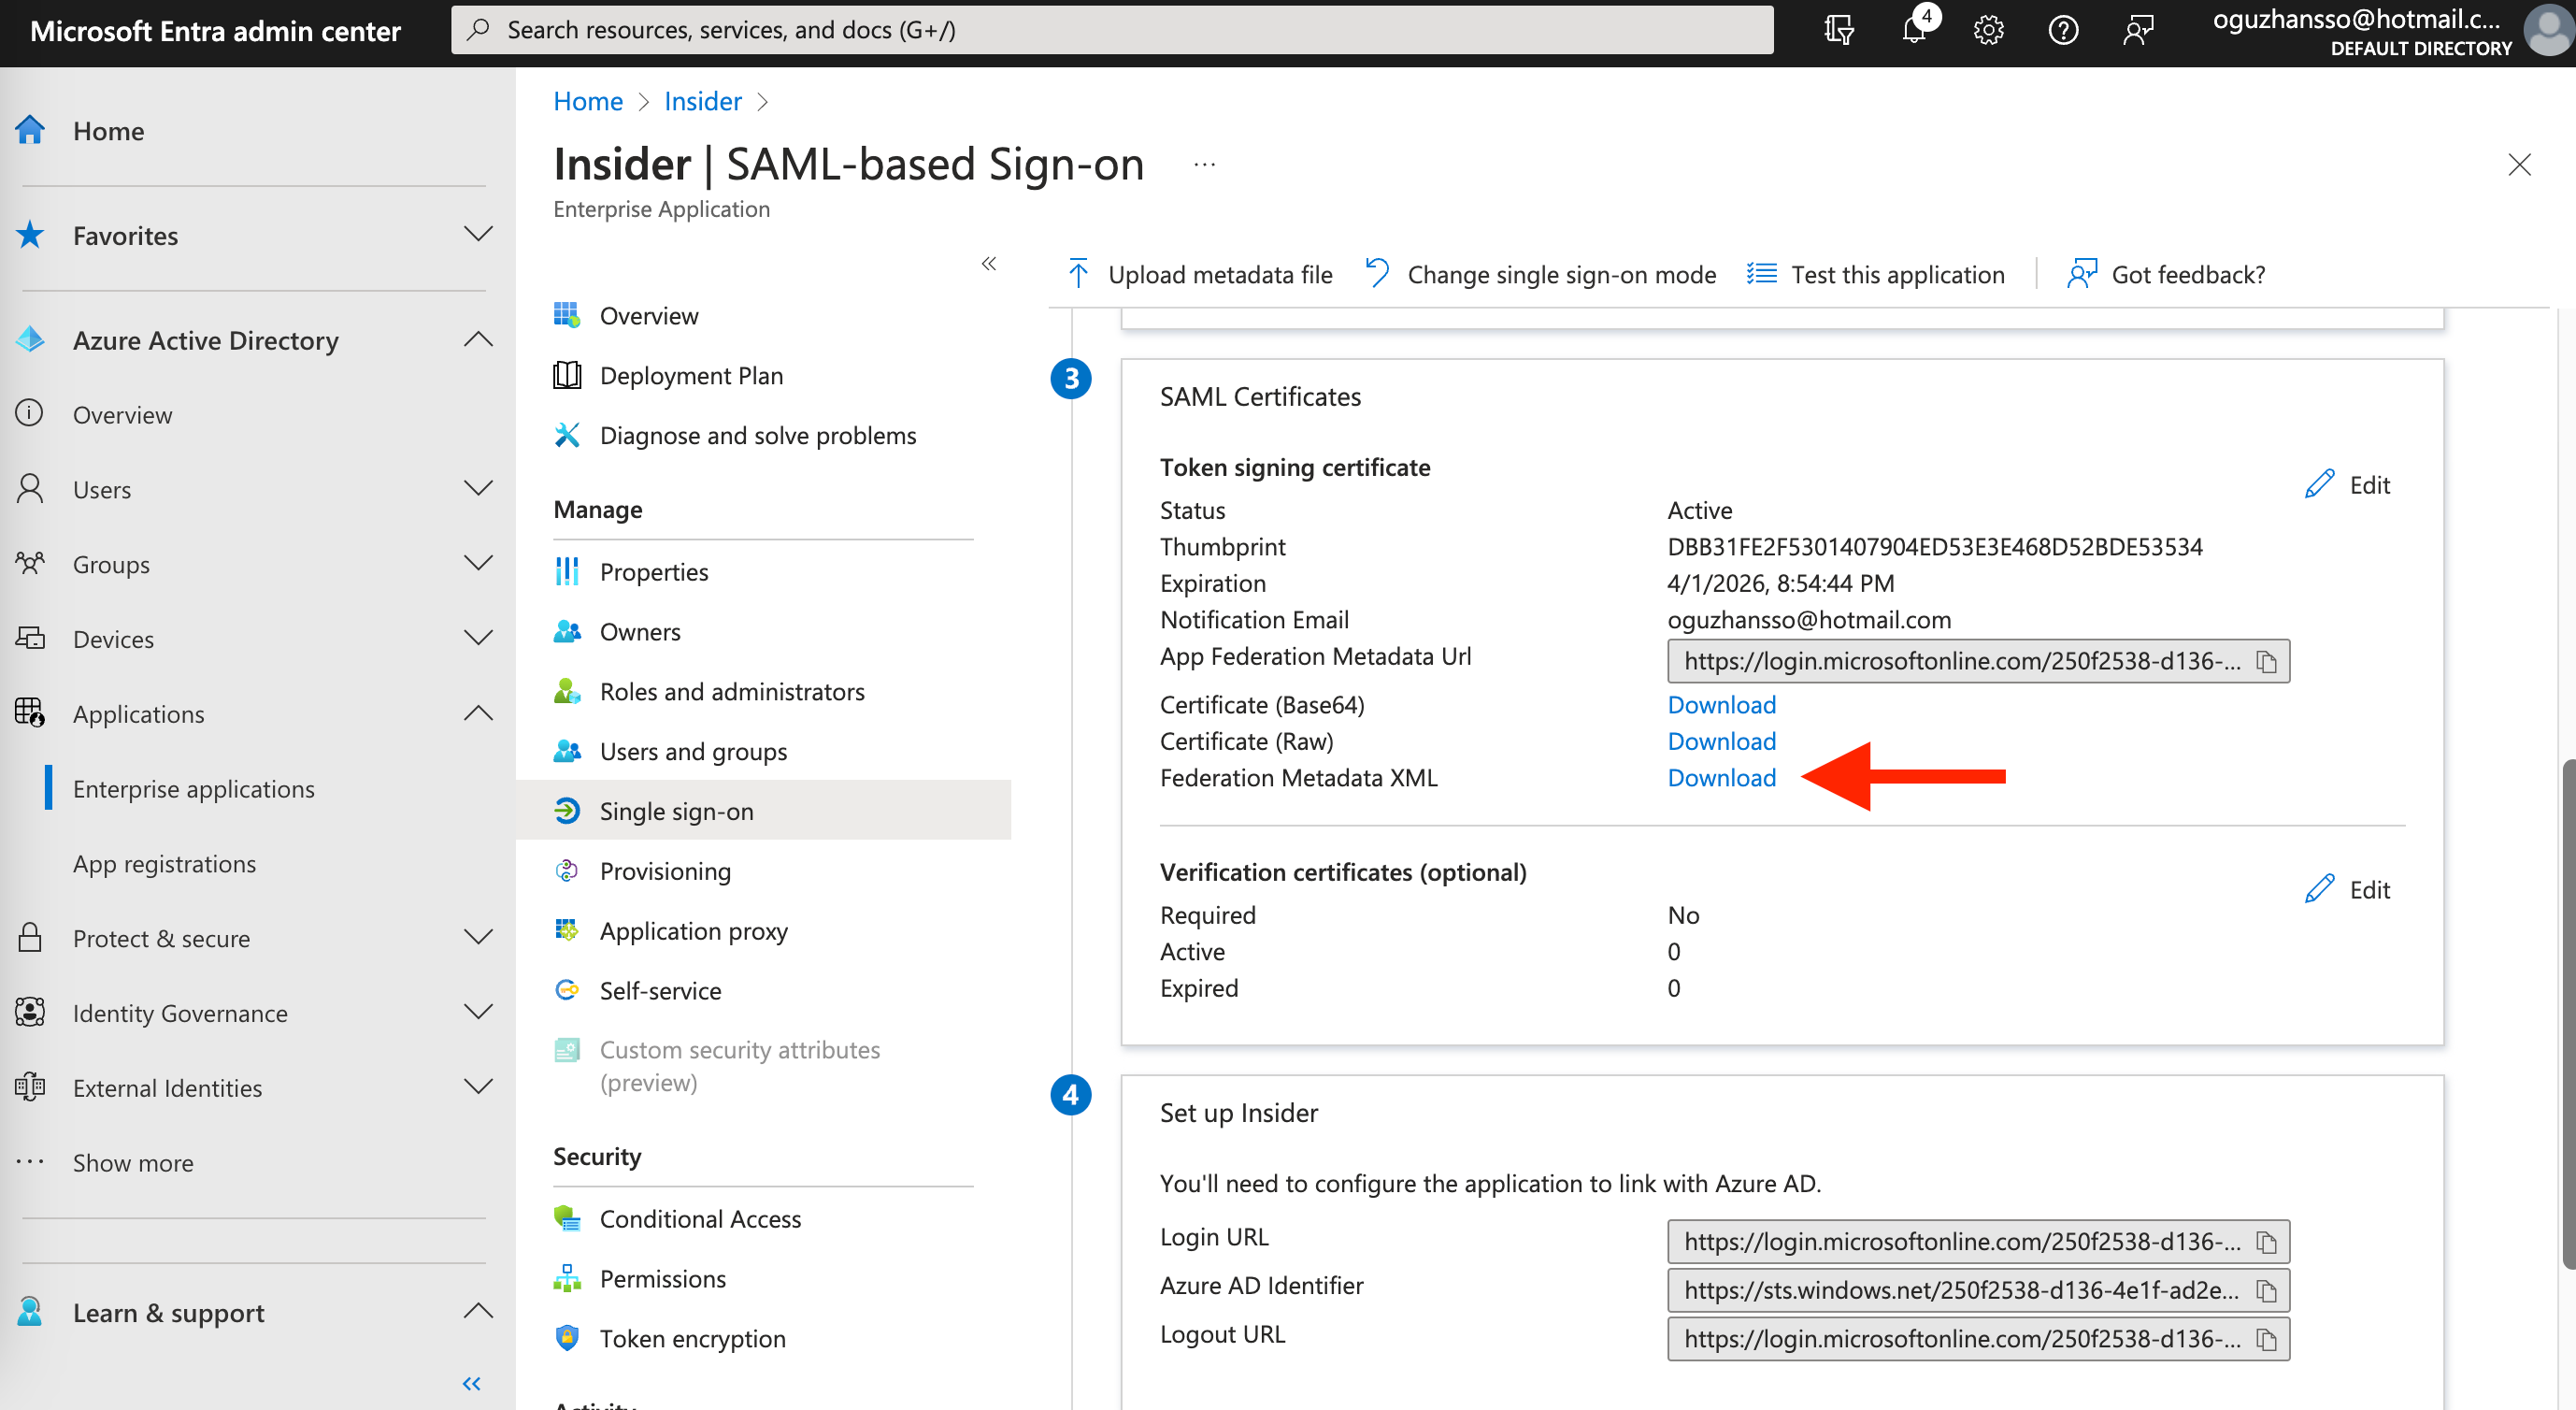
Go to Manage > Single sign-on on the left menu to download the Federation Metadata XML. You’ll see an XML file downloaded on your computer.
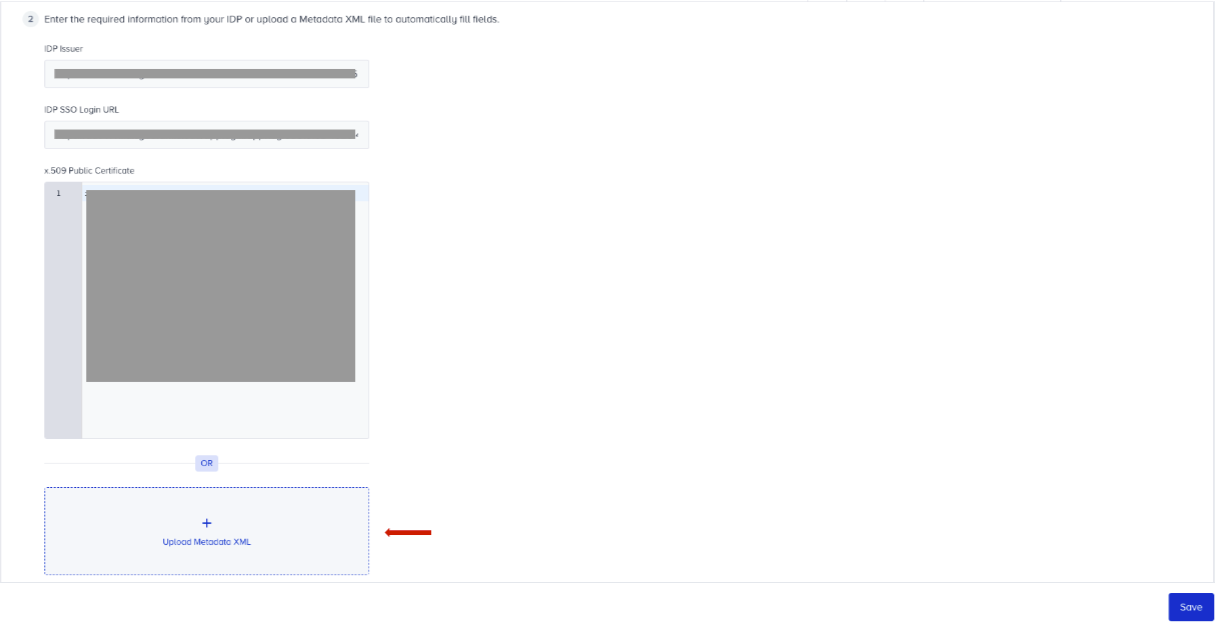
Go to Settings > Inone Settings > Security on your Inone panel and upload the downloaded XML file. The IDP Issuer, IDP SSO Login URL, and x.509 Public Certificate fields will be populated automatically.
You can also enter the values manually if you prefer.
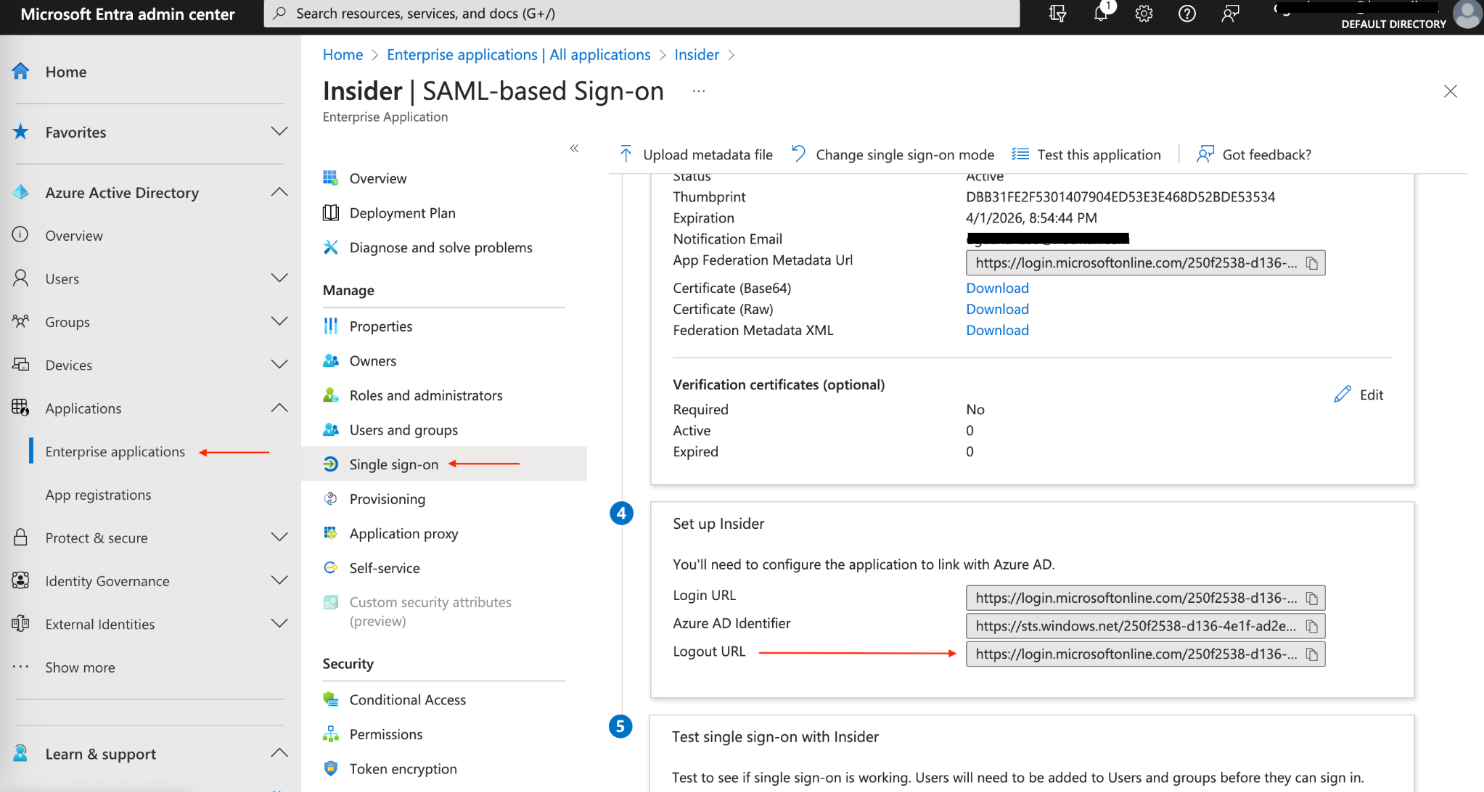
If you have enabled Single Logout for Insider One, copy the Logout URL listed in the 4th step in the image below and paste it into the IDP Logout URL field on Insider One.
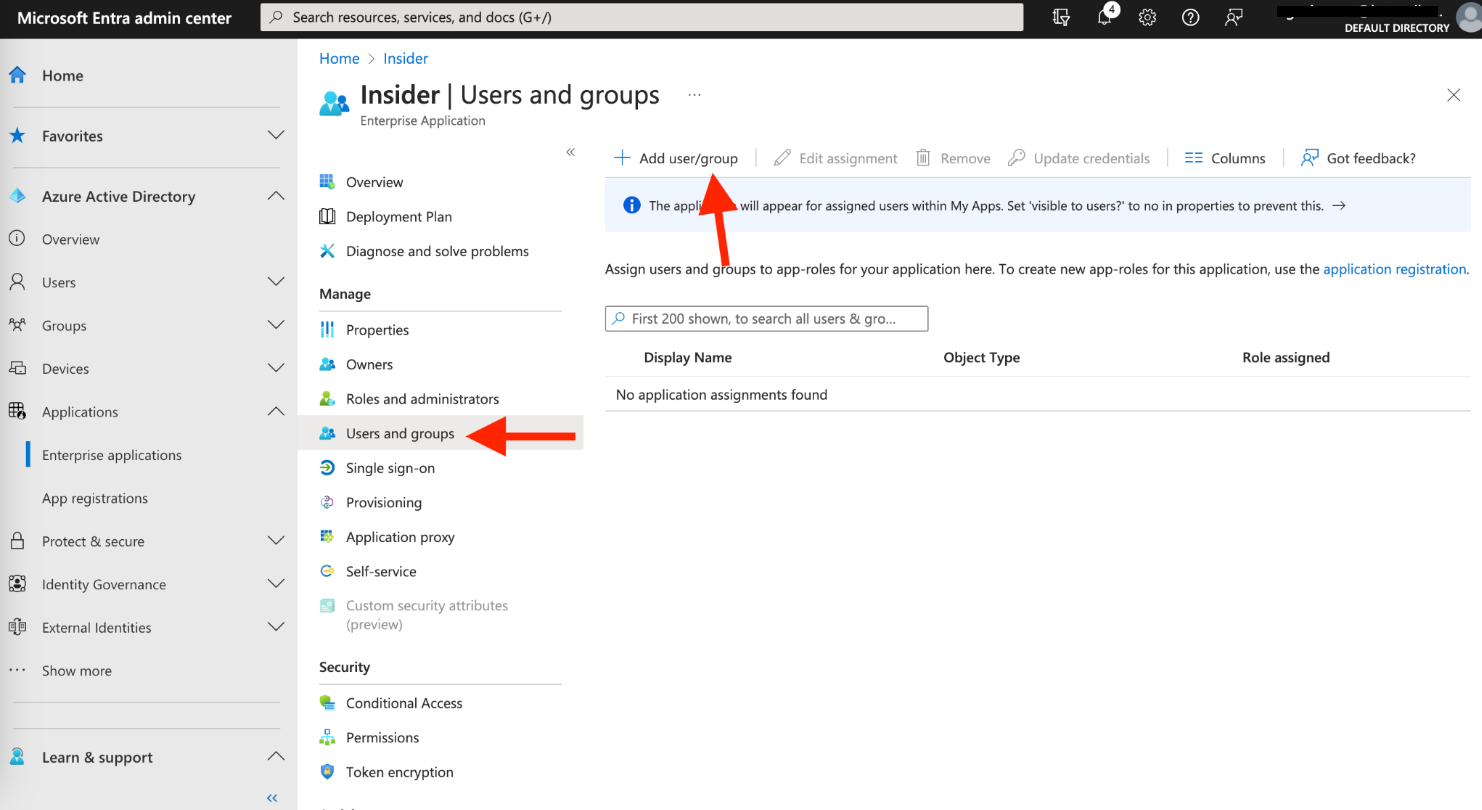
To test the connection in Azure, assign your user to the newly created app. Click the Users and Groups tab on the left menu. Click the + Add user/group button.
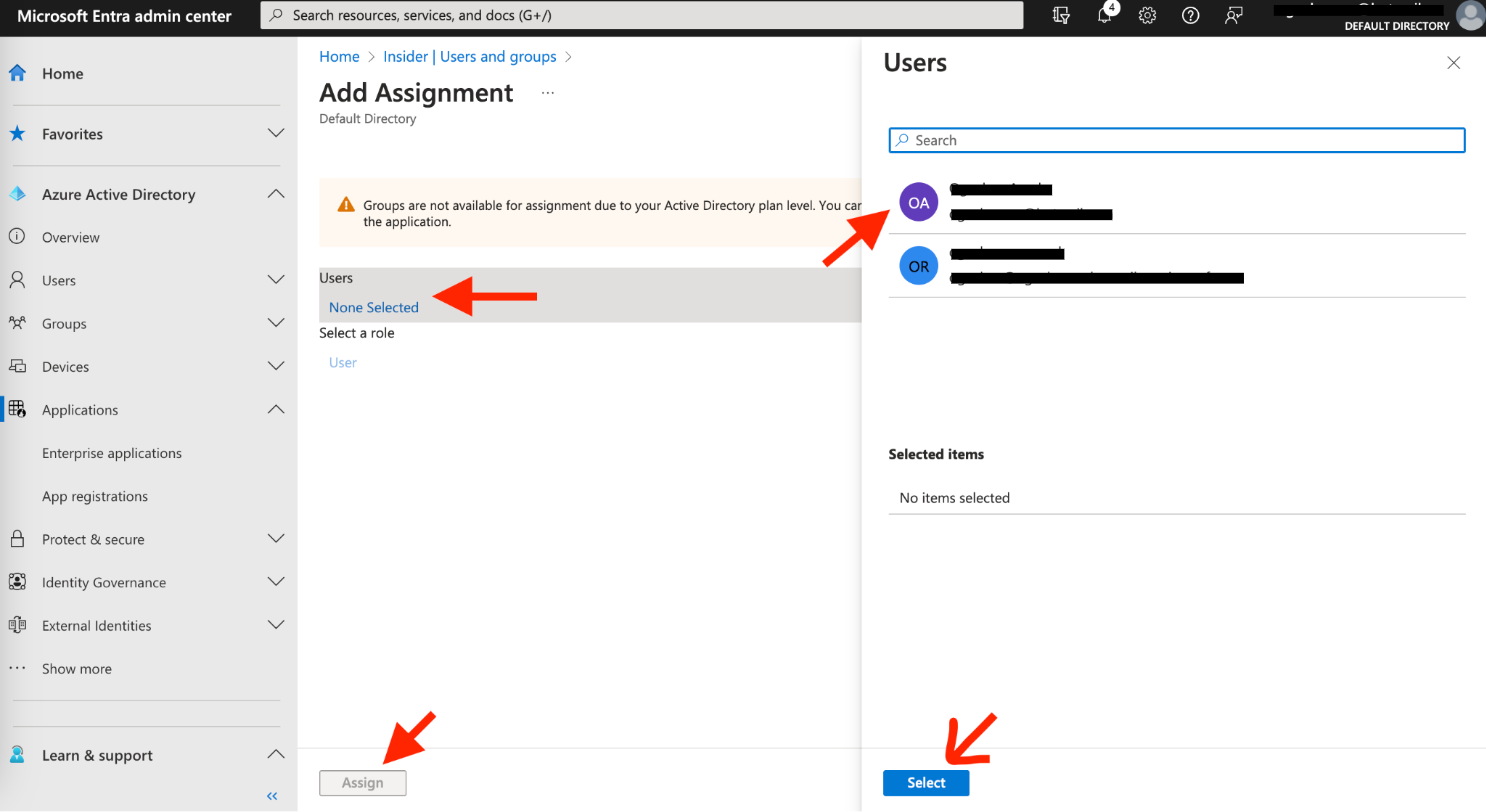
In the pop-up, select your user and click Assign.
Now test the SSO connection on Insider One. Once you click the Test SSO Connection button, the connection will be tested. If there is an error, you will see the error code next to the button.
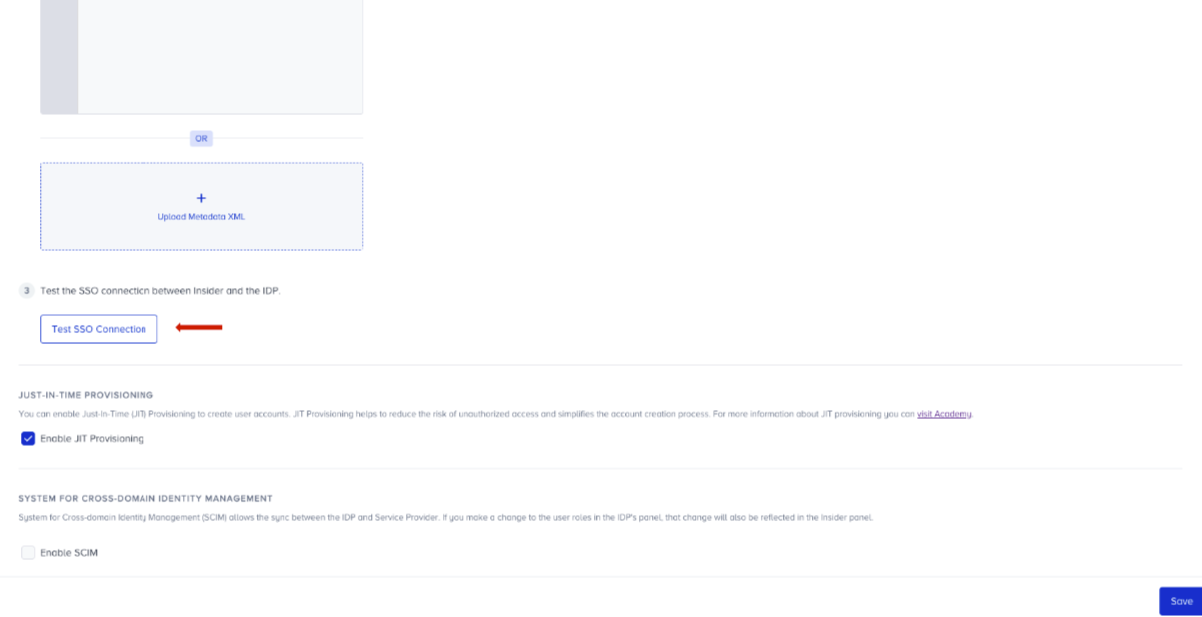
Click the Save button to save the settings. You must pass the SSO connection test to save the settings.
Congrats! You have successfully set up SSO for your panel users with Azure AD.