The Authentications page in Insider One is where you create, verify, and manage the authentications that connect Insider One to your data warehouse. You authenticate and connect your data warehouse once and reuse it across your integrations and Zero-Copy Segments, so you do not enter your credentials again for each one.
Each authentication shows where it is used, so you can check its usage before you update or delete it.
This guide answers these questions:
Supported platforms
Each platform has its own page that lists the details you enter and the steps you complete in your data warehouse. The following table lists the supported platforms and their pages.
Platform | Page |
|---|---|
Snowflake | |
Google BigQuery | |
Databricks |
Not all platforms are available for authentication yet. To authenticate those platforms individually, go to External Integrations.
Open the Authentications page
In the InOne panel, go to Components > Integrations > External Integrations.
Click the Authentications button next to Settings.
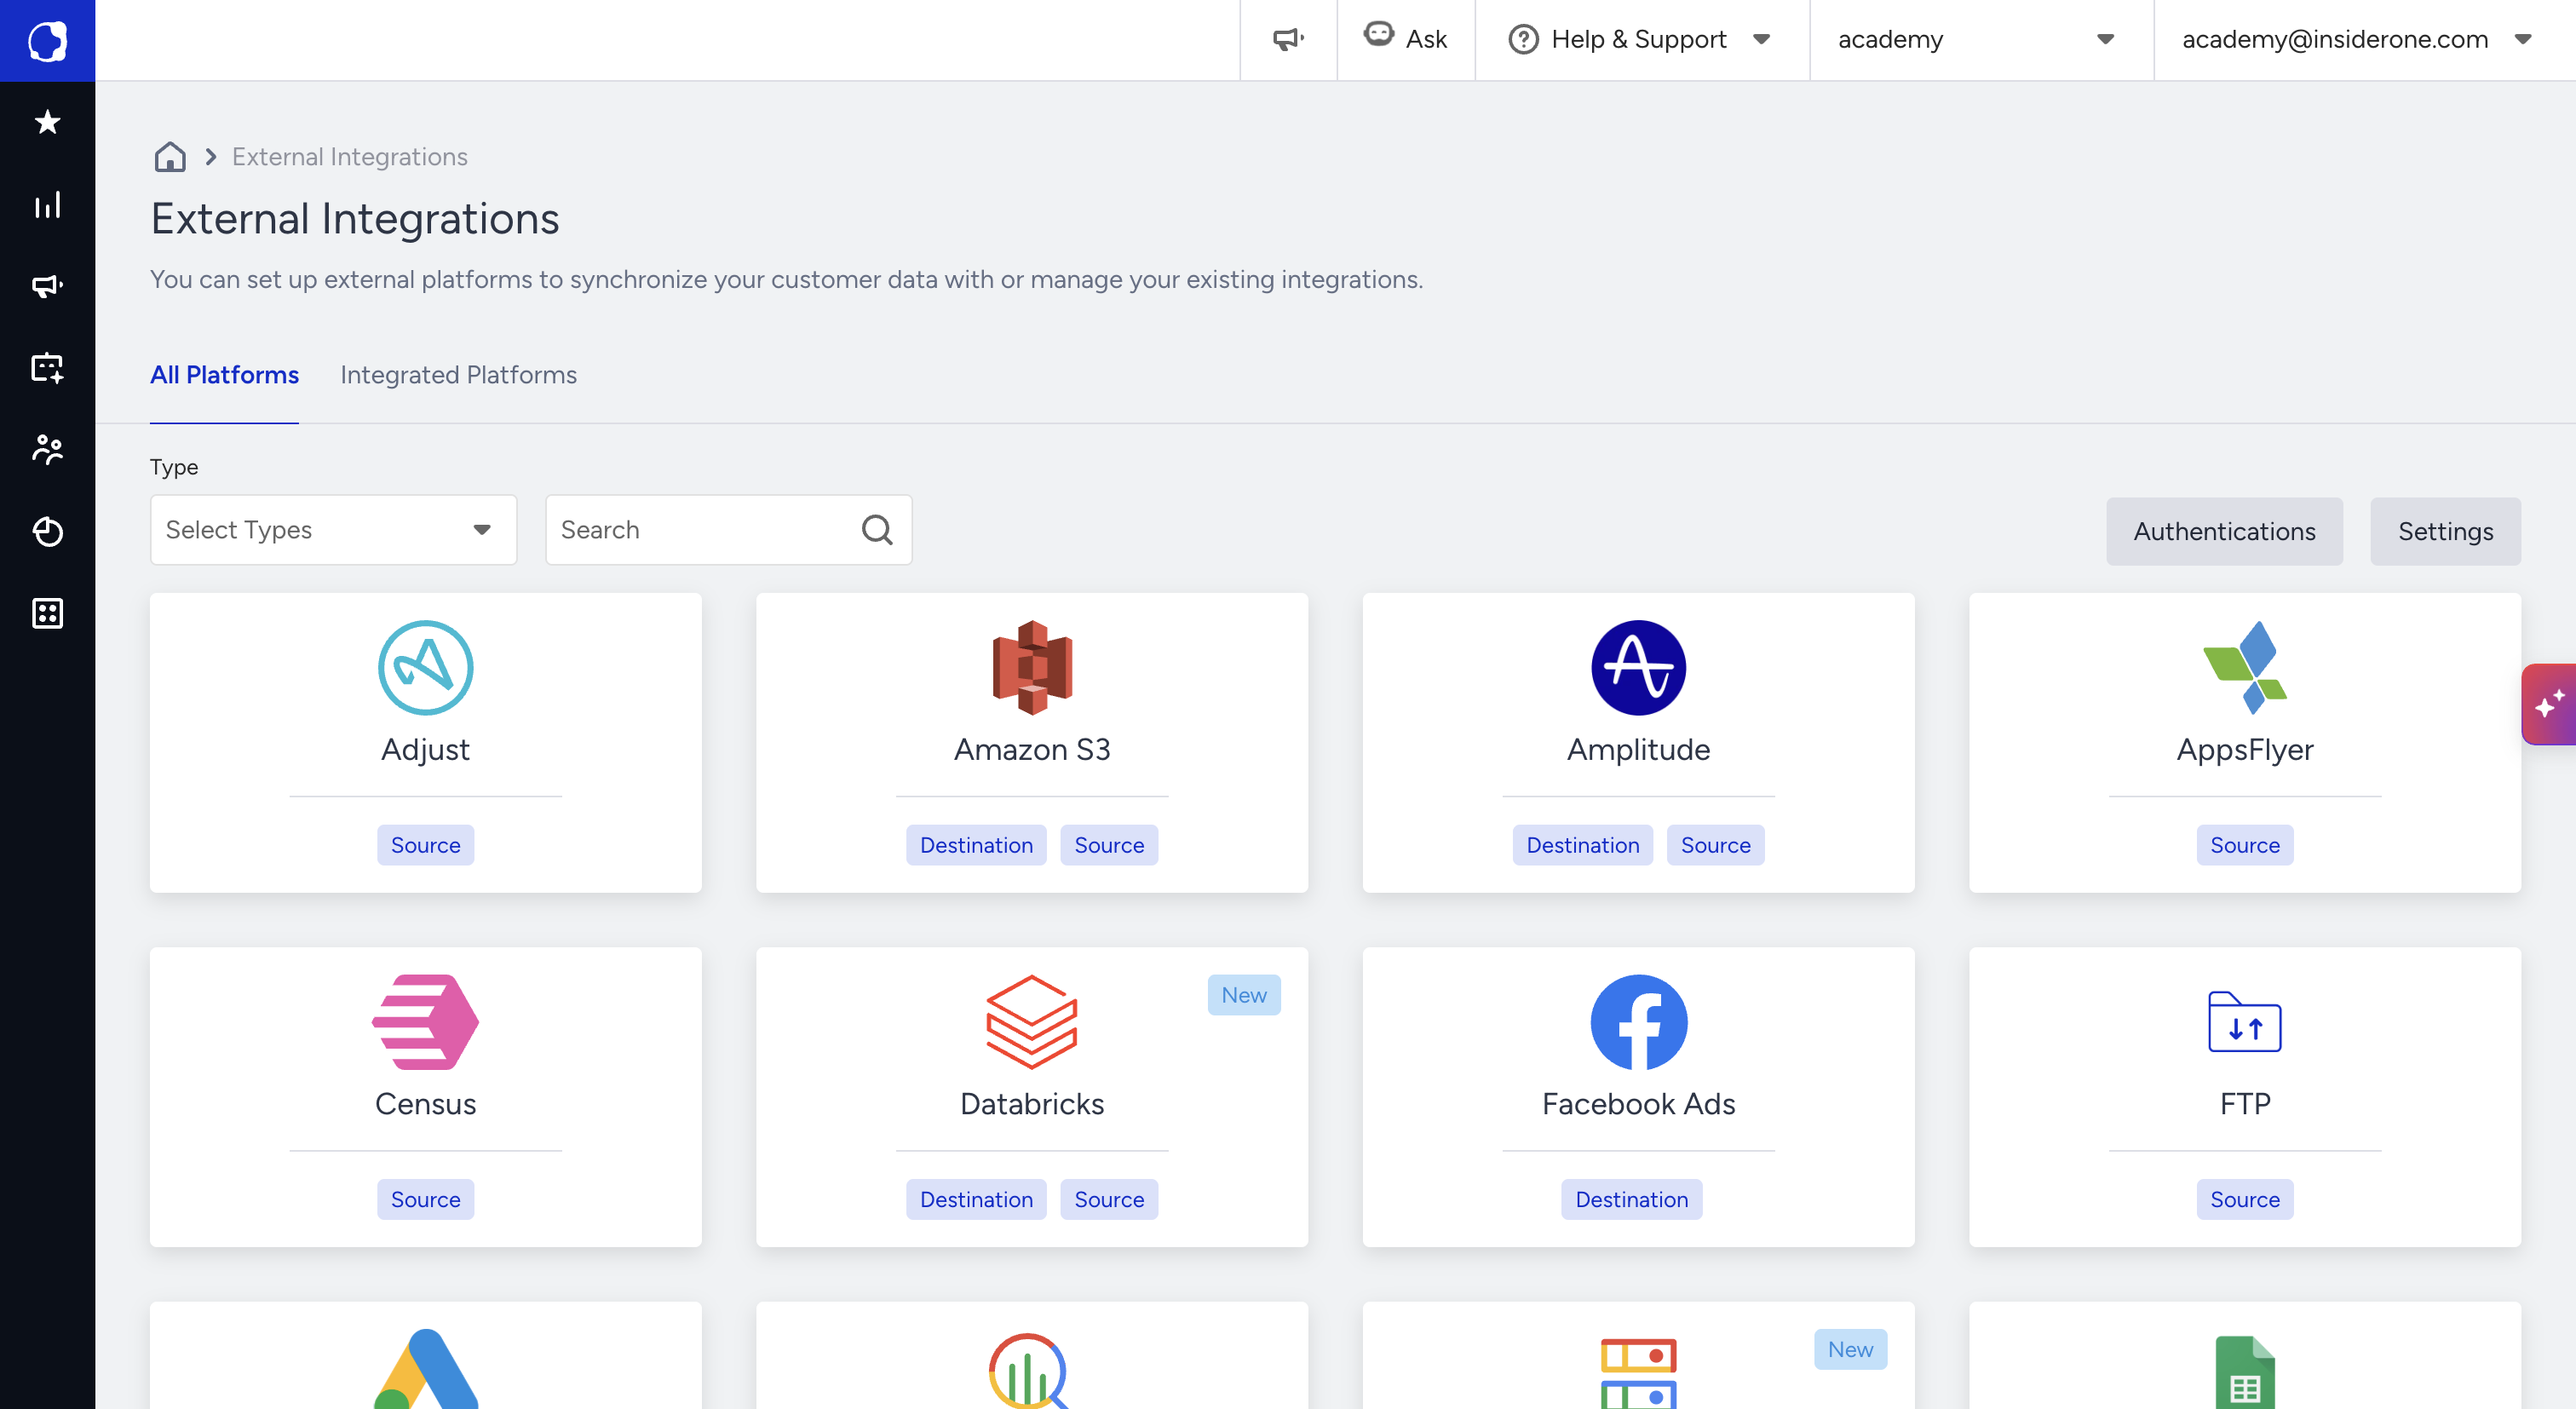
To go back, you can click Back to External Integrations at the bottom of the page.
The Authentications list
The list shows every authentication on your account.
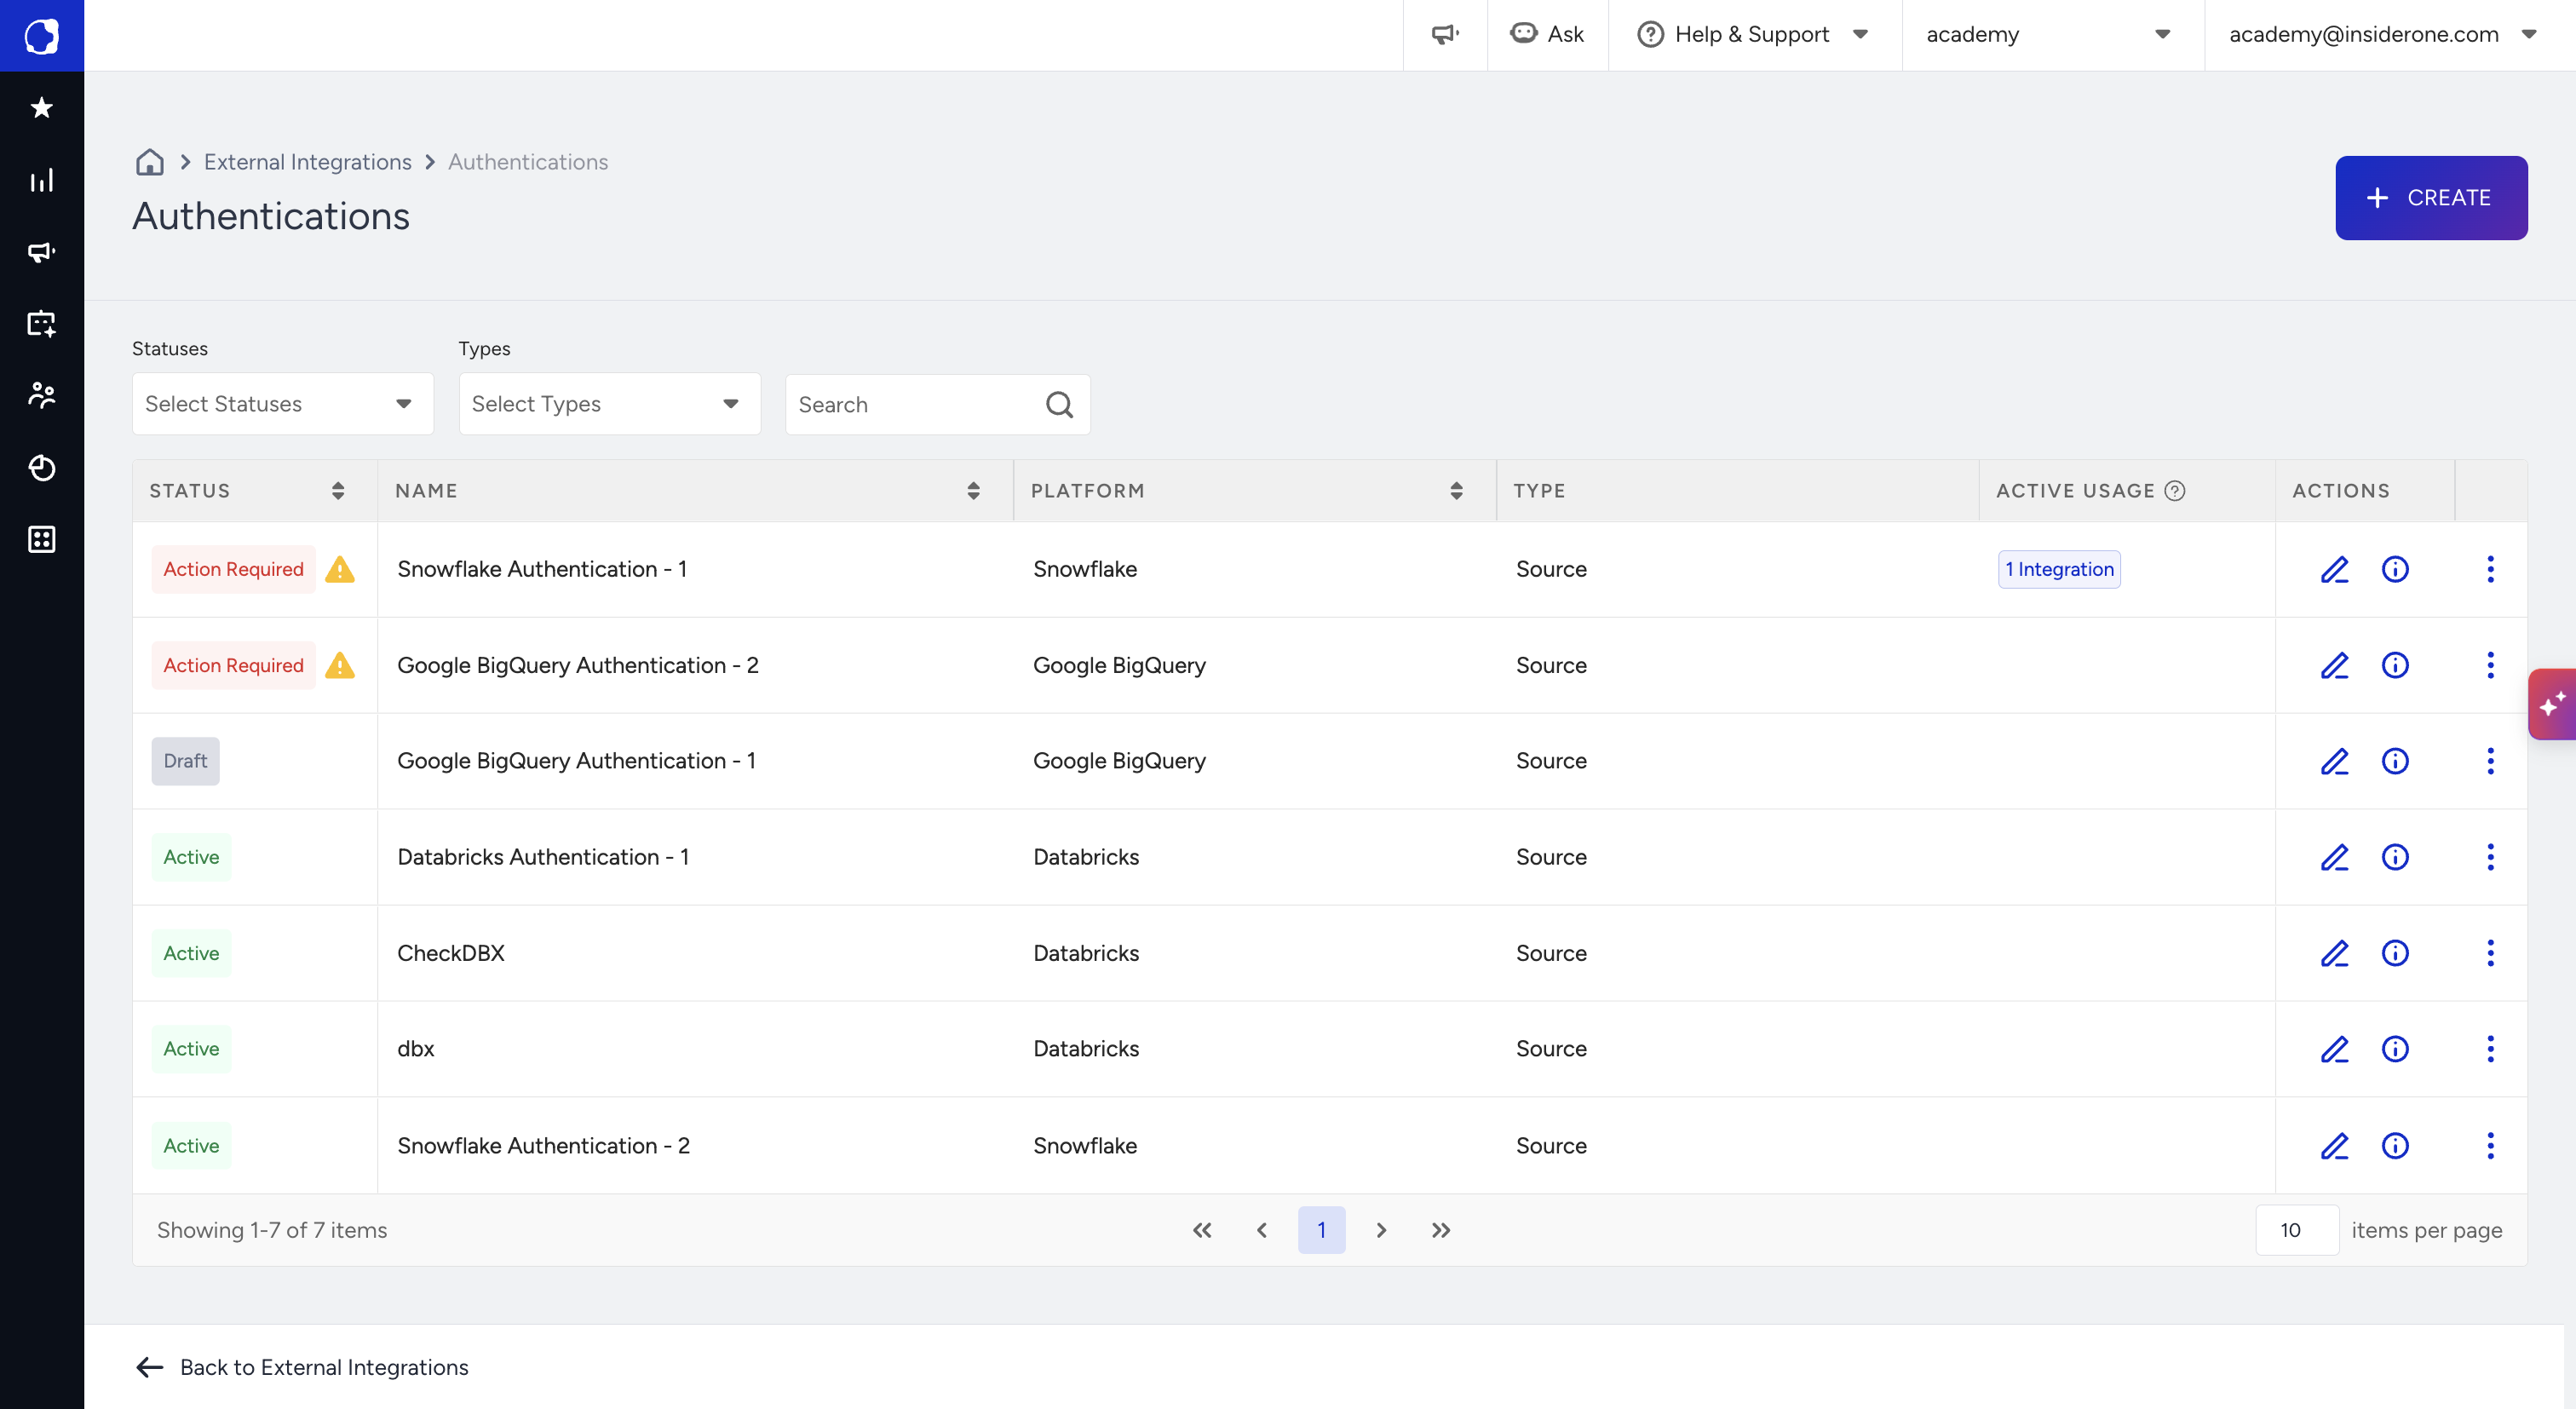
The following table explains each column of the list.
Column | What it shows |
|---|---|
STATUS | Active, Action Required, or Draft. |
NAME | The name of the authentication. |
PLATFORM | Snowflake, Google BigQuery, or Databricks. |
TYPE | The type of the authentication. |
ACTIVE USAGE | The number of Zero-Copy Segments and integrations that currently use the authentication actively, shown as a badge such as "1 Integration". |
ACTIONS | The edit icon, the info icon, and a menu. |
To narrow the list, use the Statuses and Types filters or the search field.
Statuses
The following table explains what each status means for you.
Status | What it means for you |
|---|---|
Active | You can select the authentication in integrations and Zero-Copy Segments. |
Draft | You cannot select the authentication in integrations yet. |
Action Required | You need to check and update the authentication to resume the data sync. You cannot select it in integrations. |
Row actions
The following table explains the actions available in each row.
Action | What it does |
|---|---|
Edit icon | Opens the authentication page. |
Info icon | Opens the details panel. The tooltip of the icon is "See Details". |
Menu | Contains the options listed in the following table. |
The menu options depend on the status of the authentication.
Authentication status | Menu options |
|---|---|
Draft | Pin to Top, Update status as Active, Delete Authentication |
Active | Pin to Top, Delete Authentication |
Create an authentication
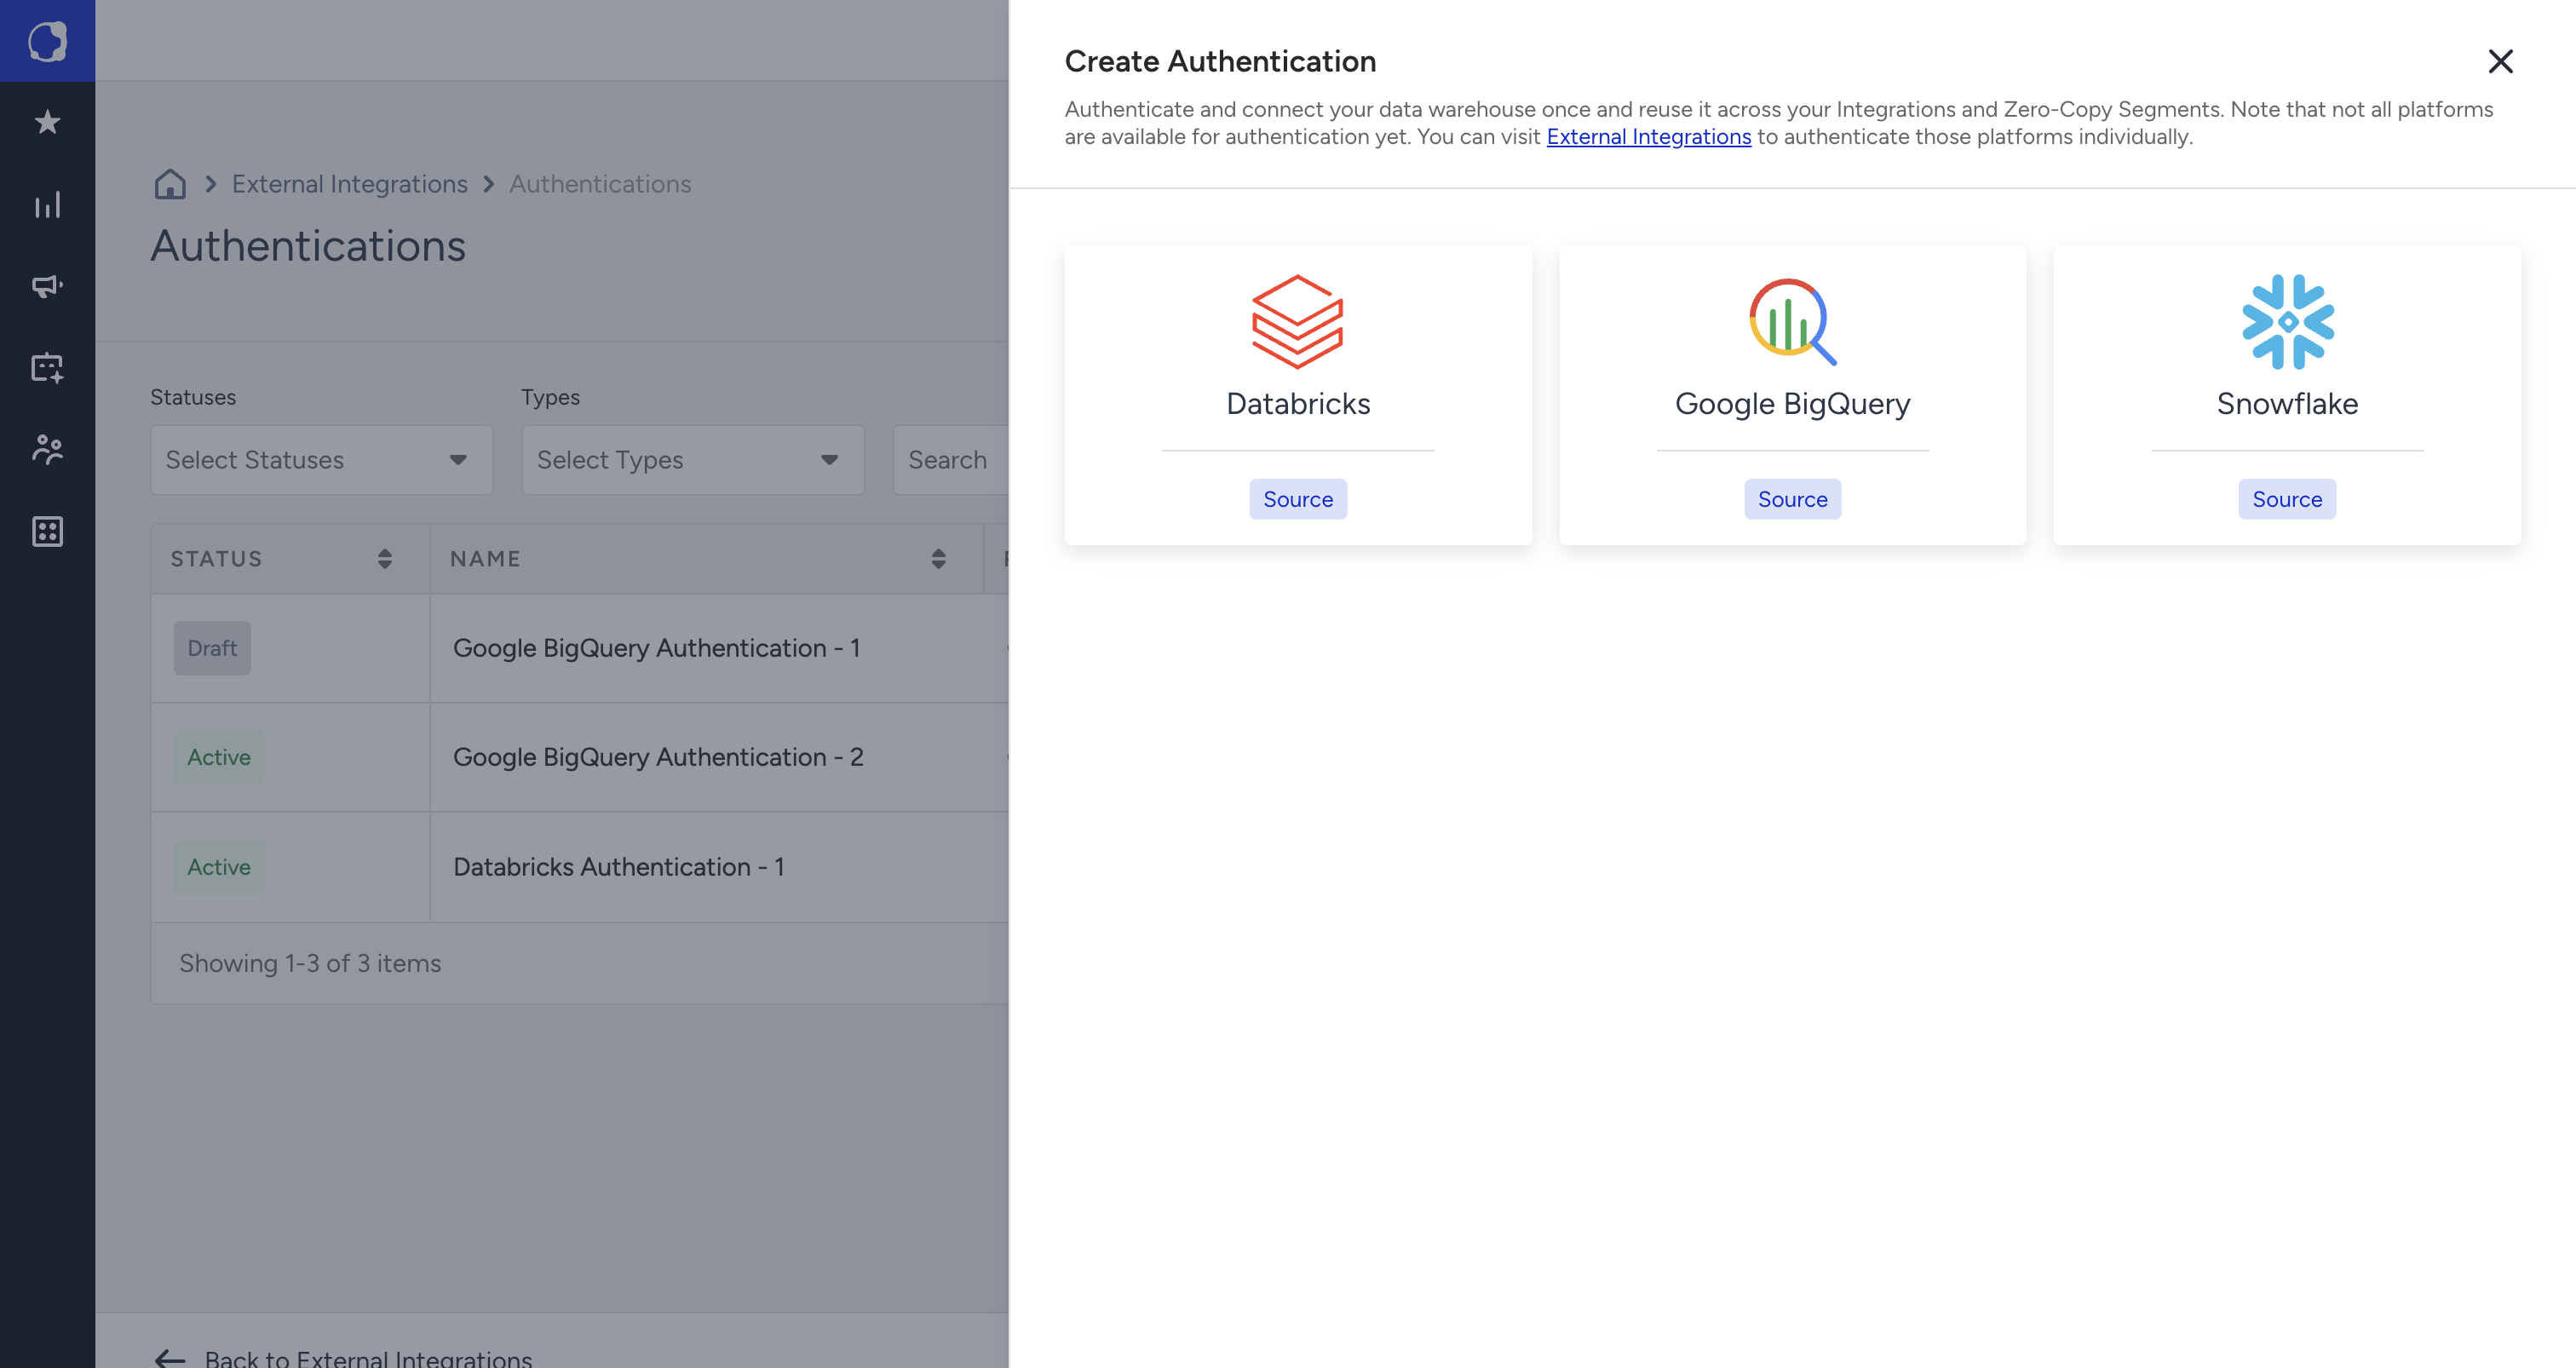
On the Authentications page, click CREATE. The Create Authentication panel opens.
Select your platform: Databricks, Google BigQuery, or Snowflake. Each platform shows a Source badge.
Enter the Authentication Name. Source is selected under Authentication Type.
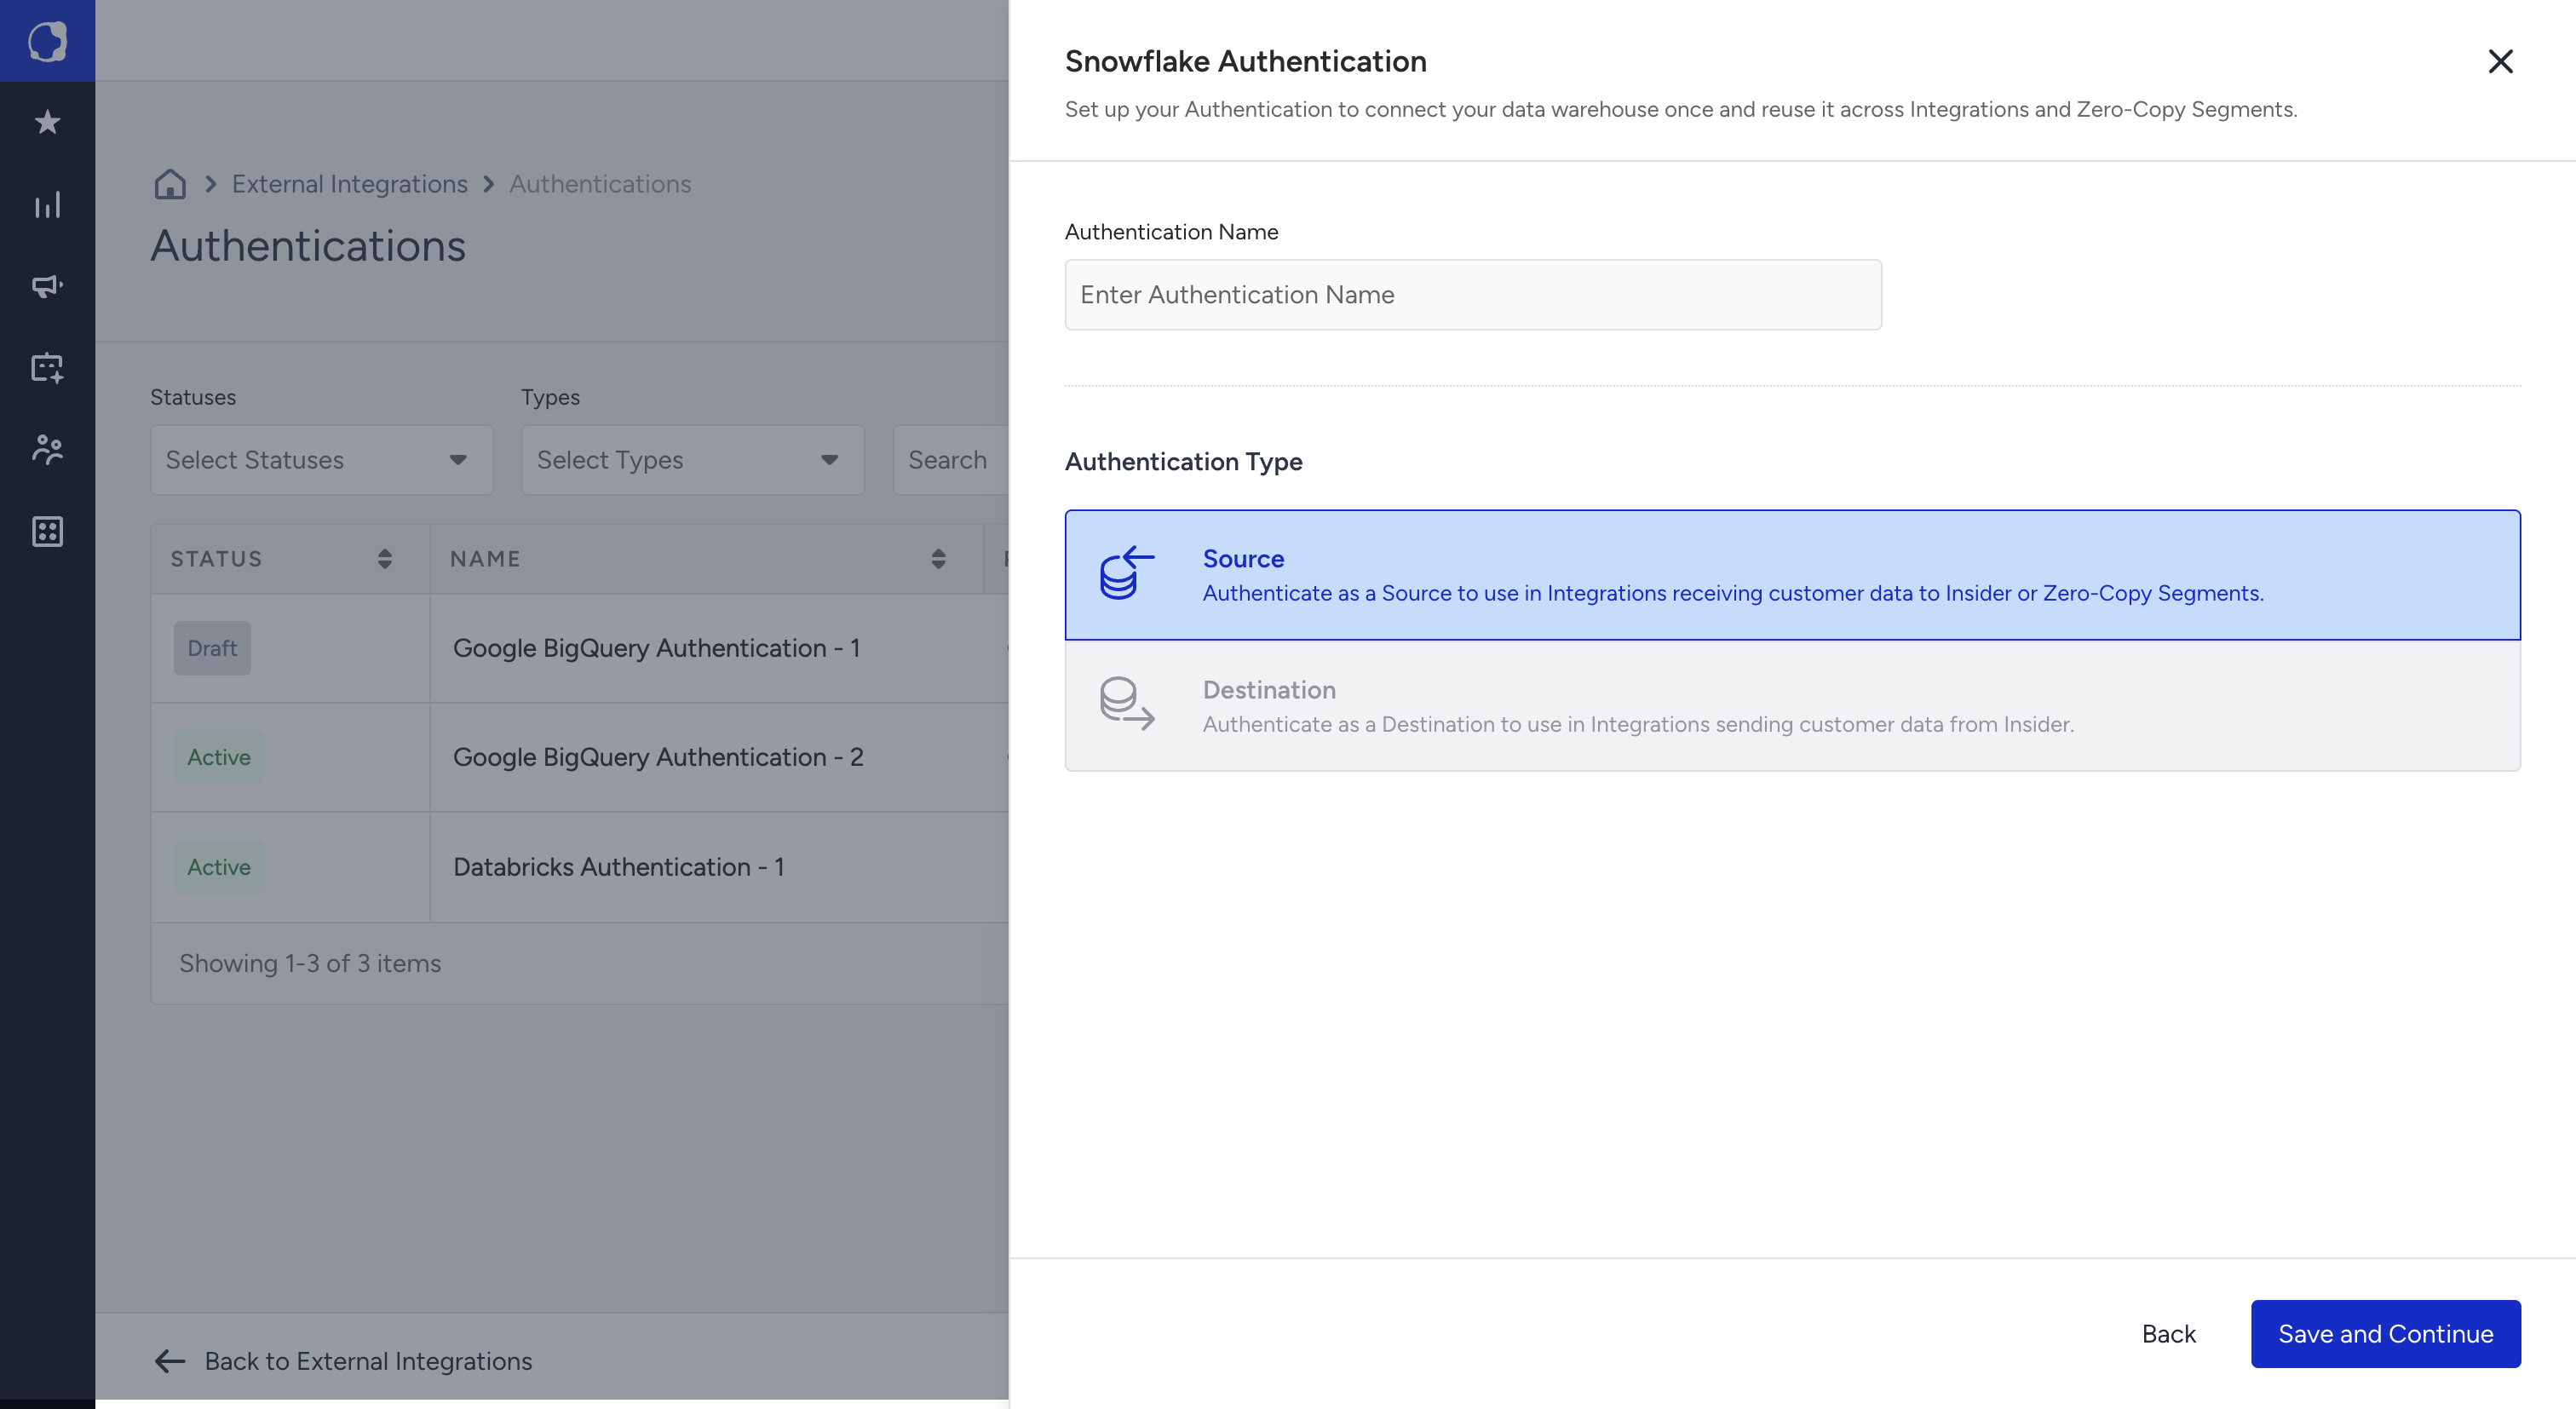
Click Save and Continue. To return to the platform selection, click Back. The authentication page opens as a full page with the name of your platform in the title. The Authentication Name is at the top right.
Enter the details for your platform. Refer to the page for your platform: Snowflake Authentication, Google BigQuery Authentication, or Databricks Authentication.
Click Verify Authentication. After a successful verification, the button turns into a green Authenticated label with a check mark.
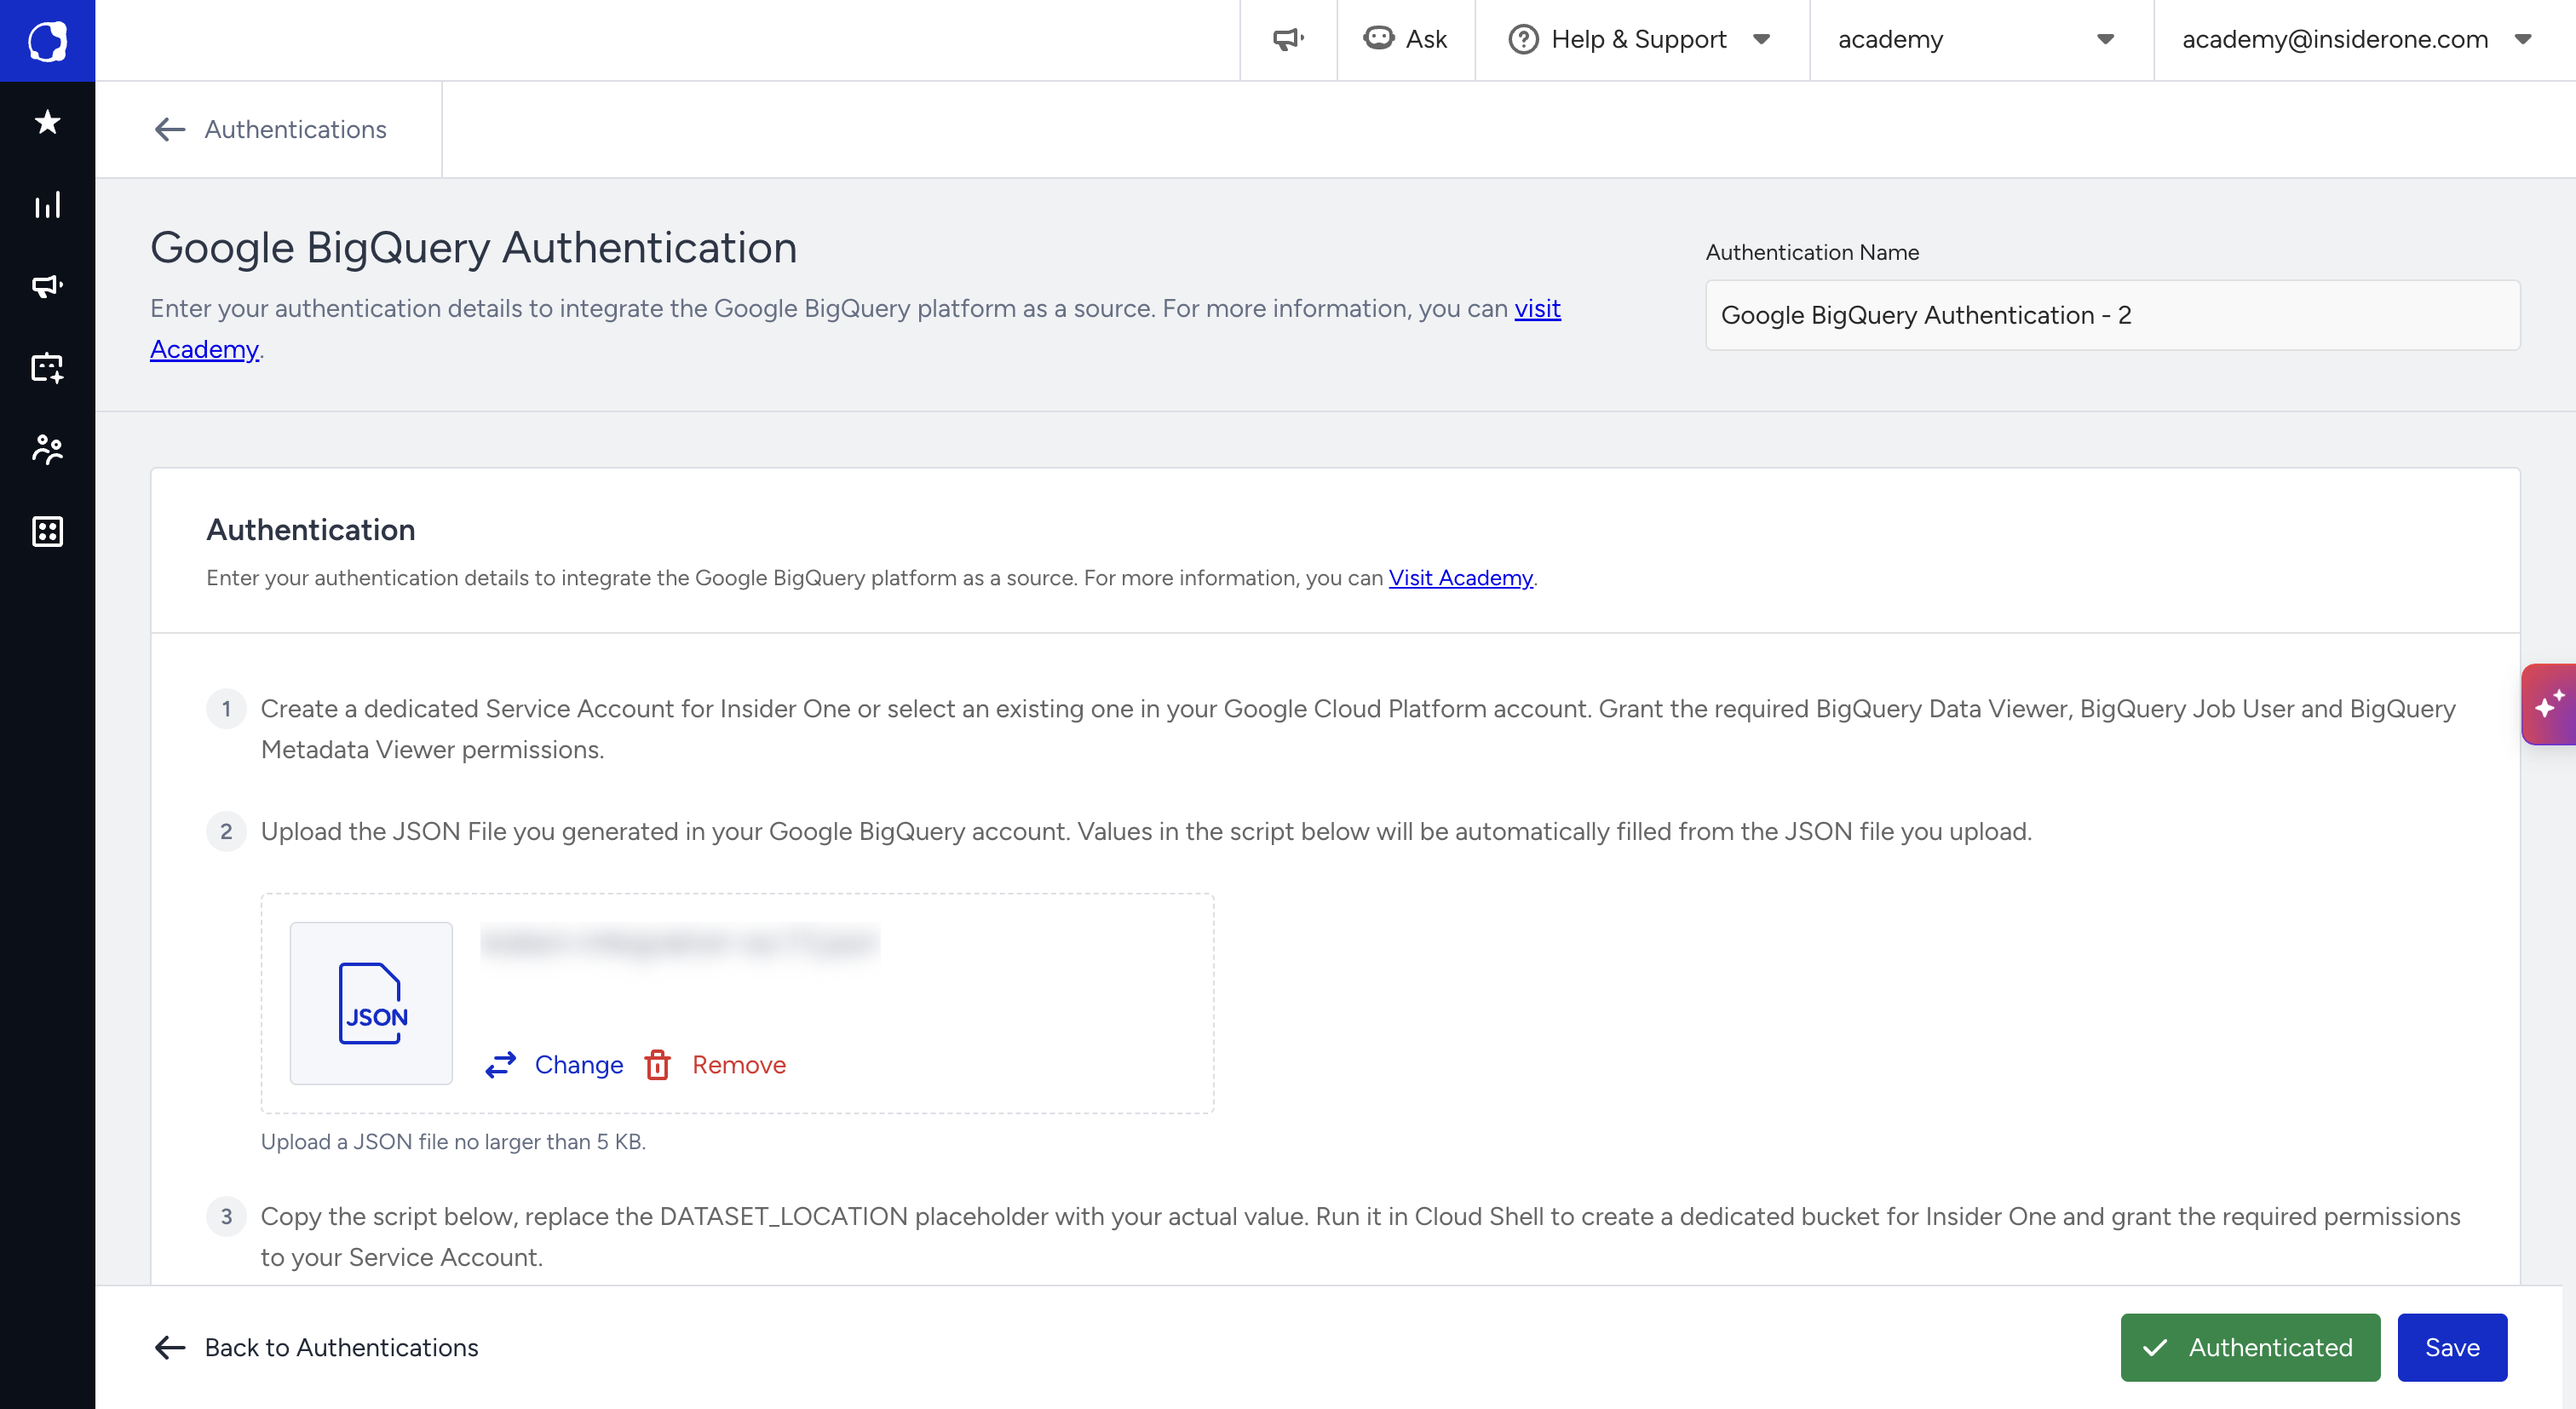
Click Save.
To return to the list, click Back to Authentications.
Use an authentication in an integration
When you set up a Snowflake, Google BigQuery, or Databricks source integration, the integration has three steps: Authentication, Match, and Launch. In the Authentication step, you select an authentication instead of entering credentials.
In the Authentication step, open the Authentication dropdown. It lists the authentications of the platform, each with a status badge. You can search the list.
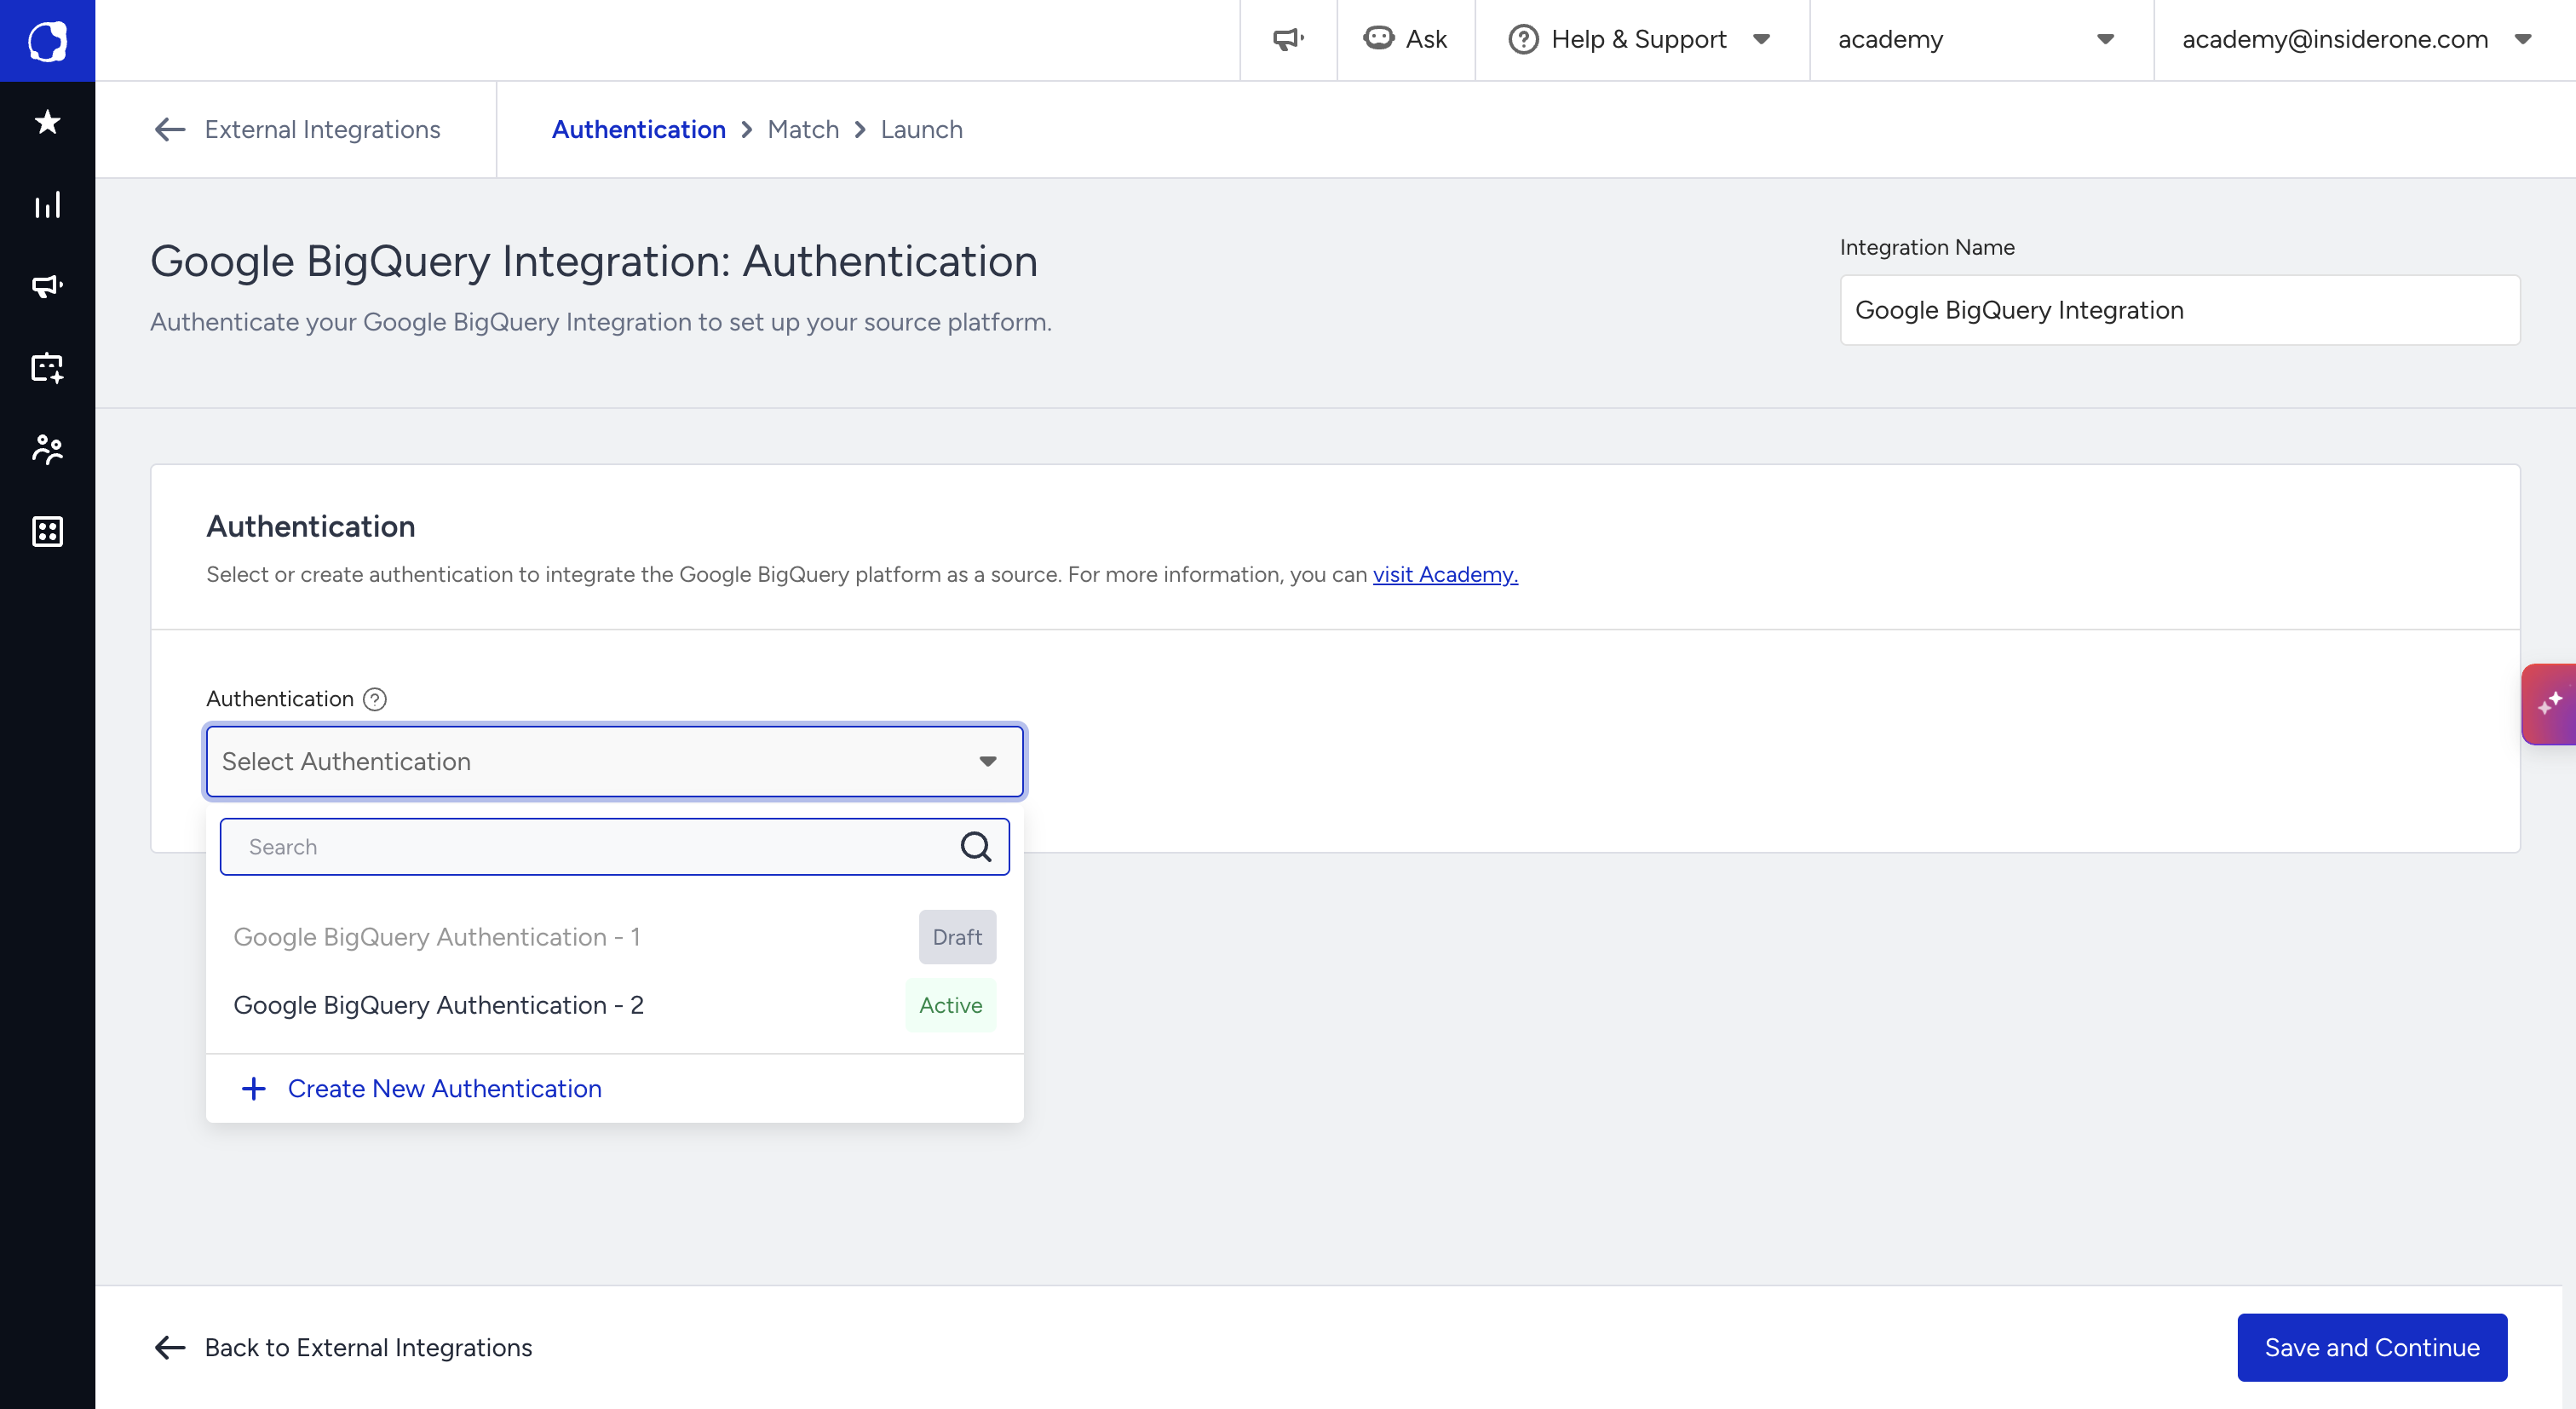
Select an authentication. You can select only authentications with the Active status. Authentications with the Draft or Action Required status are greyed out.
To create an authentication without leaving the integration, click Create New Authentication at the bottom of the dropdown. A panel opens with the sections Authentication Name and Authentication.
Enter the name and the details, click Verify Authentication, and click Save. Then select the authentication in the Authentication dropdown.
Click Save and Continue.
See where an authentication is used
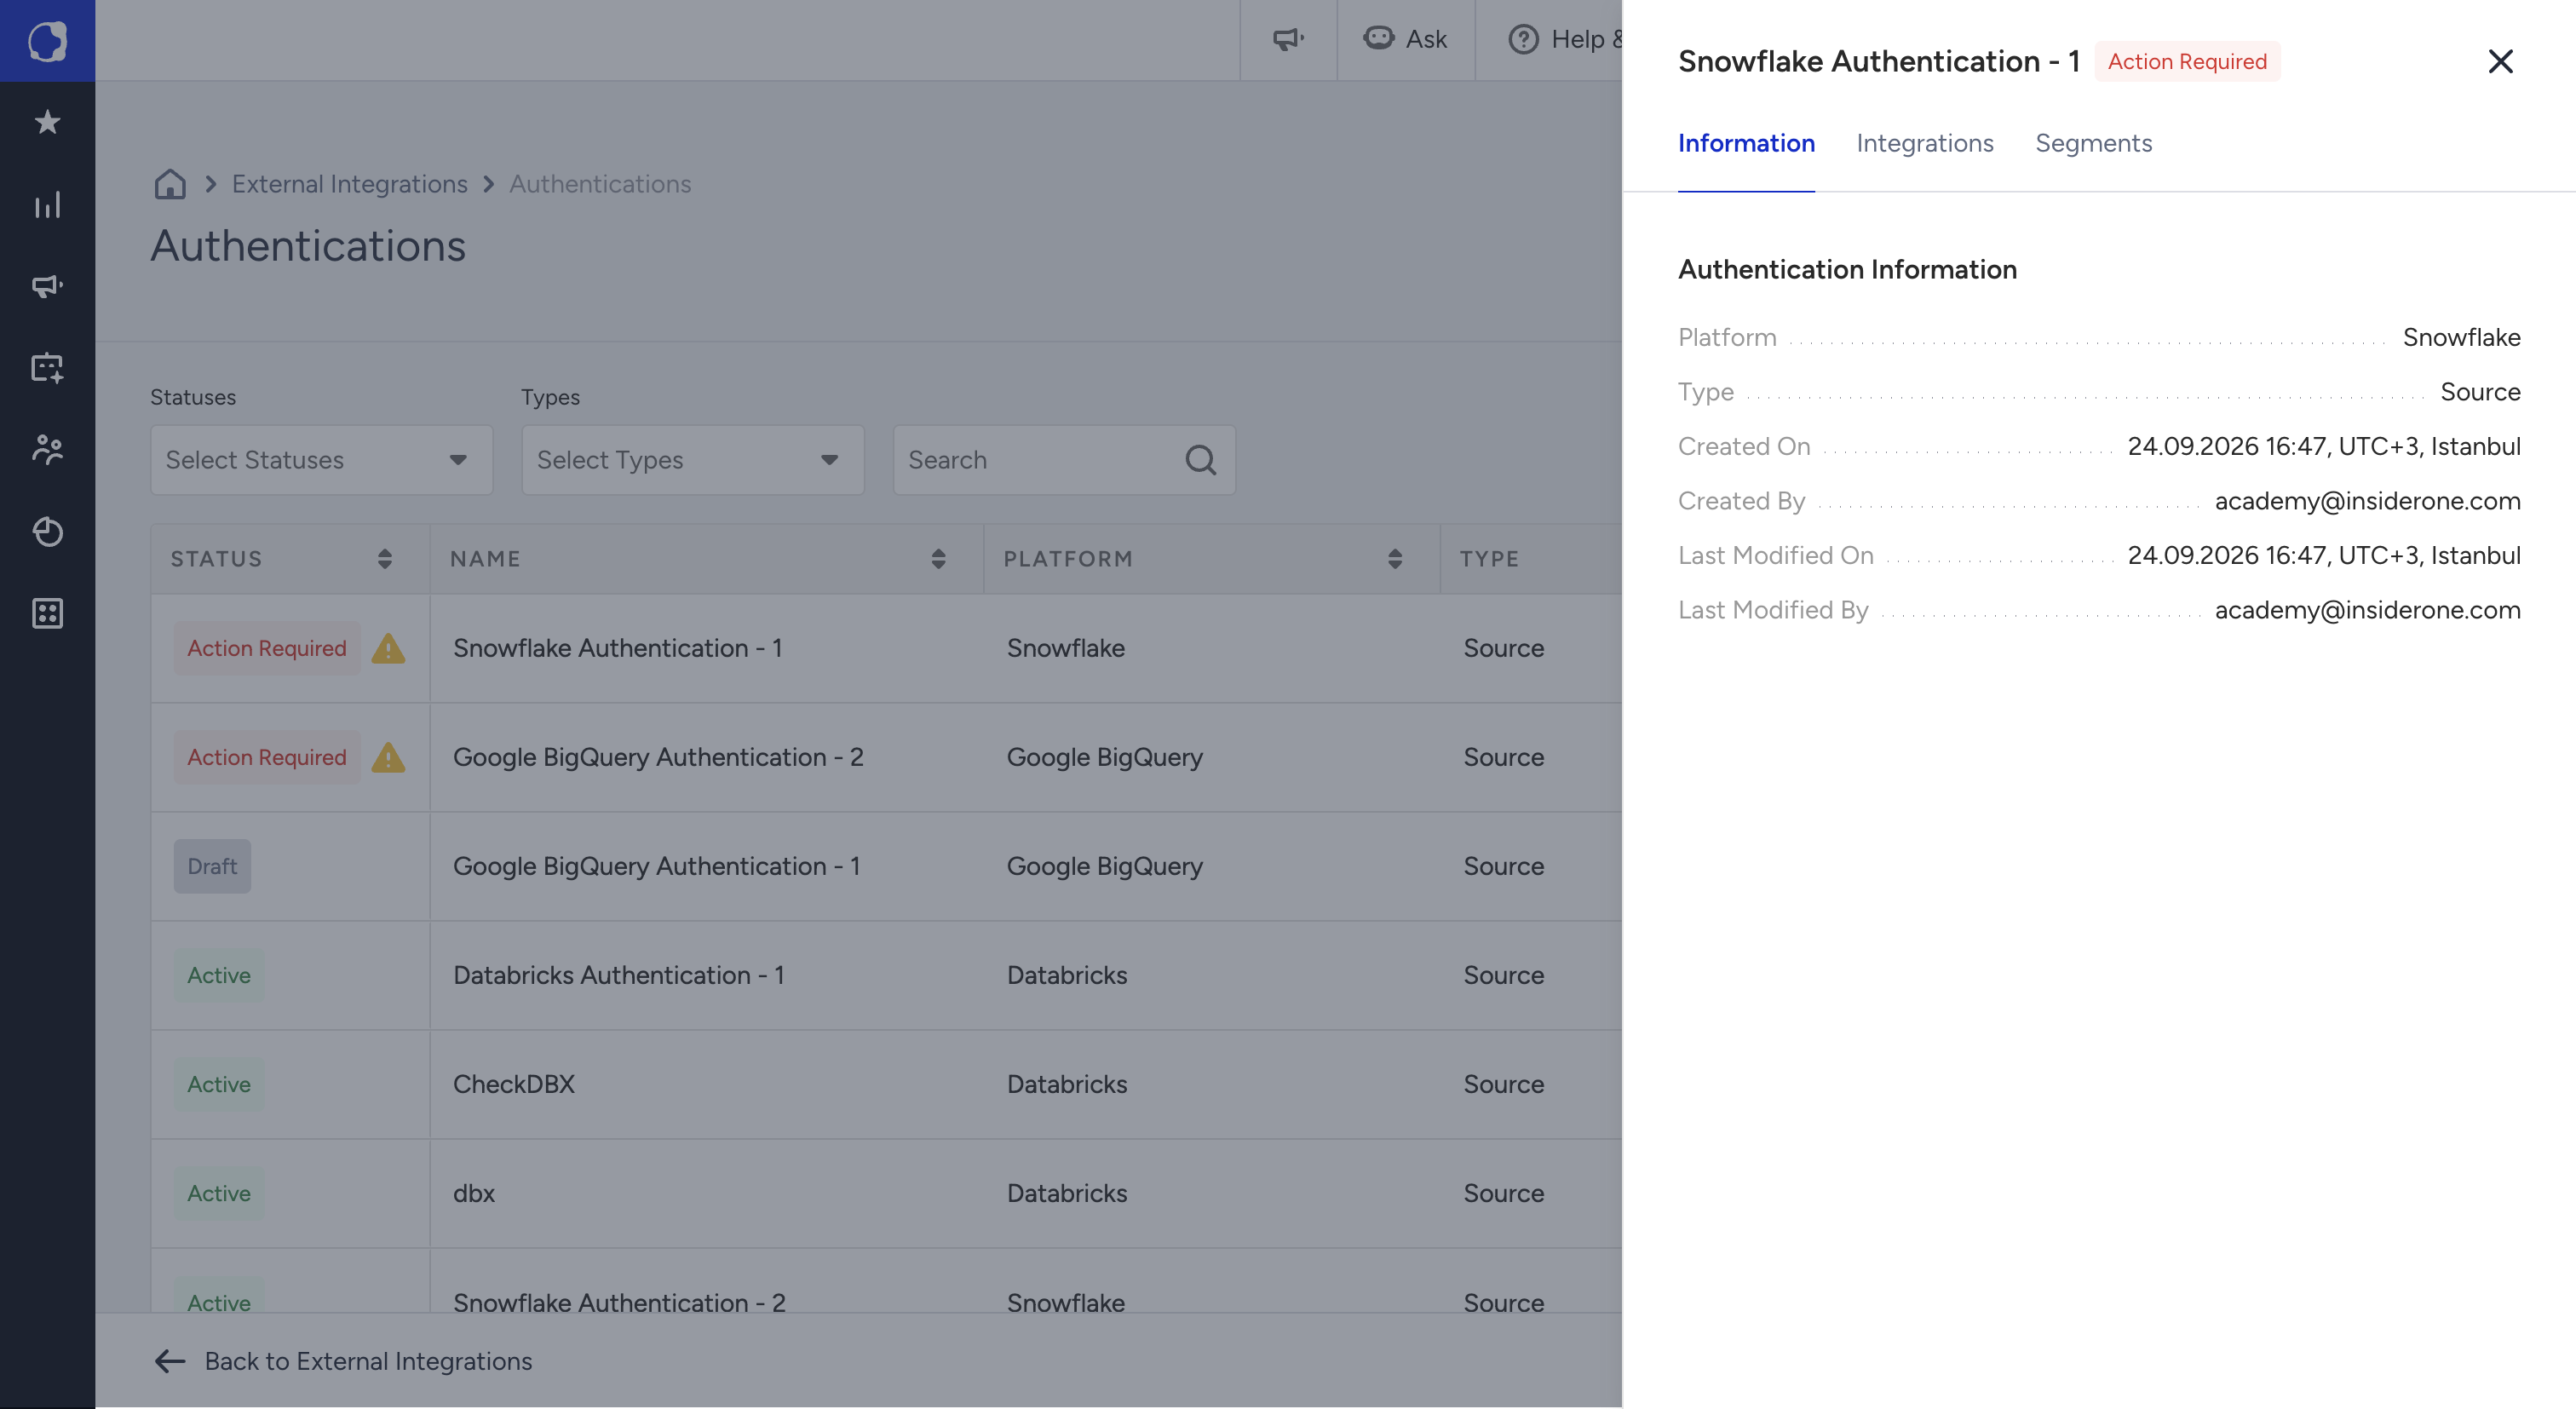
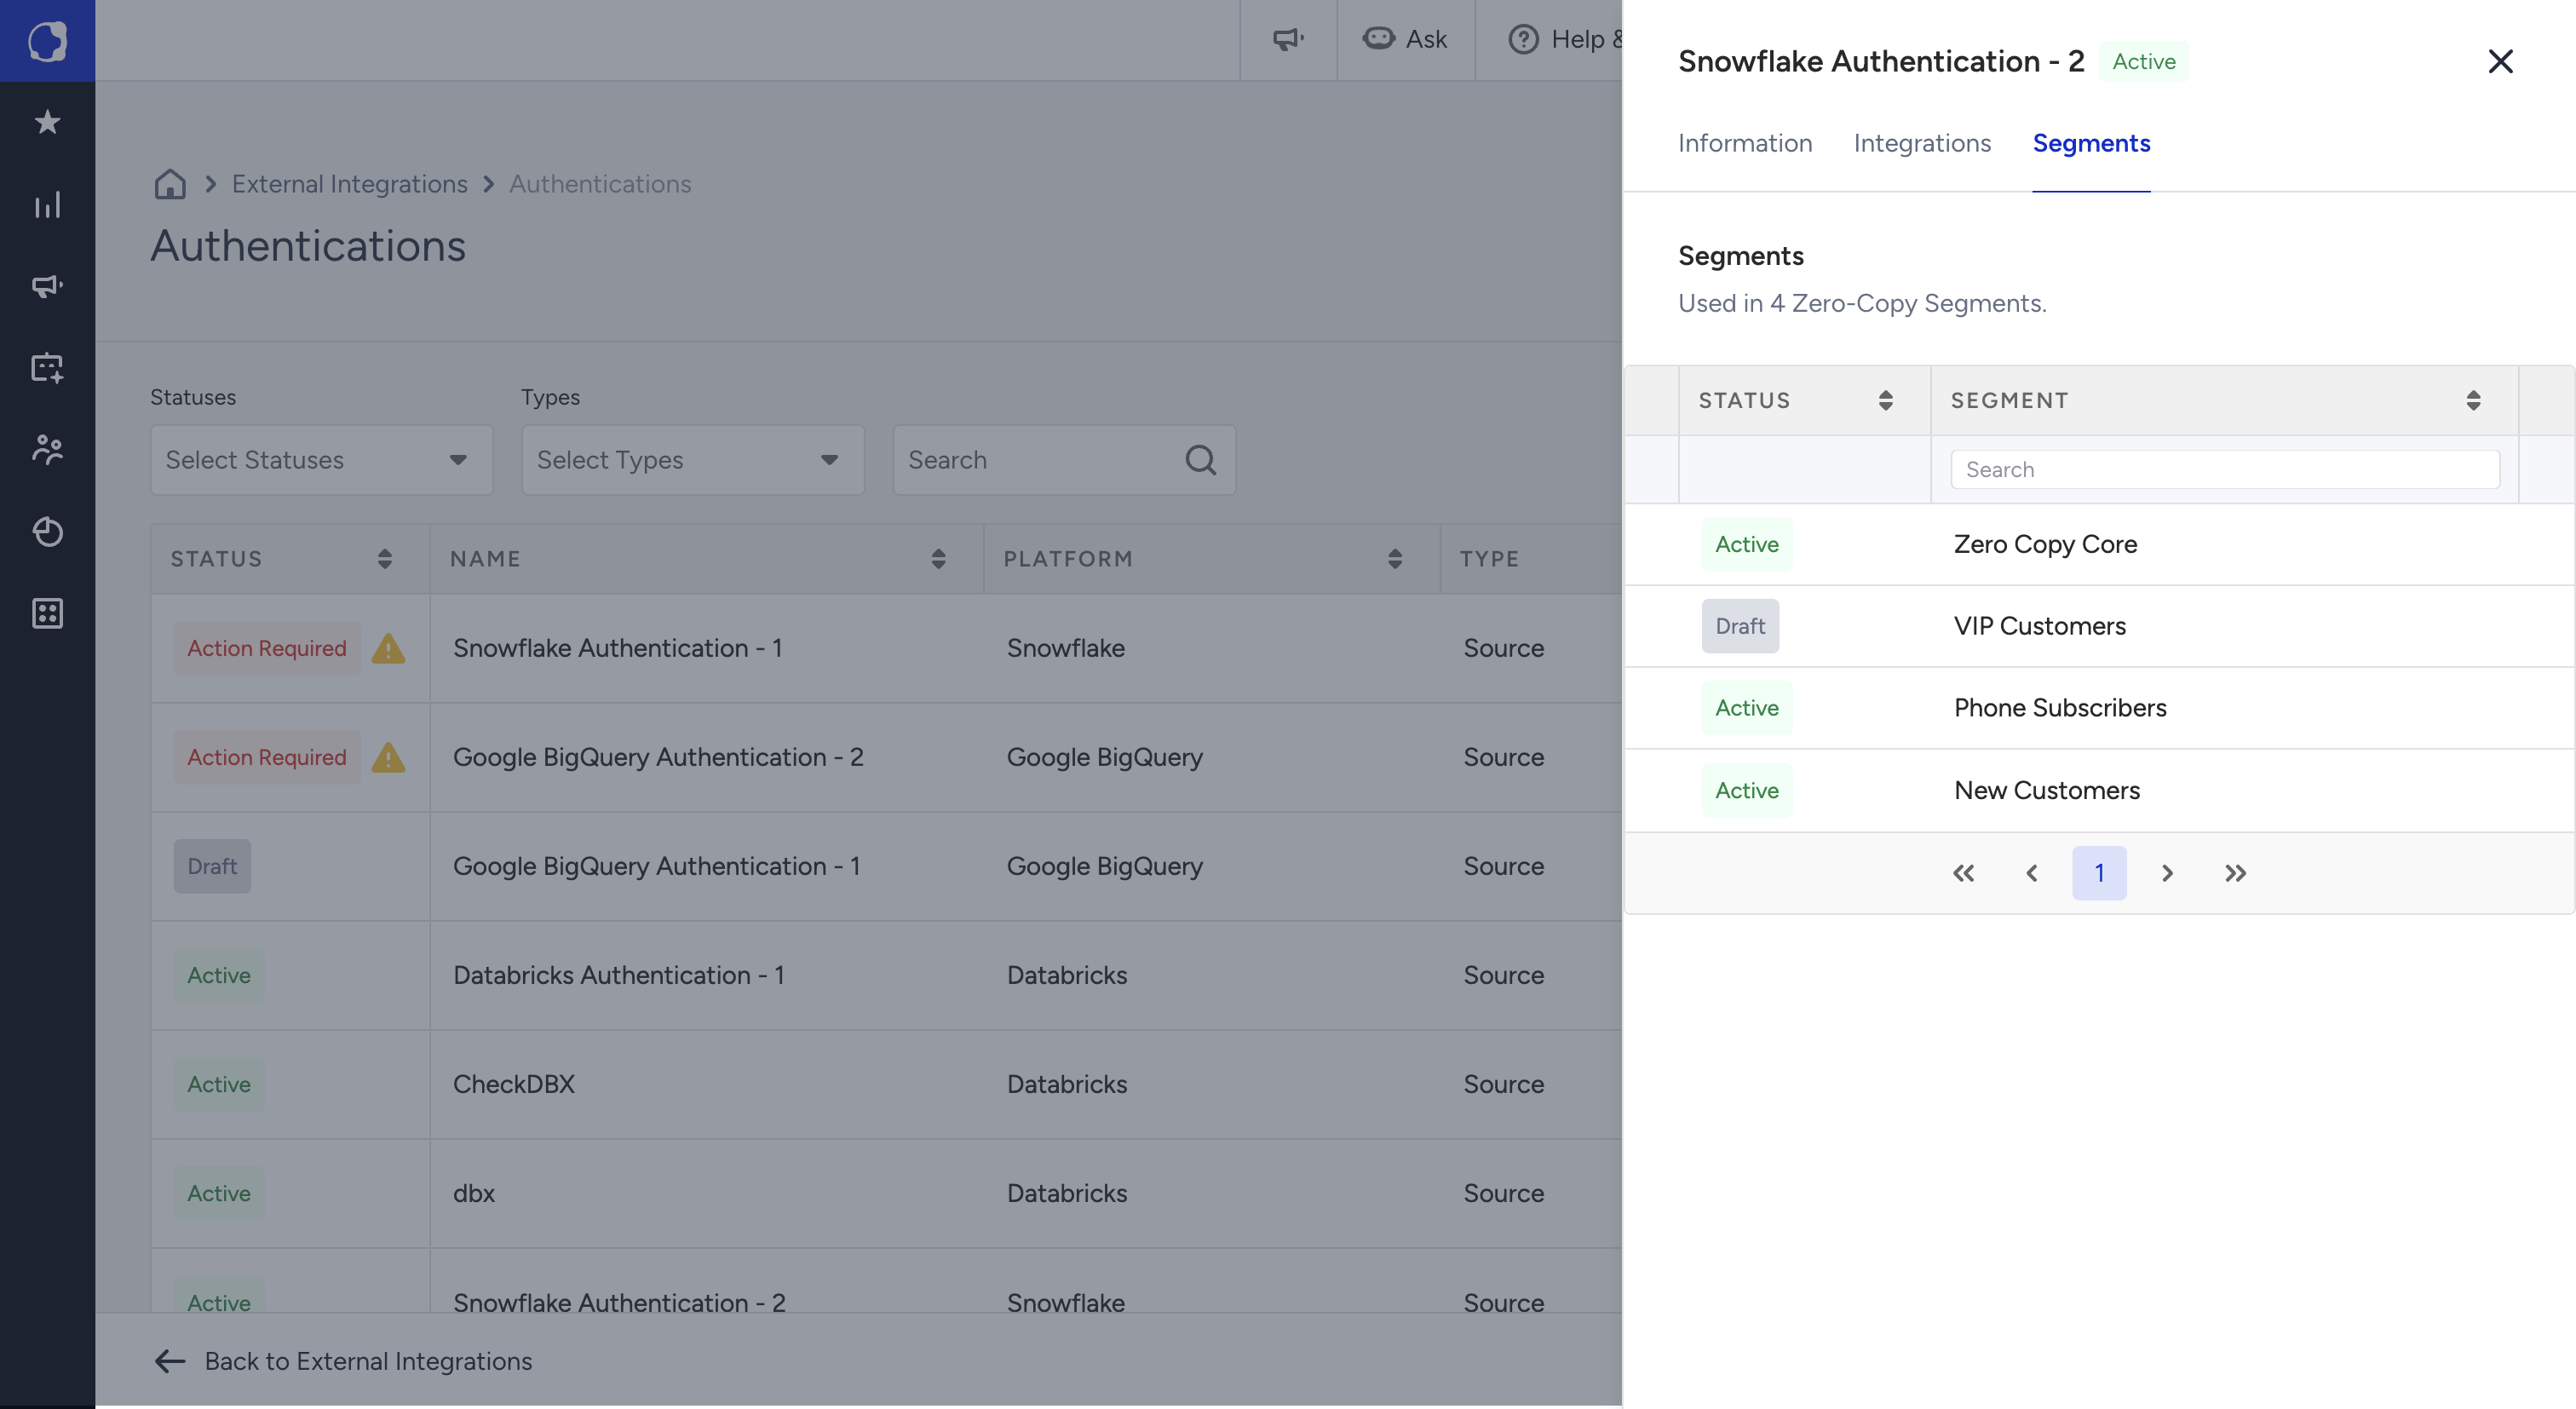
On the Authentications list, click the info icon of an authentication.
Use the tabs of the details panel. The following table explains each tab.
Tab | What it shows |
|---|---|
Information | Platform, Type, Created On, Created By, Last Modified On, and Last Modified By. |
Integrations | The integrations that use the authentication, with the text "Used in N Integration." |
Segments | The Zero-Copy Segments that use the authentication, with the text "Used in N Zero-Copy Segments." |
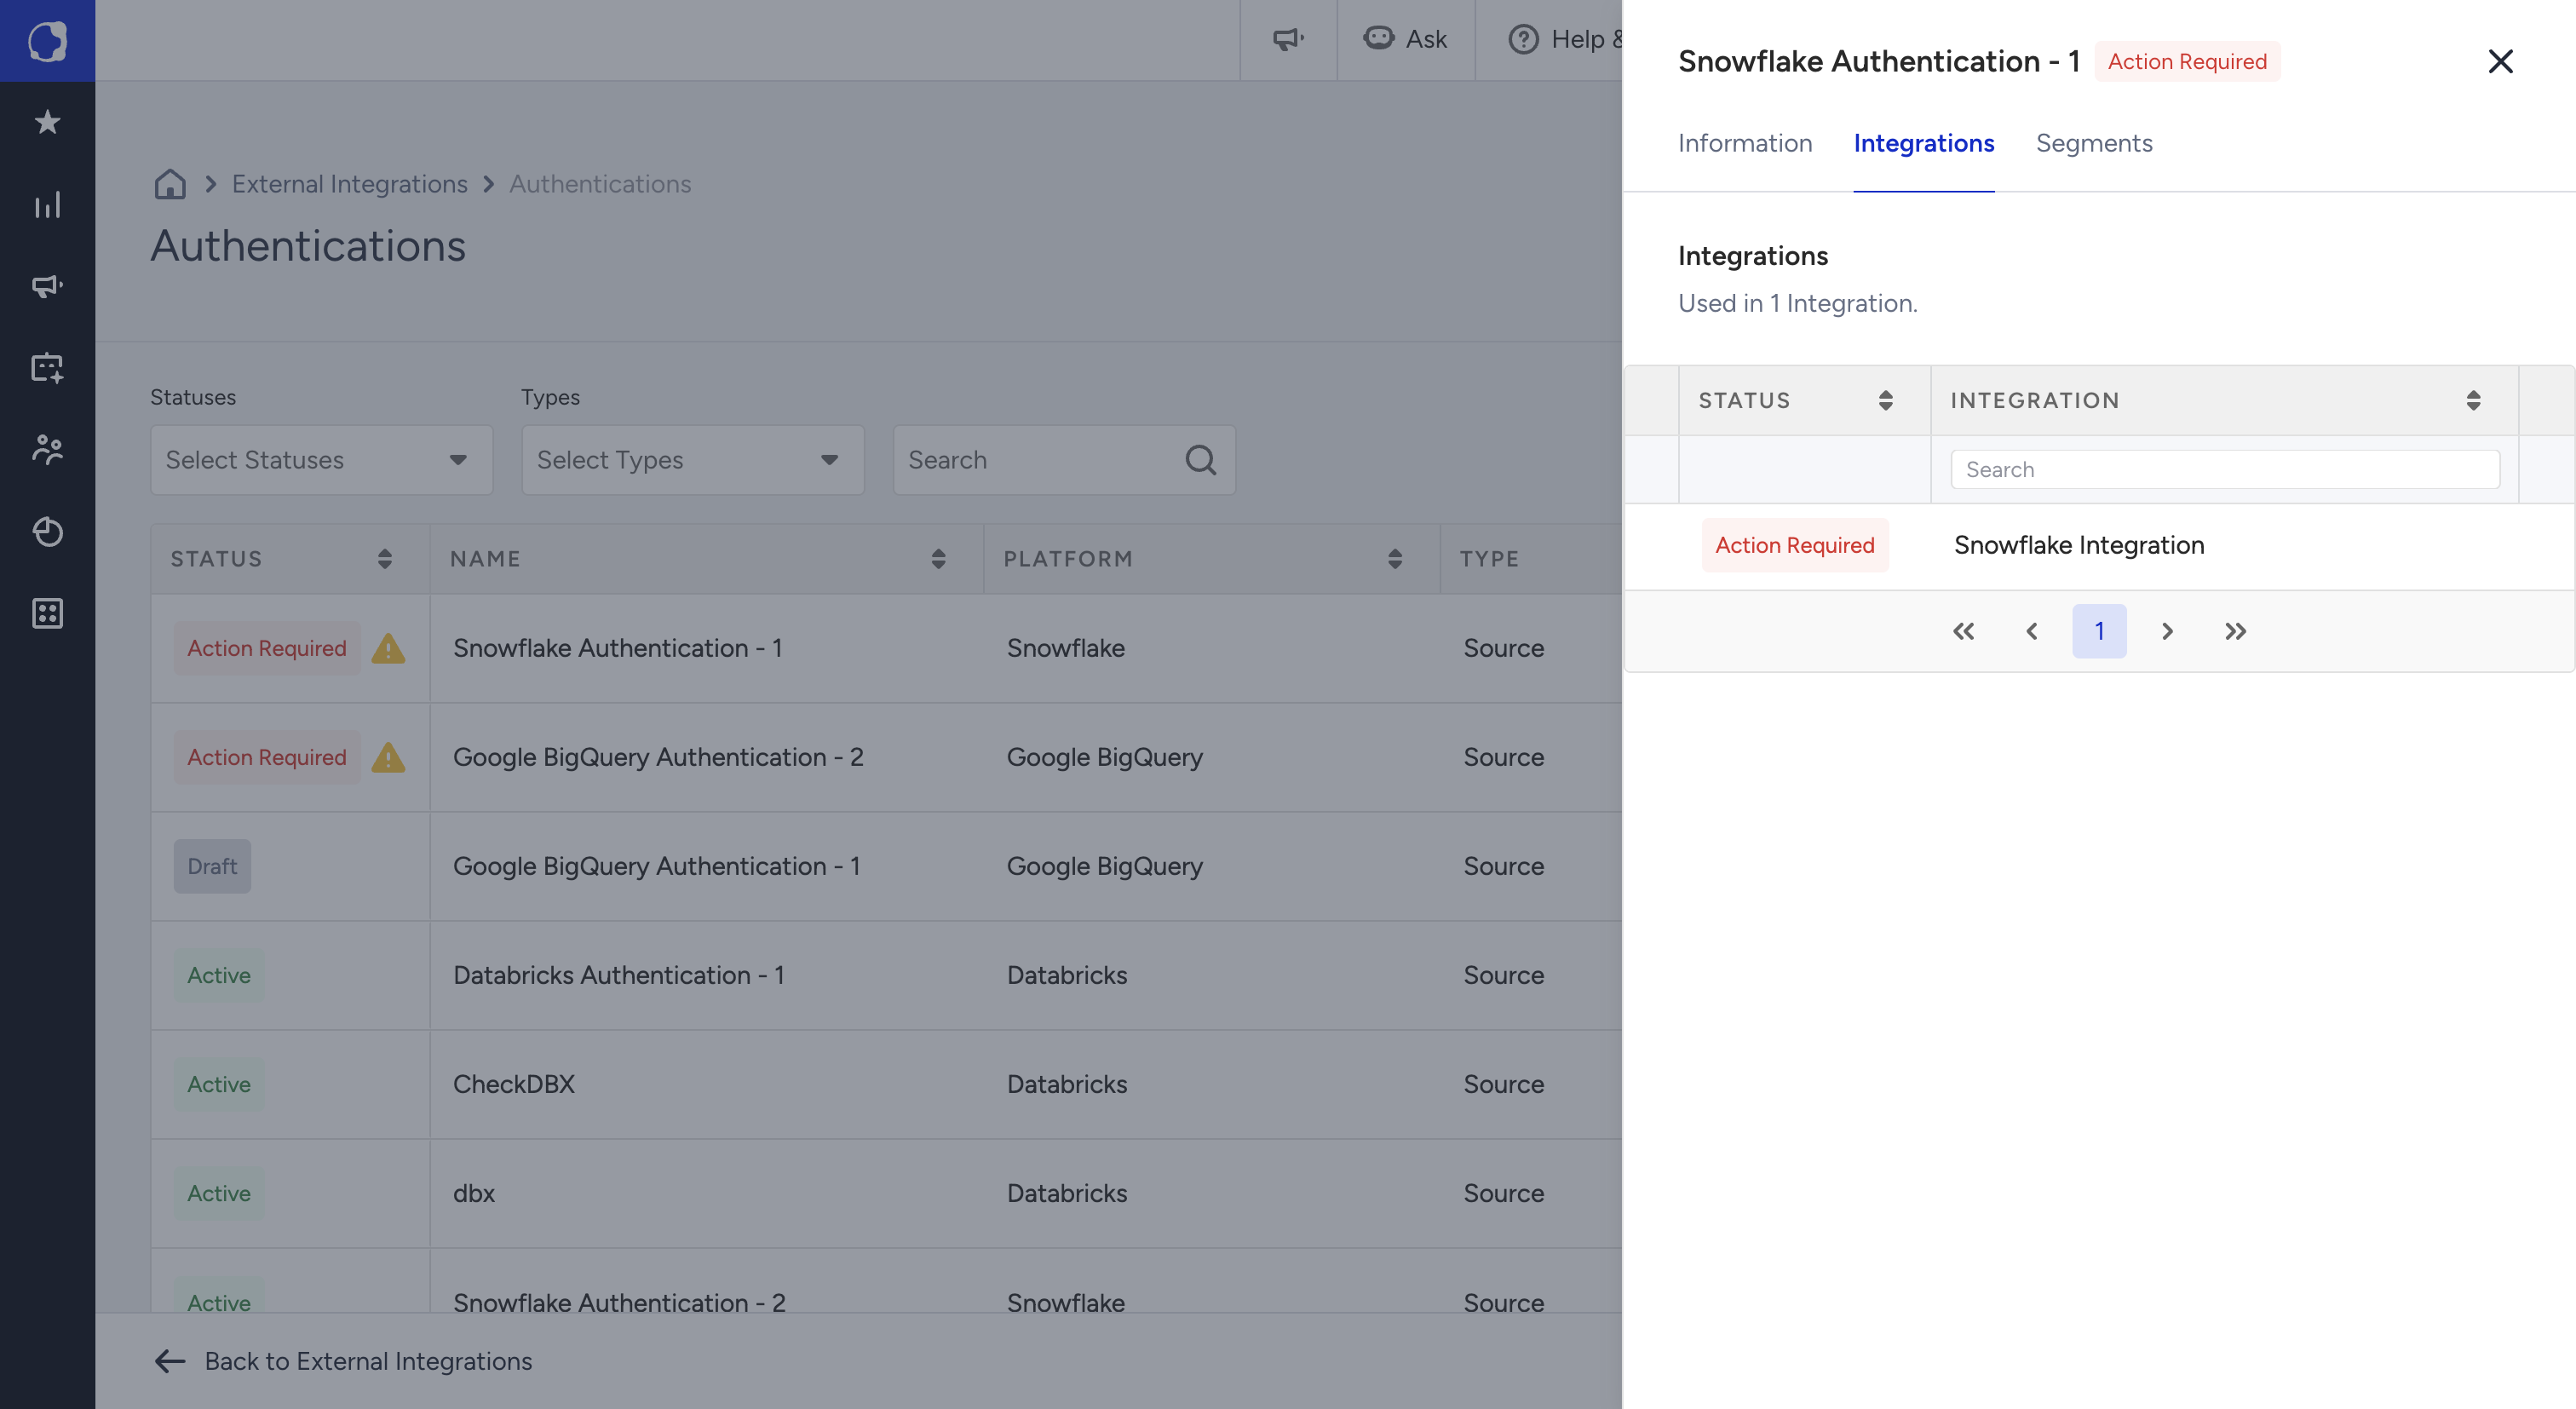
If no integration uses the authentication, the Integrations tab shows "No Usage" and "You don't have any Integrations using this authentication yet."
Update an authentication
To update an authentication, click the edit icon of the authentication on the Authentications list. The authentication page opens. Change the details, click Verify Authentication, and click Save.
You cannot edit an authentication that is in active use. Remove the active usage first.
Delete an authentication
To delete an authentication, open its menu on the Authentications list and click Delete Authentication.
You cannot delete an authentication that is in active usage. Remove the active usage first.
Fix an authentication with the Action Required status
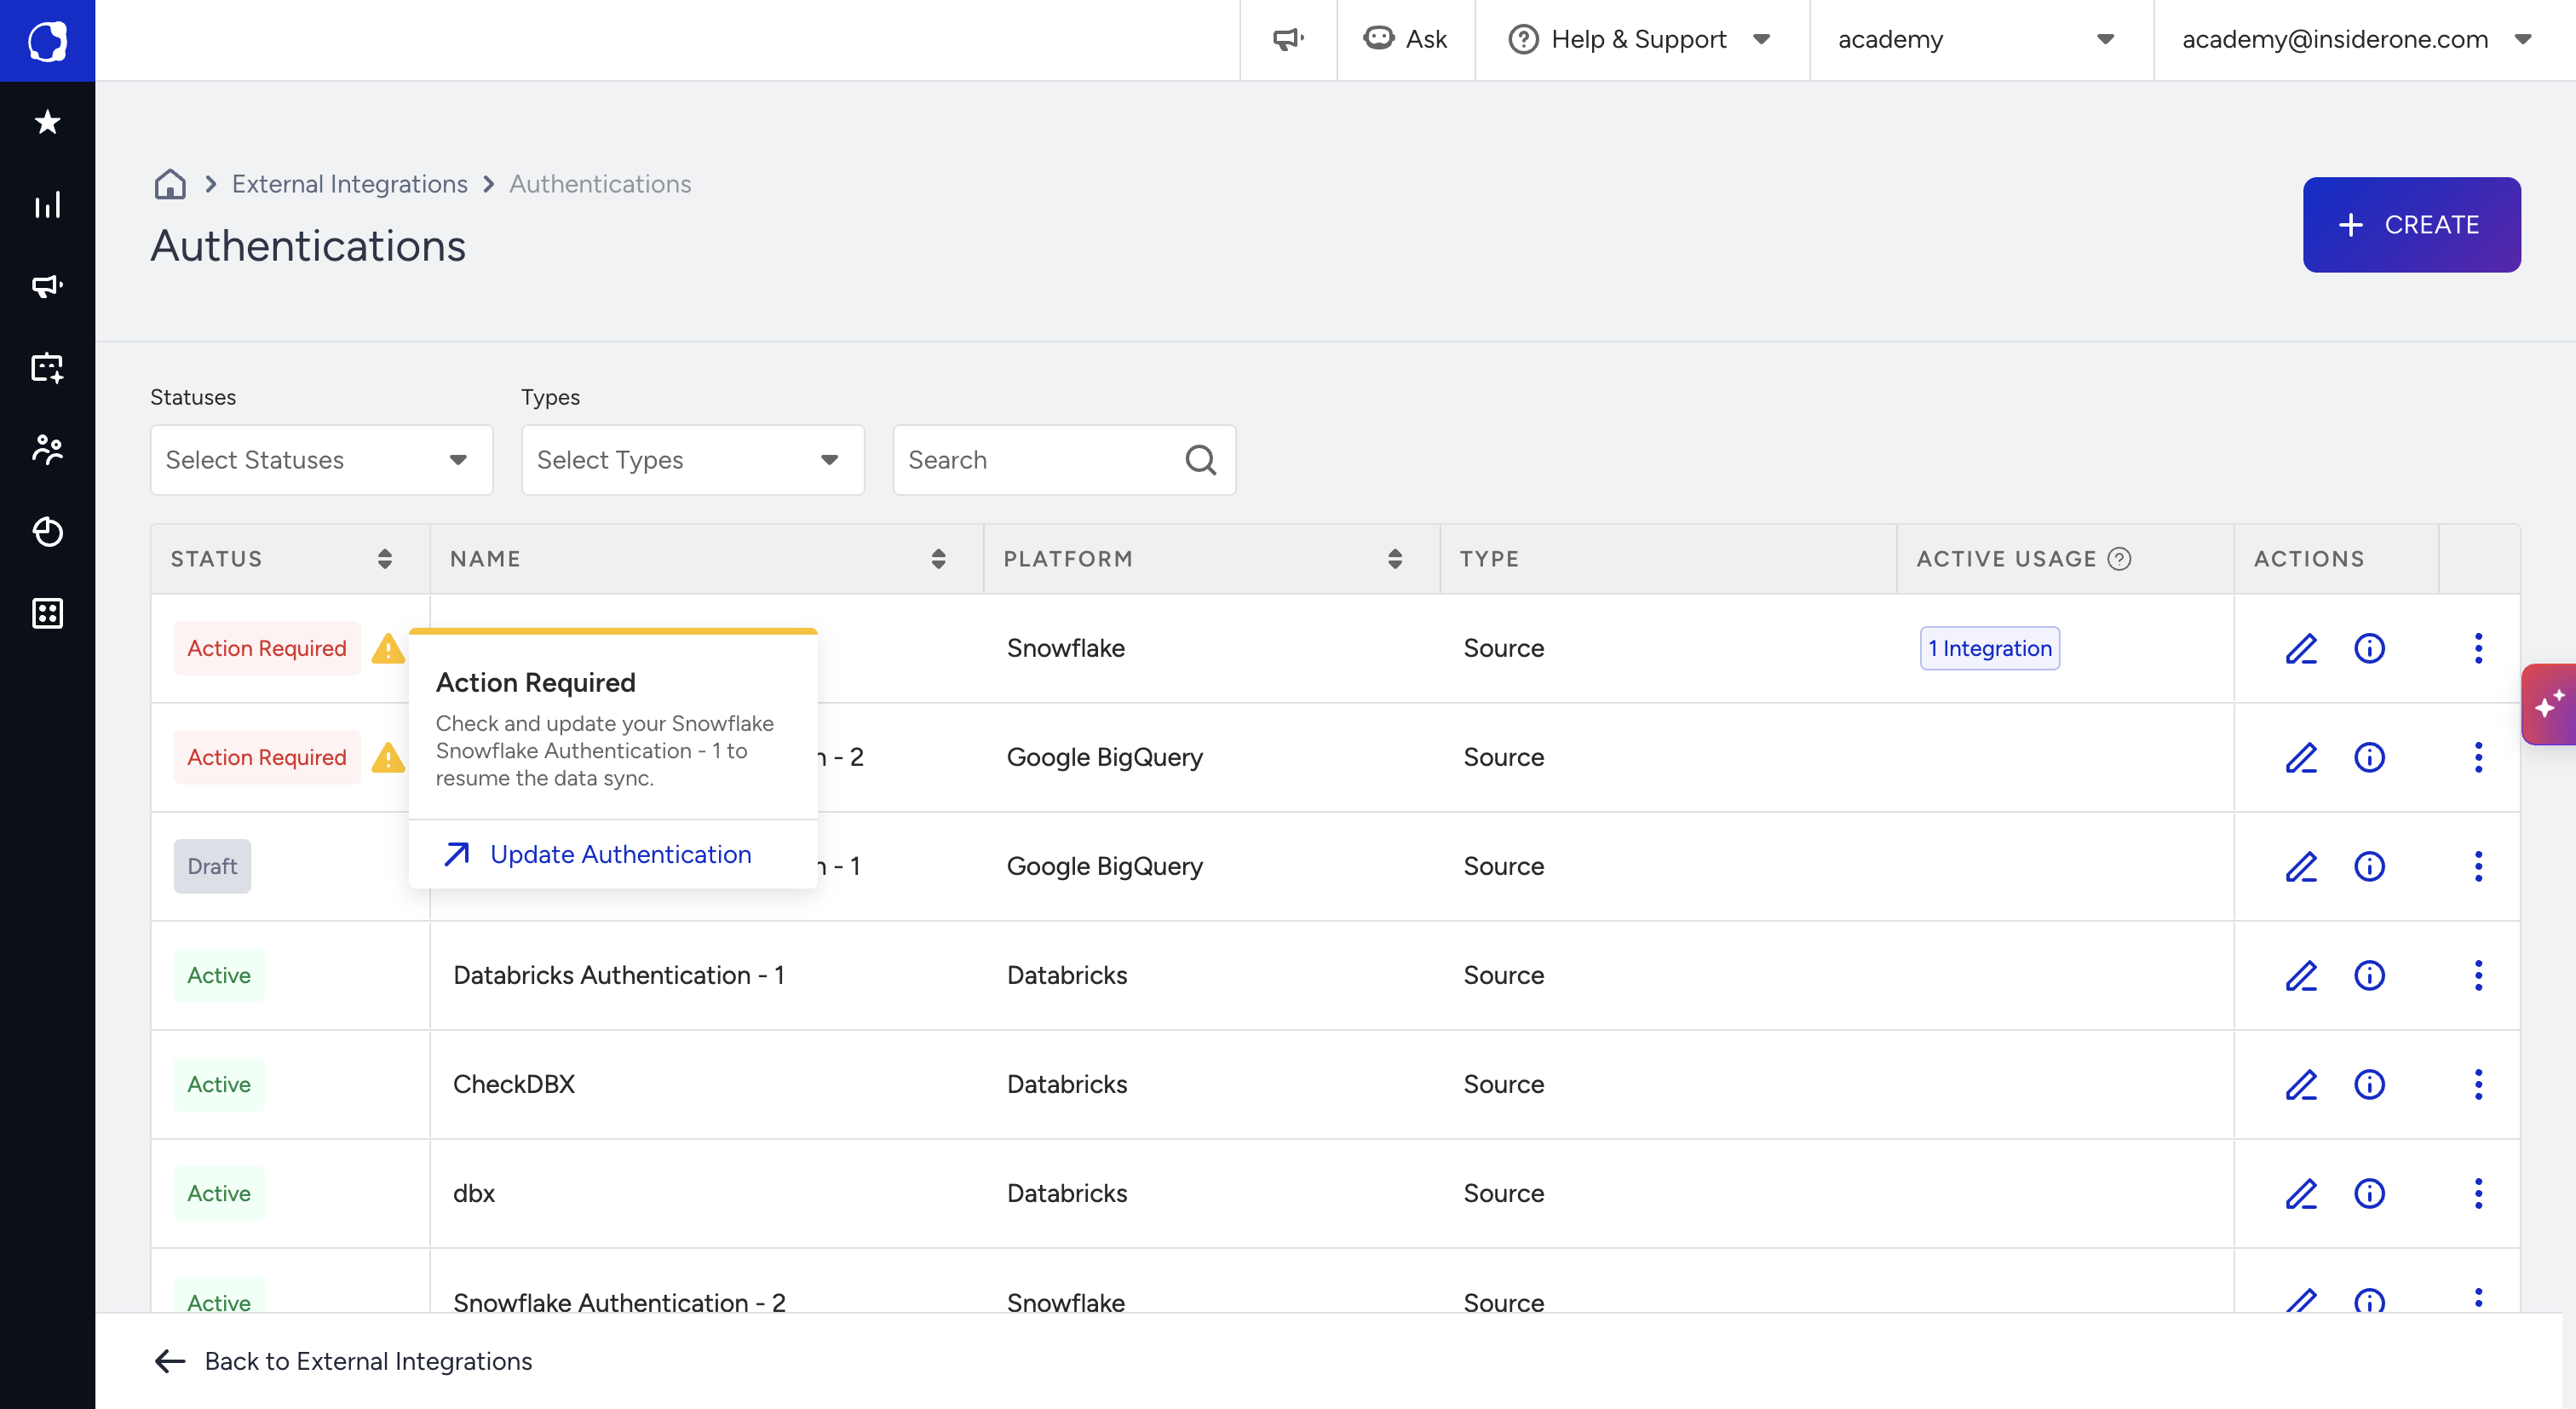
On the Authentications list, an authentication with the Action Required status shows a warning icon next to the status.
Hover over the warning icon. The Action Required box opens with a message to check and update your authentication to resume the data sync.
Click Update Authentication.
Update the details if needed. Then click Verify Authentication and Save.
Your existing authentications
If you have any verified authentications, they have already been moved to the Authentications page with automatically assigned names, such as "Snowflake Authentication - 1" or "Google BigQuery Authentication - 1".
Permissions
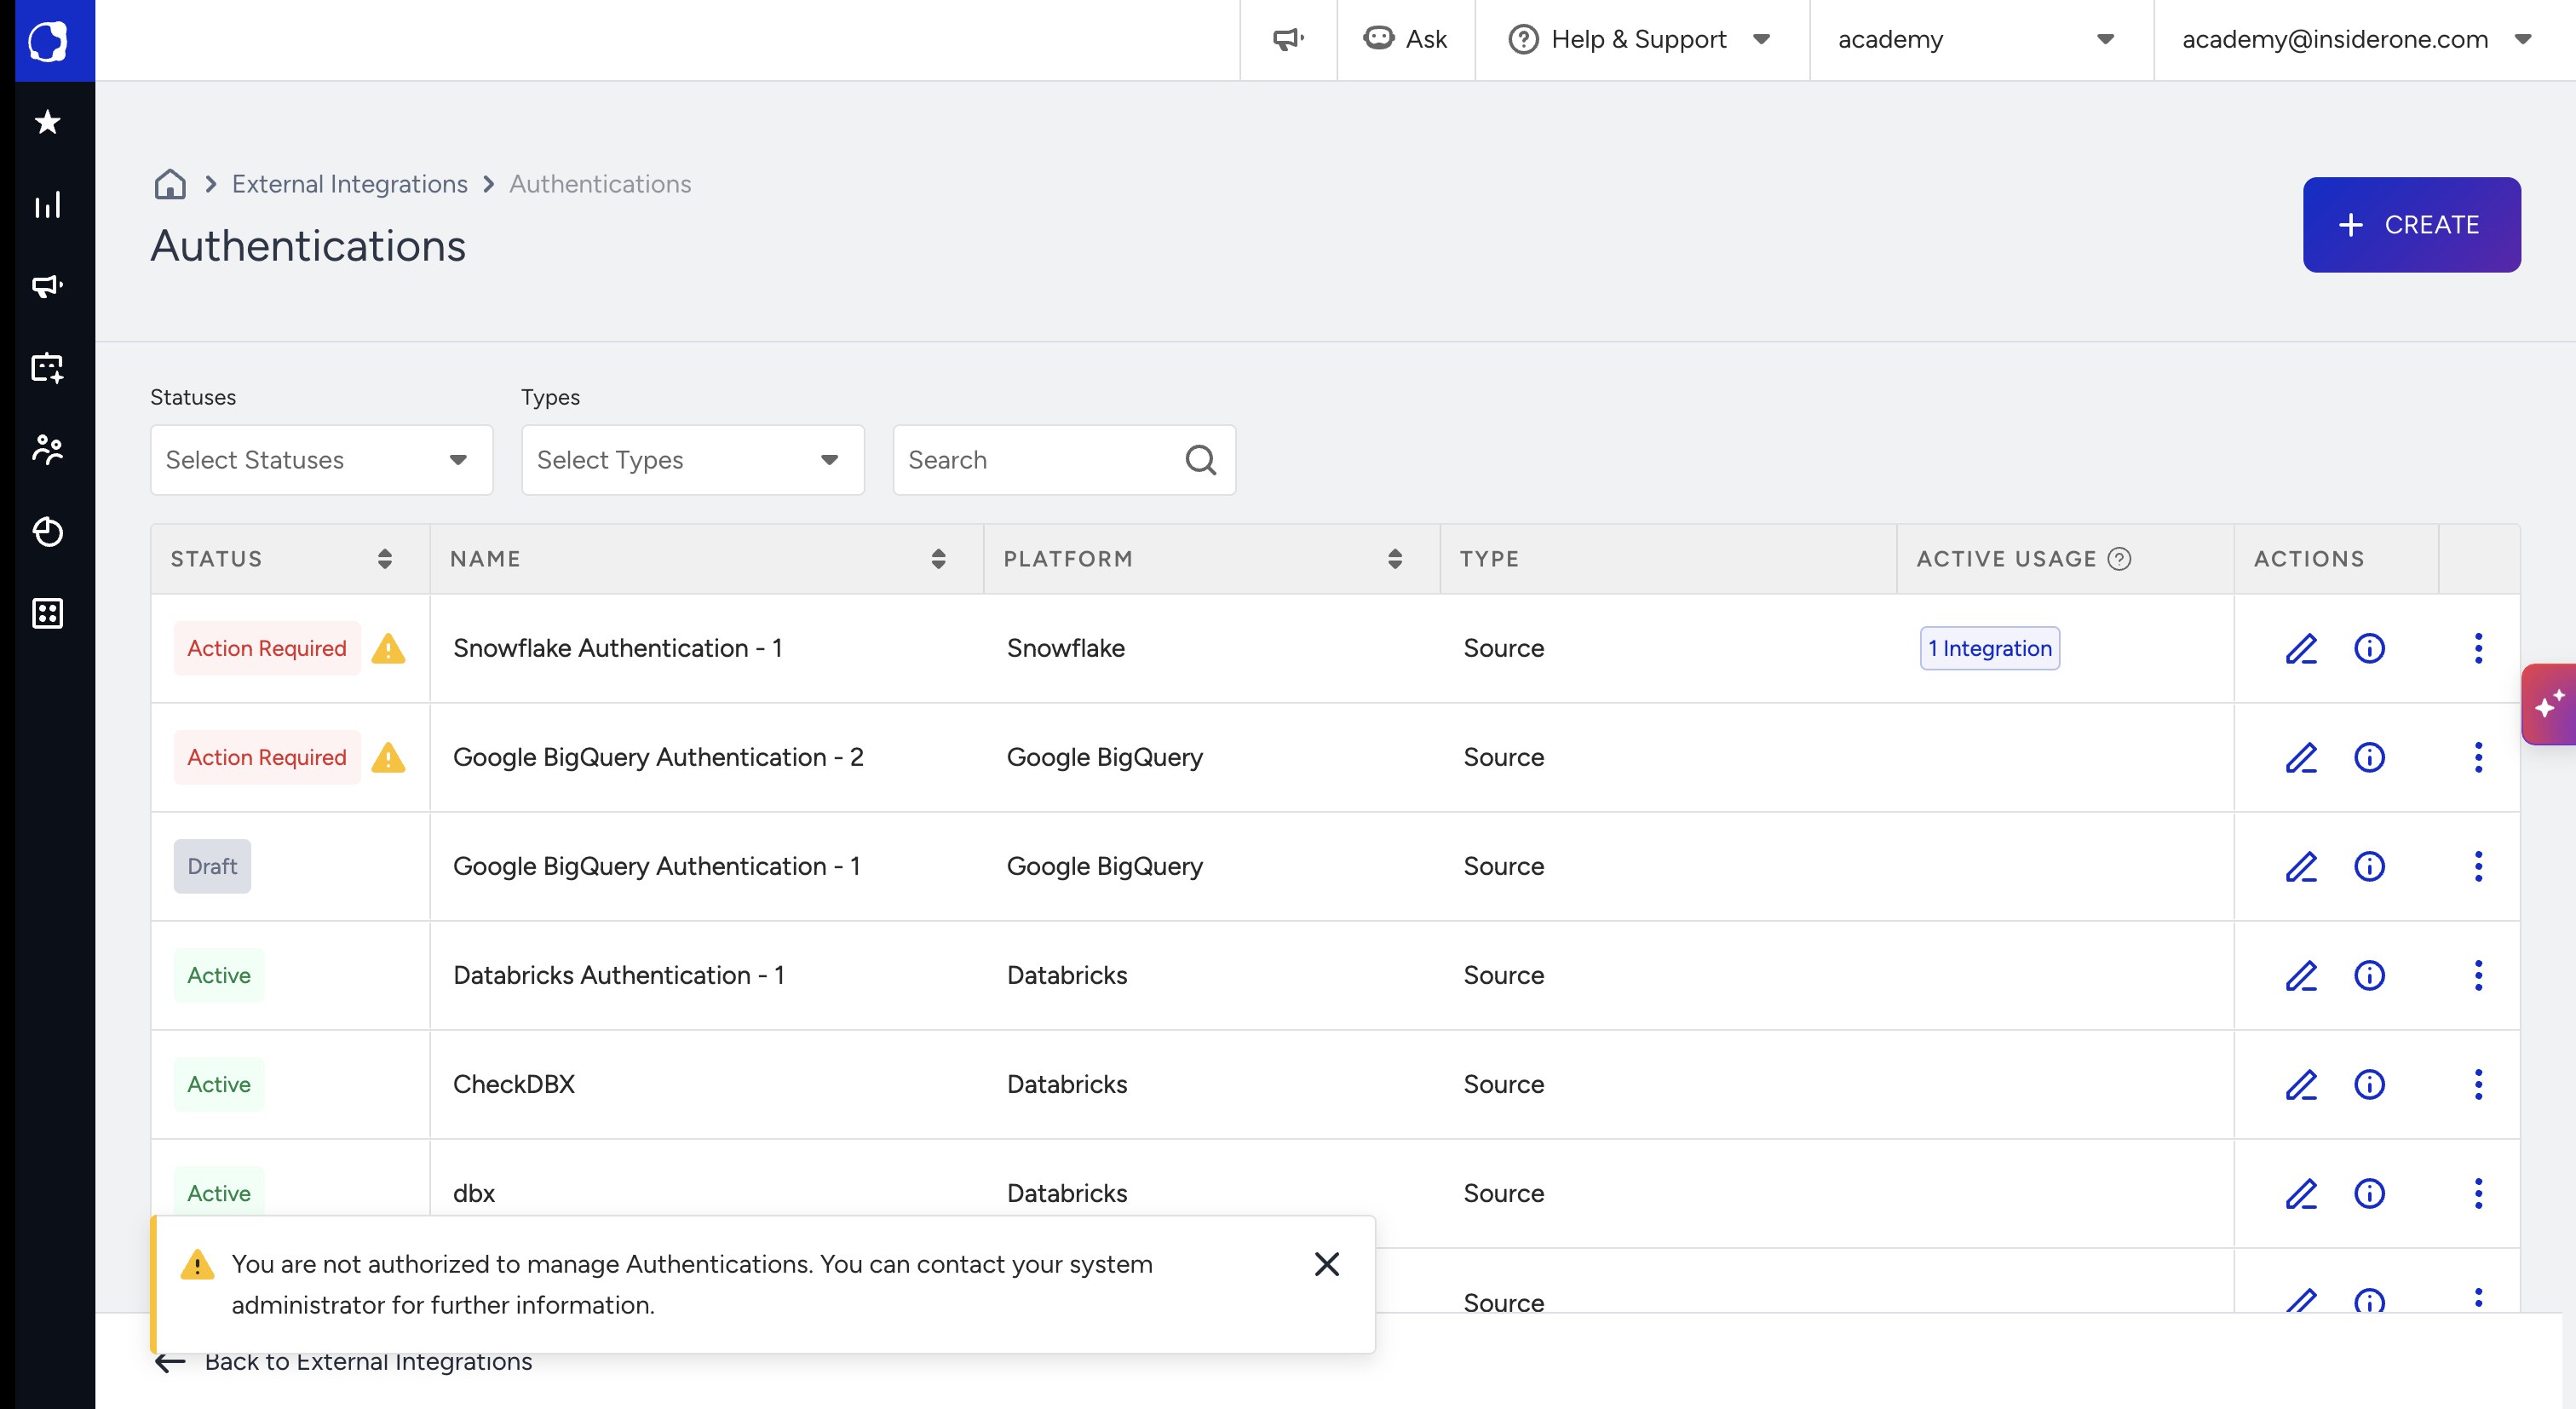
Users without permission to manage authentications can view the Authentications list and the details of an authentication. They cannot create, update, or delete an authentication. When they try, this message appears: "You are not authorized to manage Authentications. You can contact your system administrator for further information."
Limitations
Authentications are available for Snowflake, Google BigQuery, and Databricks.
You can create up to 100 authentications per type for each platform.
You cannot edit or delete an authentication that is in active use.
You can select only authentications with the Active status in an integration.