A sender email is seen as the From information in your users' inbox. It includes the name and the email address you define. Therefore, we highly suggest you use your brand name since your user name and email address will be displayed when your users receive an email from you, and you would not want them to be dismissed. By setting up the sender email address, you do not need to type it over and over again when you need it in your Email and Architect campaigns.
You can also add a dynamic sender address to send emails from sender addresses relevant to your users.
Sender Management V1
Add sender email address
1. To add a Sender Email address, navigate to Components > Sender Management.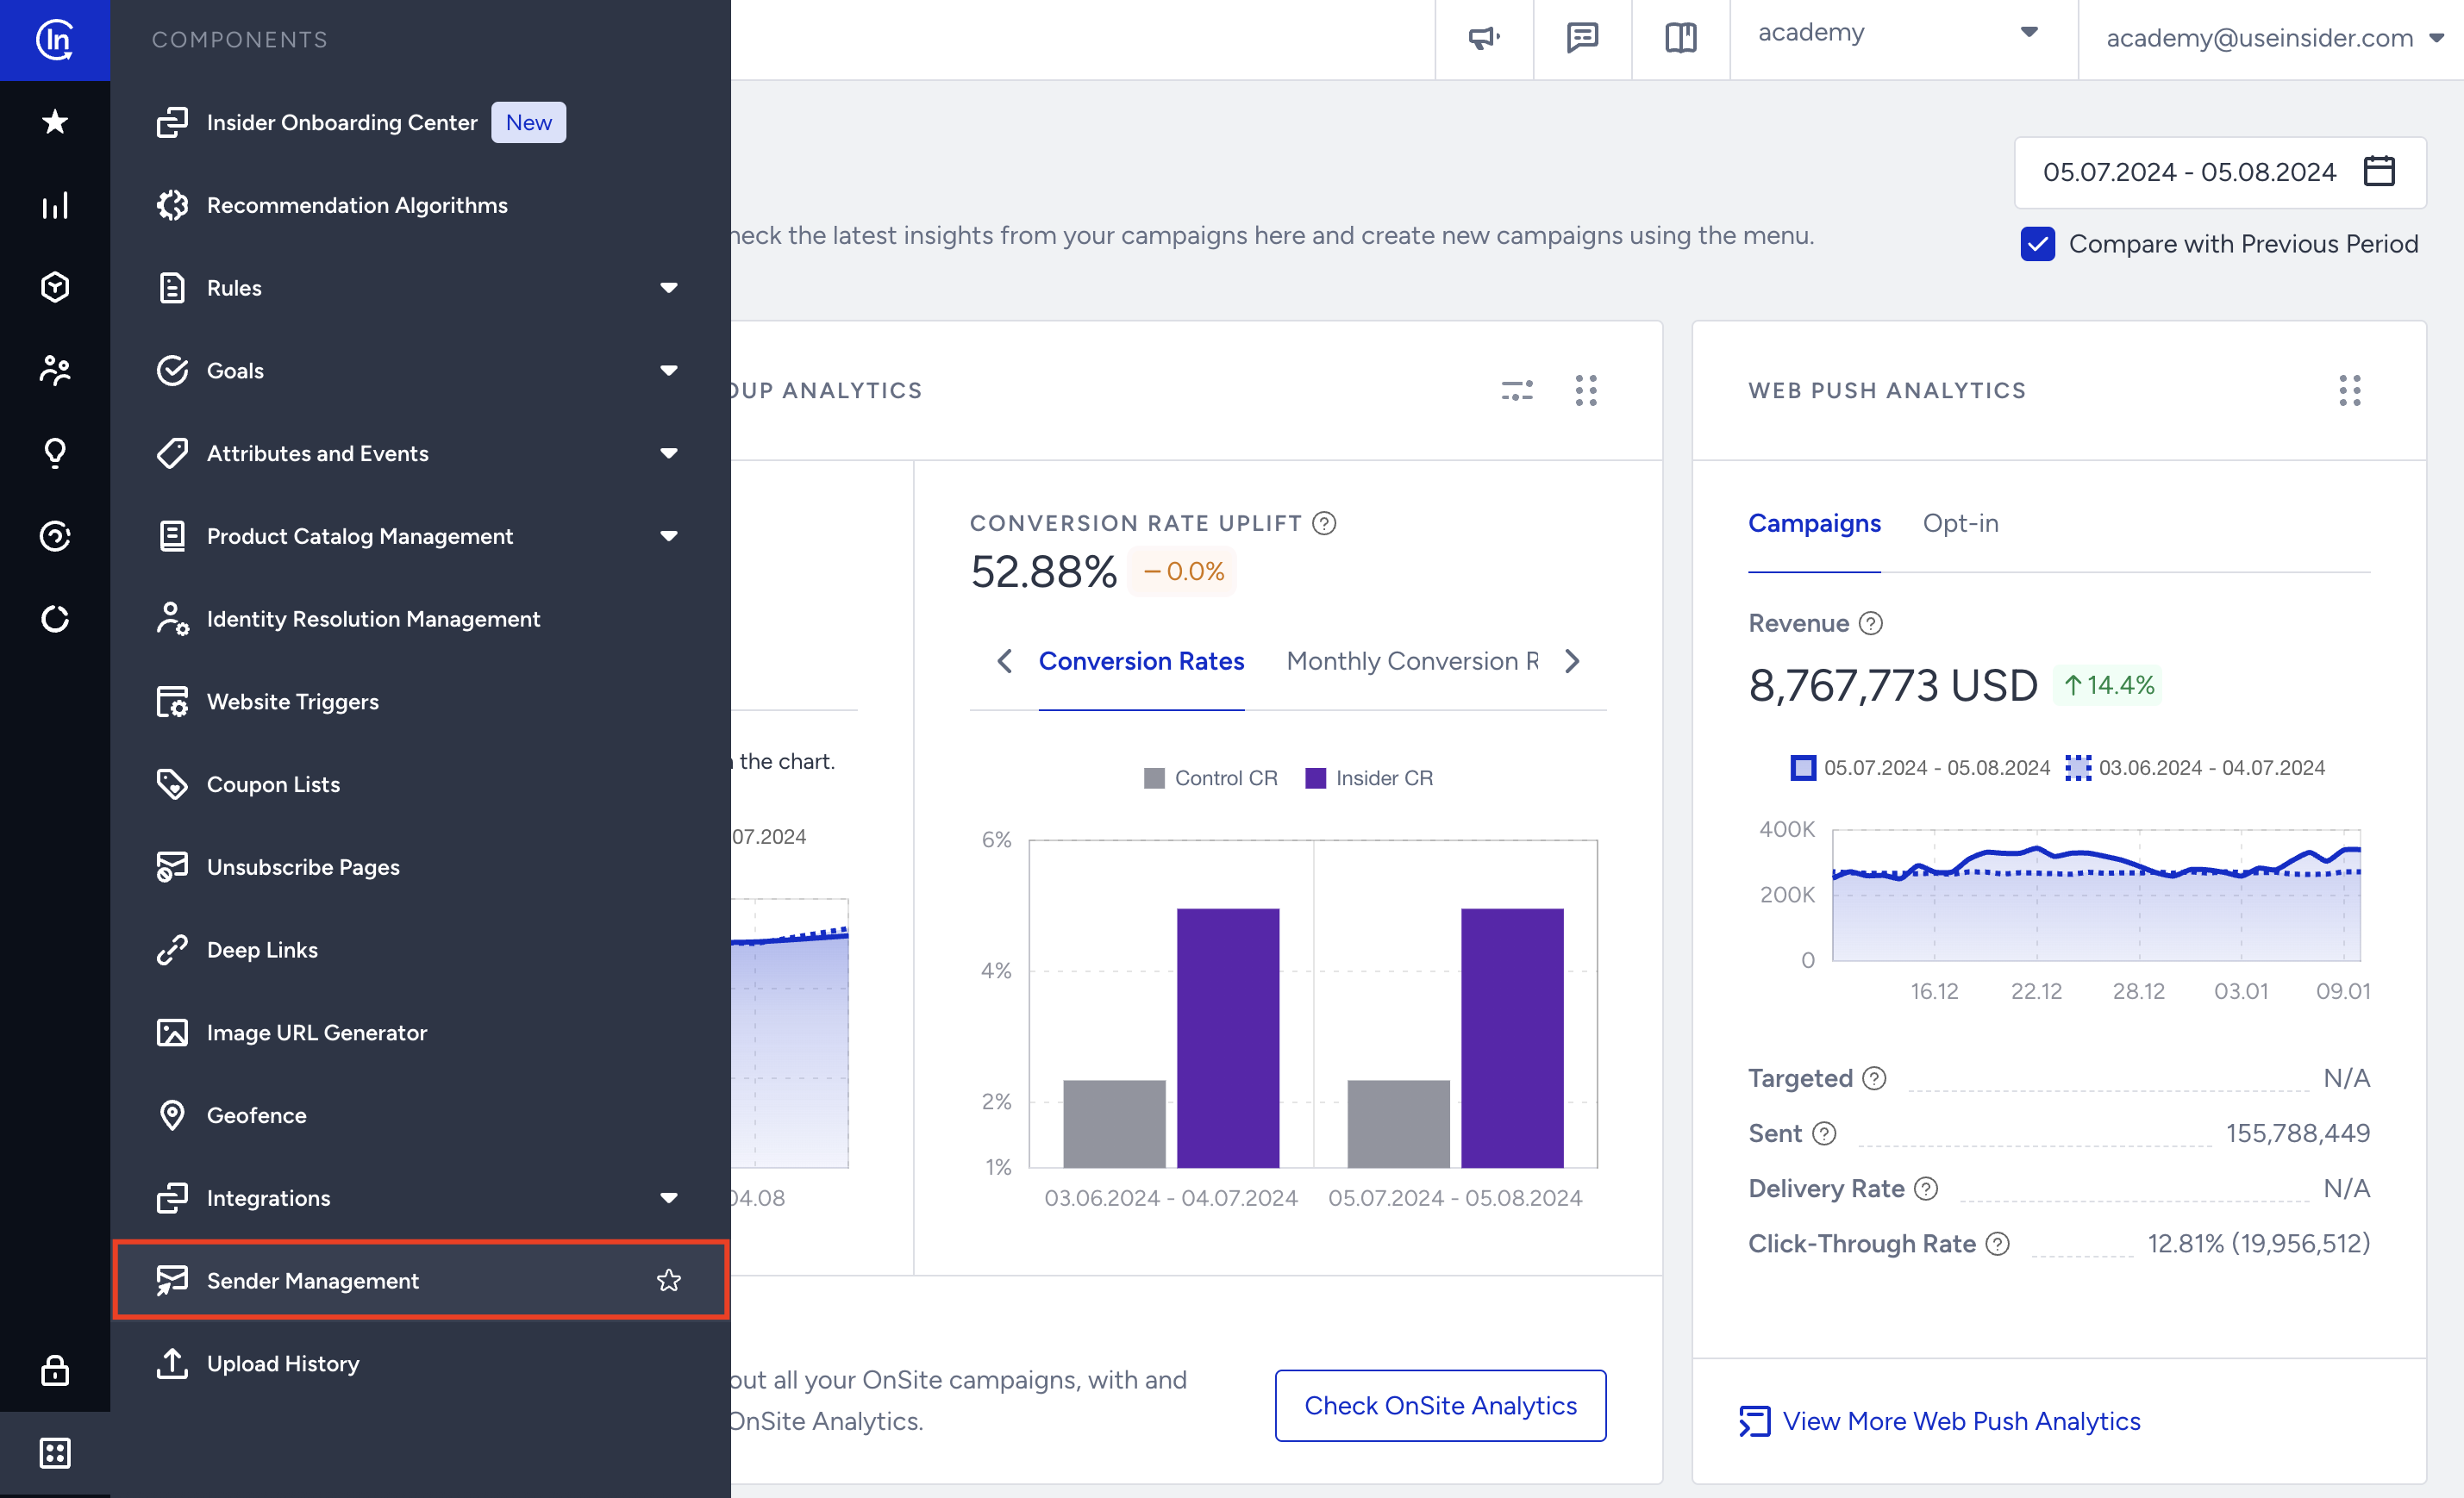
2. Click on the Create button to add an address.
3. Enter the Sender name and email address and click the Add Sender button. To add an email address, type the username and pick the domain from the dropdown.
You can add the same email address with different names, but you cannot add the same name and email address couple again. 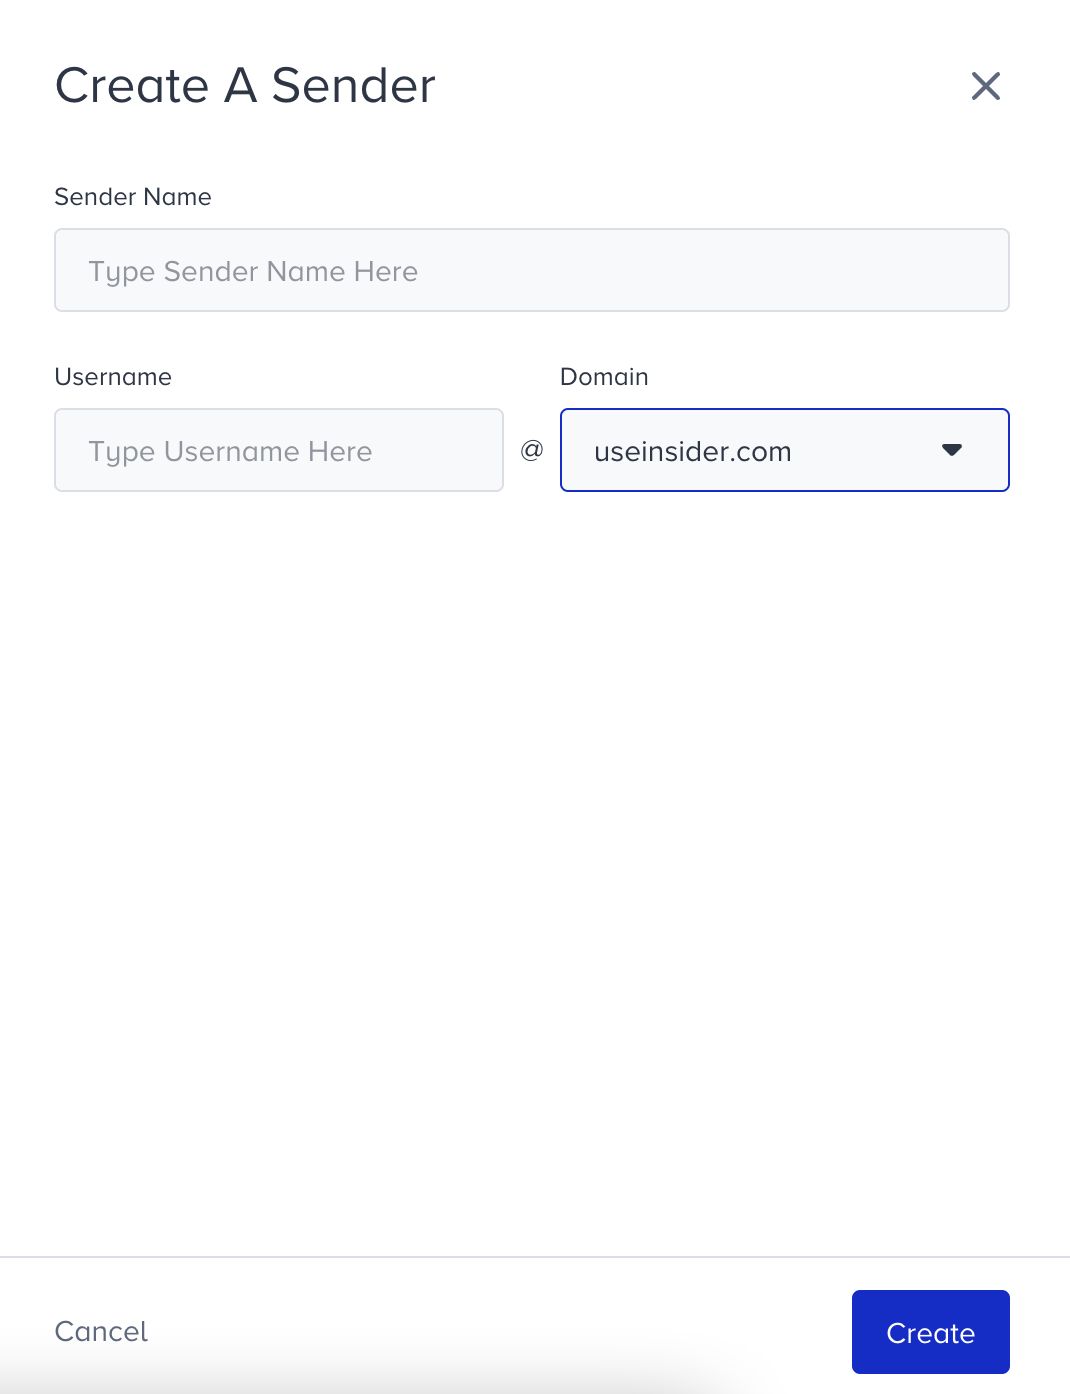
Set a default sender address
You can see the Default option as a radio button on the listing page and you can select your default email address by clicking on it. Also, you can use this address as Reply to emails on the Design Step of Email Campaigns. 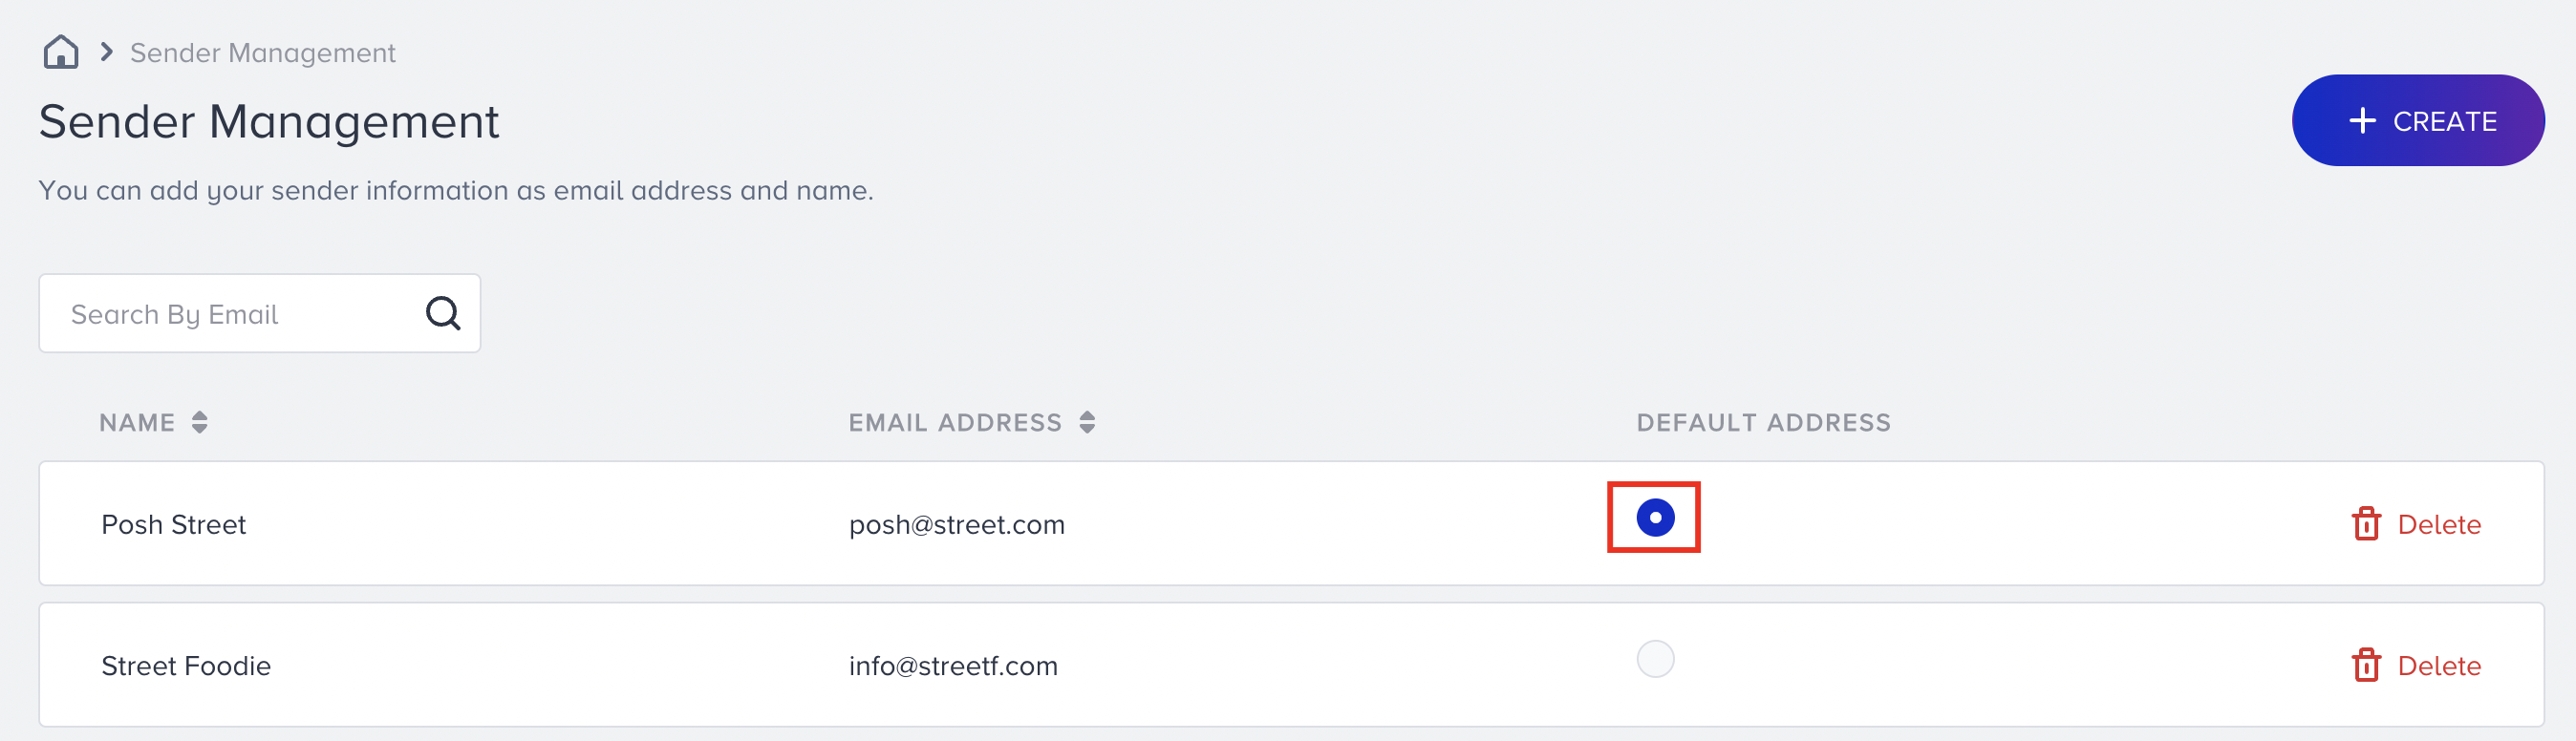
Delete a sender address
You can also delete a sender by clicking the Delete button against the each address. When you try to delete sender information, if sender information is used in Email or Architect in an active or sunset status, you cannot delete it. You cannot delete the default sender information as well.
When a sender address is deleted, Insider One automatically replaces it with your account’s Default Sender for both From and Reply-To. Active, Running, and Completed campaigns continue without interruption. No manual updates are required.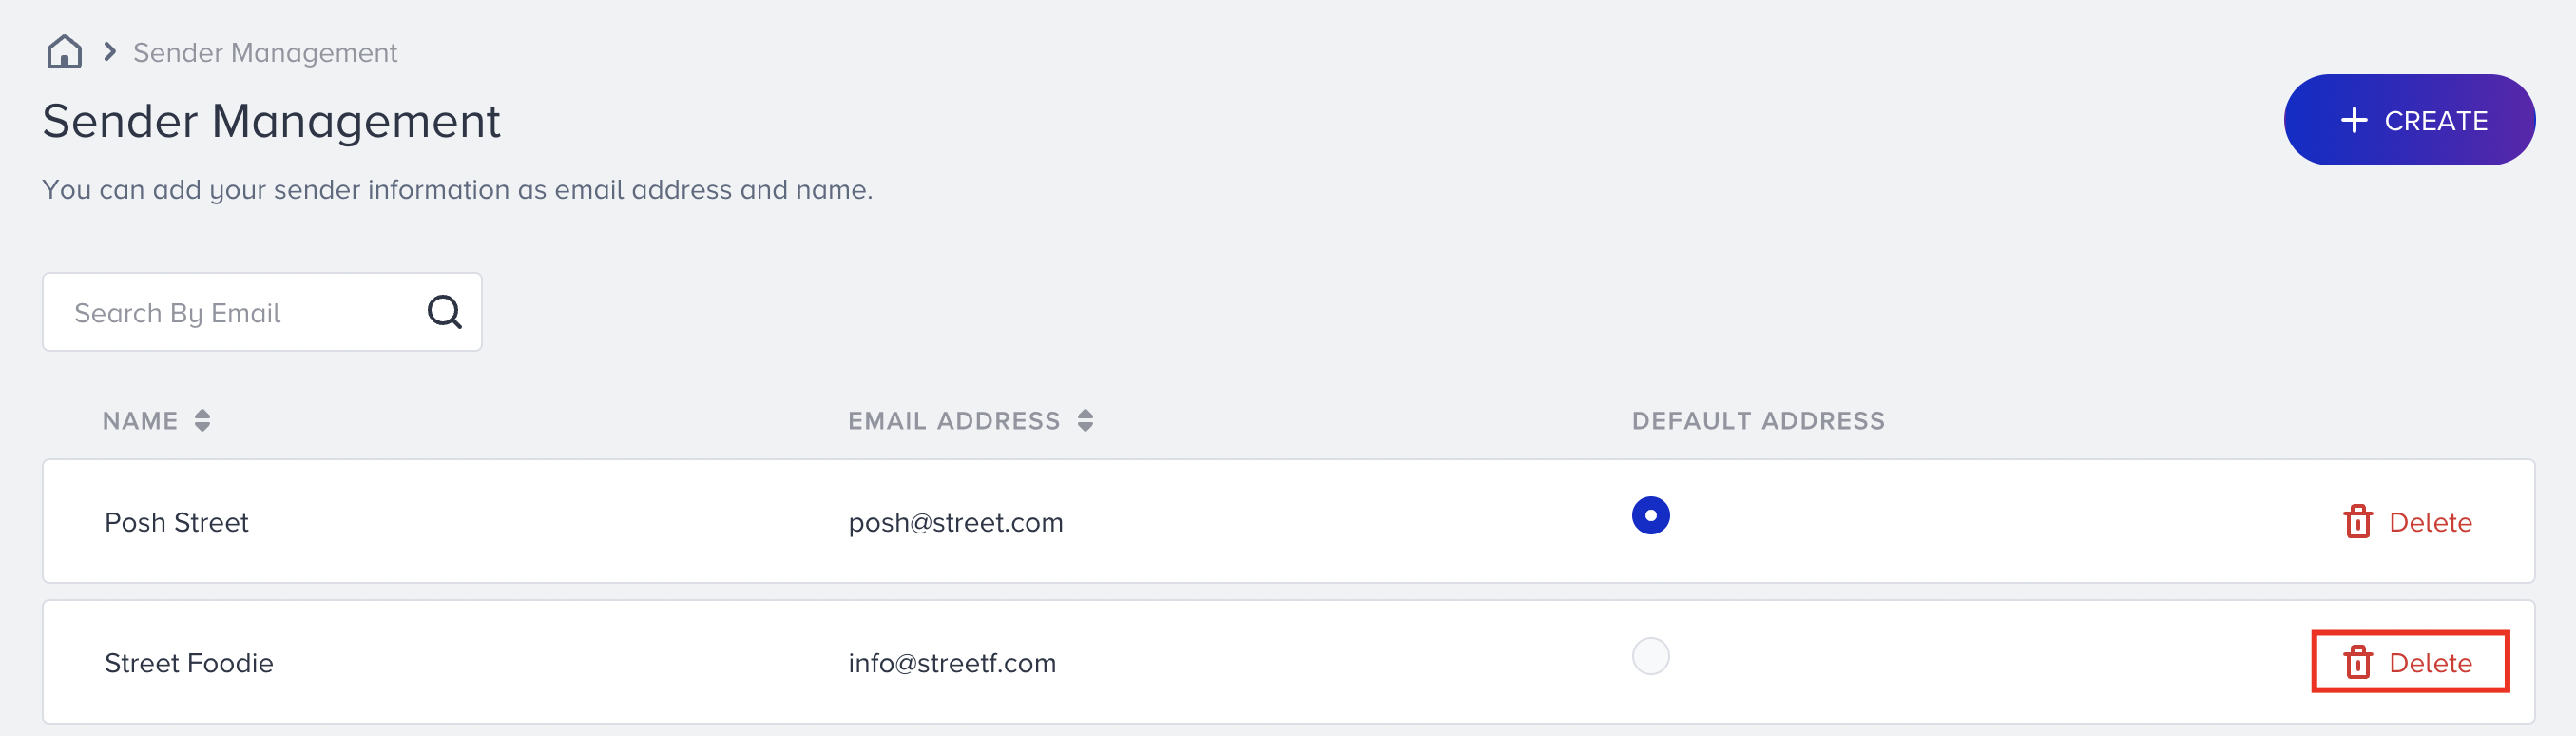
When the address is deleted, you receive an email confirming that it was replaced with the Default Sender.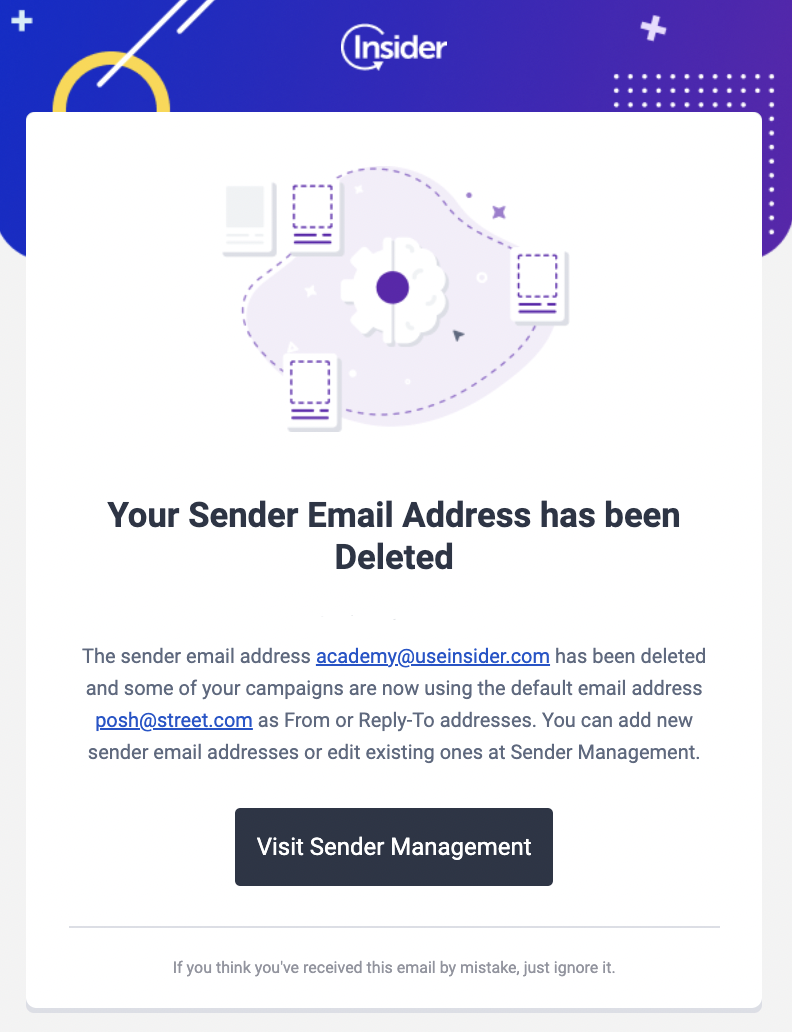
Sender Management V2
Sender Management allows users to configure and manage the email addresses and domains used for sending emails. It includes adding and verifying sender domains, setting up DNS records (CNAME, DMARC), and managing sender addresses.
Differences between Sender Management V1 and V2
- Sender Management V1 allows users to add individual sender email addresses without requiring domain authentication, while V2 requires verifying a sender domain before adding email addresses.
- V1 does not require DNS verification, whereas V2 requires adding CNAME and DMARC records for authentication.
- V2 provides dynamic sender feature where it is not possible to handle this feature in V1.
Add sender domain
The Sender domain helps your recipients identify your emails and builds trust. Here, you can add your sender domain from which your emails will be sent.
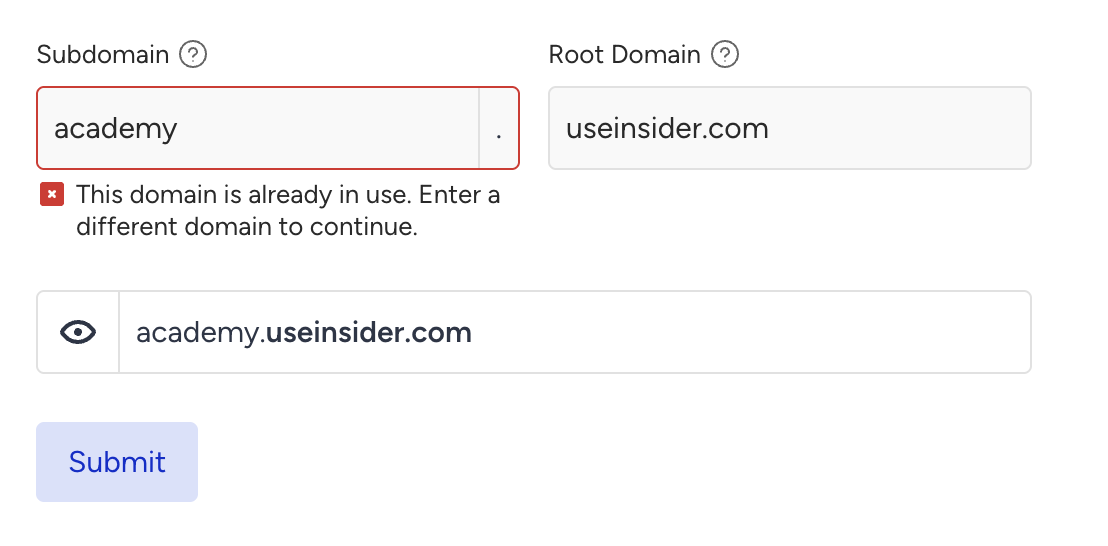
1. Click the +Add Domain button to enter your sender domain name in the provided field and submit it. Make sure that your sender domain is unique and has never been registered before. Otherwise, it might affect your email deliverability. You can create a new sub-domain to your domain.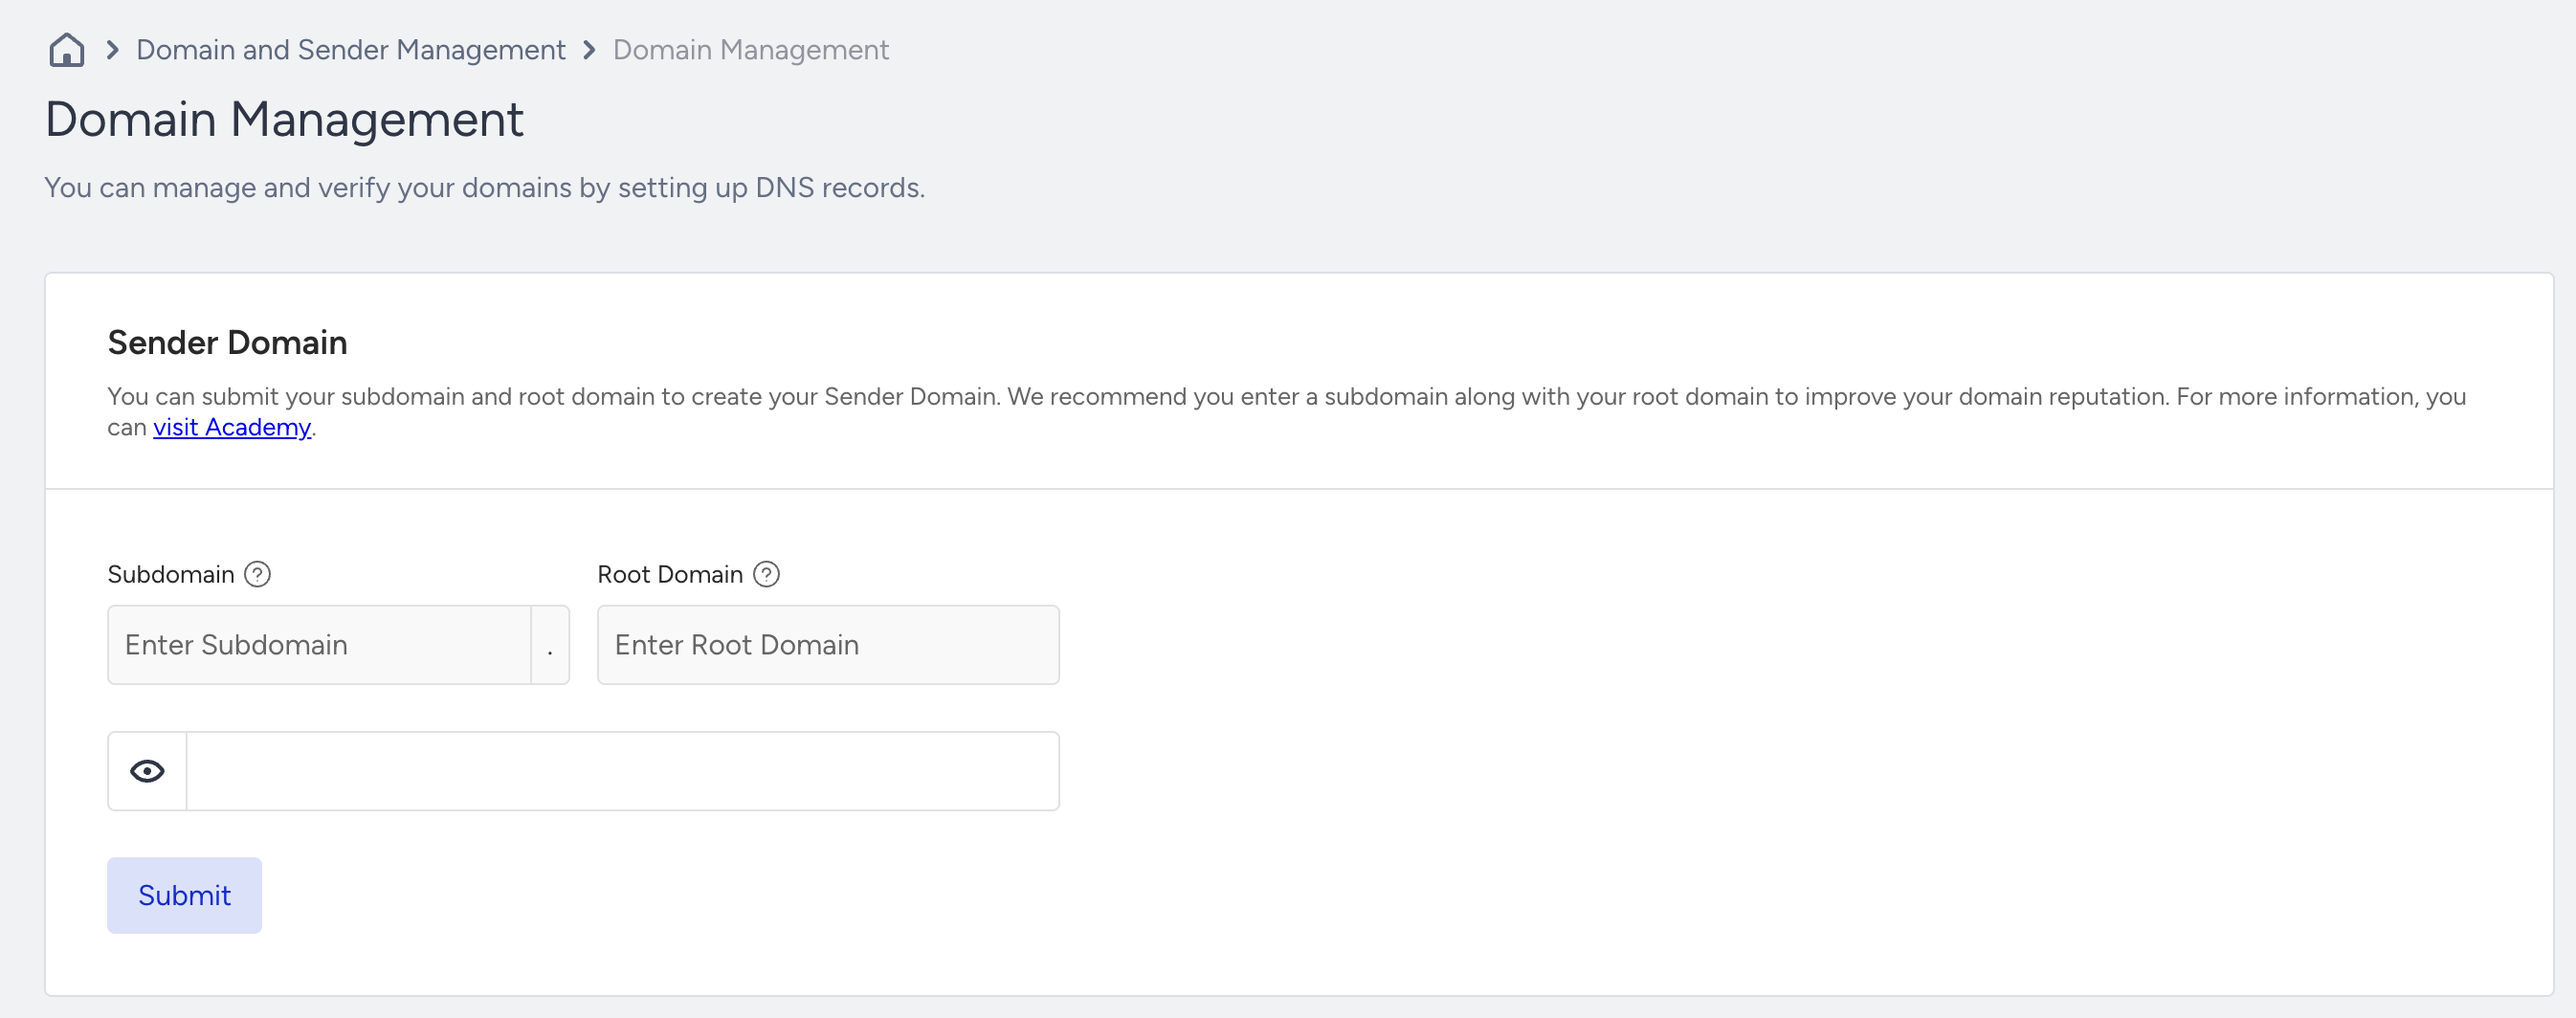
2. Once you click the Submit button, we check whether your domain is unique or already in use. If it is used anywhere else, we require you to enter a different domain to continue.
Only users with Collaborator, Editor, or Administrator access can submit a domain. If you do not have the necessary access, you should upgrade it.
Verify sender domain
Once you add your sender domain, the next step is to add domain records into your DNS configuration and verify it.
Until this step is completed, your domains' verification status will be pending.

Adding a CNAME (Canonical Name) record to your DNS configuration is to redirect from one domain or subdomain to another. These records help establish your ownership of the sender domain and enhance email deliverability.
To do your DNS configuration, you can refer to Configuring DNS Settings or follow the steps below:
1. Log in to your DNS provider's dashboard
Log in to the dashboard or control panel of your DNS hosting provider. This is where you manage your domain's DNS settings.
2. Locate DNS records
Navigate to the section where you manage DNS records. This is often referred to as "DNS Management", "DNS Settings", or "DNS Records".
3. Create a new DNS record
Find the option to add a new DNS record. It might be labeled "Add Record" or "Create Record".
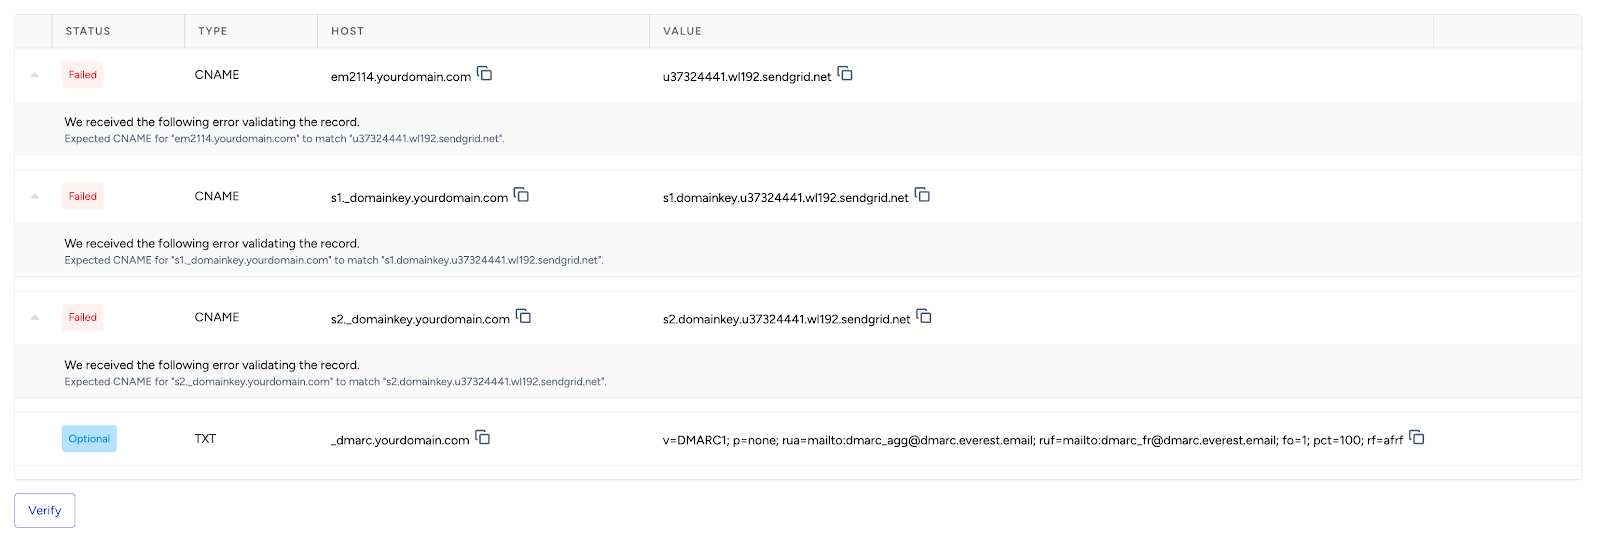
4. Add CNAME records
Choose the record type CNAME. Copy the Host value from the DNS RECORDS table in Inone as displayed in the example above (e.g. s1._domainkey.yourdomain.com), and paste it into the Name or Host field in the DNS settings.
Copy the Value record from the DNS RECORDS table in Inone, and paste it into the Points To or Value field in DNS settings (e.g. u21398234.wl.sendgrid.net).
5. Add DMARC record
As of February 2024, the DMARC record will be mandatory required by Gmail and Yahoo. We recommend adding a DMARC (Domain-based Message Authentication, Reporting, and Conformance) record to your DNS configuration as an important step to enhance email security and prevent email spoofing. DMARC helps recipients' email servers determine whether incoming emails from your domain are legitimate.
Once your DMARC record is active, we will receive email reports about email authentication and delivery. These reports provide insights into the sources of email sending on behalf of your domain.
To add a DMARC record to your DNS configuration:
5.1. Choose the record type TXT, copy the Host value from the DNS RECORDS table in Inone, and paste it into the Name or Host field in DNS settings (e.g. _dmarc.yourdomain.com, replace yourdomain.com with your actual domain).
5.2. Add this record into the Points To or Value field in DNS settings: v=DMARC1; p=none; rua=dmarc_agg@dmarc.everest.email; ruf=dmarc_fr@dmarc.everest.email; fo=1; pct=100; rf=afrf.
If you have your own email deliverability monitoring system, you can add it instead.
6. Save the records
After adding all the CNAME records, save the settings. It might take some time for the changes to propagate globally across the DNS network, so it's possible that the changes will not take effect immediately. Make sure to double check your records after implementation to ensure they are correctly configured.
7. Verify the CNAME records
After the DNS records are propagated, you can verify their existence using the Verify button on the Inone Domain Management page to confirm if your CNAME record has been added correctly.
If you're unsure how to add DNS records, you can consult with your IT or DNS administrator for guidance.
If you receive a Failed status while verifying your domain, it means your DNS records are not added, added incorrectly, or still not propagated.
Once your domain is verified successfully, you can proceed to adding sender addresses.
Add sender addresses
1. Go to the menu next to your sender domain, and click the Add Sender Addresses button.
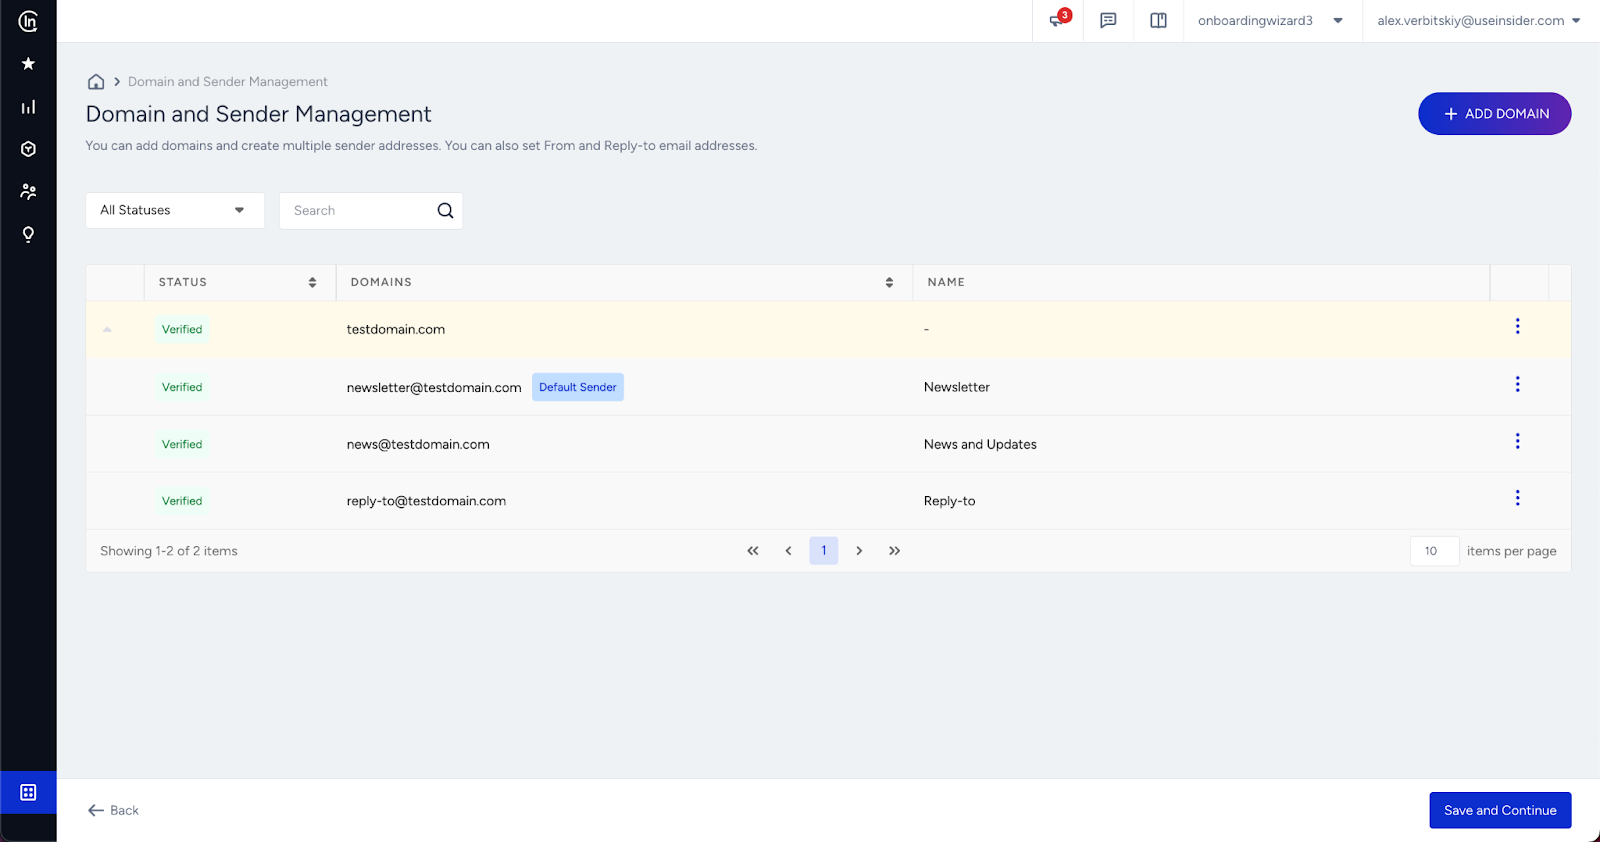
2. Give your sender address a name that your recipients will see in the From field, and the username, which is the first part of the email address you will use to send emails from.
If this sender is deleted in the future, campaigns will automatically fall back to the Default Sender..png)
Make the sender address default
After adding a sender address, you can make it a default sender from the menu. The default sender address will be selected automatically for every new email campaign once created. The Default Sender is also used automatically if any sender address or sender domain is deleted.
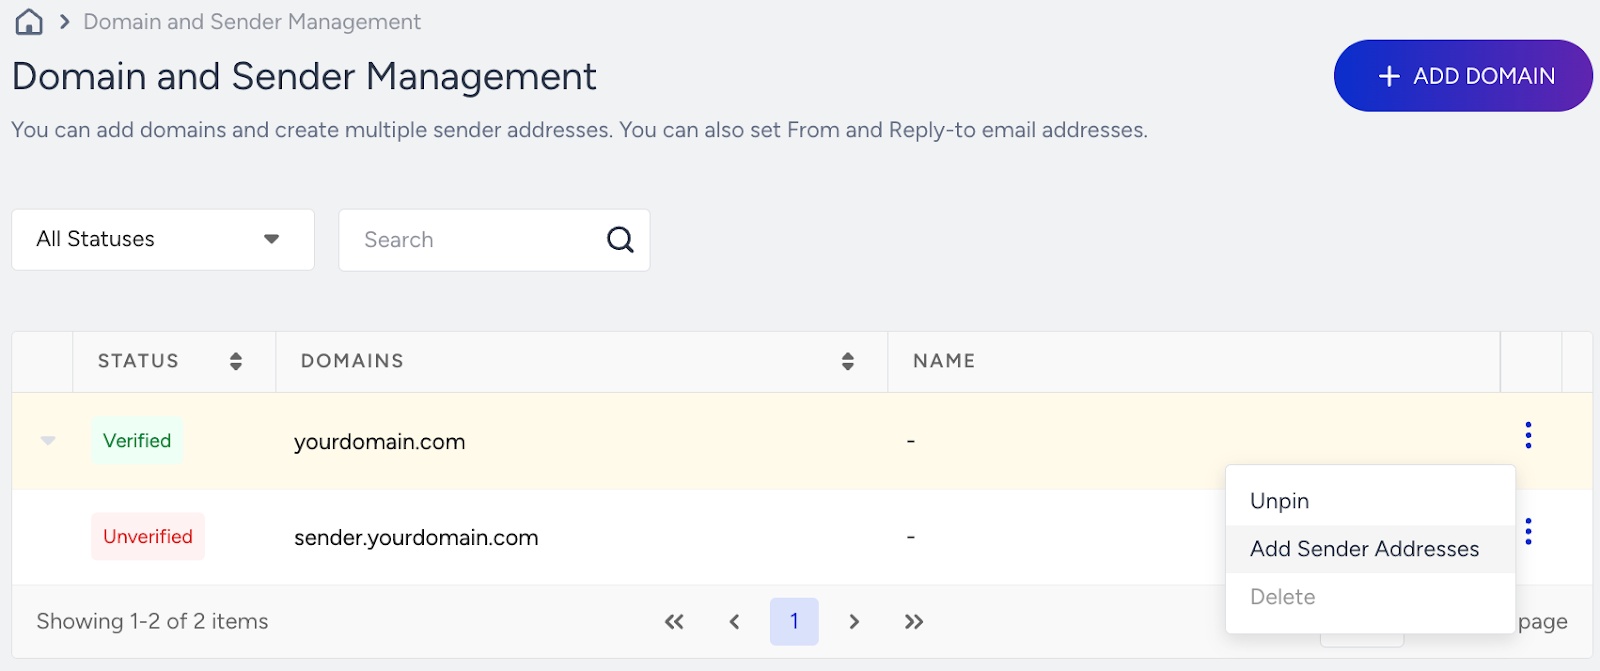
Delete a sender domain
When a sender address is deleted, Insider One automatically replaces it with your account’s Default Sender for both From and Reply-To. Active, Running, and Completed campaigns continue without interruption. No manual updates are required.
You can also delete a sender address from the menu. When you try to delete sender information, if sender information is used in Email or Architect in an active or sunset status, you cannot delete it. You cannot delete the default sender information as well.
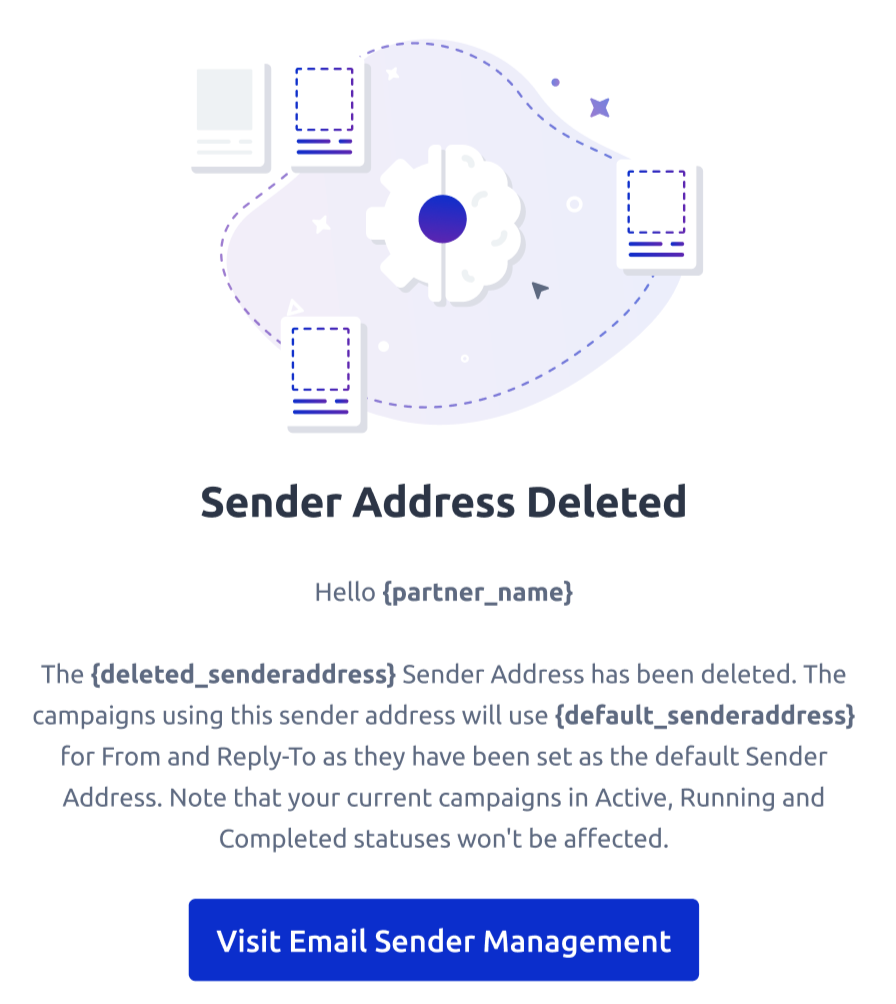
The email confirms the deletion and that the Default Sender was applied to affected campaigns.
Click the Save and Continue button once you complete adding a new sender address.