The Use Case Planner helps you map your business objectives to specific Insider One products and features in a structured, trackable workflow. Instead of starting from a product and working backward to a goal, you start from a KPI and identify the most relevant use cases, channels, and data requirements to achieve it.
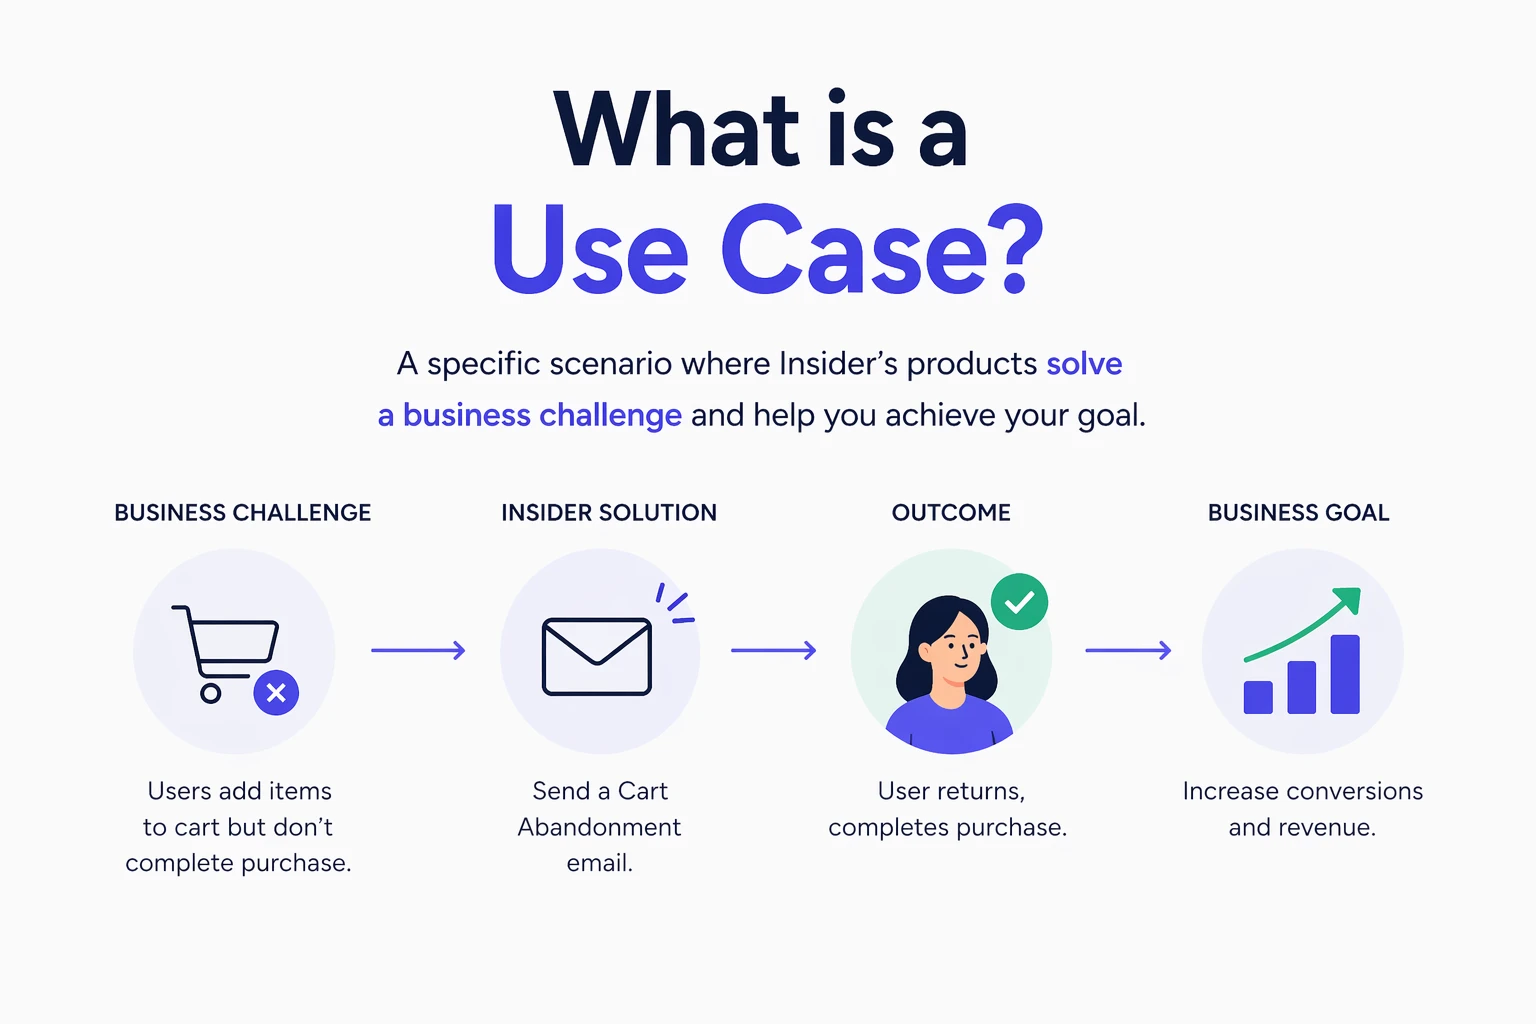
A use case is a specific scenario in which Insider's products address a business requirement. For example, sending a cart abandonment email via Architect to recover lost revenue.
The Use Case Planner guides you through three sequential steps:
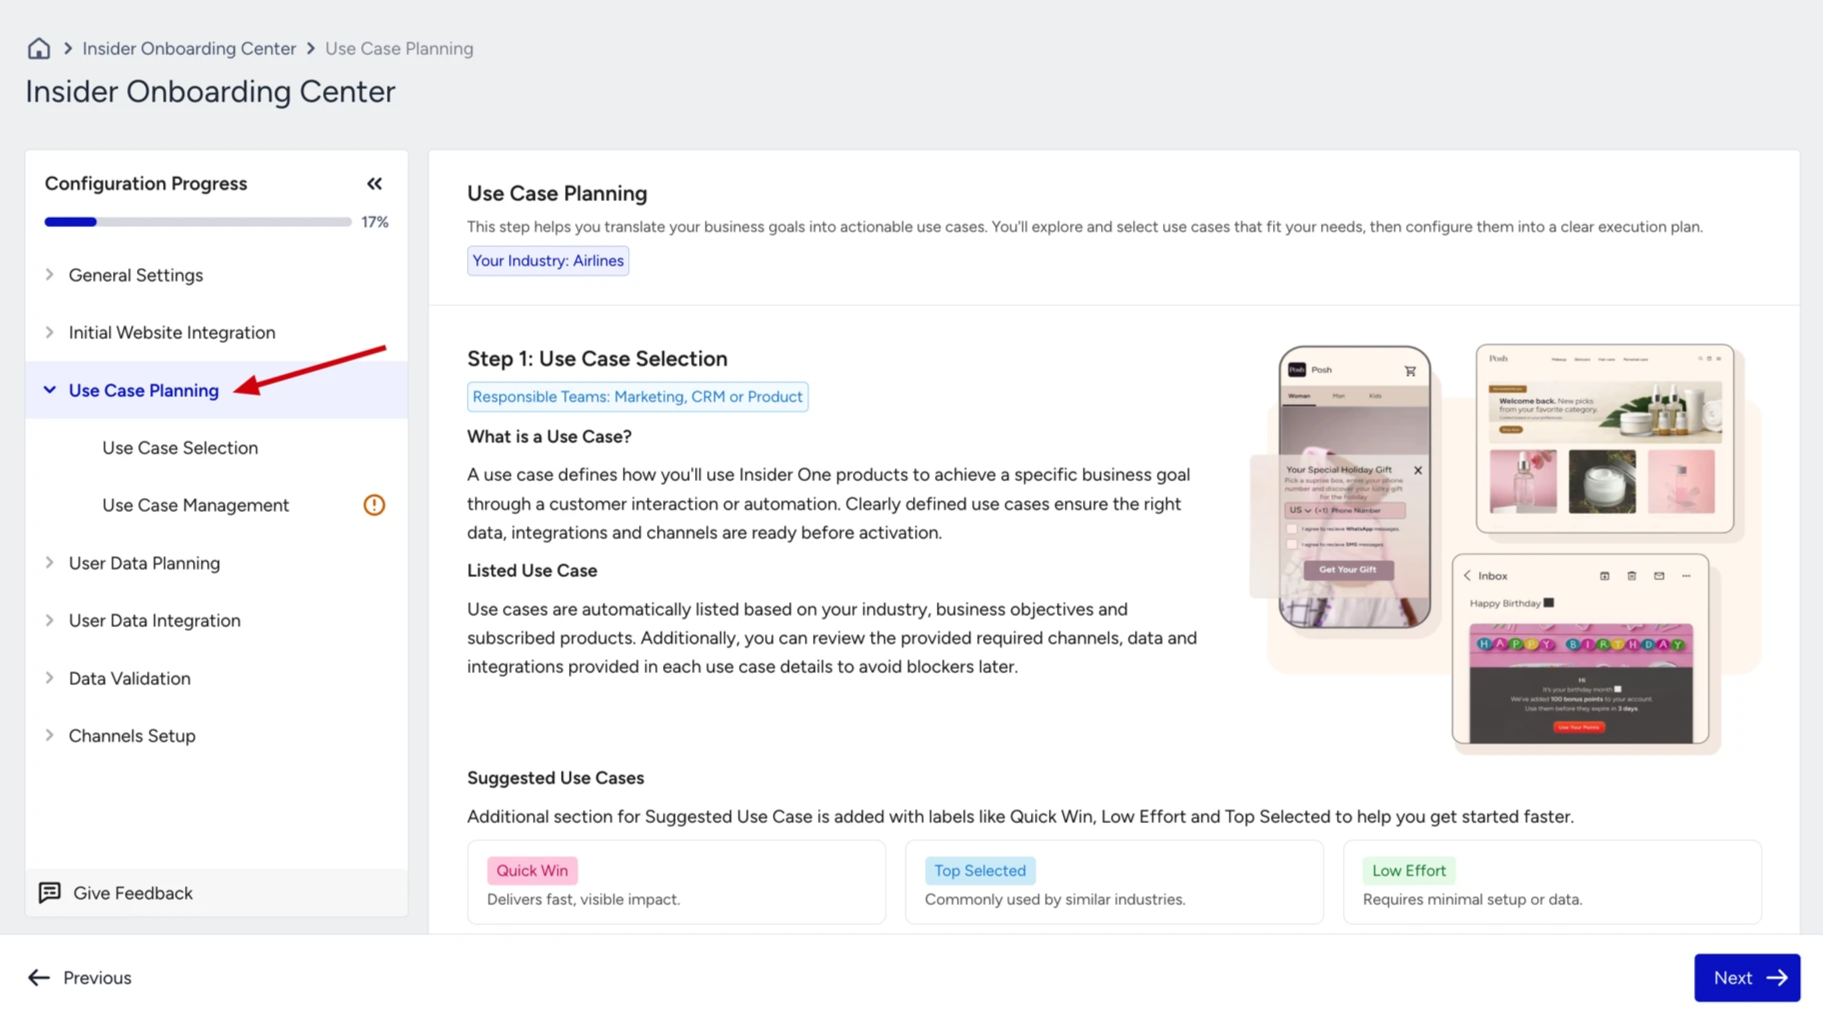
Use Case Selection: Choose or create the use cases that match your goals.
Use Case Management: Configure, prioritize, and assign each use case.
Data Requirements: Review the data you need to activate each use case.
Use Case Selection
The Use Case Selection page is the starting point of the planner. Here, you review available use cases and select the ones that align with your goals.
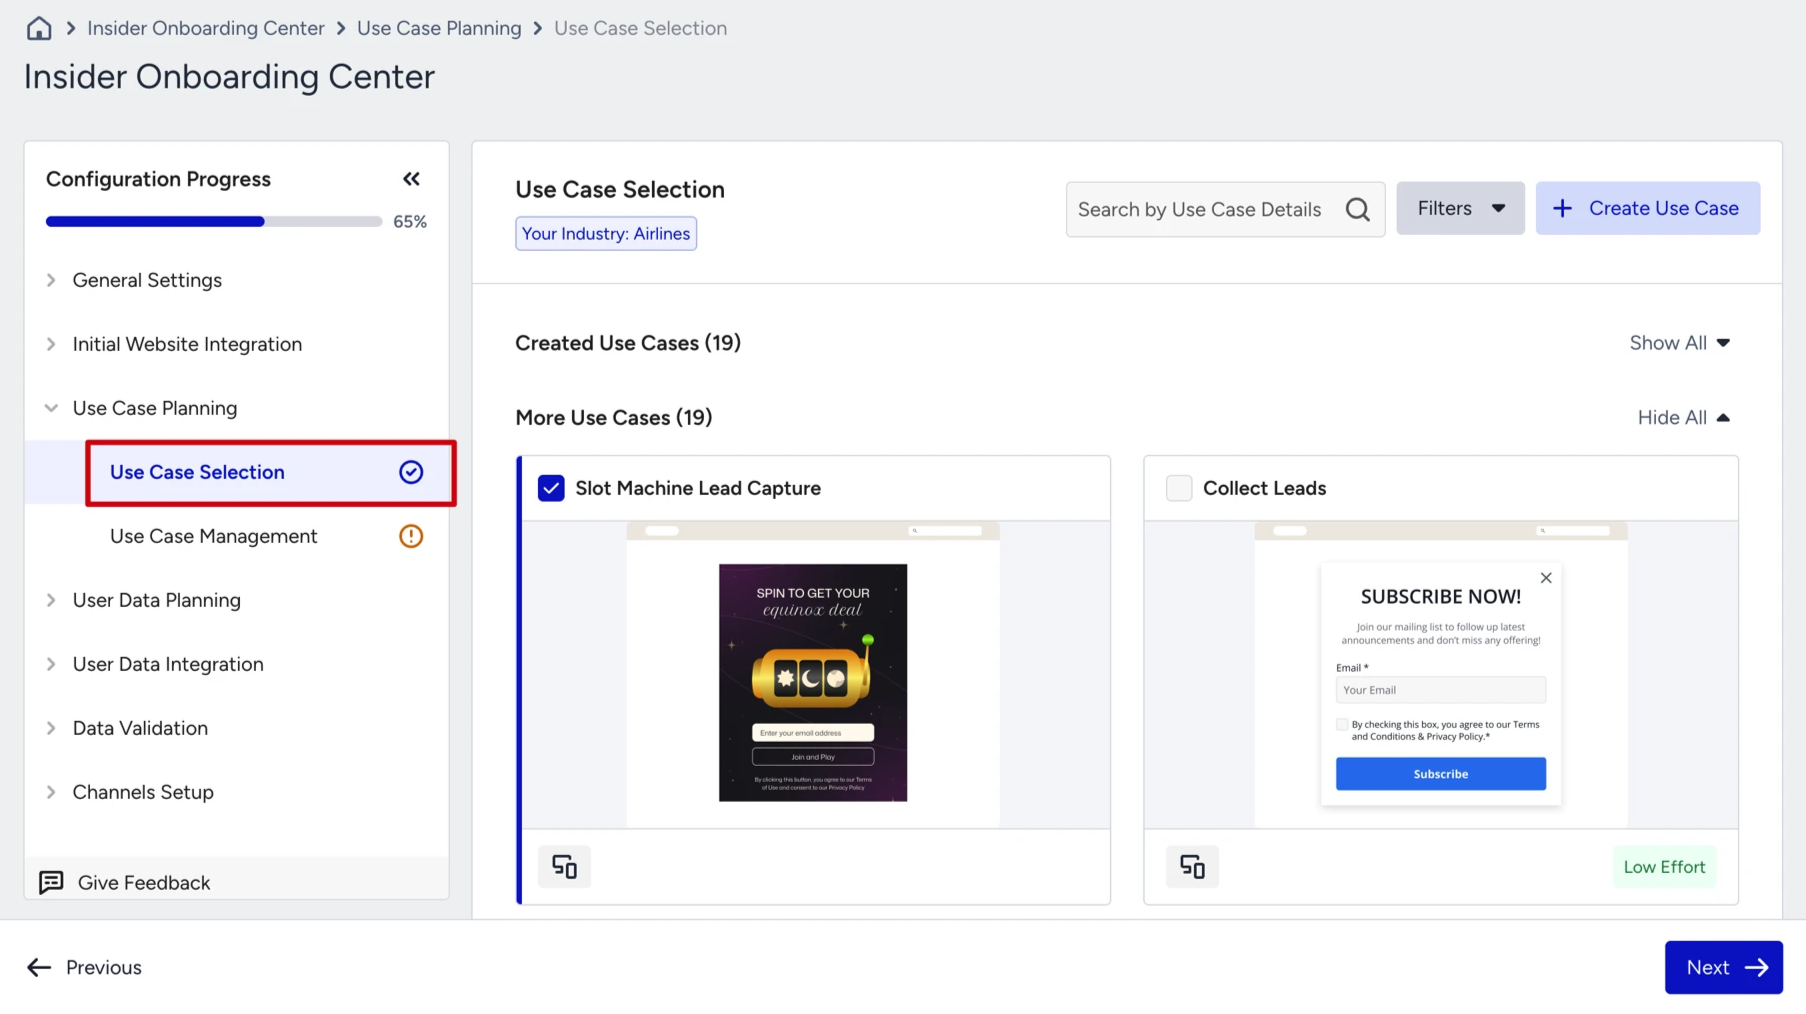
You can review the available use cases and select the ones that best fit your goals and needs. If none of the existing options match your strategy, you also have the flexibility to create a new use case from scratch.
To get more detail on a use case before selecting it, open it in full view. The full view includes the following:
Use case description explains what the use case is trying to achieve and what problem it solves.
Target segments shows which users should be included so the campaign reaches the right audience.
Objectives clarifies what business goal this use case helps you accomplish.
Recommended channel in product indicates which channels are best suited for this use case, but you can still adapt channels or products in the next step if needed.
User data requirements lists the data points you should send to use this use case. You can also add or customize data points based on your needs.
Use case preview area lets you see how the use case will appear on different channels. You can switch between tabs to preview visuals for each channel.

After reviewing, click Select Use Case to add it to your plan.
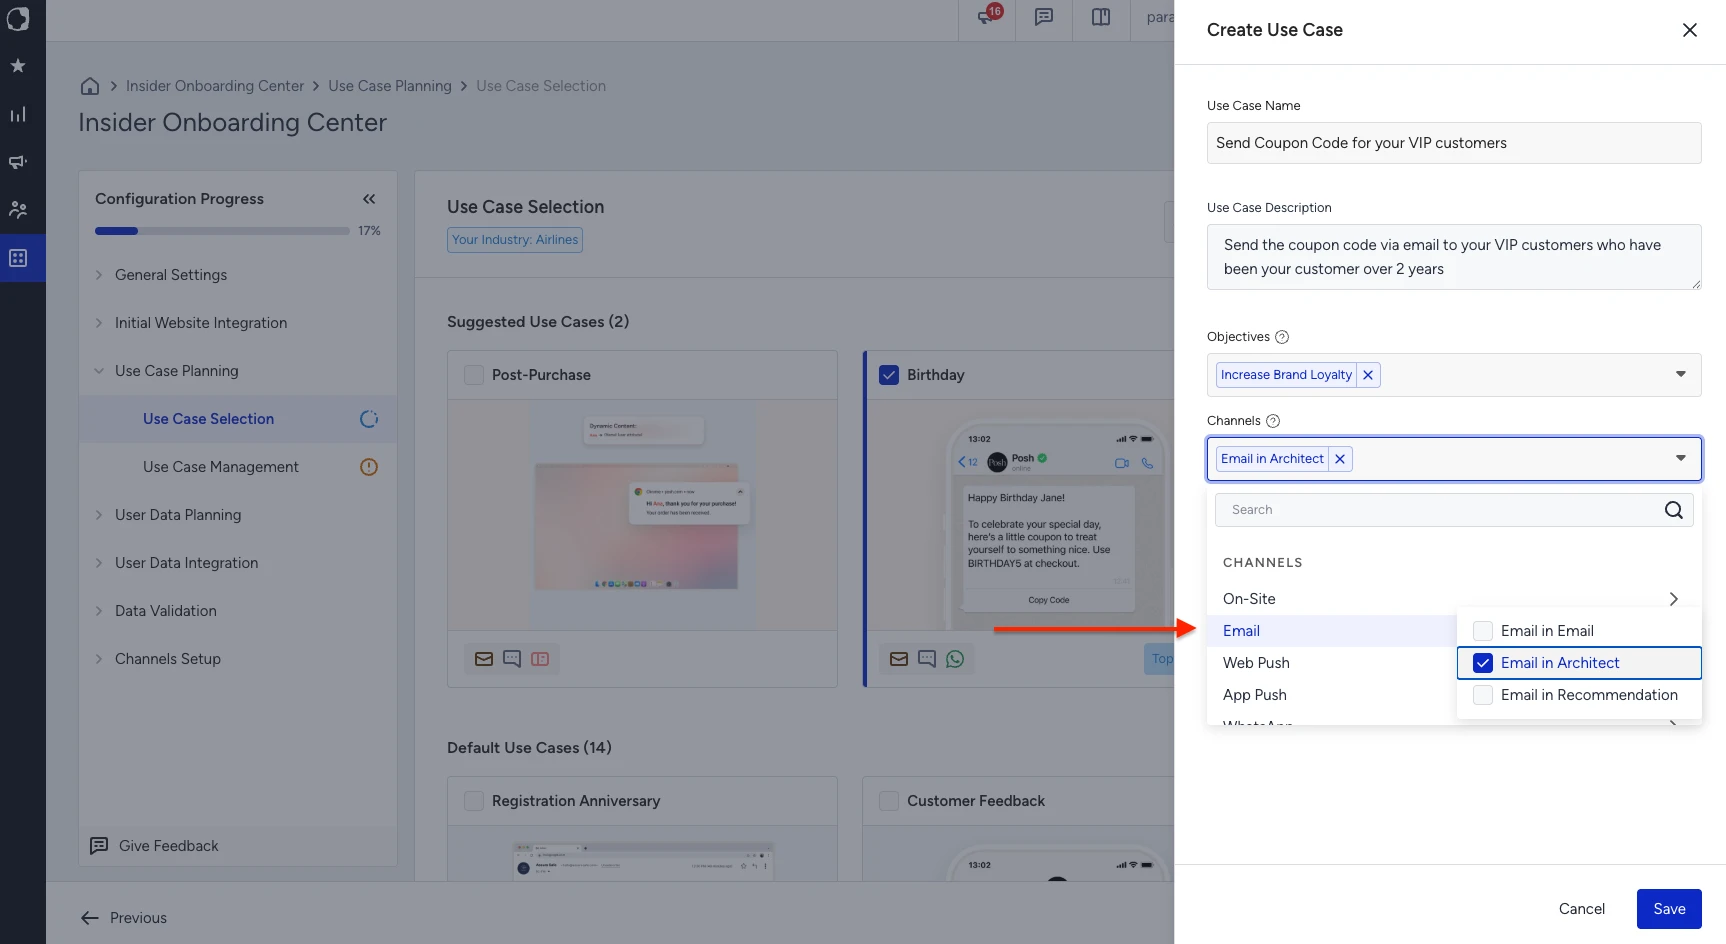
Create a new use case
If none of the available use cases match your strategy, click Create Use Case to build one from scratch.
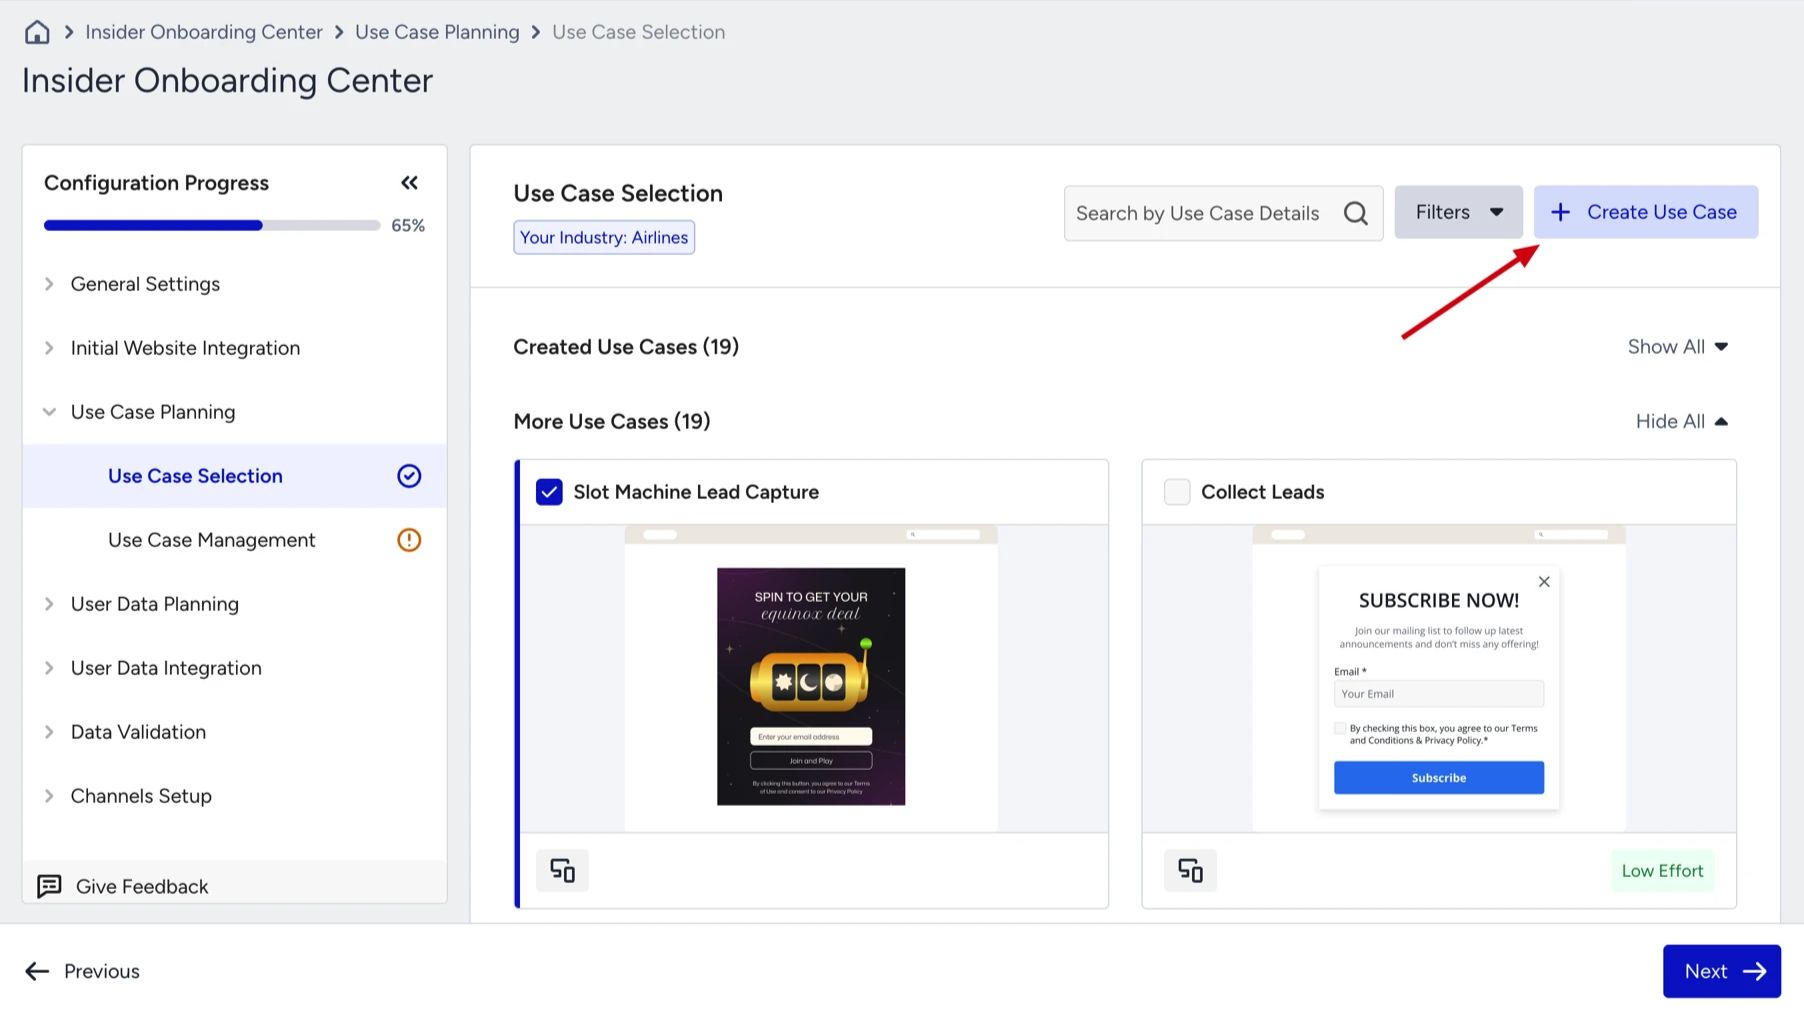
When creating a use case, define the following:
Name: Be specific and descriptive so other team members can understand its purpose at a glance. Avoid generic names.
Description: Explain what problem this use case solves and what outcome it targets.
Objective: Select the business goal this use case supports.
Channel and product: Select the channel first, then the product within that channel. For example, if you plan to send emails using Architect, select Email in Architect.
All fields can be updated in the next step. Once saved, the new use case is automatically added to your selection.
When you have completed your selections, click Next to proceed to Use Case Management.
Suggested Use Cases are pre-filtered by your industry. Review these first, as they are the most likely to match your business objectives.
Use Case Management
Use Case Management is where you configure each selected use case, assign ownership, and track progress from planning through to activation.
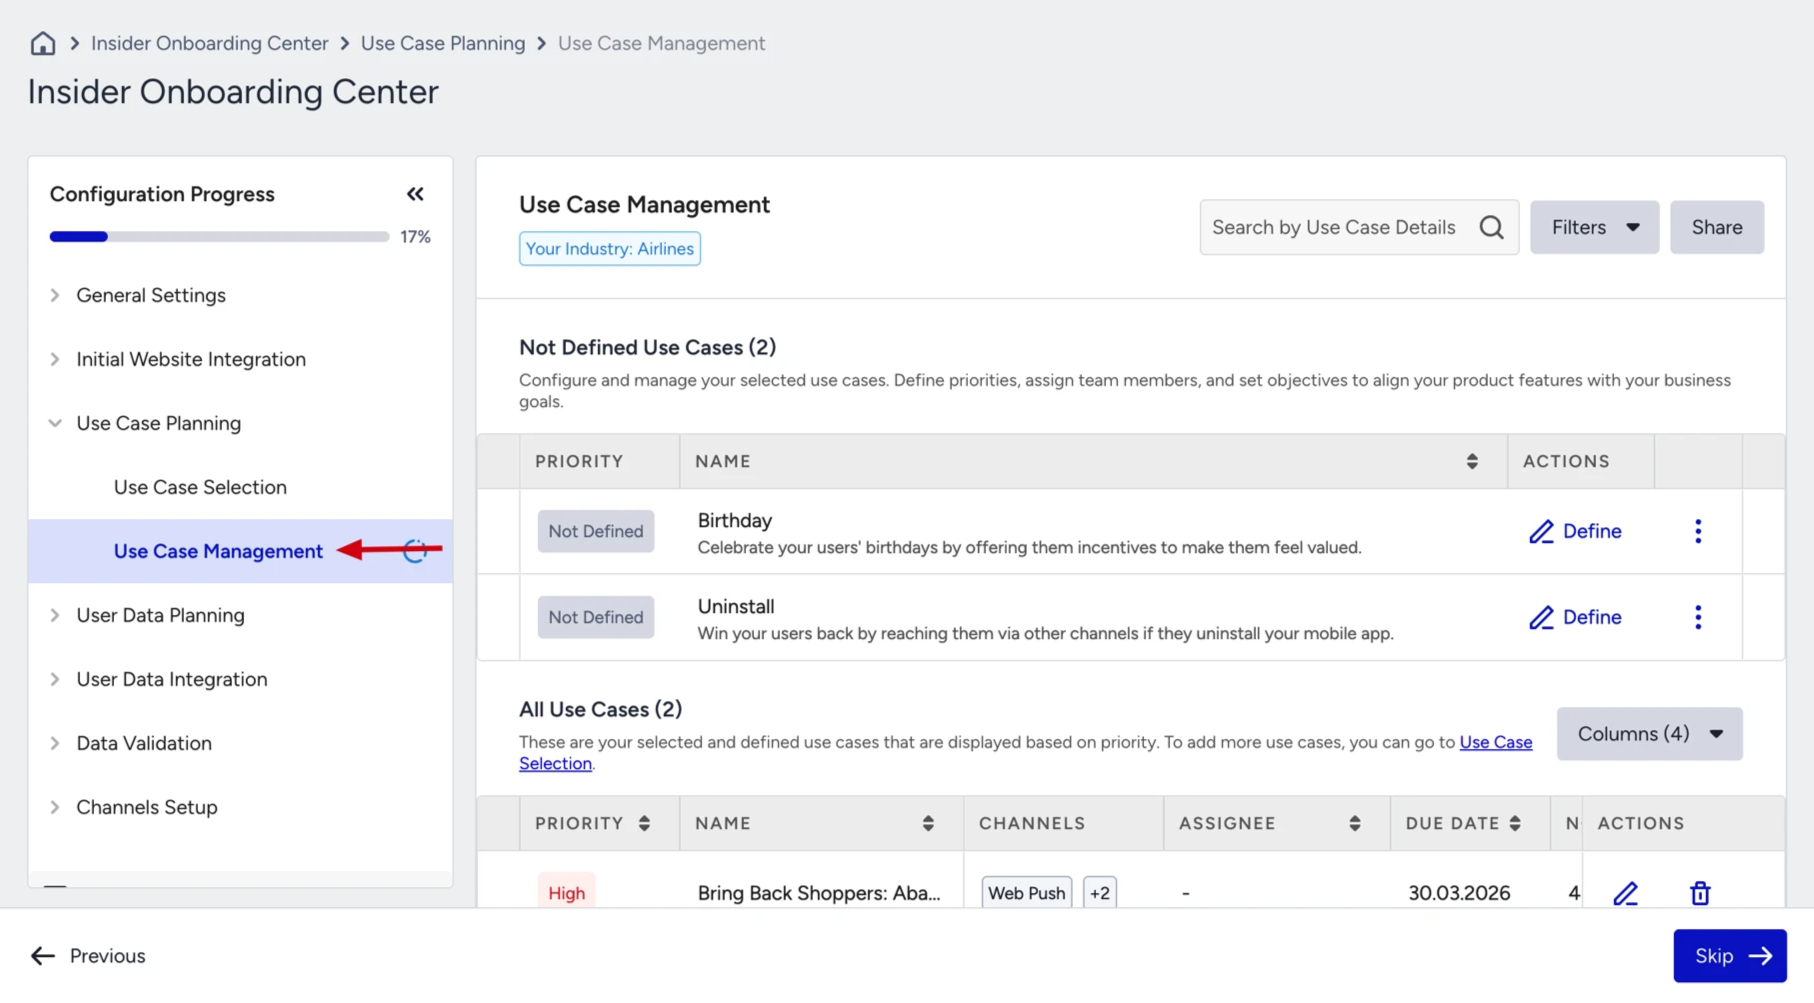
This step gives you a structured view of all selected use cases and allows you to:
Set the priority of each use case
Select the channels where it will be applied
Assign a team member or owner
Define a target launch date
Add notes for context
Track the status of each use case through to activation
When you first visit the Use Case Management, you see two sections:
Not Defined Use Cases:
All the use cases you selected in the previous step will be displayed under this section. Here, you are expected to click the “Define” button and fill in the required information. Once you complete all mandatory fields and define the use case, it will appear in the second table, indicating that it has been successfully configured and is ready for further management.
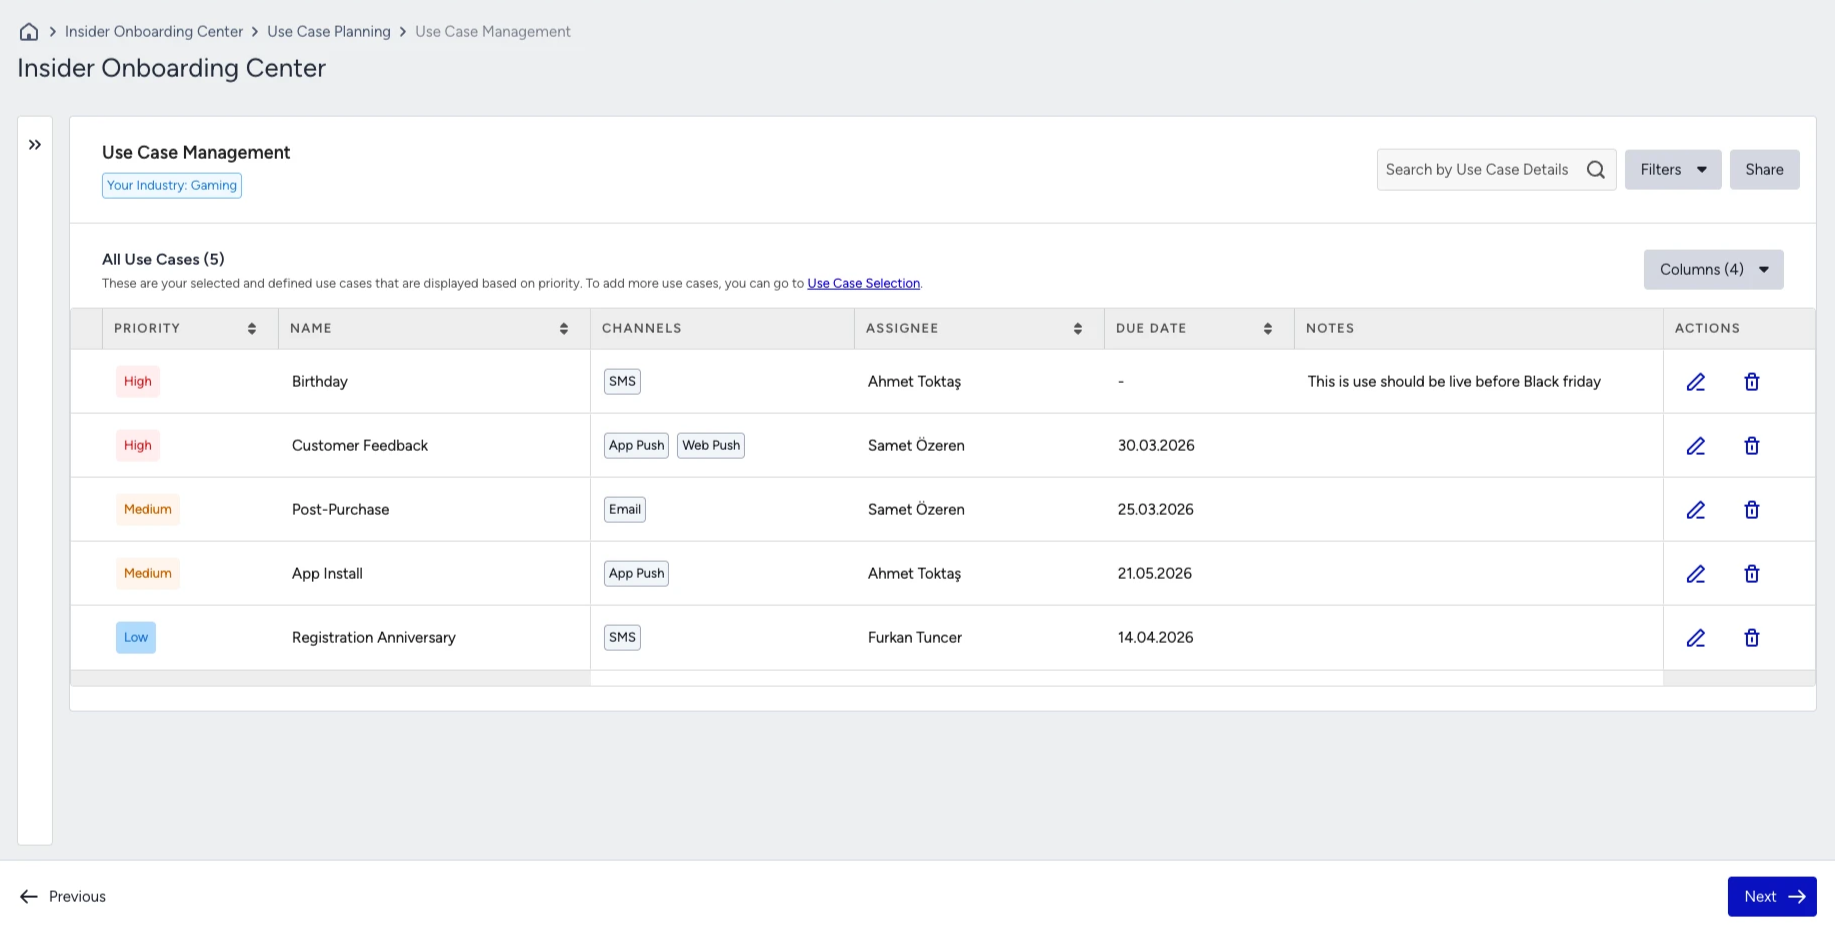
All Use Cases:
After you have defined all your use cases, they will be listed in this section and automatically prioritized. Once you have confirmed that all use cases are complete and configured, click the Next button to proceed to the next step.

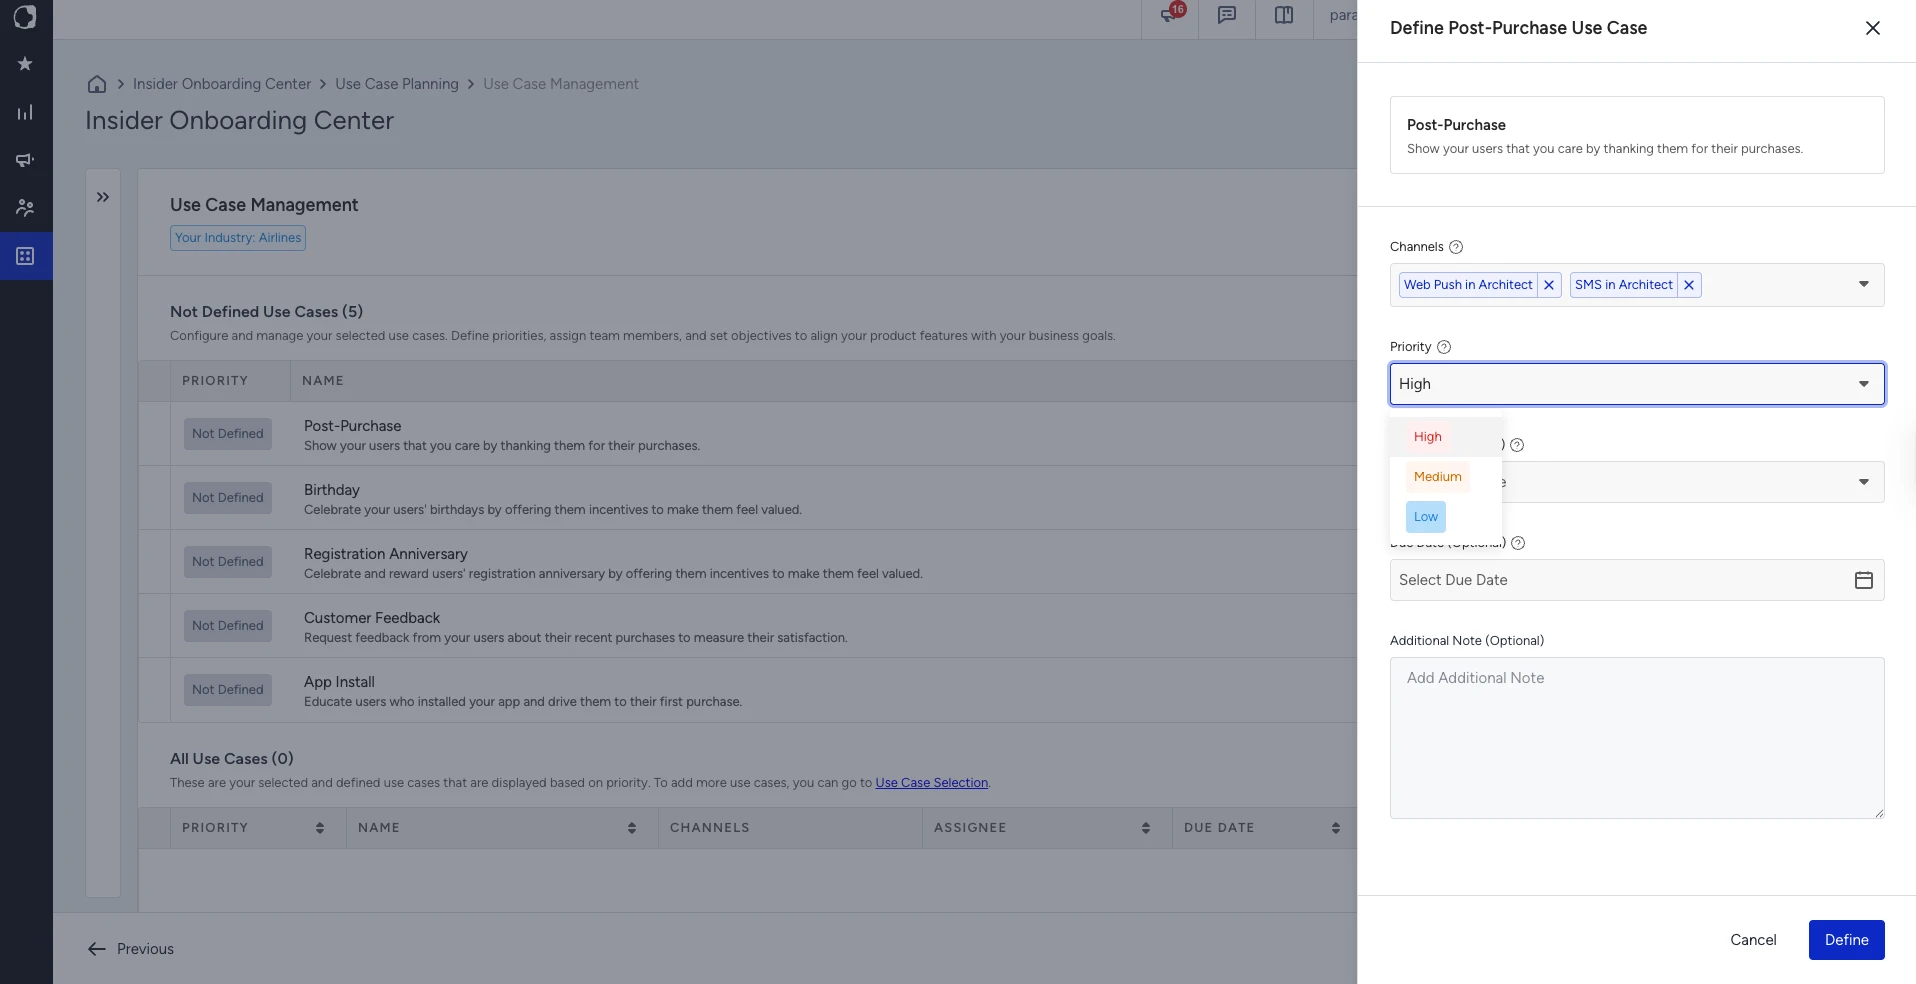
To define a use case, click Define. The following fields are available:
Field | Required | Description |
|---|---|---|
Channel | Yes | Select at least one channel where the use case will be activated |
Priority | Yes | Set the priority level relative to other use cases |
Assignee | No | Assign an owner from your team |
Due Date | No | Set the target activation date |
Notes | No | Add context or instructions for your team |
The more detailed and complete the information you provide, the easier it will be for your team members to understand and work with the use case.
Once all mandatory fields are completed, the use case moves from the Not Defined section to the All Use Cases section, where it is automatically prioritized alongside your other use cases.
When all use cases have been defined, and the Not Defined section is empty, click Next to proceed to the User Data Planning step.