If you have a Shopify website, you should implement the Insider Tag instead. For further details, refer to Integrate Insider One with Shopify Store.
Suggested reading: Web SDK Integration Guide
Insider Web SDK is a JavaScript script that extracts information from your website to use in Insider One. This information can be related to your products, customers, and their actions on your website and is used in Insider One for personalization and segmentation.
With Web SDK, you can send the following information:
Page definition for home (main), category (listing), product detail, cart (basket), checkout (other_page_view), and purchase (transaction) pages
User information for default and custom user attributes
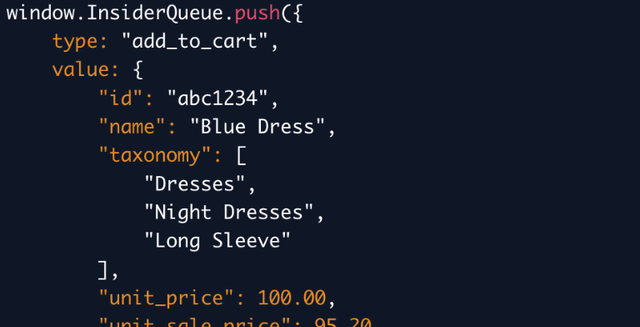
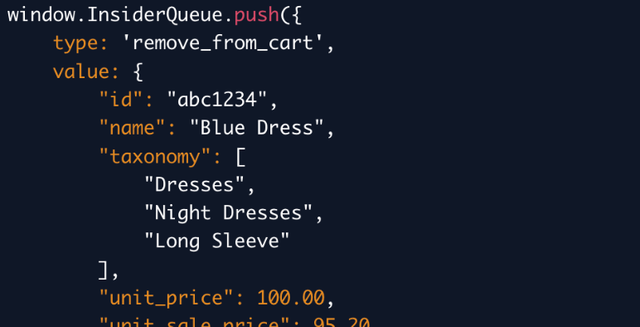
Add to Cart and Remove from Cart events
Any custom events defined on the Attributes and Events page
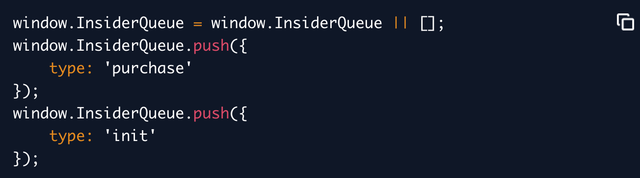
Two complementary methods: init and currency.
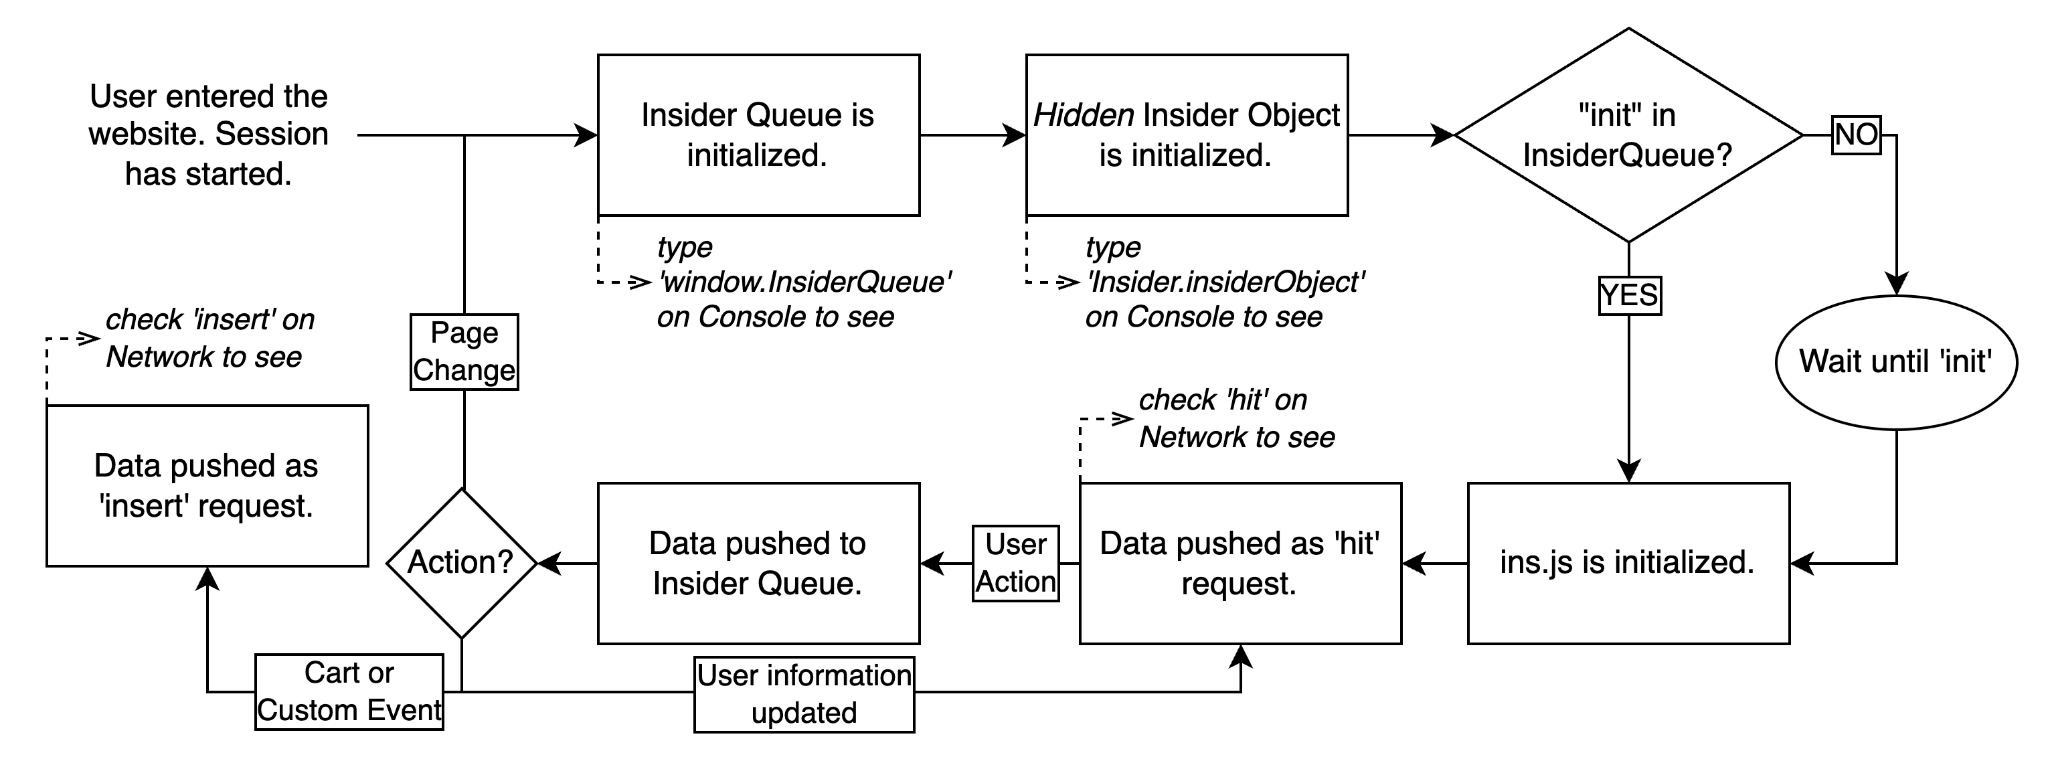
See the following infographics for the Web SDK structure.
This article explains the following concepts:
Why do you need Insider Web SDK?
You should implement the Insider Web SDK to pass data to Insider for various reasons as follows:
Data unification: When you send user data from the Mobile App or your CRM, user behavior and action across the web, mobile app, and offline can be mapped only if you implement Insider Web SDK. You cannot have unified users without the Web SDK on the website.
Segmentation and targeting: You need well-defined segmentation to run your use cases. You also need to integrate the Insider Web SDK to pass behavioral user data or user action details.
Personalization: Personalization is crucial to grab user attention, get more clicks, and generate more conversions. You need to integrate the Insider Web SDK to personalize your messages based on user actions and behavior.
Collecting consent information: The Web SDK enables you to pass users' consent (opt-in) information to receive messages from your brand over various channels. This way, you can send messages via Insider’s Architect, Email, SMS, and WhatsApp products.
Conversion tracking: The Web SDK helps you track conversions on your website. You can add the “Confirmation” page type on your purchase confirmation page for all payment types to keep track of transactions.
PII (Personally Identifiable Information) Data: Personally Identifiable Information, like emails, cannot be stored in website cookies due to GDPR policy. Web SDK is a secure way of passing PII data to Insider.
Remarketing: To target users on Facebook, Instagram, Google, and YouTube, identifier information such as phone number and email address should be passed to the respective platforms. This information can be collected through the Web SDK.
Website mapping: The Insider Web SDK makes it less error-prone when mapping out your website, as the mapping is based on the information you directly share in the Web SDK.
Insider Web SDK vs Insider Object
If you are already using the Insider Object, you do not need to replace it with the Web SDK until the Insider One team plans a migration plan with you.
See below for the structural differences between Insider Object and Insider Web SDK.
.png)
Insider Web SDK is an upgraded version of the Insider Object. Insider Web SDK empowers you in the following ways compared to Insider Object.
Better Data Accuracy
The Insider Object has a container-based object structure, whereas the Insider Web SDK has a queue structure. In the Insider Object, data can be overwritten in these containers without being processed concurrently, whereas the Web SDK's queue structure orders requests before processing.
You can also have complete control over the initialization rules with the Web SDK, as it uses the push method to initialize the Insider Tag at the correct time, avoiding data accuracy issues that might arise from script loading order.
Easier Integration Process
System Rules are functions defined to understand the geography of your website and track customers’ activity throughout it, what type of pages they visit, which products they view or add to their cart, whether they complete their transaction, how many categories they visit, etc.
While this process was manually configured in the Insider Object integration, it is automated in the Web SDK as the necessary system rules are updated directly via the integration wizard.
Adaptability for Single-Page Websites
While the initialization is static in Insider Object, the Web SDK enables you to set the initialization condition init and push the page view information to Insider Queue and Insider Tag whenever a user goes to a new page.

Triggering Cart Events
Insider Web SDK enables you to push and define the “add to cart” and “remove from cart” events to the Insider Queue with the needed values.
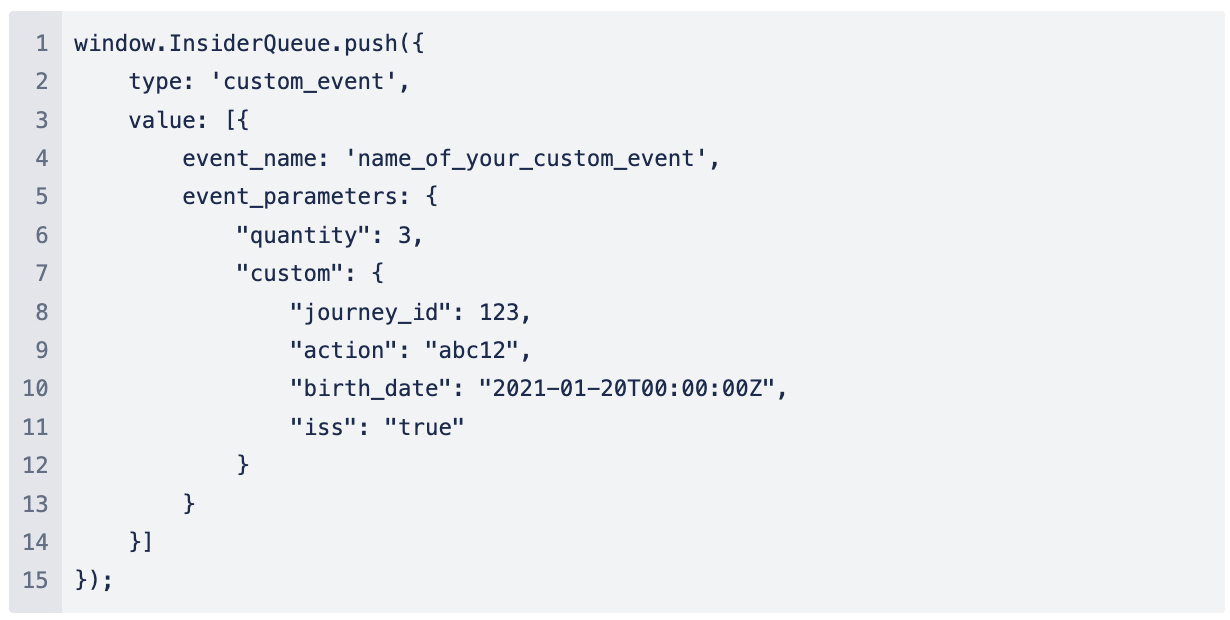
Custom Events
The custom event you will define in the Web SDK should be defined on the Attributes and Events page as a custom event with the needed parameters. Then you should push this custom event to InsiderQueue using the correct parameters.
Insider Web SDK Integration
To easily integrate Insider Web SDK into your website, you can follow the Web SDK Integration Guide or directly use the Website Integration Wizard.
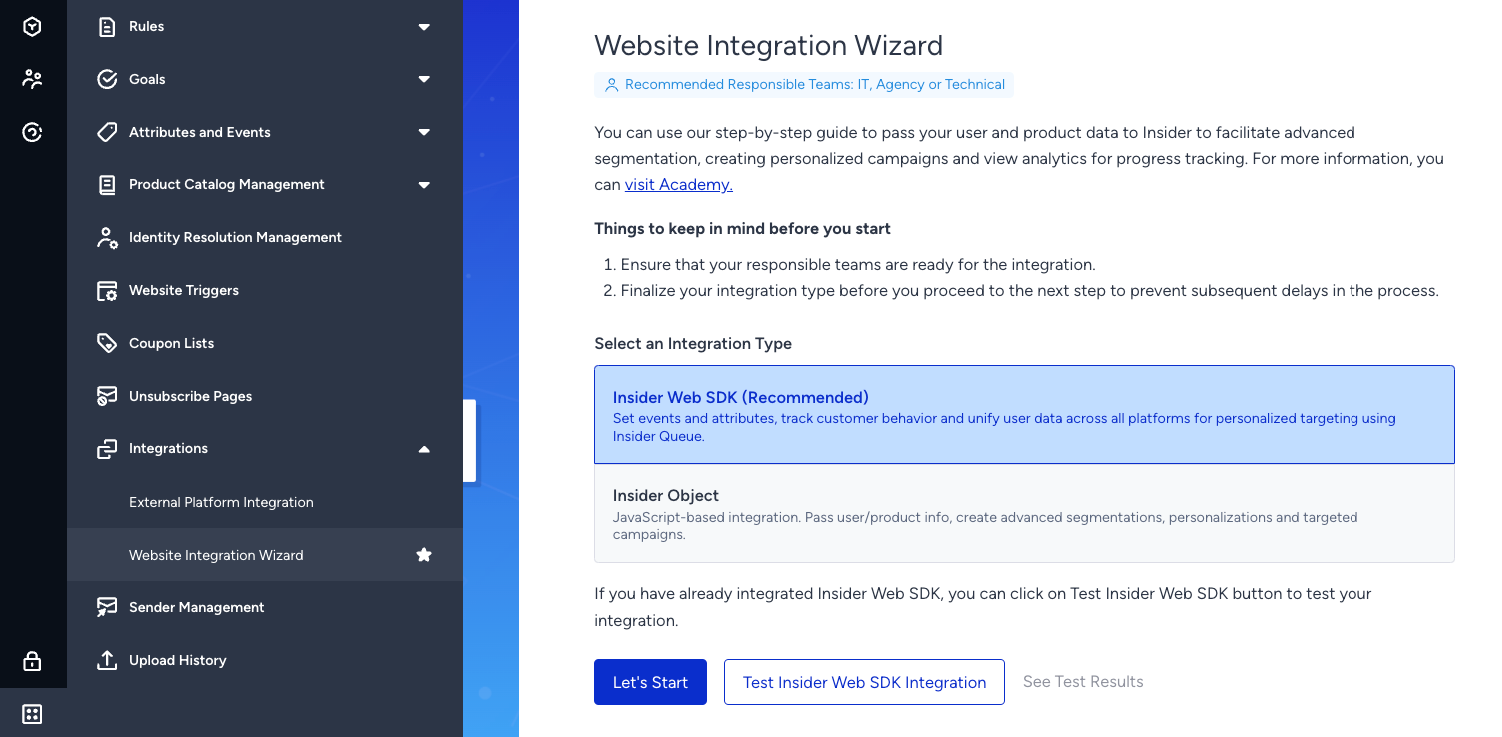
Within the integration wizard, you will have the option to choose between Insider Web SDK and Insider Object for the integration. We recommend using Web SDK as it is the upgraded version of Insider Object.
The Website Integration Wizard covers almost all Web SDK capabilities and your web integration to Insider. You can consult the Insider One team for further details about the cart events, custom identifier setup, and custom events.
Test Insider Tag Integration
Insider Tag is a script to be added to your website and is required for the Web SDK integration. Once you complete the integration, you only need to test it in the integration wizard.
Integration Method
You can integrate the Web SDK into your website in various methods. The integration wizard currently provides the steps only for the source code implementation. You can also integrate it via third parties such as Google Tag Manager, Tealium Tag Manager, or Adobe Launch.
Business Industry
Before continuing the integration, you need to specify the industry in which your business operates. You can also select to have the cart page functionality, as not all industries have it. The rest of your integration will be configured based on this selection.
Insider Queue Integration
Insider Web SDK consists of two main parts: Insider Tag and Insider Queue. Insider Queue is an array that enables you to define the page types of your website for Insider to identify. With Insider Queue, you can push data about these pages and users and define events and attributes to utilize in Insider.
Insider Queue must be defined before the Insider Tag. Otherwise, the Insider Tag cannot read any information.
Integration Element Status
At this step, you will complete the following steps to integrate Insider with your website:
Define the type of your pages as home, category, product, cart, checkout, or confirmation page
Define attributes for your users
Define attributes for your products
Define product attributes for your category pages
Define product attributes for your customers’ carts if the Cart Page was selected on the Business Industry Page
Define information for a completed purchase if the Cart Page was selected on the Business Industry Page
Deploy and Test
After completing your integration in the previous step, you will be required to test your integration. During this step, you will test every integration you have completed. Within each sub-step, you will be directed to your website’s homepage.

You need to follow the instructions listed on the left of the testing modal and get the approval message that indicates the integration is successful, as above.
Test Results
At this step, you will see the results of each test conducted in the previous step as “Not Tested,” “Successful,” or “Errors.”
Confirmation
After completing the integration successfully, you must confirm it to update your system rules accordingly. Before confirming your integration, you can consult the Insider One team.