Suggested reading: Architect Channel In-App
You can send in-app campaigns to your users within your journeys. You can follow these steps to design your campaign:
- Add In-App element on canvas
- Go to Template Store
- Select an In-App template
- Create your content
- Edit campaign options
- Save the In-App
- Specify time-out
- Rename channel name
- Save the In-App channel
- Live Actions & User Interactions
In-App campaign creation steps are similar to the In-App templates with the following differences:
- There is no segment step specific to your campaign as users who enter the journey and arrive at the on-site channel are already segmented based on their activities.
- There is no A/B testing specific to your campaign on the design step as it is not convenient with journey logic. If needed, you can use the A/B split function instead.
- There is no Campaign Goals selection on the Edit Campaign Options step as the journey has its goal settings on the top bar of the canvas.
- There is no Campaign Duration selection on the Edit Campaign Options step as the journey has its activation time settings on the launch popup. Also, the campaign can be active on your app only when the journey is on active or test status.
- There is no Review & Launch step as the journey has its launch popup.
After you complete the integration process, you can follow the steps below to start creating In-App campaigns in your journeys:
1. Add the In-App element on canvas
Click the Add button on the path you want to add your channel in the journey and select In-App.

2. Select type
Select the template type.

3. Select an In-App template
- Select one of the templates you want to use.
 Basic Templates
 Enhanced Templates
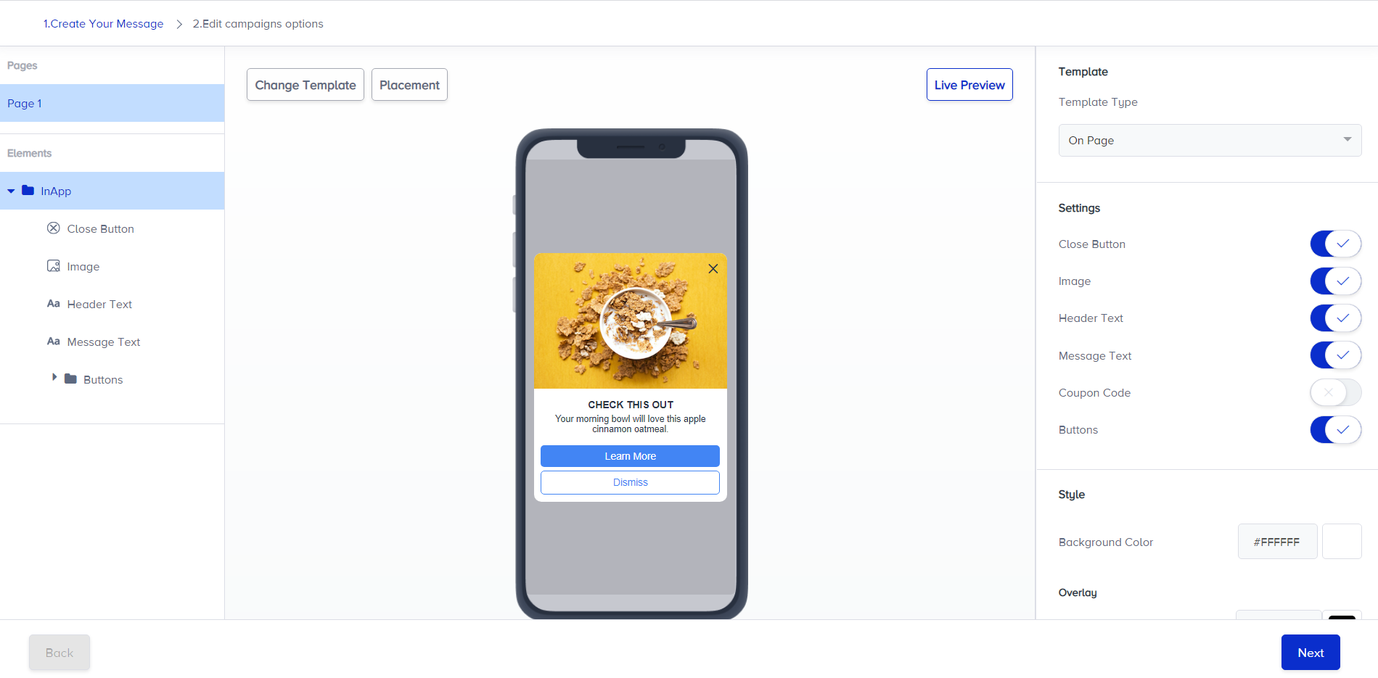
4. Create your content
- Prepare your content on the Create Your Message/Design step. If you want to change the template, you can click the Change Template button.
- After creating your message, click the Next button at the bottom to proceed.
 Design step of a basic template
 Design step of an enhanced template
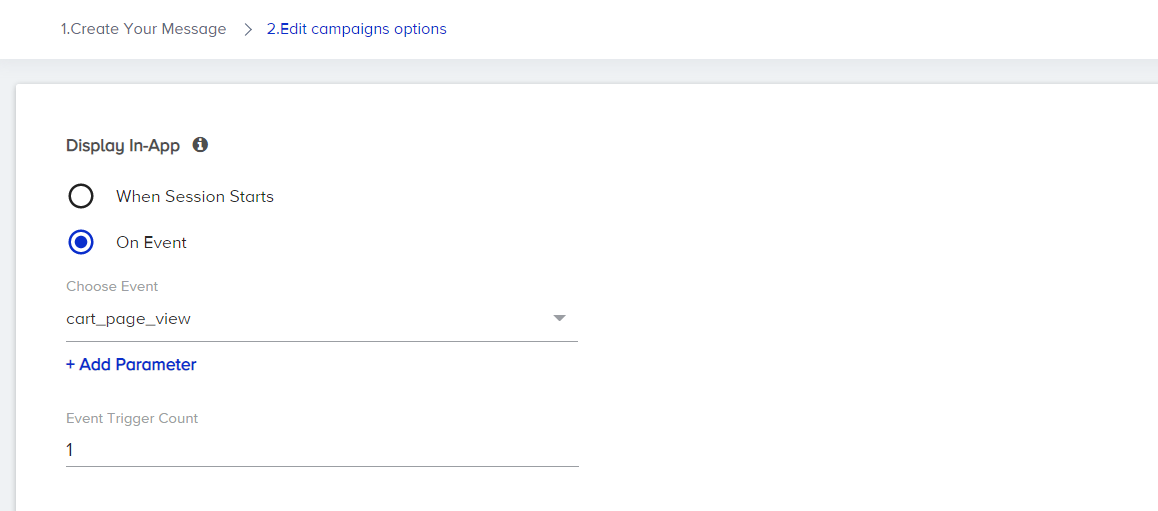
5. Edit campaign options
- Select when you want to display the in-app campaign on your app. When the session starts or when the user performs the specified even
 Campaign options for a basic template
- Select display options. You can specify the delay duration to show your campaign, recurring display rule, and priority.

Frequency capping will be applied to your Architect Inapp campaigns if it is set via the mobile settings.
 Rules for an enhanced template
6. Save the In-App
After configuring the campaign options, click the Save button. You will be directed to the main journey In-App page.
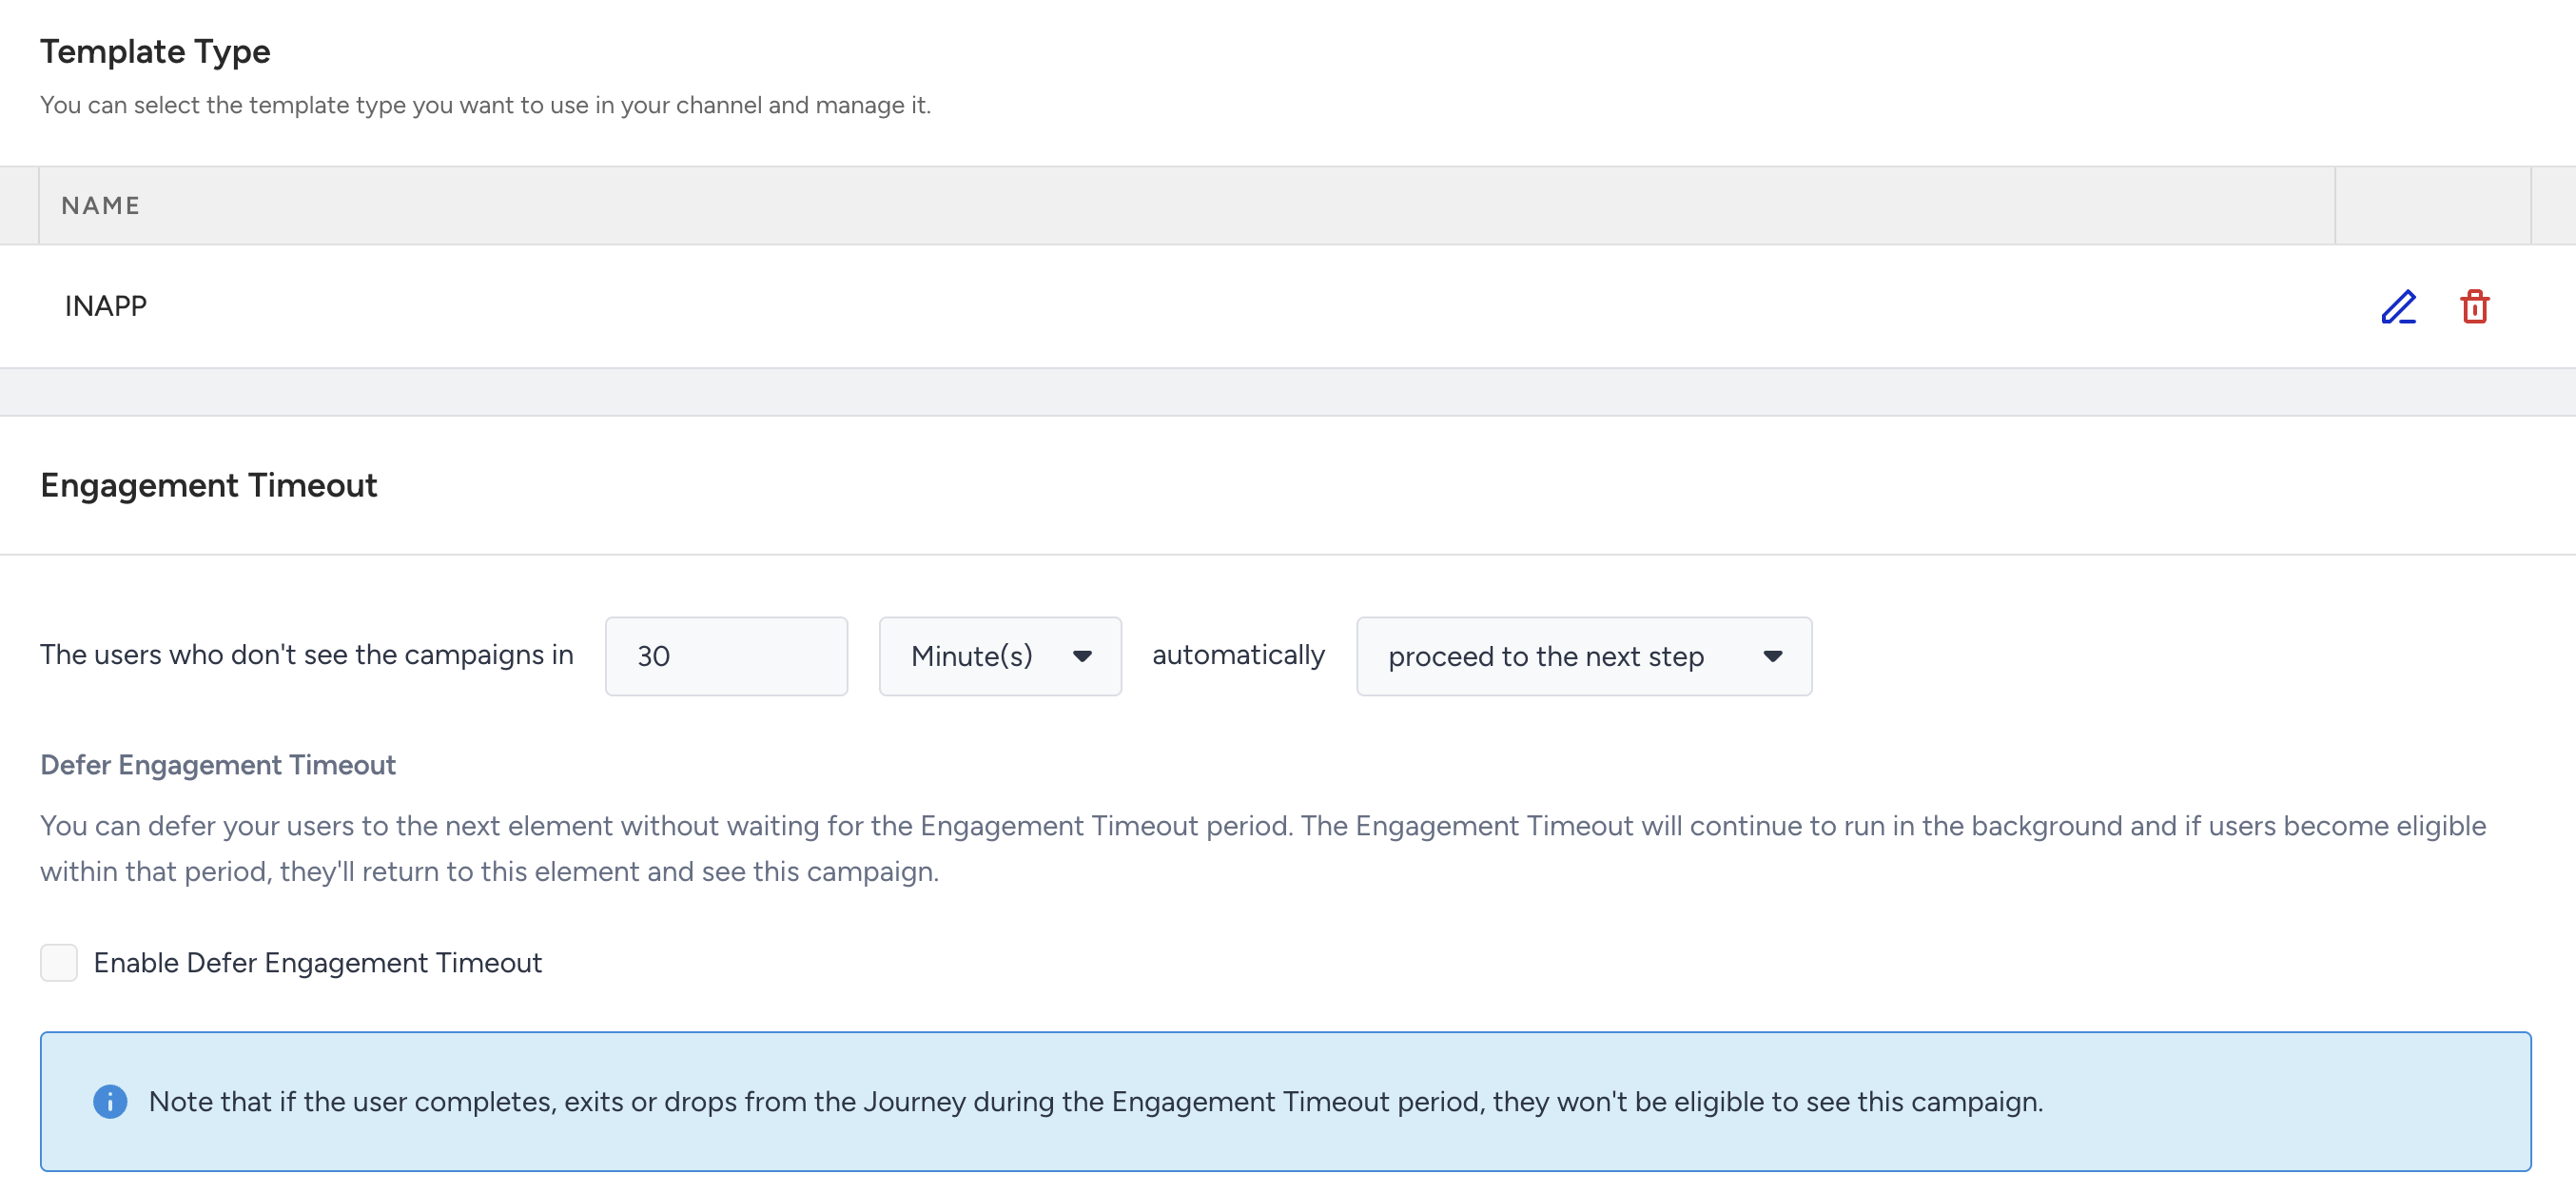
7. Specify time-out
You can specify the duration to keep users at the In-App channel and which action you want to take on users if they do not see the campaign.
8. Rename channel name
Channel Name is generated by default based on journey name and channel type. You can rename it at the top right corner if you want to give it a different name..png)
9. Save the In-App channel
Configuring the settings for your In-App element, save this channel.
Once you launch your journey on active status, your in-app campaign will be active on your app to be displayed to the users who come to the in-app channel step in your journey.
Live Actions & User Interactions
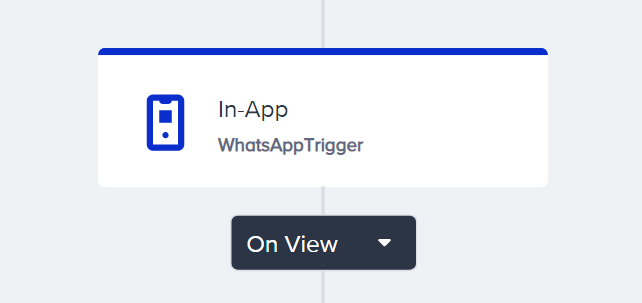
Live Actions
On View action comes right after the in-app element. It is selected by default and you cannot change it to any other action. Users can proceed to the next step by seeing the in-app campaign or proceeding automatically due to the time out.
Checking User Interactions
After the In-App element, you can take another action via branching your flow based on user interactions on the in-app campaign after a while. Read more on Check Interaction.

Once you launch your journey with the In-App channel, you can track its performance via In-App Analytics.