Check API Response examines the data and status codes an API returns after a request. It helps ensure the reliability and effectiveness of the integrated APIs.
The Check Conditions element helps you access the unique attributes and events written in Insider's Unified Customer Database. With Check API Response in your Call an API element, you can use your external data to create more advanced journeys, evaluate your users' fetched attributes, and direct them to different paths.
This guide explains the following:
- How does Check API Response work?
- Adding more paths for Check API Response
- Tips and tricks
- Use cases
- Requirements
For example, you can use the Call an API element to obtain users' loyalty points information and redirect them to different paths depending on their points.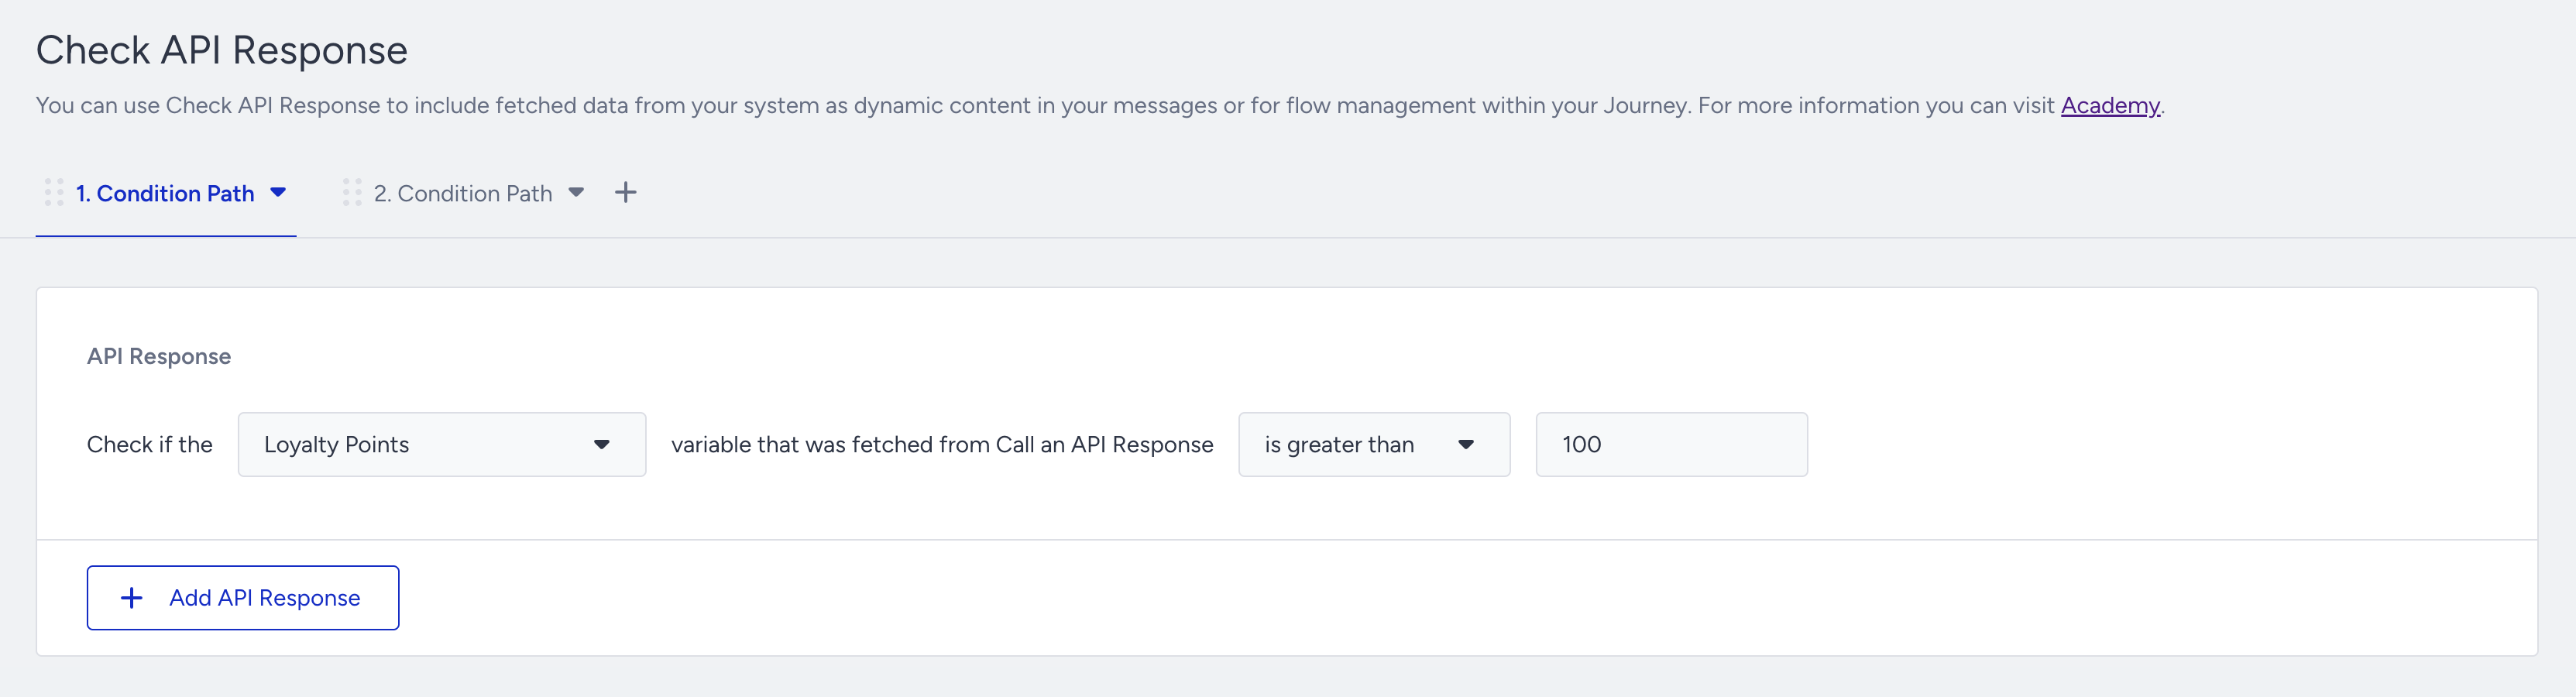
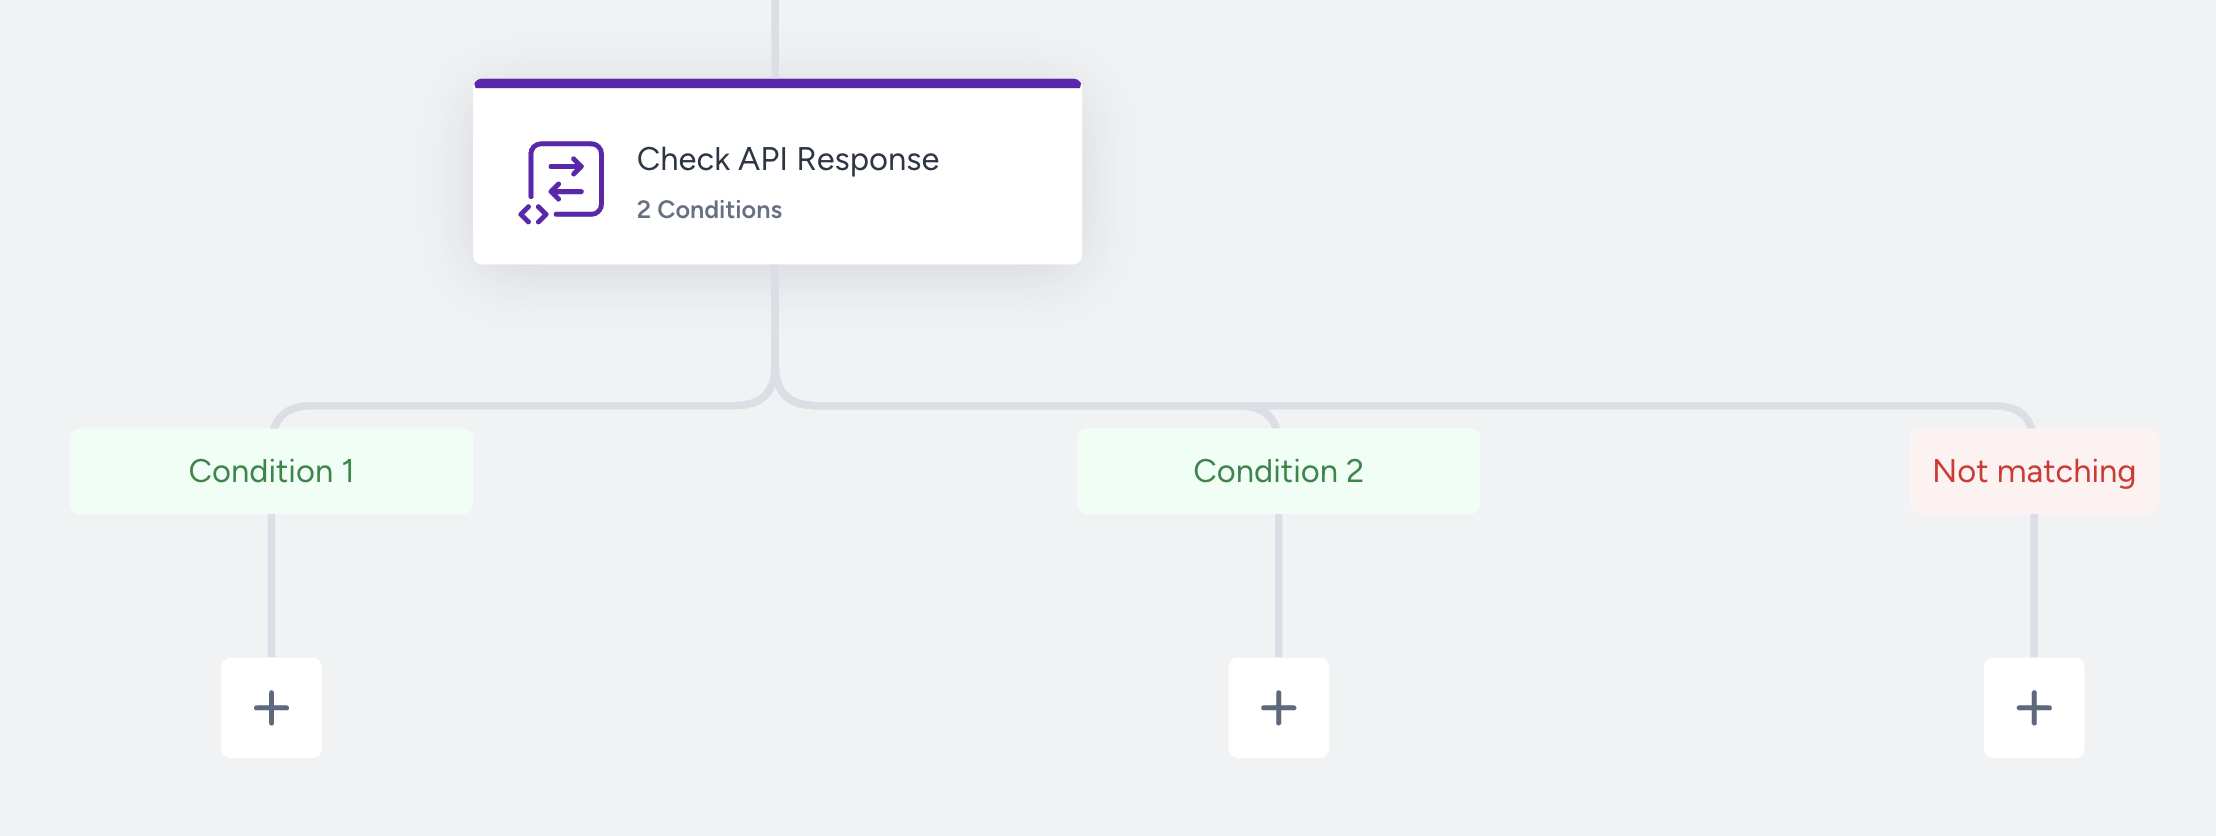
How does Check API Response work?
The Check API Response element divides users into Matching and Not matching paths based on their fetched attributes. You create a true or false query that evaluates users and directs them to the next steps.
- Matching path: The number of users who meet the specified conditions and proceed down the “matching” path.
- Not matching path: The number of users who do not meet the specified criteria and proceed down the “not matching” path.
Conditions are evaluated when users come to the Check API Response element. If no element follows one of the paths after the Check API Response element, users will go down that path and exit the journey. In this case, this journey will be counted as completed. Meanwhile, users who do not meet the condition(s) will go down the “not matching” path.
Adding more paths for Check API Response
You may want to send different contextualized messages based on your users' properties or actions. This feature enables you to add more than two paths to your journeys.
Click the +(plus) button to create another path after the Check API Response element. Each tab creates a different condition path.
You can click the dropdown to rename or delete your path(s) when necessary. 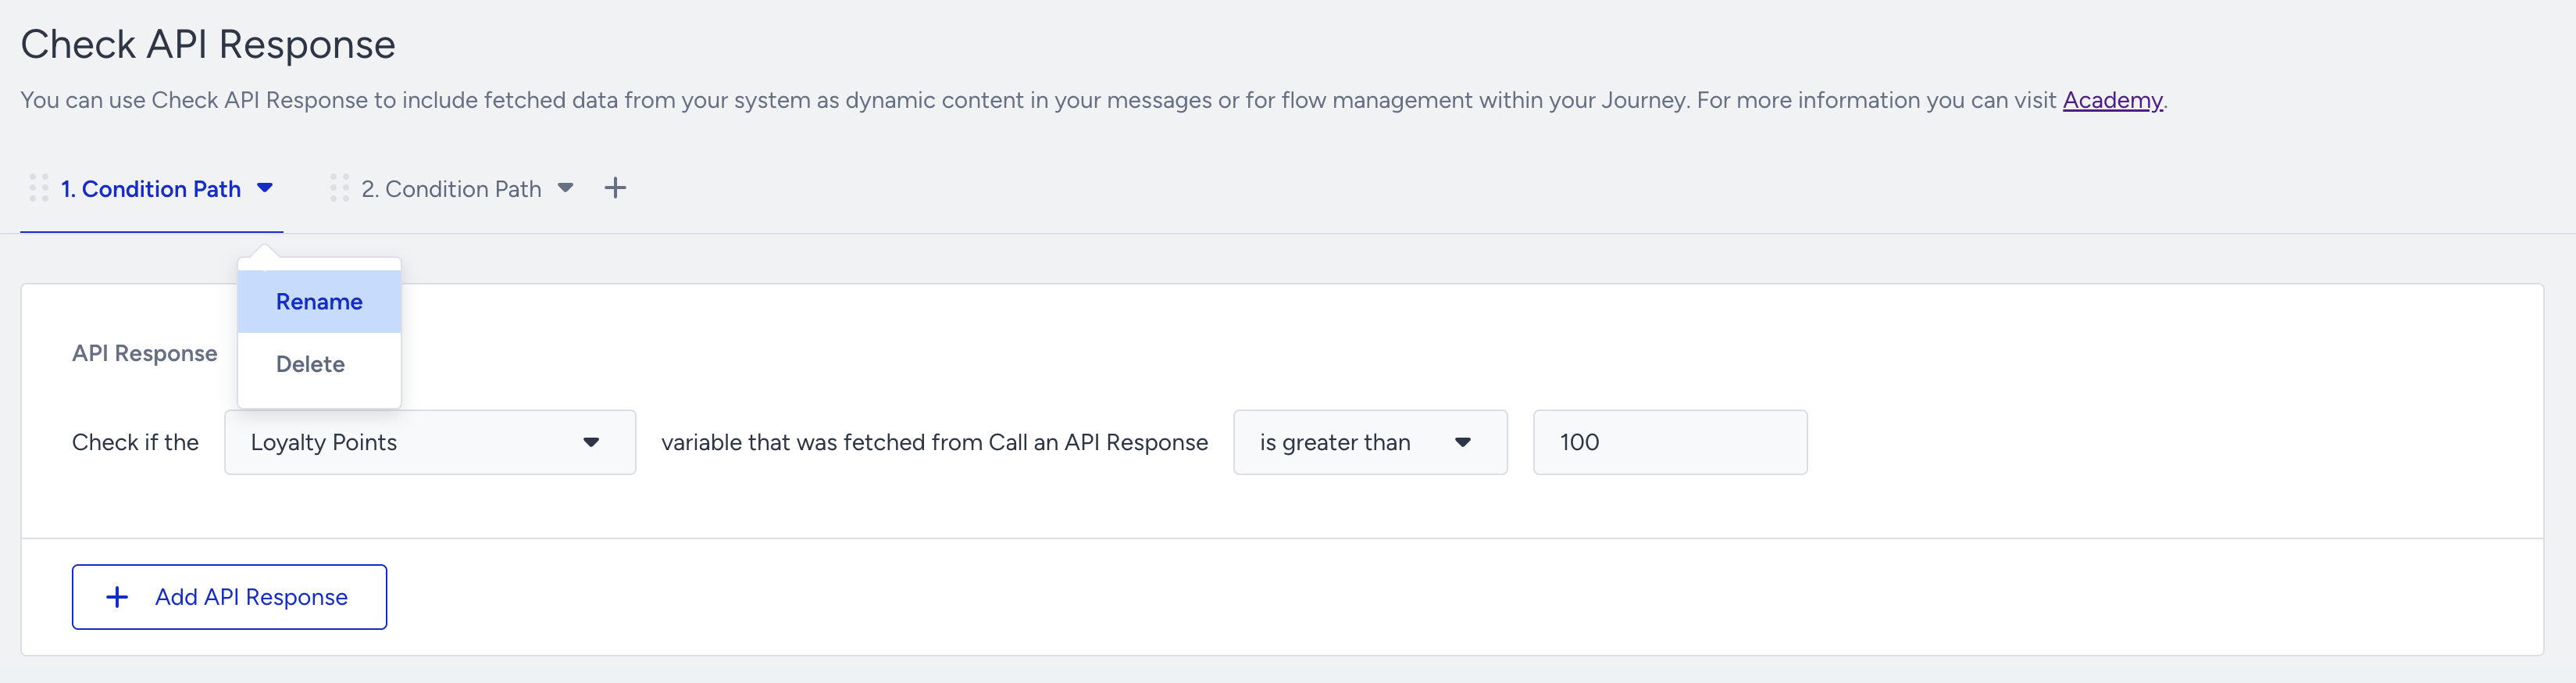
When you rename the condition paths, the path name will be changed on the canvas. 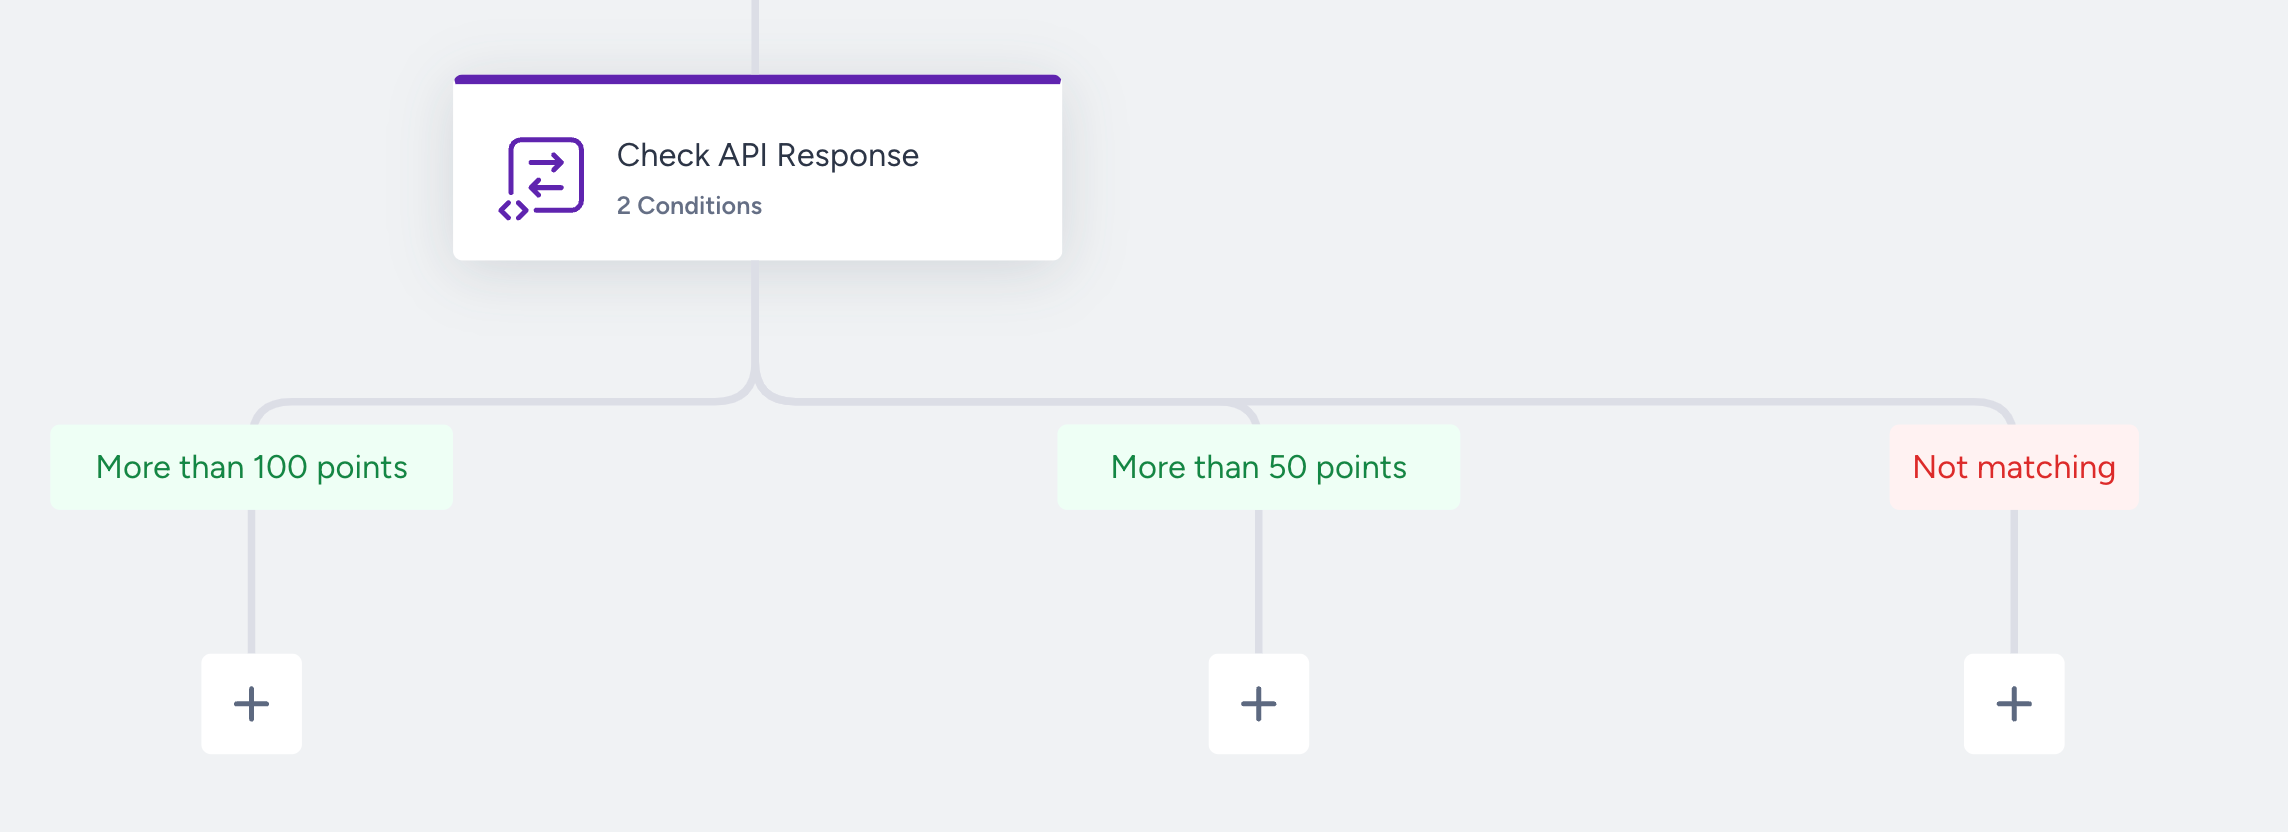
If you have multiple branches, similar to other Check elements, the Check API Response element considers each tab's conditions in the order you place them. This means that the condition of the first tab is evaluated first. You can drag and drop the tabs to prioritize different condition paths.
For example, in the first Condition tab, you select the “loyalty points” attribute with the value 100.
In the second Condition tab, select the same attribute with the value 50.
When a user arrives at the Check API Response, the system first checks whether their point is greater than 100.
If yes, they go down to the first condition path.
If no, the system checks whether the value is greater than 50.
If yes, they go down to the second condition path.
If no, they go down to the not matching path.
If you put the value 50 in the first condition path, since all users with a points value of 100 would also go to the first path, no one would enter the second path. So, it is important to consider the priority when building paths. 
Tips and tricks
- You can use every attribute you fetch through Call an API inside the Check API Response.
- Depending on the type of data you have set in Call an API, more operators fitting your use case will be unlocked. For example, if the data type is “number”, you will see operators such as “greater than” and “lower than”.
Although you cannot use UCD segments in the Check API Response, you can add Check Conditions after or before the Check API Response to create a combined use case.
Use cases
- You can check if users' loyalty points are above a certain threshold.
- You can check if users' NPS score is below a threshold. If so, you can send a coupon code.
- You can send users different email content depending on their favorite brand. Your title goes hereAll the use cases for Check API Response depend on the external data fetched through Call an API. You can check Fetching Data through Call an API.
Requirements
- You should enable the Response in your Call an API element beforehand.
- You should complete the required configurations to pass the data to Insider.
- You should correctly fill in the data type field in your Call an API element.