Requirements
To start using the Lead Generation template, you need to integrate a basic SDK version 12 or higher.
Use Cases
To better understand how and when to use the lead generation, refer to Use Cases for App Lead Generation.
User engagement, regardless of the channel, is the primary driver of revenue. You may consider that having a mobile app will help you in engagement, as it makes everything easier and more convenient. But still, knowing your users and increasing your presence by creating different engagement channels is equally important. After all, apps can be deleted or notifications can be turned off easily.
You should complete the following steps to launch a campaign with the Lead Generation template:
1. Create a campaign
1. Navigate to Campaigns > Optimization > App Templates.
2. Click the Create to start creating your campaign. Choose Basic Templates.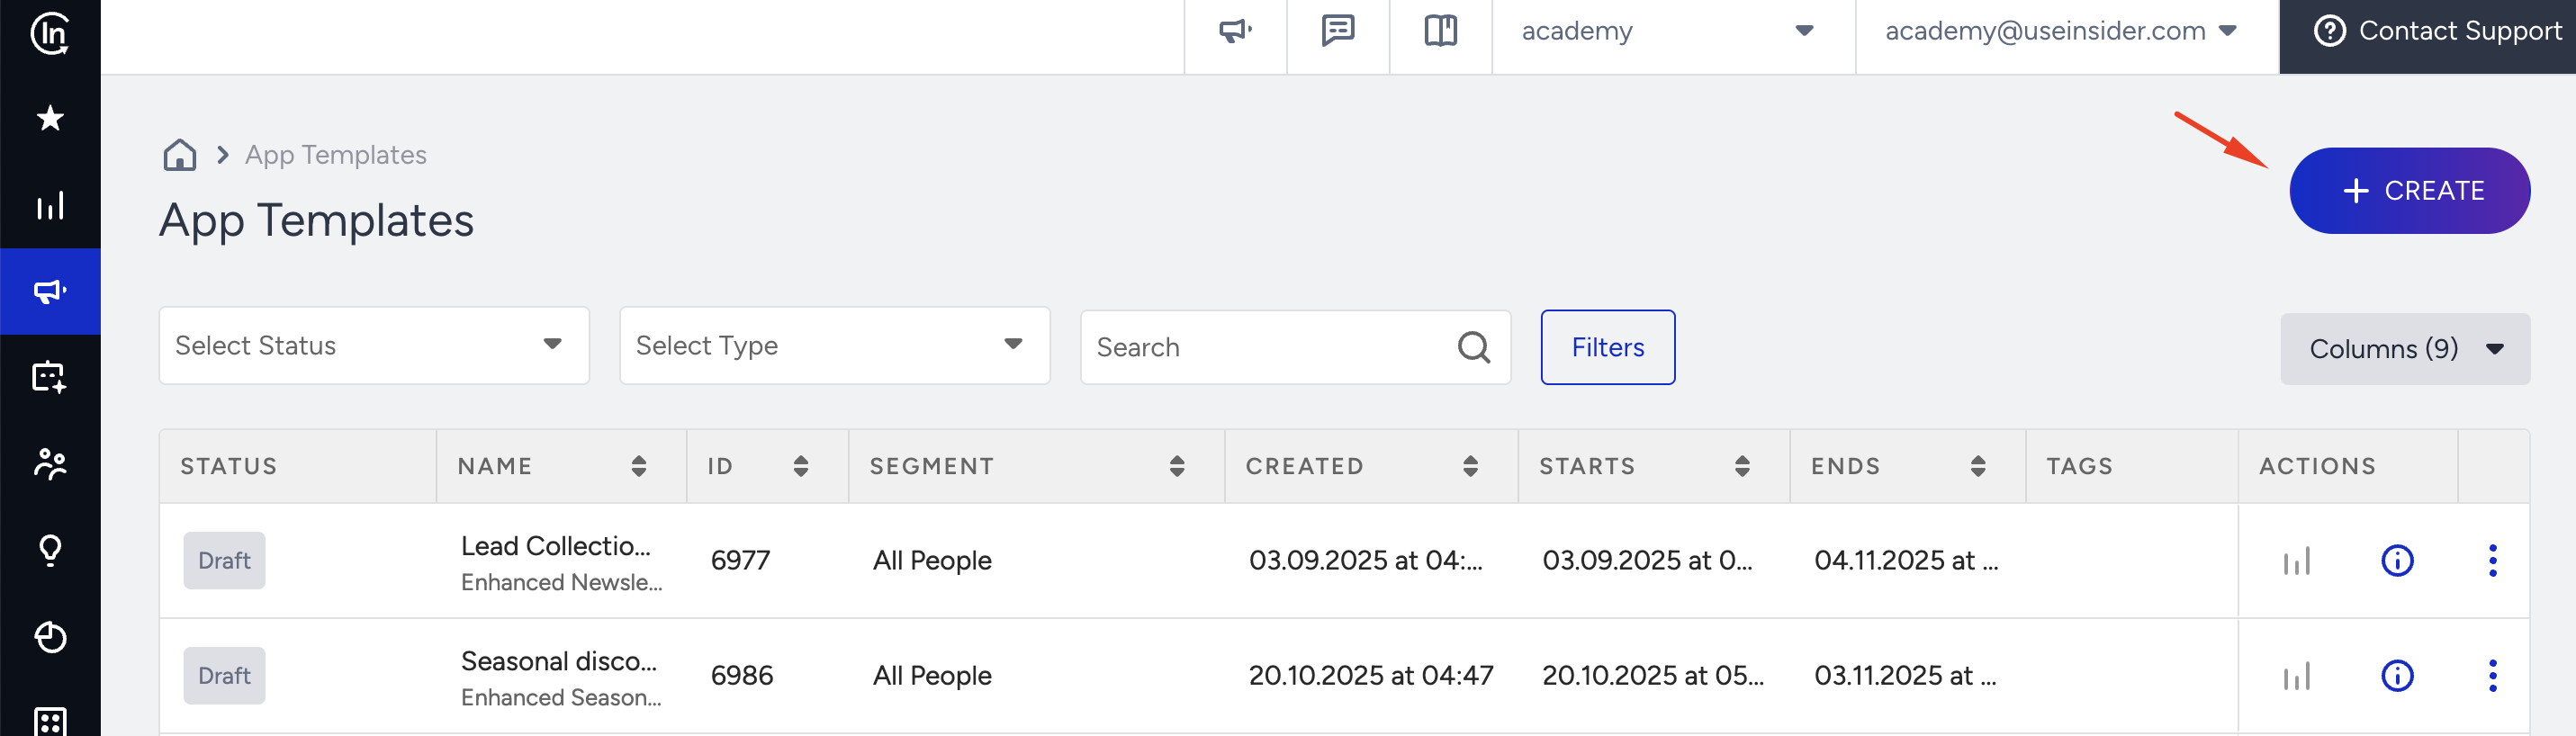
3. Select the Lead Generation template.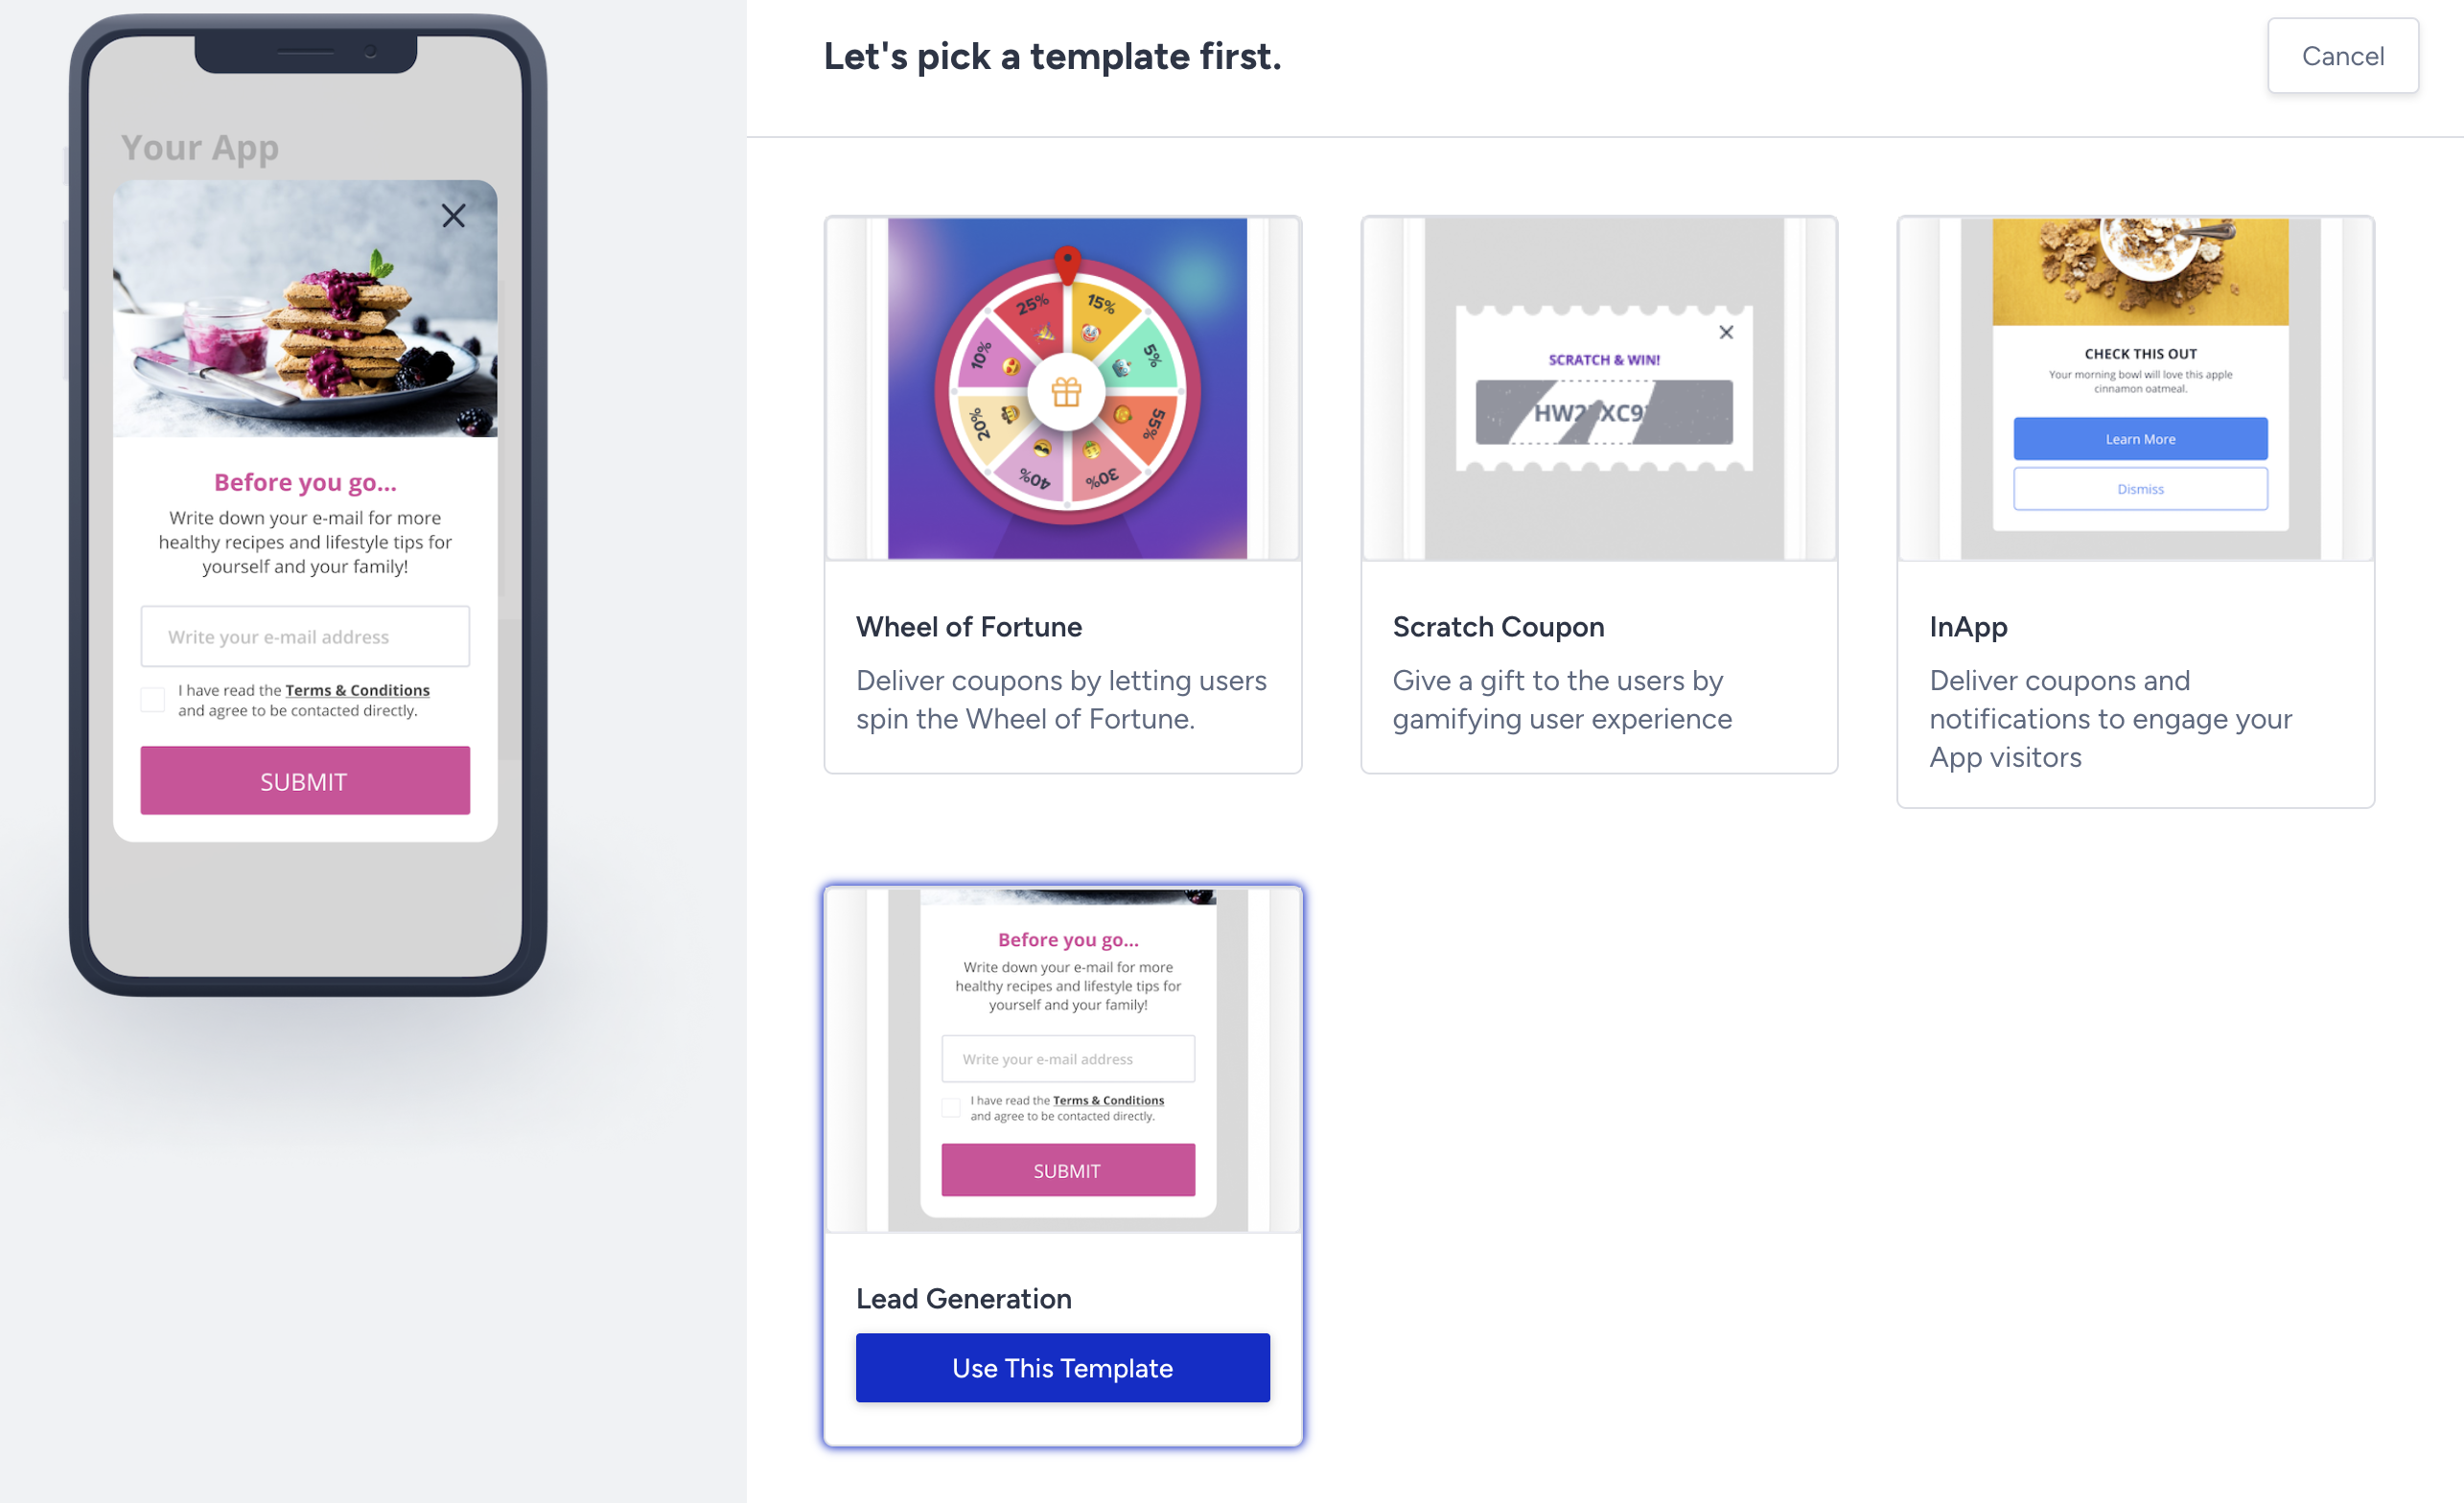
This template consists of two pages: the Content page and the Thanks page.
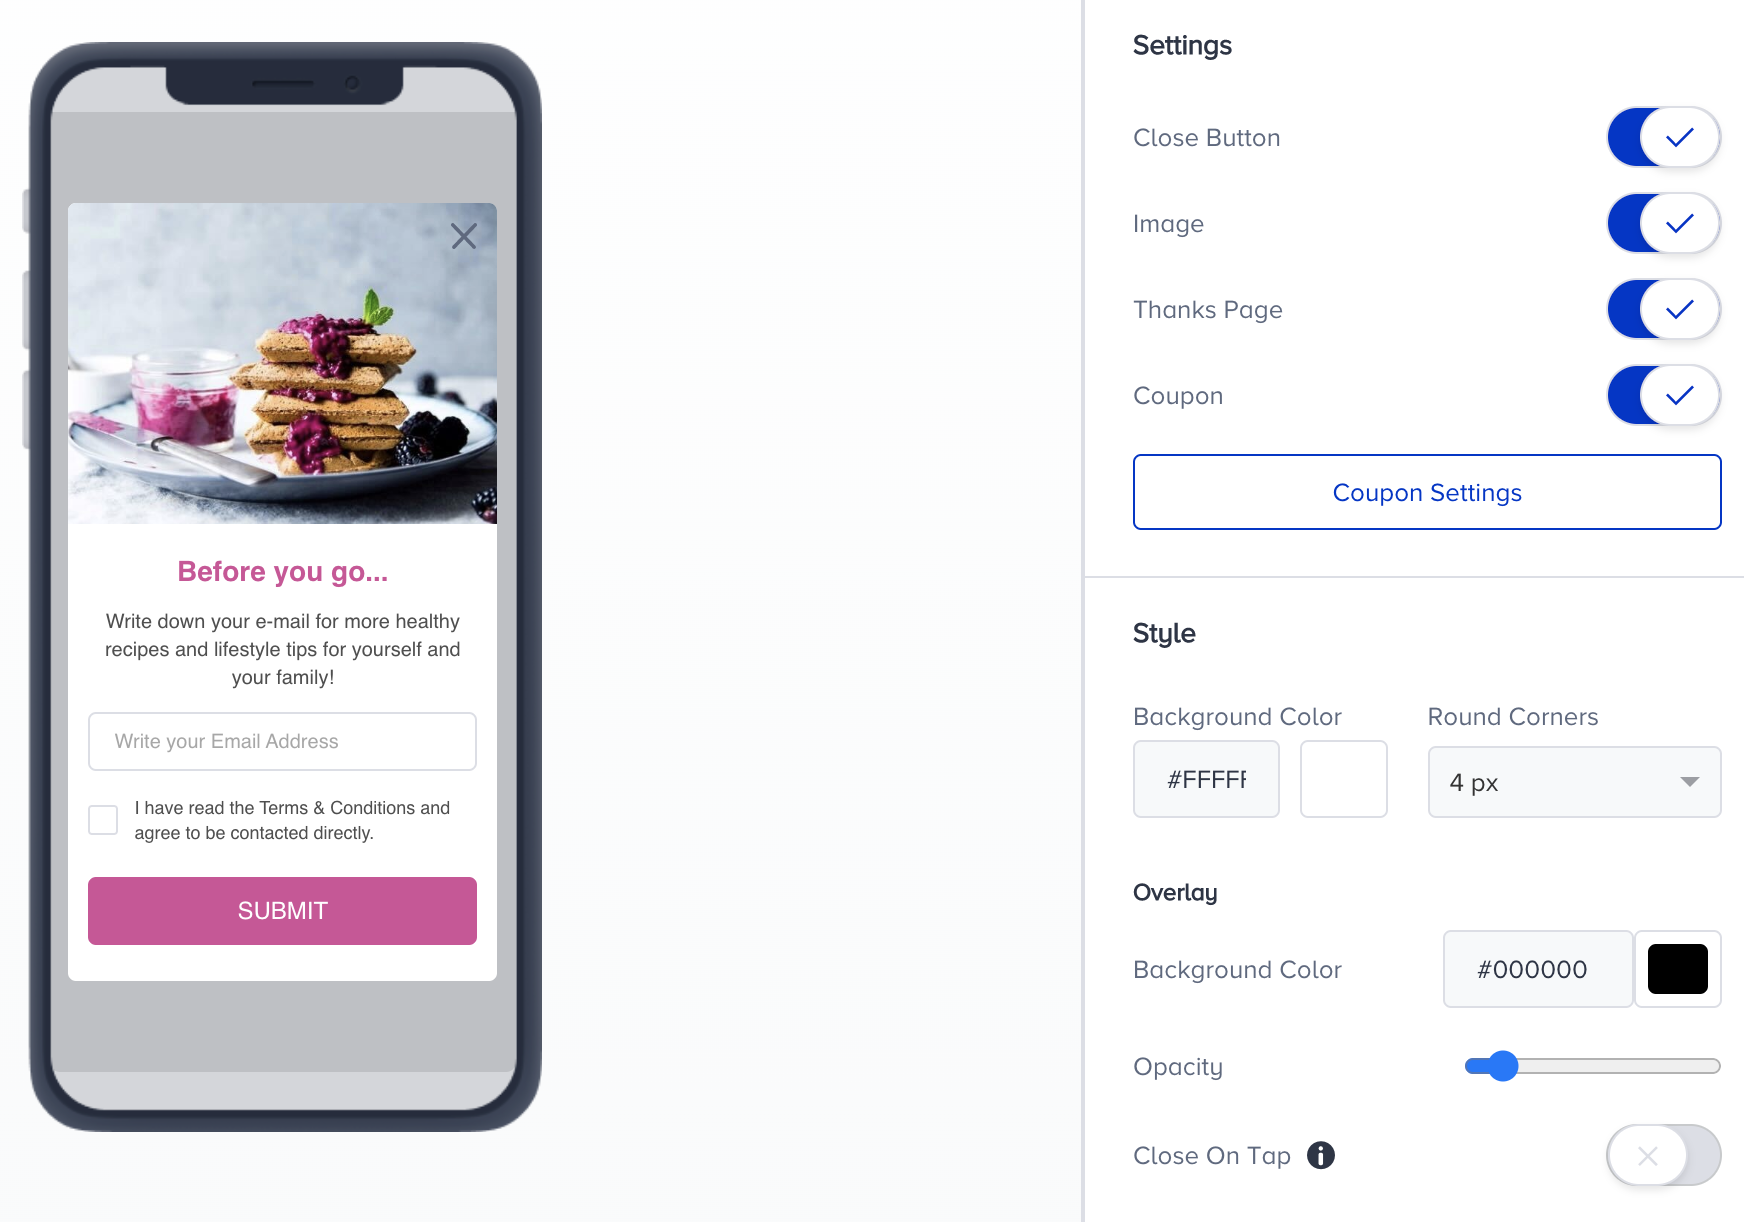
4. To configure your Content page, select the elements that you want to have on your template..png) 5. Change the style of your template. These changes will apply to your entire template.
5. Change the style of your template. These changes will apply to your entire template..png)
6. Click each element to see and customize the style and text settings available for the respective element.
.png)
7. You can add a Policy element with a link to your policy page..png)
8. You can customize the Submit button that user will use to submit their information..png)
9. If you want to add more elements (e.g., input column, policy, etc.), you can choose them from Add Element..png)
With the Add Element option, you can add Header Text, Message Text, Input, and Policy elements.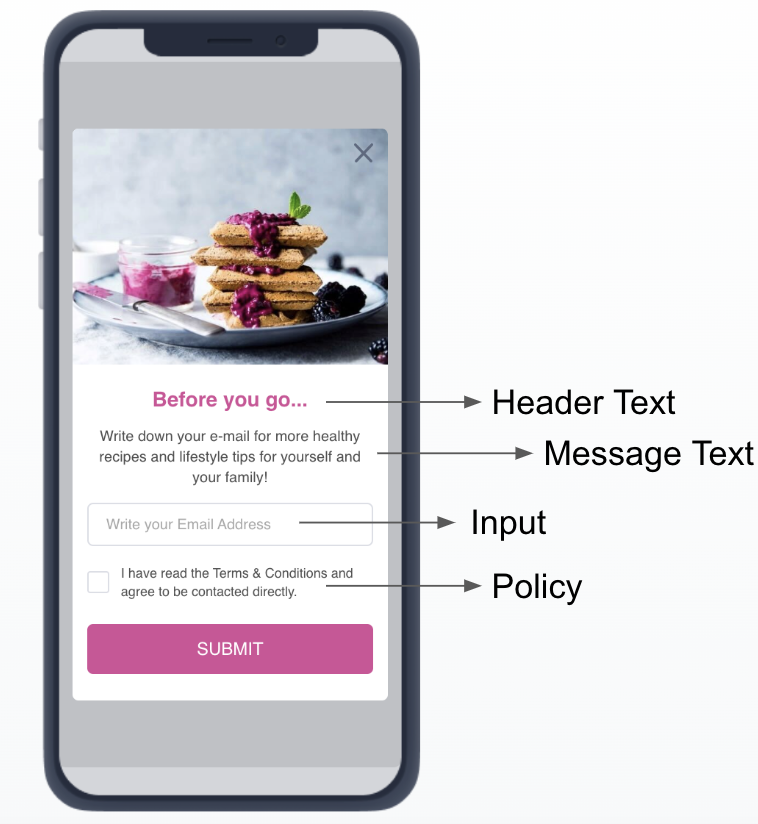
Header Text
You can use this option to encourage users to read your content on the template.
Message Text
You can use this option to add your message.
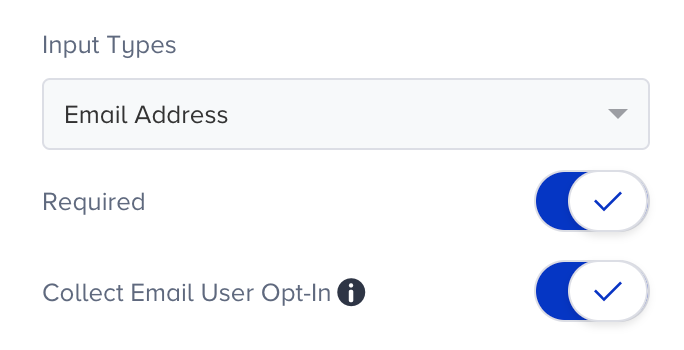
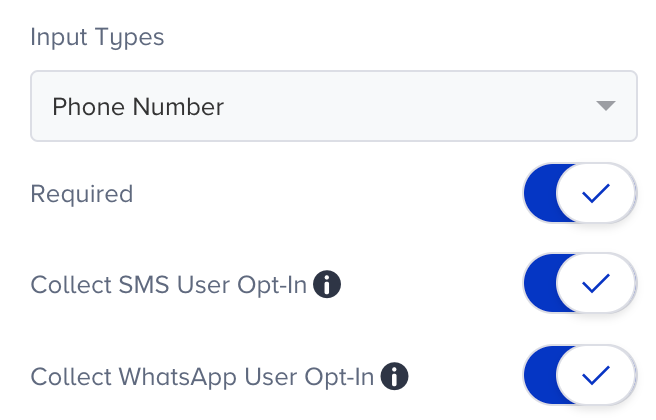
Input
You can collect email addresses, phone numbers, or any other input as text from your users.
|  |
|  |
Policy
You can add policies that you want your users to agree.
10. If you have toggled on the Coupon element, click the Coupon Settings button to select a previously created coupon list. Follow the steps in Coupon Management to add coupon codes to your campaigns.
11. Lead Generation can have a second button, and this button can have different actions.
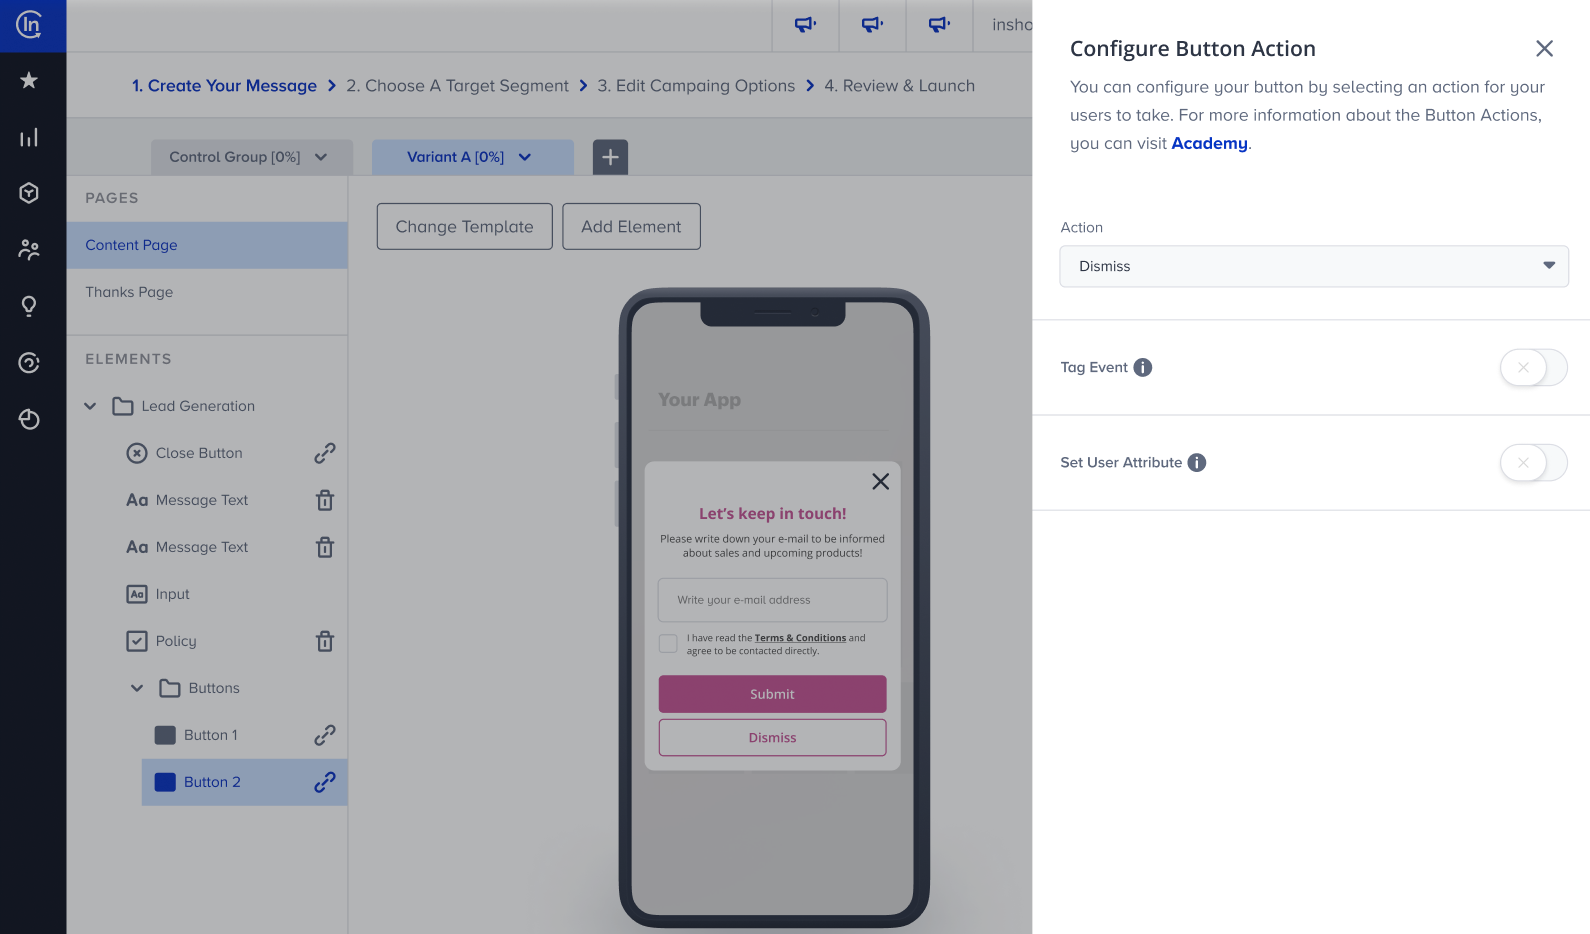
- Dismiss: Closes the template.
- Deep Link: Redirects users to another page. It works on both internal and external links.
- Push Permission: Helps app owners ask for push permission (on iOS) with Insider's App Templates. If a push permission pops up once, it will never be shown again. This is due to the limitations of the operating system, to not bother the user too much.
- Open Settings: Takes the user to the settings of the app at the OS level. If users previously disabled push notifications or location services, they can enable them from these settings.
- Feedback: Opens the default app rating prompt on the application.
Push permission allows the app owner to trigger a native push permission popup on iOS. You can prompt each user only once with this popup. If a user clicks it multiple times, no popup will be prompted again. You can set the re-eligibility to Never to create a campaign a user will see only once, and redirect users to a page where you can ask them if they want to opt in for push notifications.
Open Settings option opens the settings page of the app. Unlike push permission, this can be triggered multiple times. If a user opens their app settings via this option, they can configure their app notification details and settings, consent for cameras, microphone etc. You can ask your users for permissions via an InApp and redirect them to the settings page.
Google suggests against excessive usage of the app rating prompt.
12. Apart from the click behaviors, buttons have different capabilities.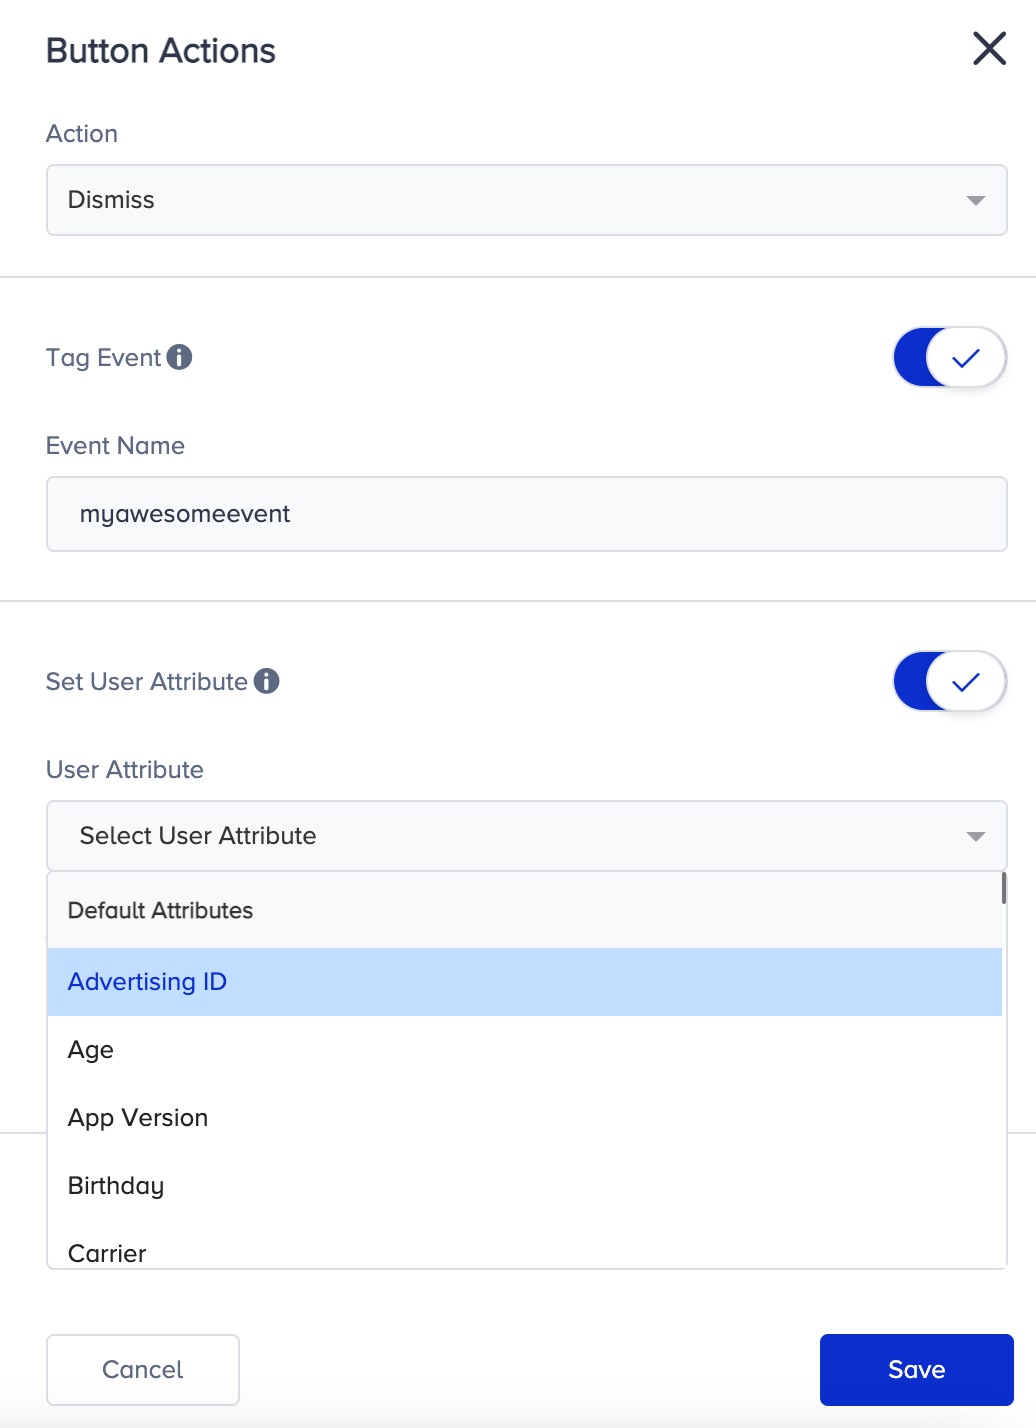
- Tag Event: Allows you to tag (trigger) an event when the respective button is clicked. This event does not have to be predefined. These events can be used for segmentation later. When you’re entering the event name, you need to make sure the event name consists of English-only characters, is lowercase, and underscored instead of a space.
- Set User Attribute: Allows you to set a specific attribute for the user who clicked on the respective button. You can either select from an existing attribute or create a new one. Either way, you need to enter a value for the attribute. This means that whenever the user taps on the button, this attribute will be set with the given value for that user.
2. Test your campaign
Refer to Test an app template to see how to test your campaign..png)
3. Choose a target segment
Refer to Choose a target segment to see the steps you should take to select your target audience..png)
You can exclude dynamic segments, get an exact audience, and select from Predefined Segments, Standard Segments, Predictive Segments, Integrated Segments, RFM Segments, and Saved Segments.
4. Edit campaign options
Refer to Edit campaign options to see the steps that you should configure before launching your campaign..png)
5. Review and launch
Refer to Review and Launch to confirm the details of your campaign..png)
6. See results
Go to the Results page to view the analytics of your campaign.