You can assign tags to each email campaign and categorize them. You can use tags to create different campaigns and send them to other categories.
You can create new tags or add your previously created tags to your campaigns on your listing page and the launch step of the respective email campaign.
Tags can be assigned to campaigns on the listing page and the launch step.
This guide explains how to:
Add tags on the listing page
1. Click the menu and select Edit Tags. You will be prompted with the Edit Tags page. 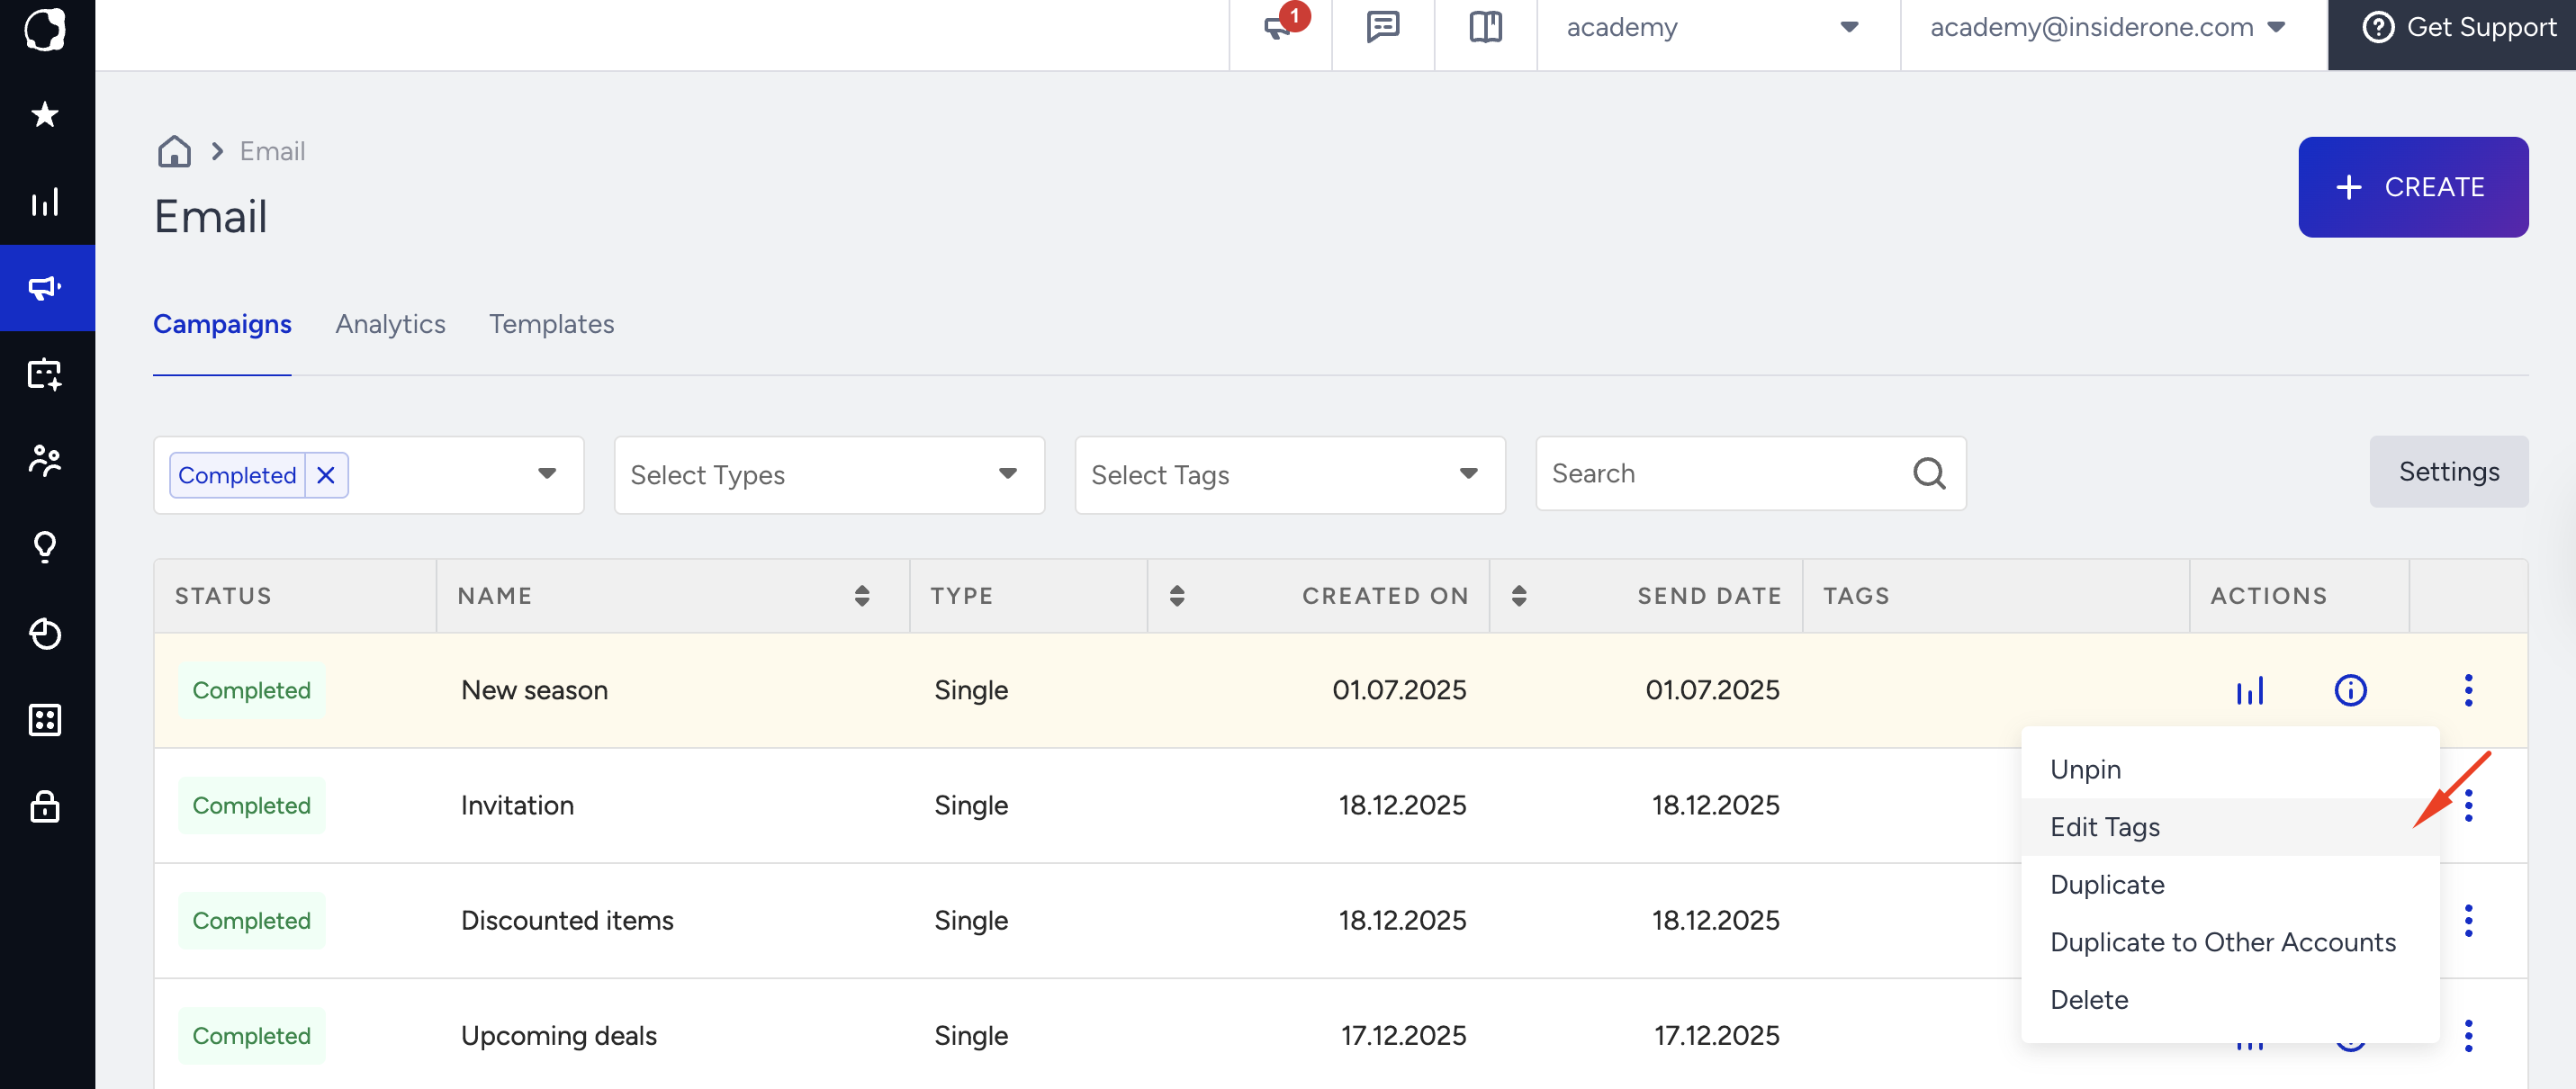
2. Start typing your tag name to create it or select a previous tag from the dropdown.
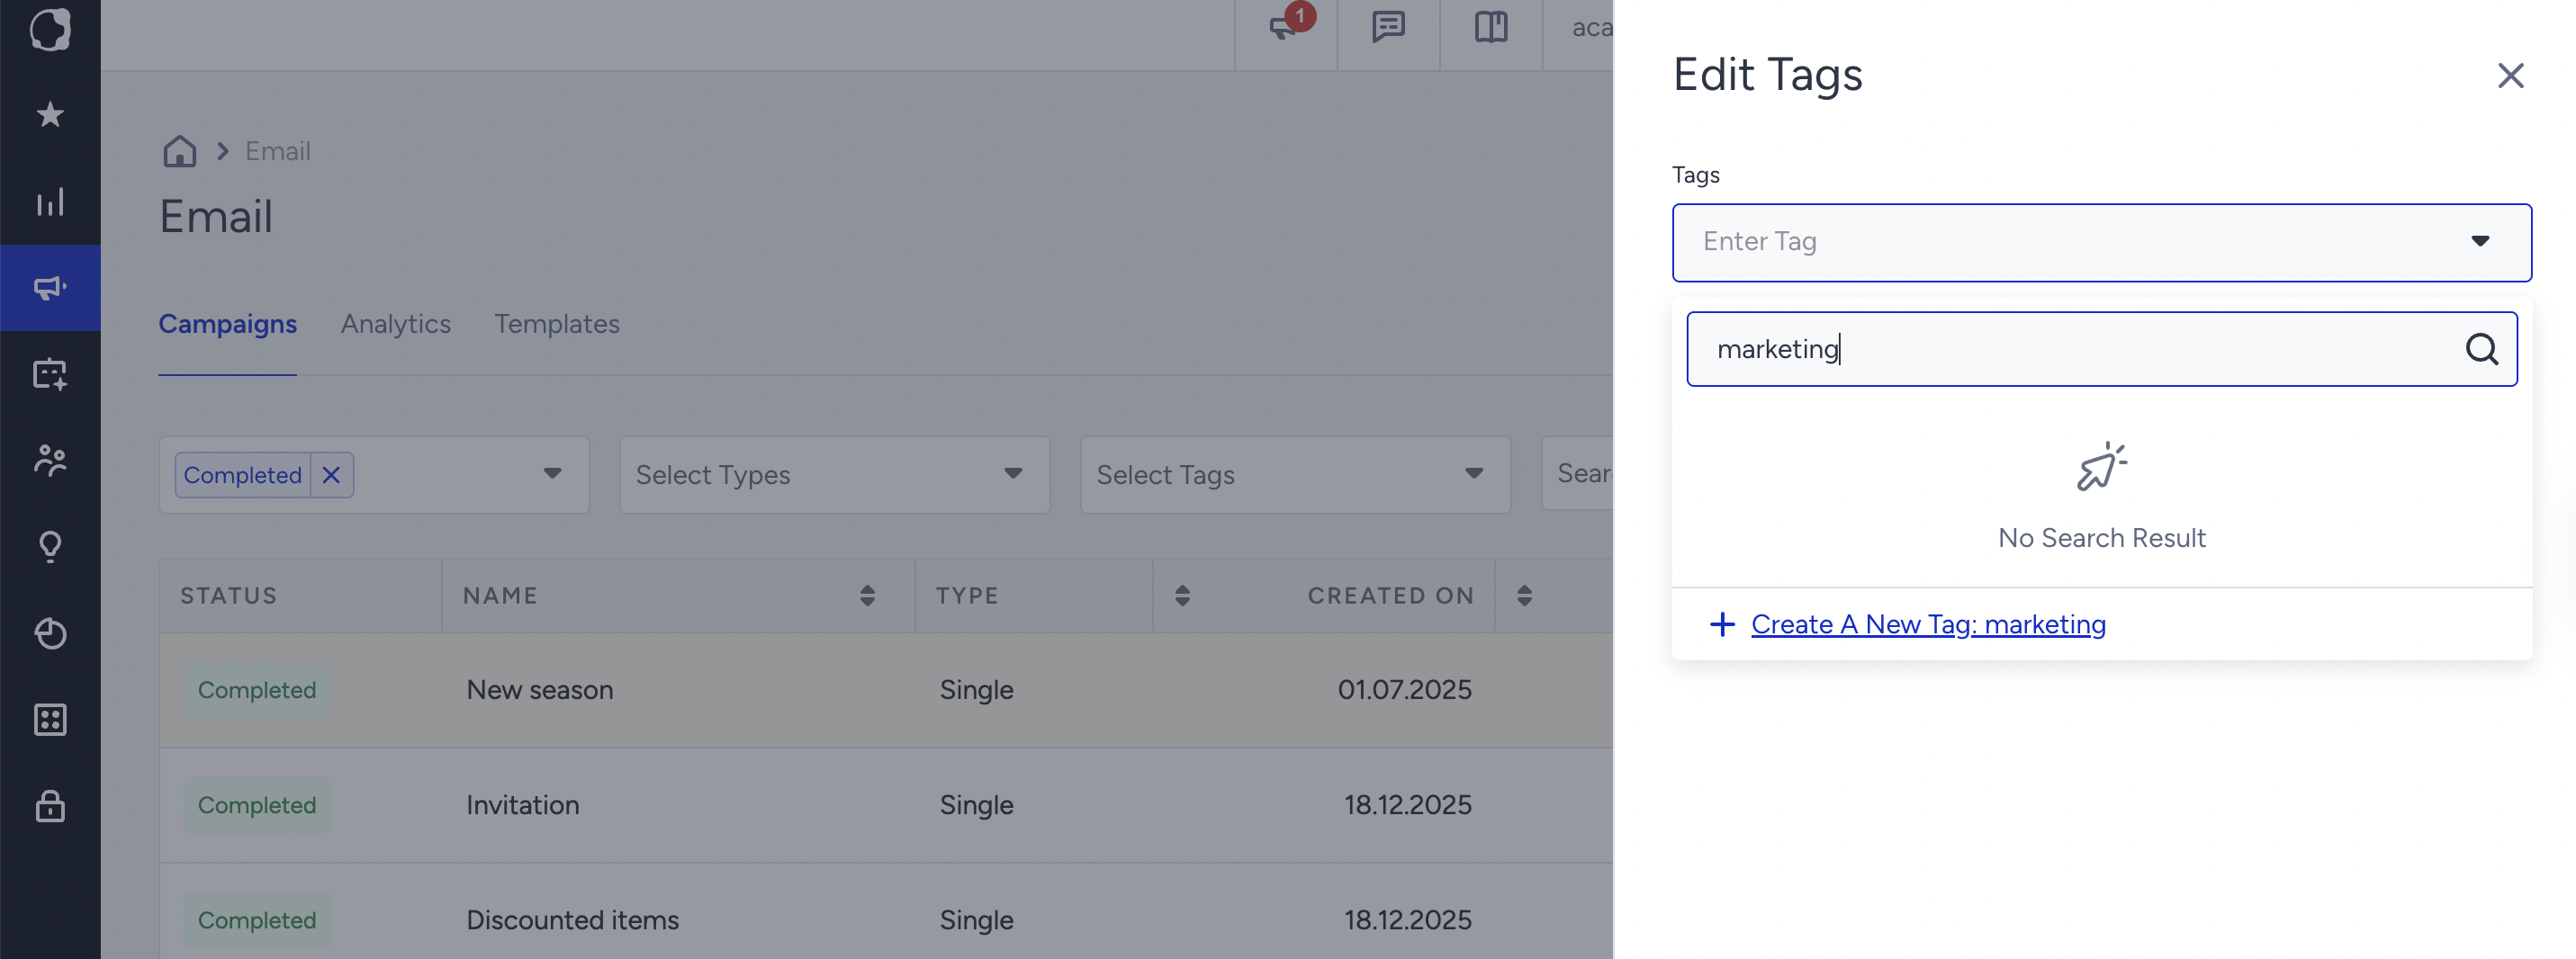
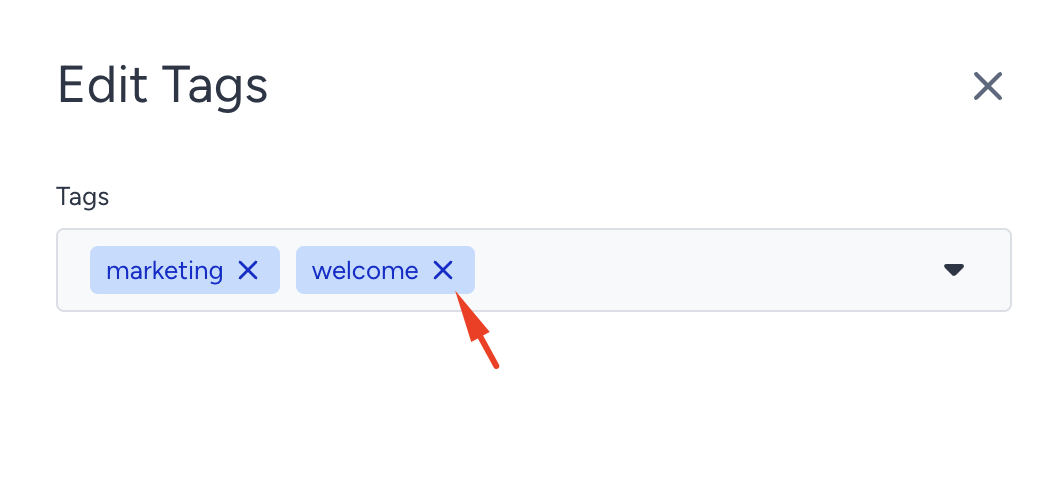
If any tags are added to your campaign, you can use this prompt to remove them, too.
Adding your tag(s) to your campaign, you can use the All Tags dropdown above the campaign list to filter out your campaigns by their tags.
Add tags on the Launch step
You can also create a new tag or add a previously created tag to your email campaign at its launch step.
- Scroll down to Campaign Tags.
- Start typing your tag name to create it or select a previously created tag from the dropdown.
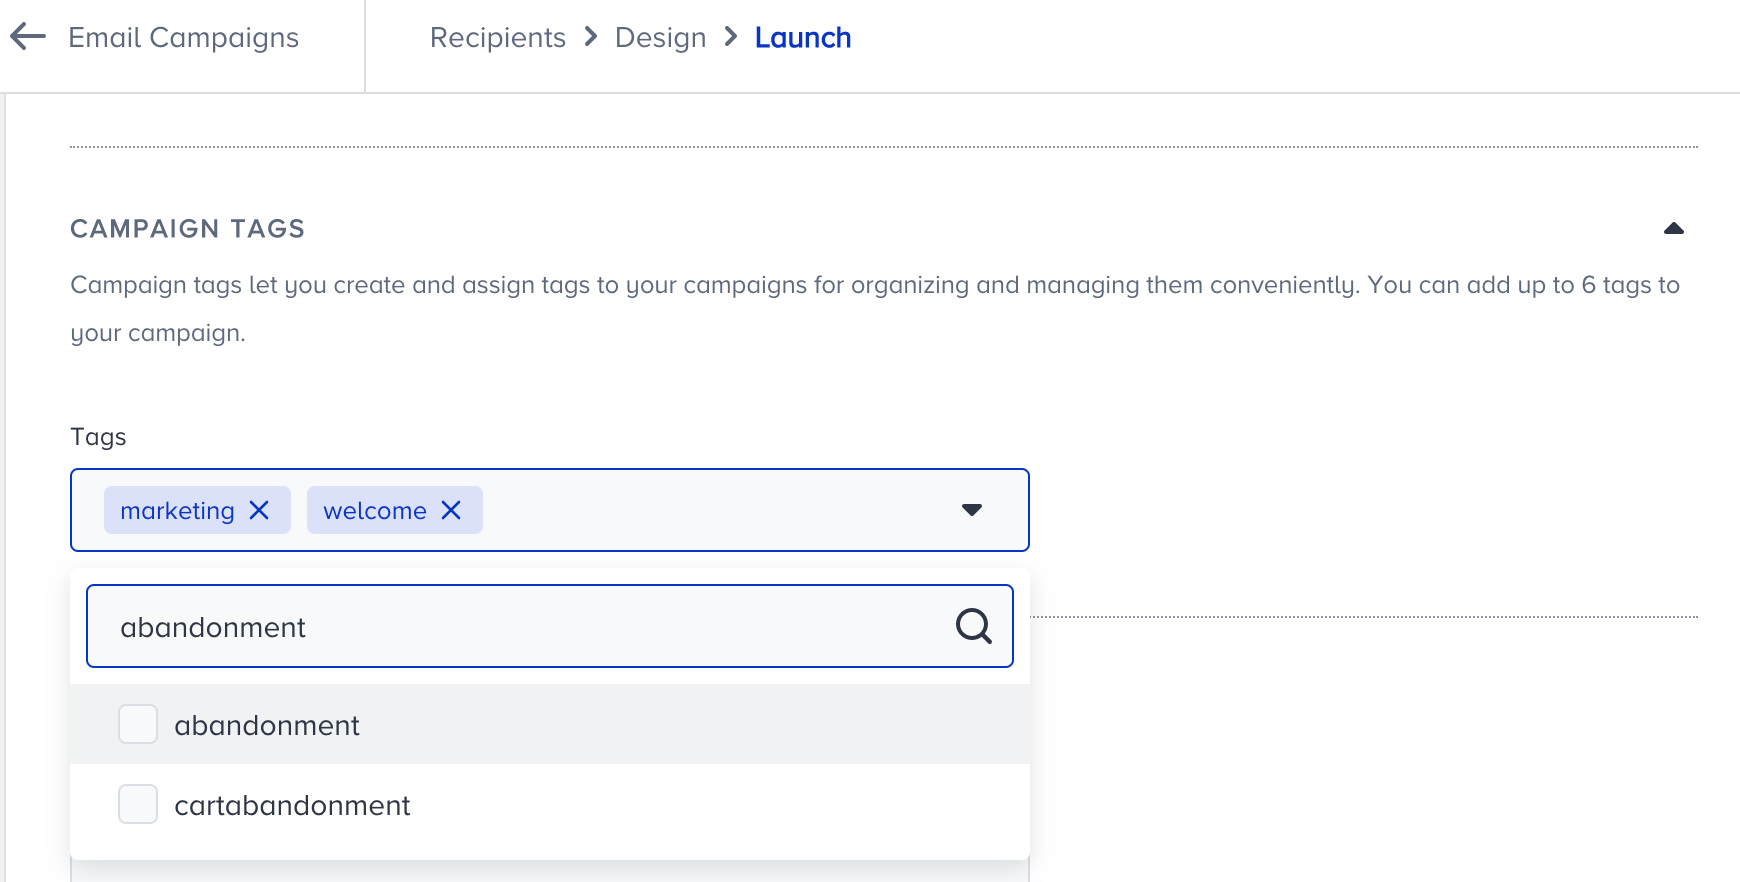
- If any tags have been added to your campaign, you can use this section to remove them, too.
Remove tags from your campaign
To delete a tag from your campaign:
1. Click the menu against the campaign to go to the Edit Tags window.
2. Click the x (Delete) button to remove the tag and click the Save button to save your changes.