Emails with personalized copy — addressing by names — bring in 14% more profit than those without personalization.
Add dynamic content to greetings, to email footer to specify recipient’s email address, always address by names in triggered emails.
The video below introduces dynamic content in emails.
This article explains the following concepts:
- Use dynamic content in emails with Drag and Drop Editor
- Add variables manually
- Customize date format
- Customize number format
- Add dynamic URLs
- Add dynamic images
Use dynamic content in emails with Drag and Drop Editor
To use dynamic content:
1. In the email template you are working with, place the mouse cursor in the necessary place.
2. In the settings panel above the template you are working with, you’ll see the Dynamic Content button.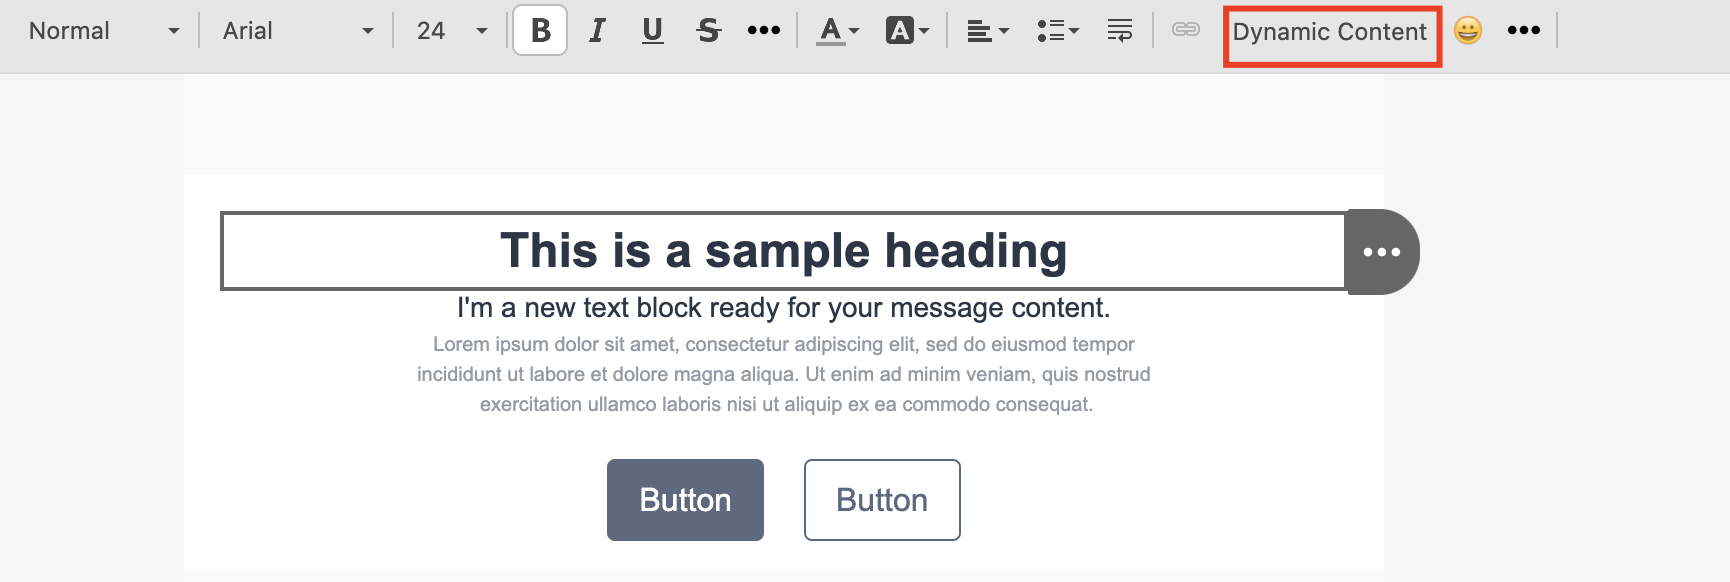
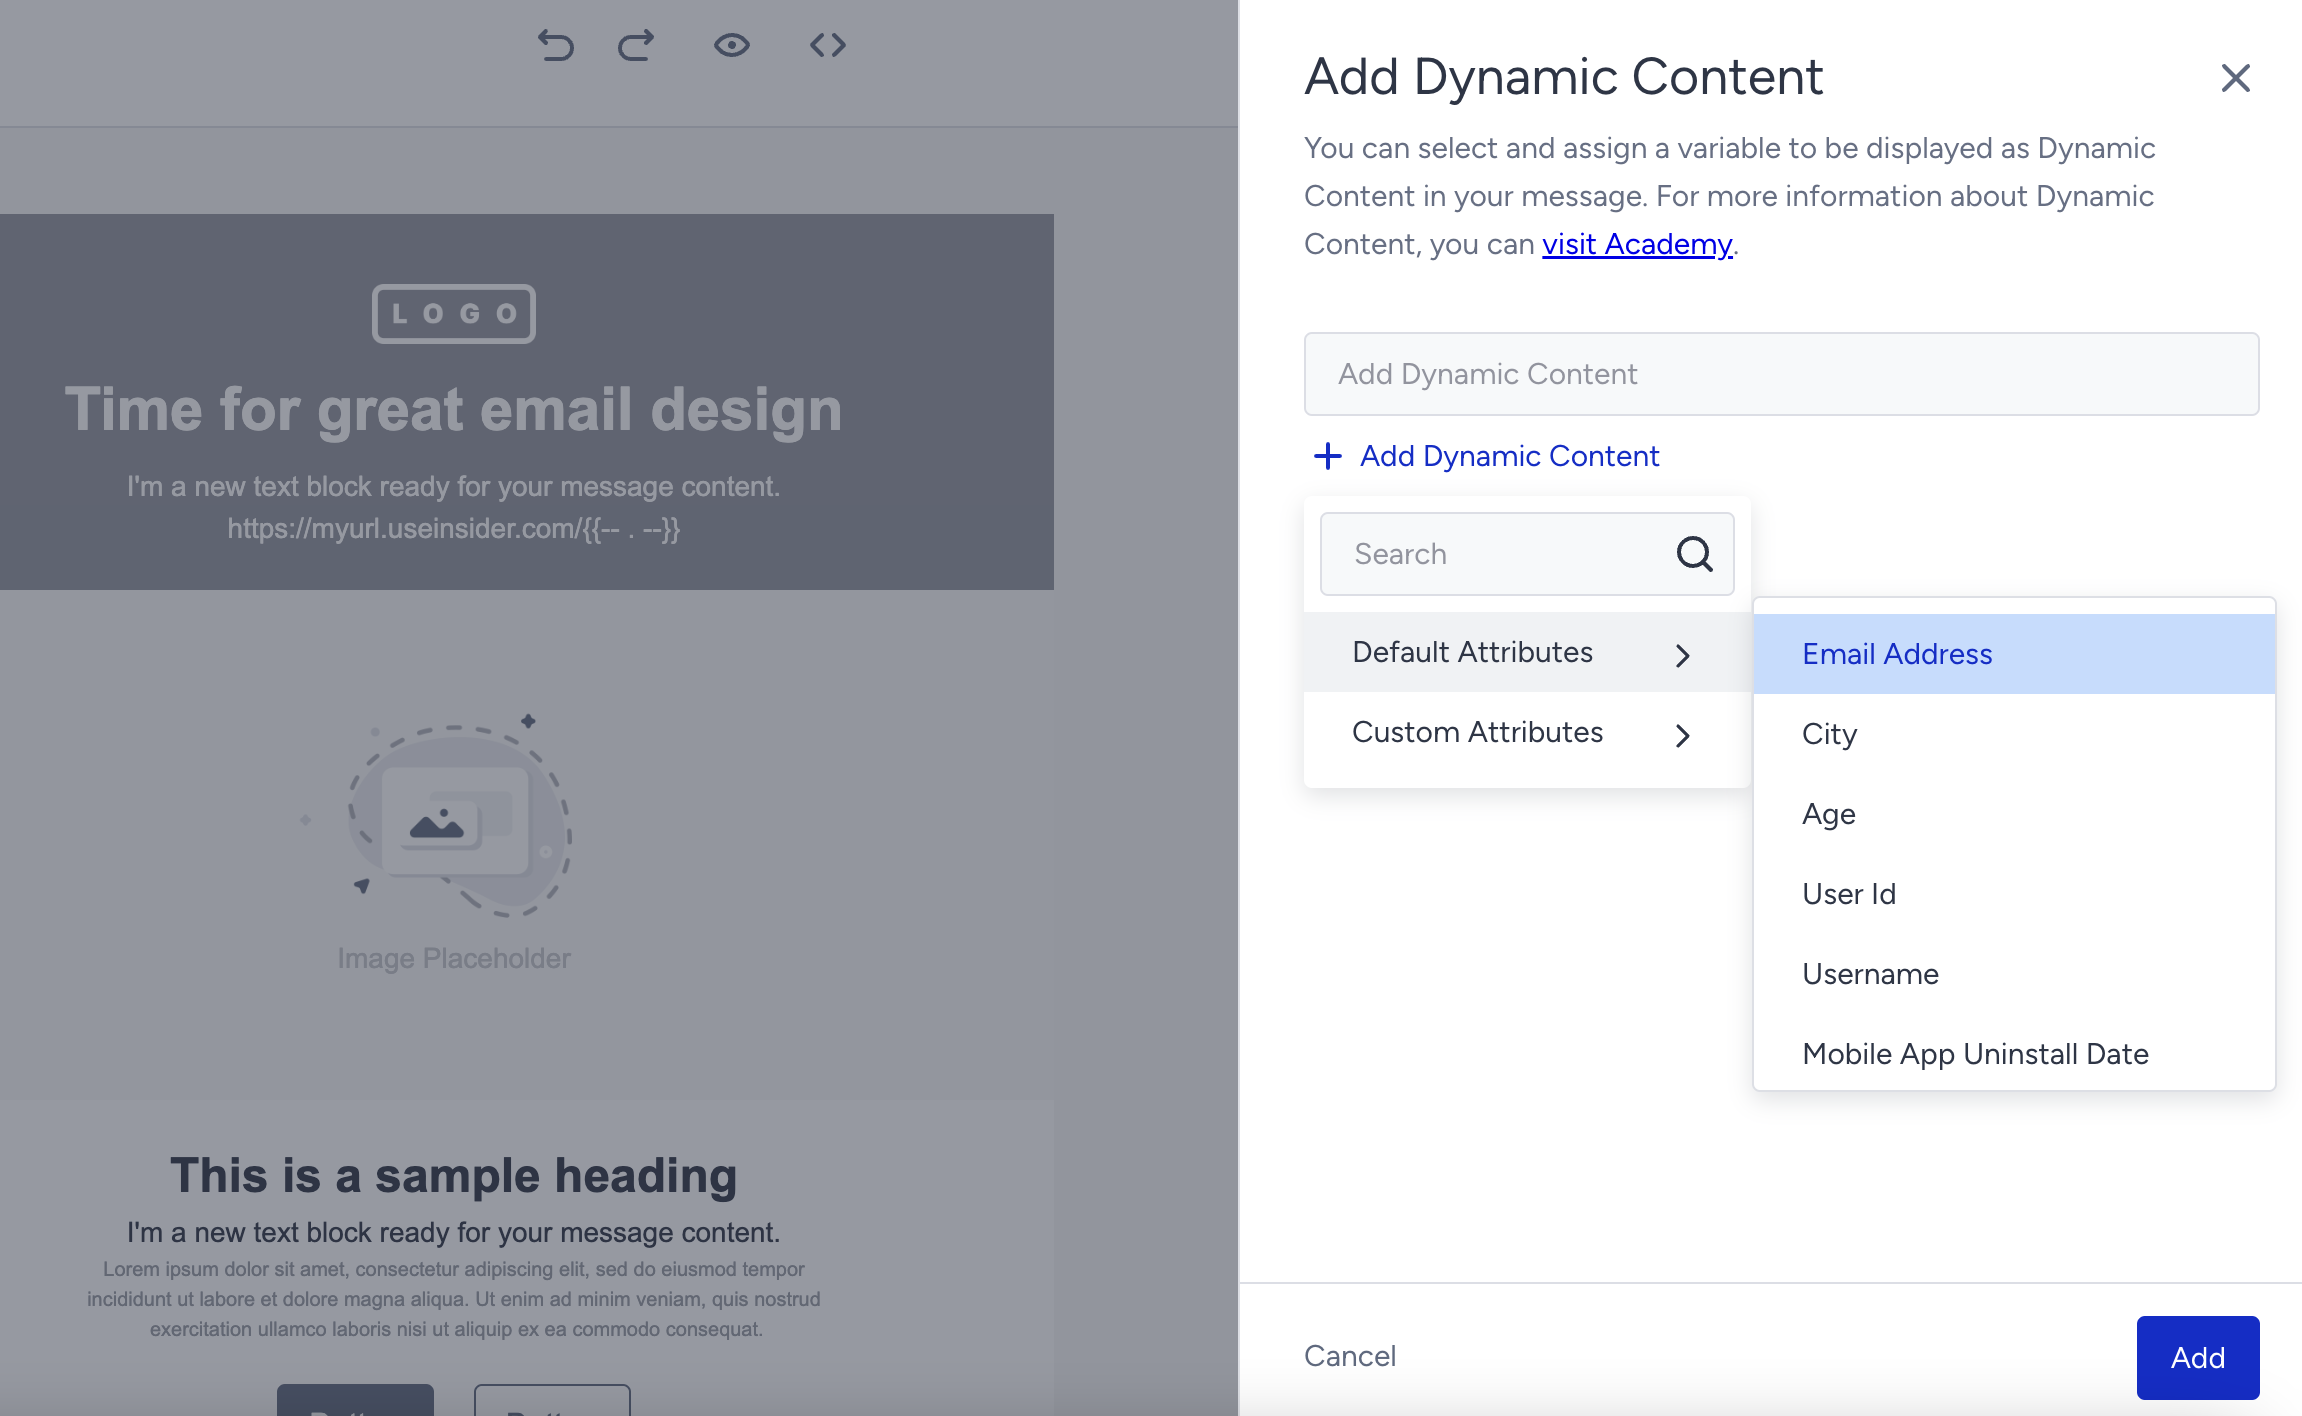
3. Choose from the default or custom attributes.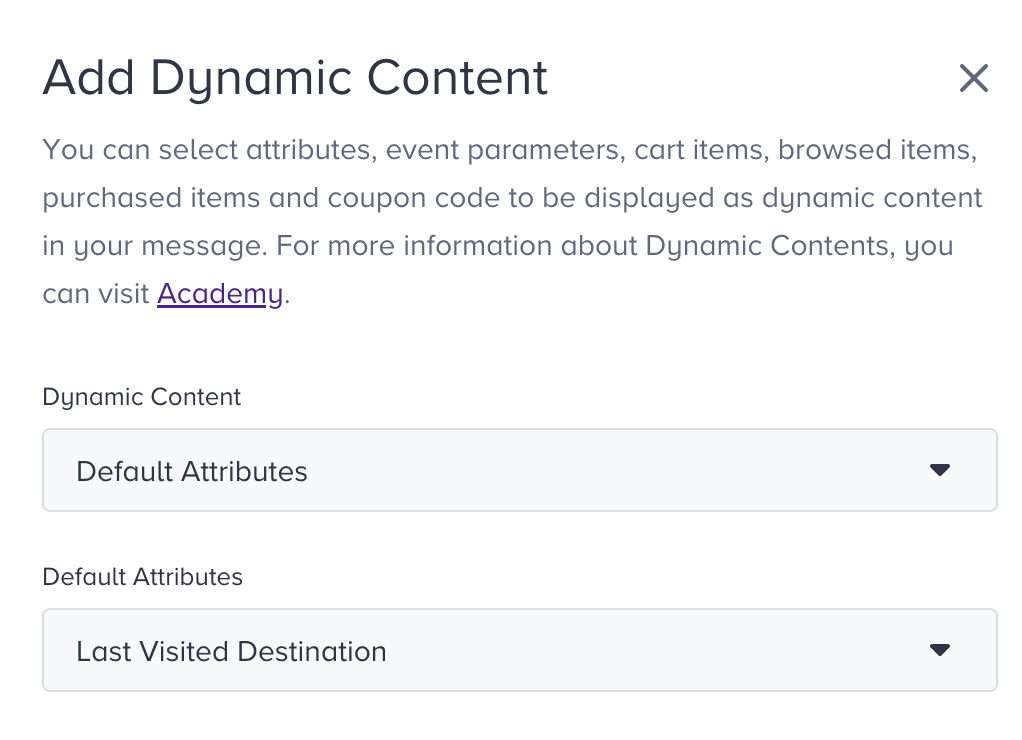
You can also insert campaign-related dynamic attributes such as email campaign name and ID into your email templates or URLs within the template. You can use the following syntax:
{@email_campaign_name} to populate the email campaign name
{@email_campaign_id} to populate the email campaign ID
{@email_variation_id} to populate the email variation ID
Add variables manually
If you want to add the variables manually, make sure to follow these criteria:
- You should add the variable tags annotated with double open and close parentheses as in {{variable}}.
- Variables are validated against the available custom fields, and a validation error is thrown if the specified fields do not exist in our databases.
- If no default value is specified, the field is not displayed, as users might not have the specified value.
- Default or fallback value is specified with the following syntax: {{variable|default}}. An example for this would be Dear {{name|customer}}!. If the specified user has a value for this field (e.g., Jon), the personalized content will be Dear Jon!, otherwise Dear customer!.
- Any syntax error will fail to deliver the email. For this reason, make sure to use the {{ and }} correctly.
- Some examples for syntax errors are {{name, {{name|customer, {name|customer}, {name|customer}}, name|customer}}, and {{name|customer}.
Customize date format
You can display your date-type default and custom attributes, such as {{birthday}}, {{membership_date}}, and {{insurance_expiry_date}} in different formats. Below is the sample formatting syntax for the email design:
Wrong example: {custom_field|fallbackvalue} ❌
Correct example: {custom_field|time-format=YYYY-MM-DD hh:mm:ss}} ✅
Correct example: {{custom_field|time-format=YYYY-MM-DD hh:mm:ss|fallbackvalue}} ✅
{{attribute_name|time-format=DD-MM-YYYY}}
You can customize your date formatting with spaces, dashes, hyphens, etc. Once you insert your attribute representing the date, the date value of this attribute will be displayed in a human-readable format. You can use this for any date-type attribute like birthday, registration date, release date, etc. Below you can see some examples:
{{custom_field|time-format=DD-MMM-YYYY}}
{{custom_field|time-format=MMMM/DD/YY}}
{{custom_field|time-format=MMMM/D/YY}}
The date parameters in the example above have different formats like DD, D, YY, and YYYY. When you use the first example as your attribute in your email, it can be converted to a user as 07-Mar-2023, while the second as March/07/23.
You can customize your attribute values using the following formats:
| Formatting | Description | Example |
|---|---|---|
| DD | Day as number with zero | 07 |
| D | Day as number without zero | 7 |
| M | Month as number with zero | 09 |
| MM | Month as number without zero | 9 |
| MMM | Month as text in short format | Mar |
| MMMM | Month as text in full format | March |
| YY | Last two digits of the year | 23 |
| YYYY | Year as number in full format | 2023 |
You can also use custom time formats with different time parameters. Below you can see some examples:
{{custom_field|time-format=hh:mm:ss}}
{{custom_field|time-format=hh:mm}}
{{custom_field|time-format=HH:mm:ss}}
The time parameters in the example above have different formats like hh, HH, and mm. You can customize your attribute values using the following different formats:
| H, HH, h, hh | Hour |
| M, MM, m, mm | Minute |
| s, ss | Second |
| A, a | PM and AM |
You can use both date and time formats inside the same dynamic content in both your email campaigns and Architect email campaigns. For example, the {{custom_field|time-format=YYYY-MM-DD hh:mm:ss A}} attribute can be converted as 2023-04-11 15:21:13 PM.
Below you can see all supported date and time formats. The results are created based on 2023-04-11T15:21:13Z.
Date and Time Formats
| Date and time format | Result |
|---|---|
| M/DD/YYYY | 4/11/2023 |
| MM/DD/YYYY | 04/11/2023 |
| MMM/DD/YYYY | Apr/11/2023 |
| MMMM/DD/YYYY | April/11/2023 |
| M/DD/YY | 4/11/23 |
| MM/DD/YY | 04/11/23 |
| MMM/DD/YY | Apr/11/23 |
| MMMM/DD/YY | April/11/23 |
| DD/M/YYYY | 11/4/2023 |
| DD/MM/YYYY | 11/04/2023 |
| DD/MMM/YYYY | 11/Apr/2023 |
| DD/MMMM/YYYY | 11/April/2023 |
| DD/M/YY | 11/4/23 |
| DD/MM/YY | 11/04/23 |
| DD/MMM/YY | 11/Apr/23 |
| DD/MMMM/YY | 11/April/23 |
| DD-M-YYYY | 11-4-2023 |
| DD-MM-YYYY | 11-04-2023 |
| DD-MMM-YYYY | 11-Apr-2023 |
| DD-MMMM-YYYY | 11-April-2023 |
| DD-MM-YY | 11-04-23 |
| YYYY-M-DD | 2023-4-11 |
| YYYY-MM-DD | 2023-04-11 |
| YYYY-MMM-DD | 2023-Apr-11 |
| YYYY-MMMM-DD | 2023-April-11 |
| M/D/YYYY | 4/11/2023 |
| MM/D/YYYY | 04/11/2023 |
| MMM/D/YYYY | Apr/11/2023 |
| MMMM/D/YYYY | April/11/2023 |
| M/D/YY | 4/11/23 |
| MM/D/YY | 04/11/23 |
| MMM/D/YY | Apr/11/23 |
| MMMM/D/YY | April/11/23 |
| D/M/YYYY | 11/4/2023 |
| D/MM/YYYY | 11/04/2023 |
| D/MMM/YYYY | 11/Apr/2023 |
| D/MMMM/YYYY | 11/April/2023 |
| D/M/YY | 11/4/23 |
| D/MM/YY | 11/04/23 |
| D/MMM/YY | 11/Apr/23 |
| D/MMMM/YY | 11/April/23 |
| M-D-YY | 4-11-23 |
| MM-D-YY | 04-11-23 |
| MMM-D-YY | Apr-11-23 |
| MMMM-D-YY | April-11-23 |
| D-M-YYYY | 11-4-2023 |
| D-MM-YYYY | 11-04-2023 |
| D-MMM-YYYY | 11-Apr-2023 |
| D-MMMM-YYYY | 11-April-2023 |
| D-M-YY | 11-4-23 |
| D-MM-YY | 11-04-23 |
| D-MMM-YY | 11-Apr-23 |
| D-MMMM-YY | 11-April-23 |
| MMM D, YYYY | Apr 11, 2023 |
| MMMM D, YYYY | April 11, 2023 |
| YYYY-MM-DD hh:mm:ss | 11/04/2023 03:21:13 |
| hh:mm:ss | 03:21:13 |
| YYYY-MM-DD hh:mm:ss A | 2023-04-11 15:21:13 PM |
| YYYY-MM-DD hh:mm:ss a | 2023-04-11 15:21:13 pm |
| H:m:s | 15:21:13 |
| H:m:ss | 15:21:13 |
| HH:m:ss | 15:21:13 |
| HH:m:ss | 15:21:13 |
| h:m:s | 03:21:13 |
| h:m:ss | 03:21:13 |
| hh:m:s | 03:21:13 |
| hh:m:ss | 03:21:13 |
| H:mm:s | 15:21:13 |
| H:mm:ss | 15:21:13 |
| HH:mm:s | 15:21:13 |
| HH:mm:ss | 15:21:13 |
| h:mm:s | 03:21:13 |
| h:mm:ss | 03:21:13 |
| hh:mm:s | 03:21:13 |
| hh:mm:ss | 03:21:13 |
| D MMM | 11 Apr |
| D MMMM | 11 April |
Once you complete designing your email, make sure to send a test email to yourself to make sure your attributes function as you set them.
Customize number format
You can add a separator between the digits of your number-type default and custom attributes, such as {{price}}, {{amount}}, {{phone_number}}, etc., to customize the format of the dynamic content in your email and make it easier for your recipients to read the numbers.
If you customize the number format for any dynamic attribute, you cannot add a fallback value to that attribute.
You can use a comma (,), a dot (.), a space ( ), and an apostrophe (') as thousand and decimal separators.
Syntax example: {{dynamic_attribute|number-format=thousand_separator,decimal_separator}}
- thousand_separator: Specifies the character used to separate thousands.
- decimal_separator: Specifies the character used to separate decimals.
Examples
Below, you can see some examples of the usage of the thousand and decimal separators.
| Separator | Syntax | Example |
|---|---|---|
| Dot as thousand Comma as decimal | {{last_purchase_amount|number-format=dot,comma}} | 1.234.567.890,00 |
| Comma as thousand Dot as decimal | {{last_purchase_amount|number-format=comma,dot}} | 1,234,567,890.00 |
| Apostrophe as thousand Comma as decimal | {{last_purchase_amount|number-format=apostrophe,comma}} | 1'234'567'890,00 |
| Space as thousand Dot as decimal | {{last_purchase_amount|number-format=space,dot}} | 1 234 567 890.00 |
| Dot as thousand Comma as decimal (integer) | {{last_purchase_amount|number-format=dot,comma}} | 1.234.567.890,00 |
| Dot as thousand Dot as decimal (integer) | {{last_purchase_amount|number-format=dot,dot}} | 1.234.567.890.00 |
| Apostrophe as thousand Dot as decimal | {{last_purchase_amount|number-format=apostrophe,dot}} | 1'234'567'890.00 |
| Dot as thousand Empty decimal | {{last_purchase_amount|number-format=dot}} | 1.234.567.890.00 |
| Comma as thousand Empty decimal | {{last_purchase_amount|number-format=comma}} | 1,234,567,890.00 |
| Apostrophe as thousand Empty decimal | {{last_purchase_amount|number-format=apostrophe}} | 1'234'567'890.00 |
| Space as thousand Empty decimal | {{last_purchase_amount|number-format=space}} | 1 234 567 890.00 |
| Empty thousand Comma as decimal | {{last_purchase_amount|number-format=,comma}} | 1234567890,00 |
| Empty thousand Dot as decimal | {{last_purchase_amount|number-format=,dot}} | 1234567890.00 |
| Empty thousand Apostrophe as decimal | {{last_purchase_amount|number-format=,apostrophe}} | 1234567890'00 |
| Empty thousand Space as decimal | {{last_purchase_amount|number-format=,space}} | 1234567890 00 |
Add dynamic URLs
You can add dynamic URLs inside your campaign if:
- Your URL is in the https://yourcompany.com/ID format,
- The ID or parameter at the end of the URL is an attribute of each user (e.g., name, ID, code, etc.).
To add your dynamic URL that meets the requirements above:
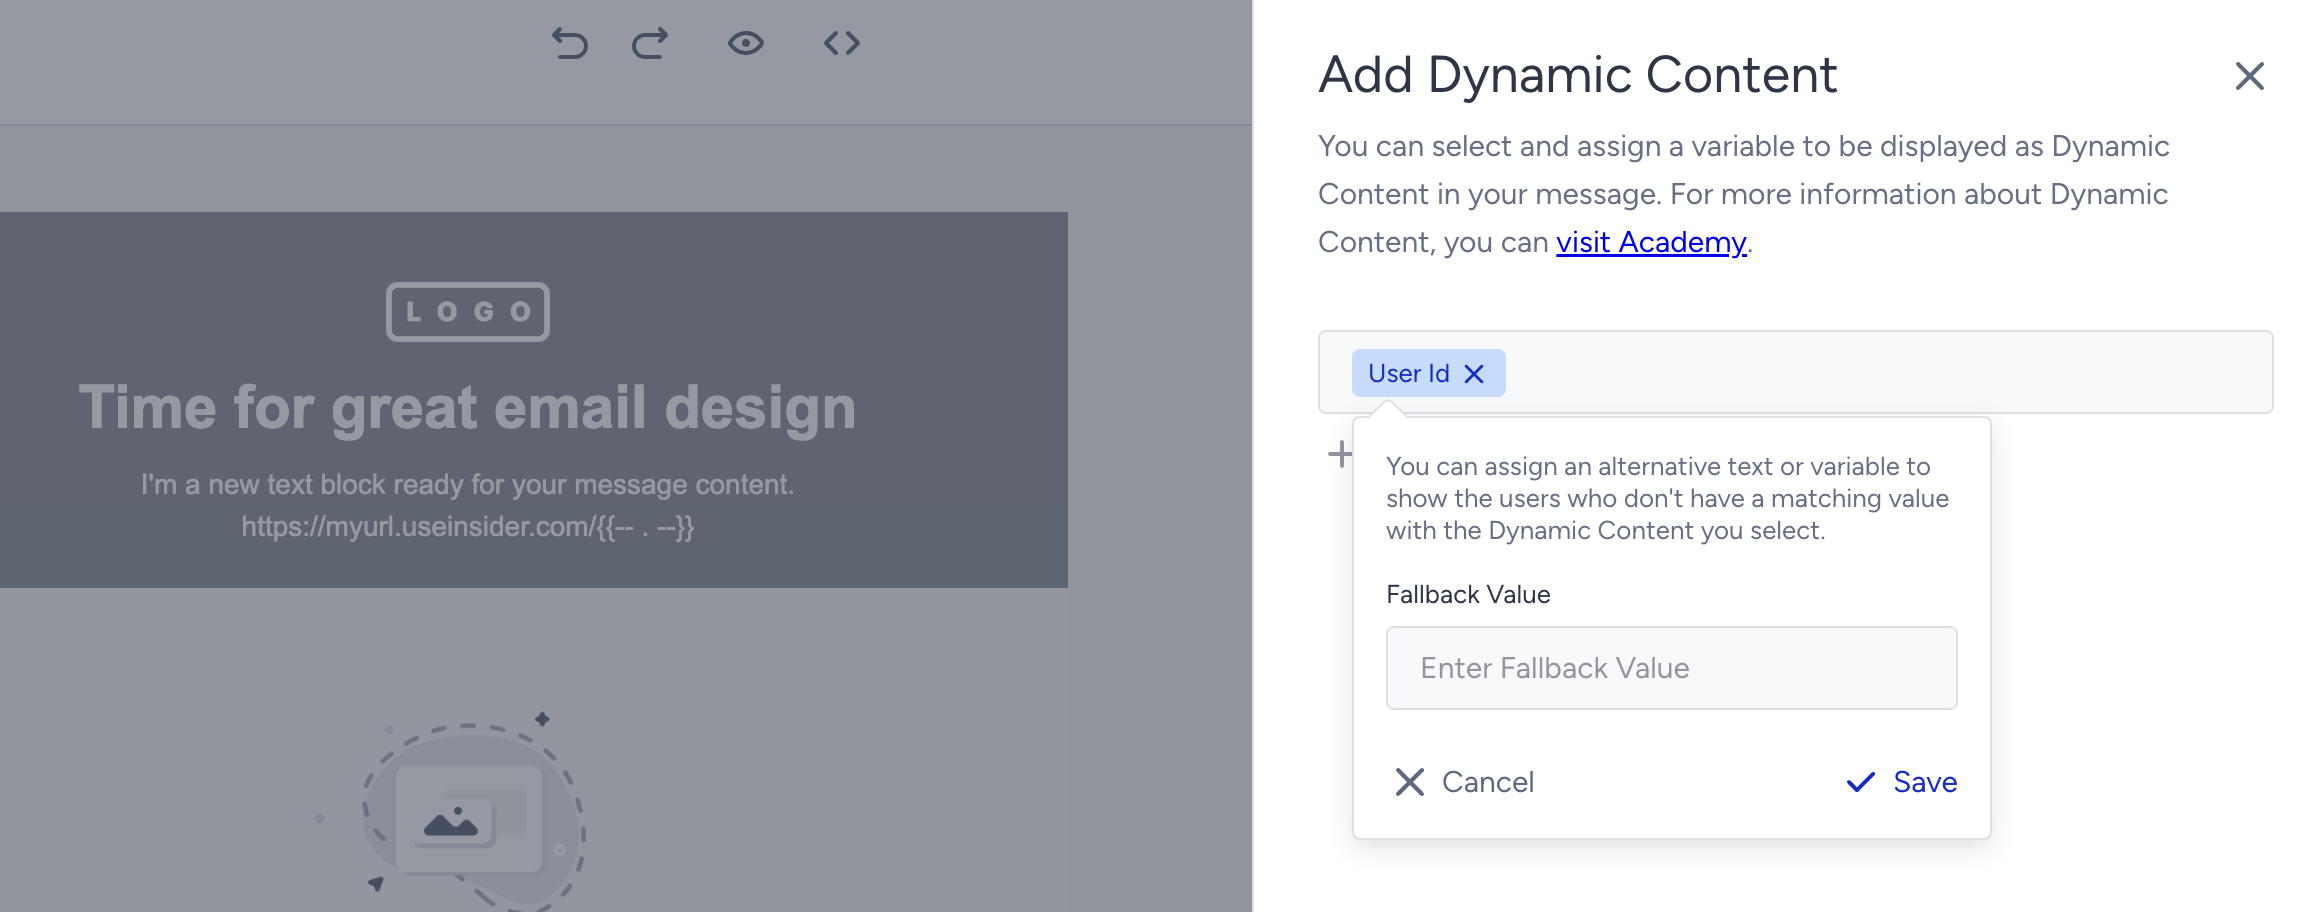
1. Add the first fixed part of your URL as a text, and click the Dynamic Content button on the toolbar.
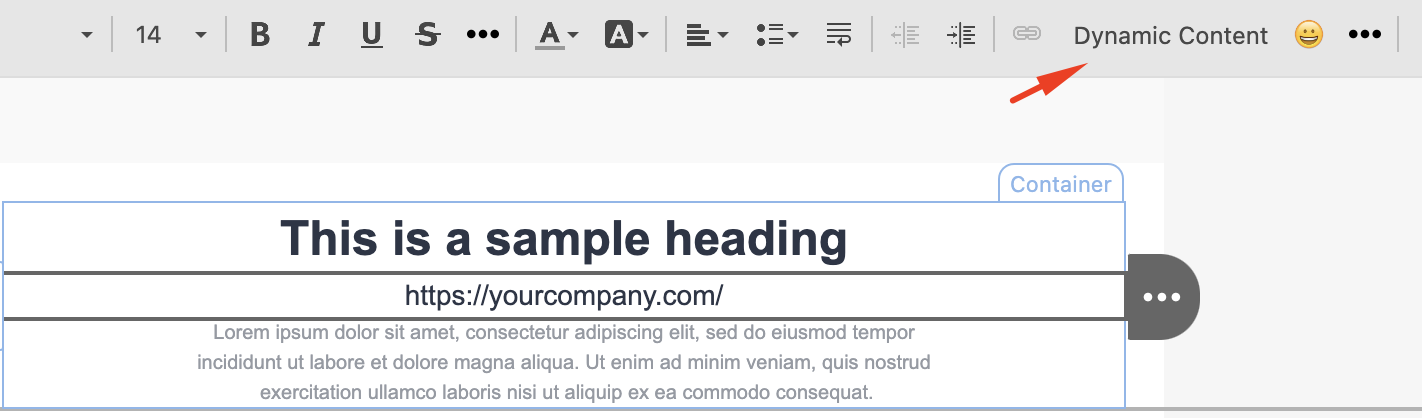
2. Select the user attribute that will appear at the end of the URL to redirect users to their own page, and click the Add button at the bottom of the window.
You can assign a fallback after selecting the dynamic content, or you can add it directly inside the attribute as in attribute|fallbackValue and replace “fallbackValue” with your value.
Once the attribute is added to the end of the URL, the link will appear as below. The following example displays the name attribute added to a URL. When you test your campaign, the attribute will be replaced with the value of your name attribute if any. E.g. https://yourcompany.com/johndoe.

You can also add a dynamic url to an image, button, or custom text with the same URL structure in the related input field.

Make sure to test that the dynamic content in the URL matches the user attribute inside the panel. If your page format is https://yourcompany.com/surname and you use the name variable instead, the link will not redirect to the correct page and display an error. To avoid such cases, first check the dynamic variables separately in the email, then use them in the URL.
Add dynamic images
You can add dynamic images to your email campaigns that change according to your users based on their variables such as last visited product image, last abandoned product image, etc.
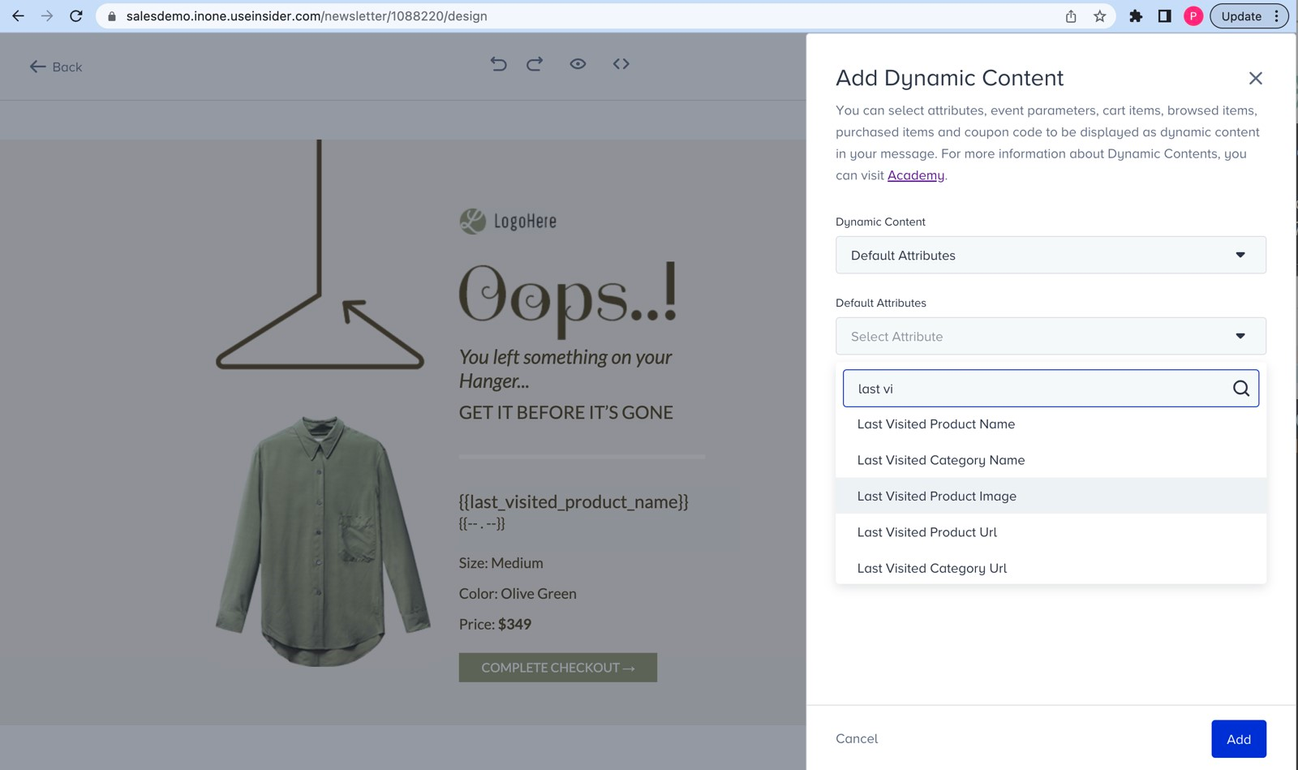
To use dynamic image content, ensure your users have values for the respective attributes. If they do not, you should add these attributes to your users.
1. Once you have image attributes assigned to your users, you can search them in the dynamic content dropdown.
2. After the syntax appears inside your email design, copy and paste it as an image path of an image block.
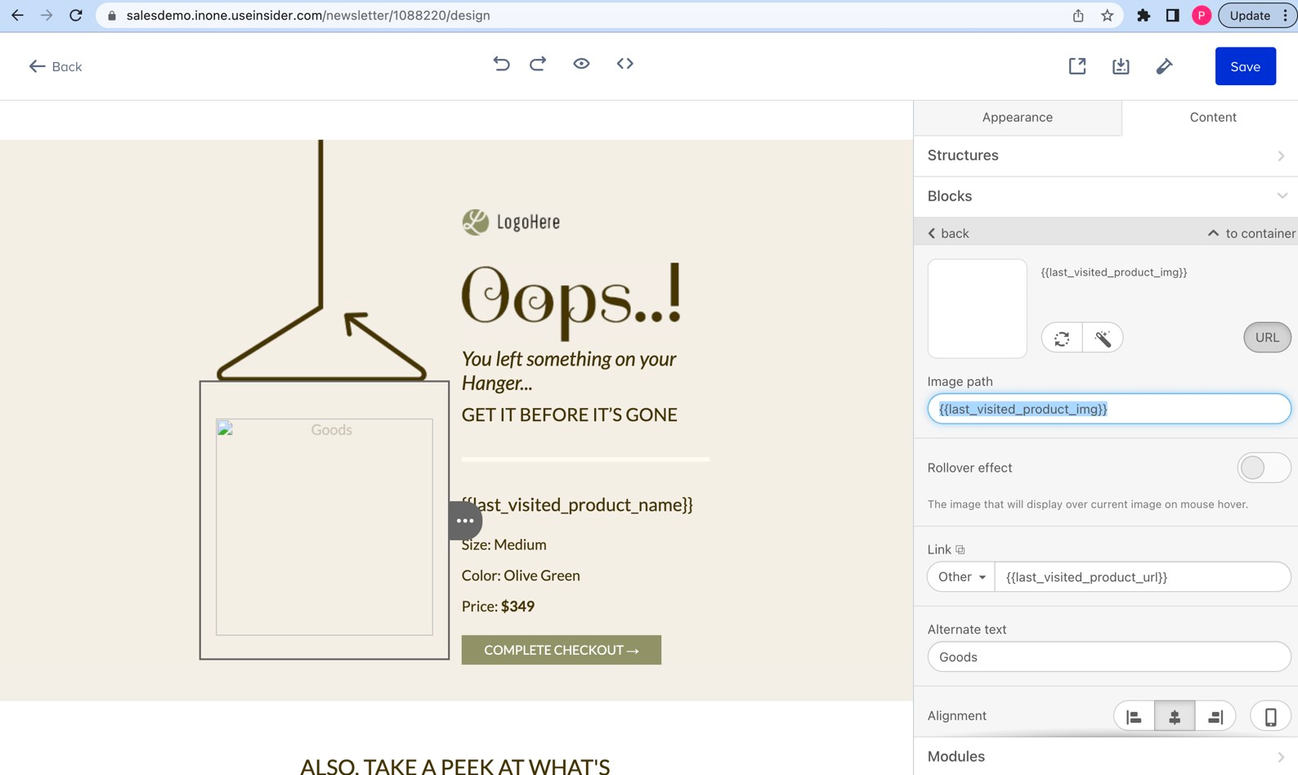
After this, the image will appear as above and can not be seen since it is dynamic content. You should send a test email to check how it works.
Video: Personalizing Messages with Dynamic Content
The video below explains how to personalize messages with dynamic content.
{% now "2006-01-02" %}
{% now "02.01.2006" %}
{% now "02 Jan 2006" %}
{% now "02 January 2006" %}
{% now "2006 Jan 02" %}
{% now "Jan 02 2006" %}