You need to establish the locales or stores for product dispatch before initiating the catalog integration. To facilitate this, navigate to Components > Product Catalog Management > Catalog Settings page. Here, you can view and manage all the locales and stores that have been established.
In this article, you can find answers to the following questions:
- How can I create a new locale and store?
- How can I validate a locale and store?
- How can I launch a Smart Recommender campaign with locale and store?
- What are the limitations of the locale?
Create a new locale and store
To create a new locale or store,
1. Click the + Create Locale button.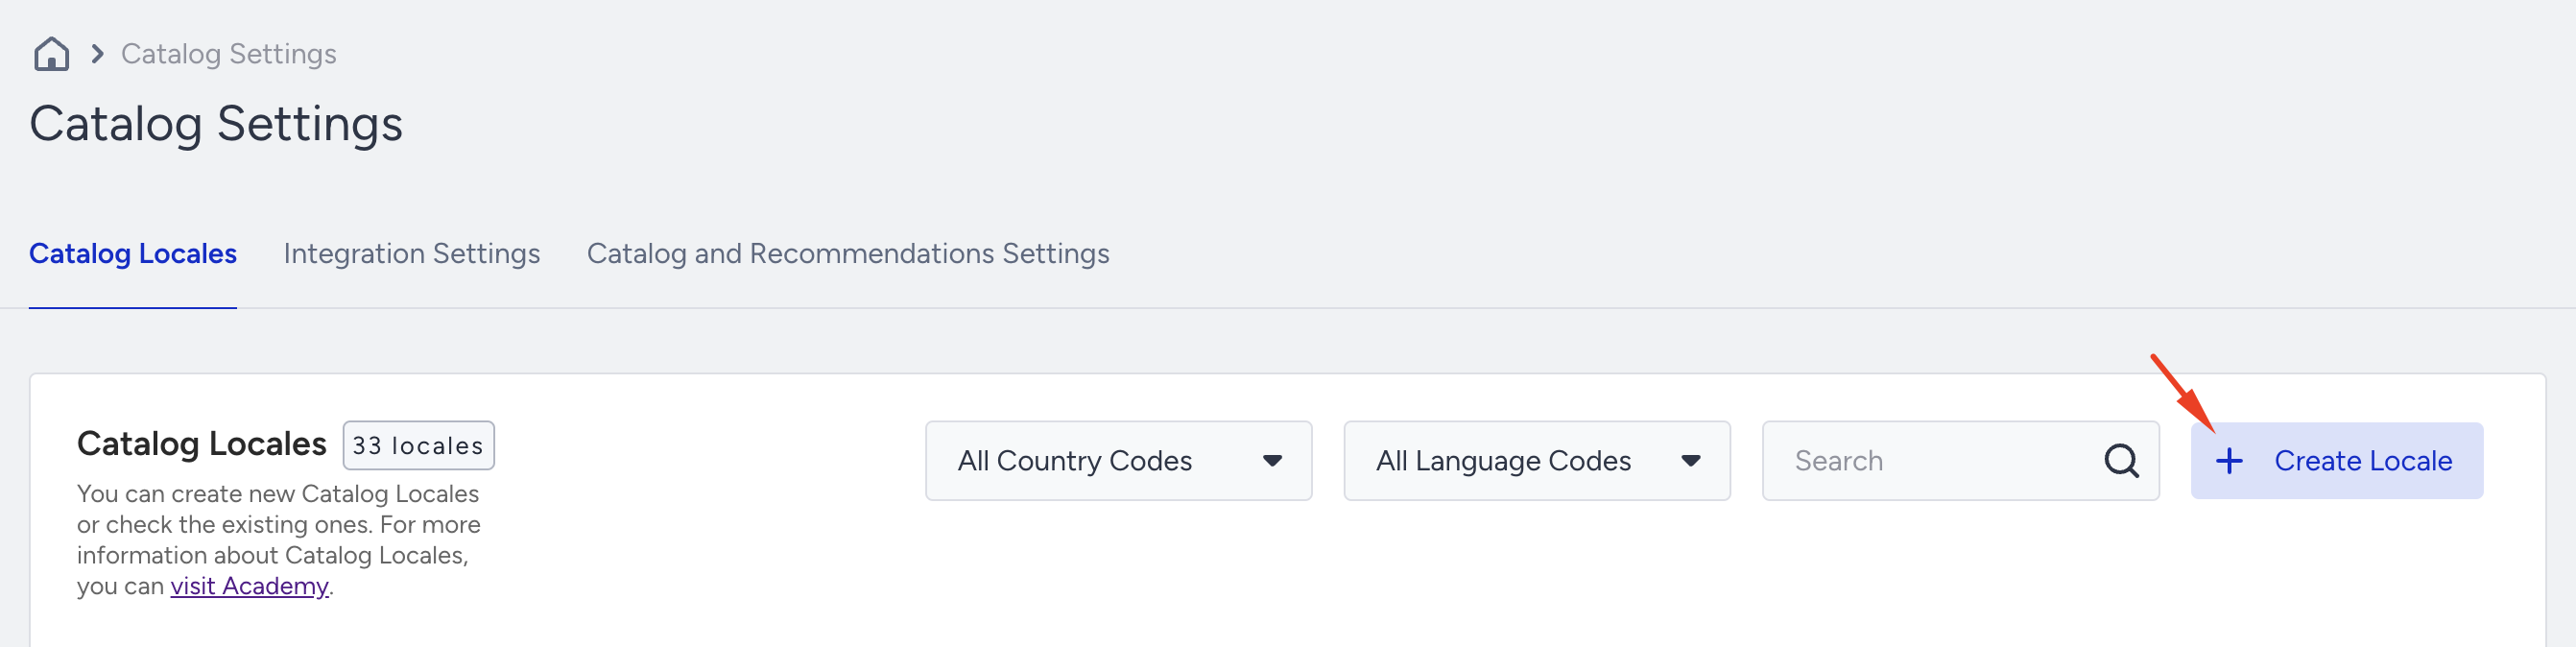
2. You can:
- Select a value from the Locales list that is not among your existing locales, and leave the store field empty to create a new locale from scratch.
- Choose a locale that is not among your locales and fill in the store value to create a new locale and its associated store.
- Select one of your existing locales and create a new store under it by entering a store value.
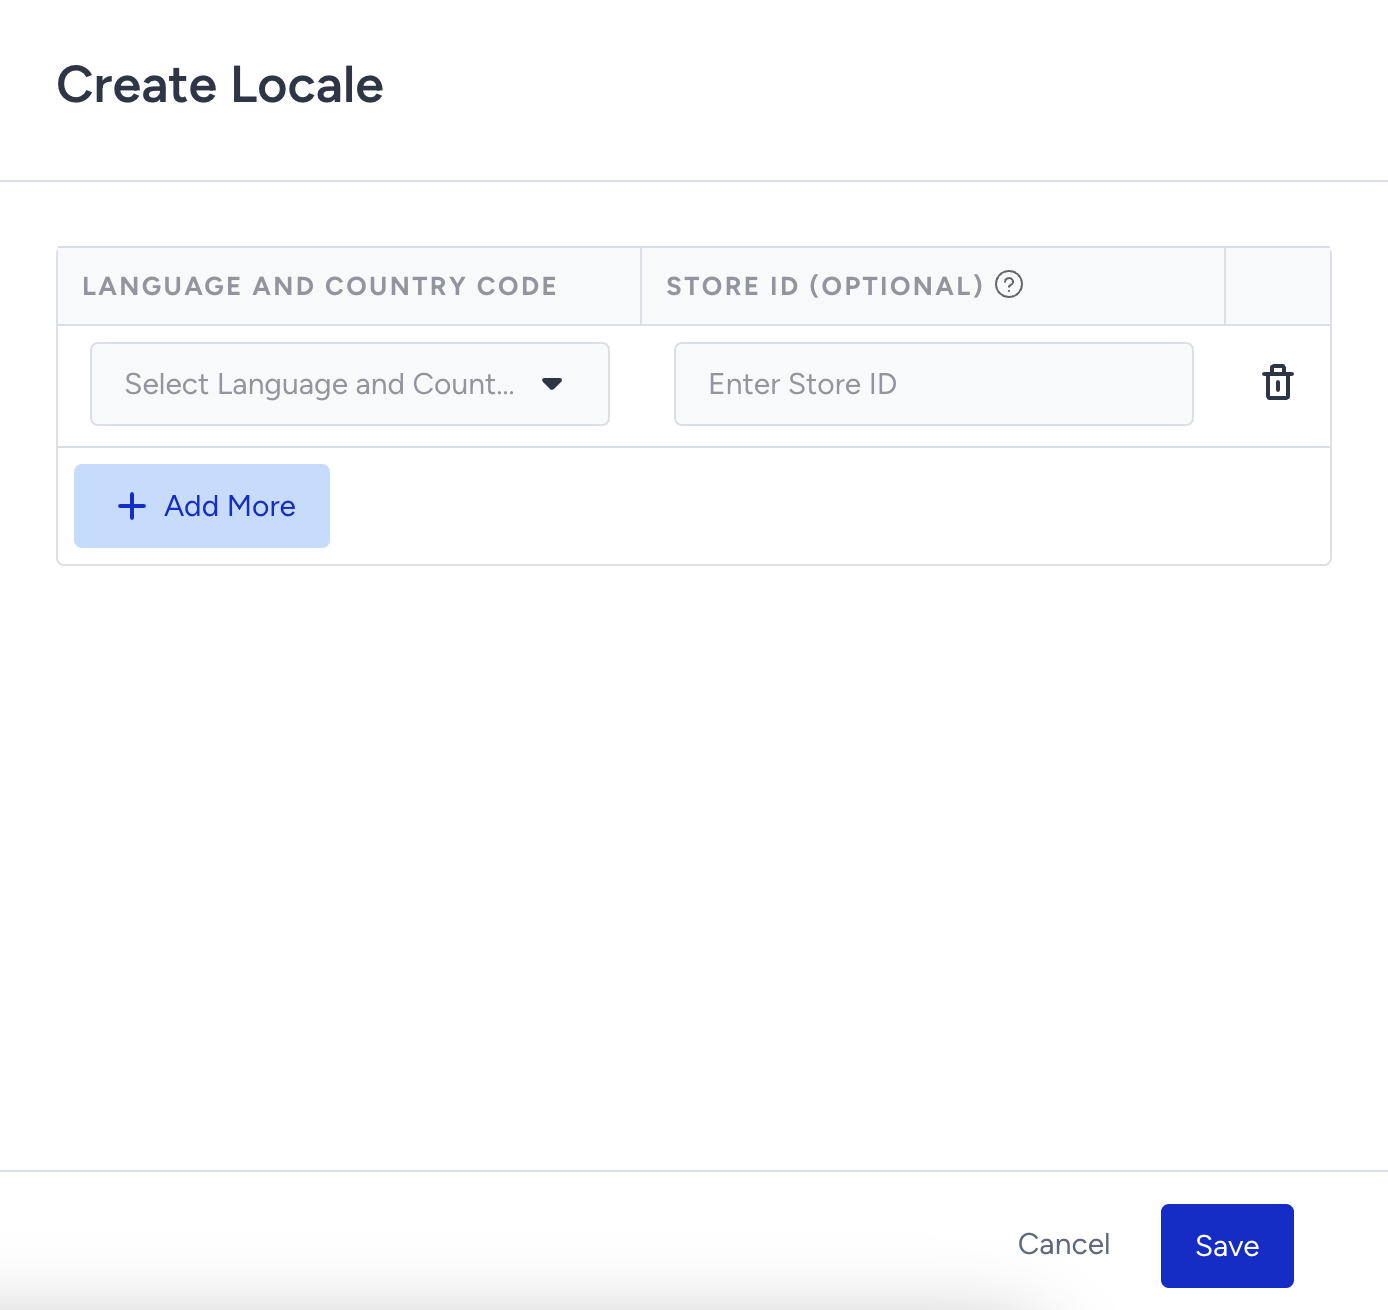
3. Click the Save button to save your changes.
Validate a locate and store
Your catalog information for a locale must exist in the product catalog database. Locale validations within the Product Catalog Integration are as follows:
- Clickstream integrations: The locale in the hit object must be created in the catalog settings to perform product insert and update operations.
- Catalog API integrations: The locale in the payload must be created in the catalog settings to perform product insert and update operations.
- XML integrations: To perform product insert and update operations, the page for Product Catalog Integration must specify the locale or store for which the XML is created.
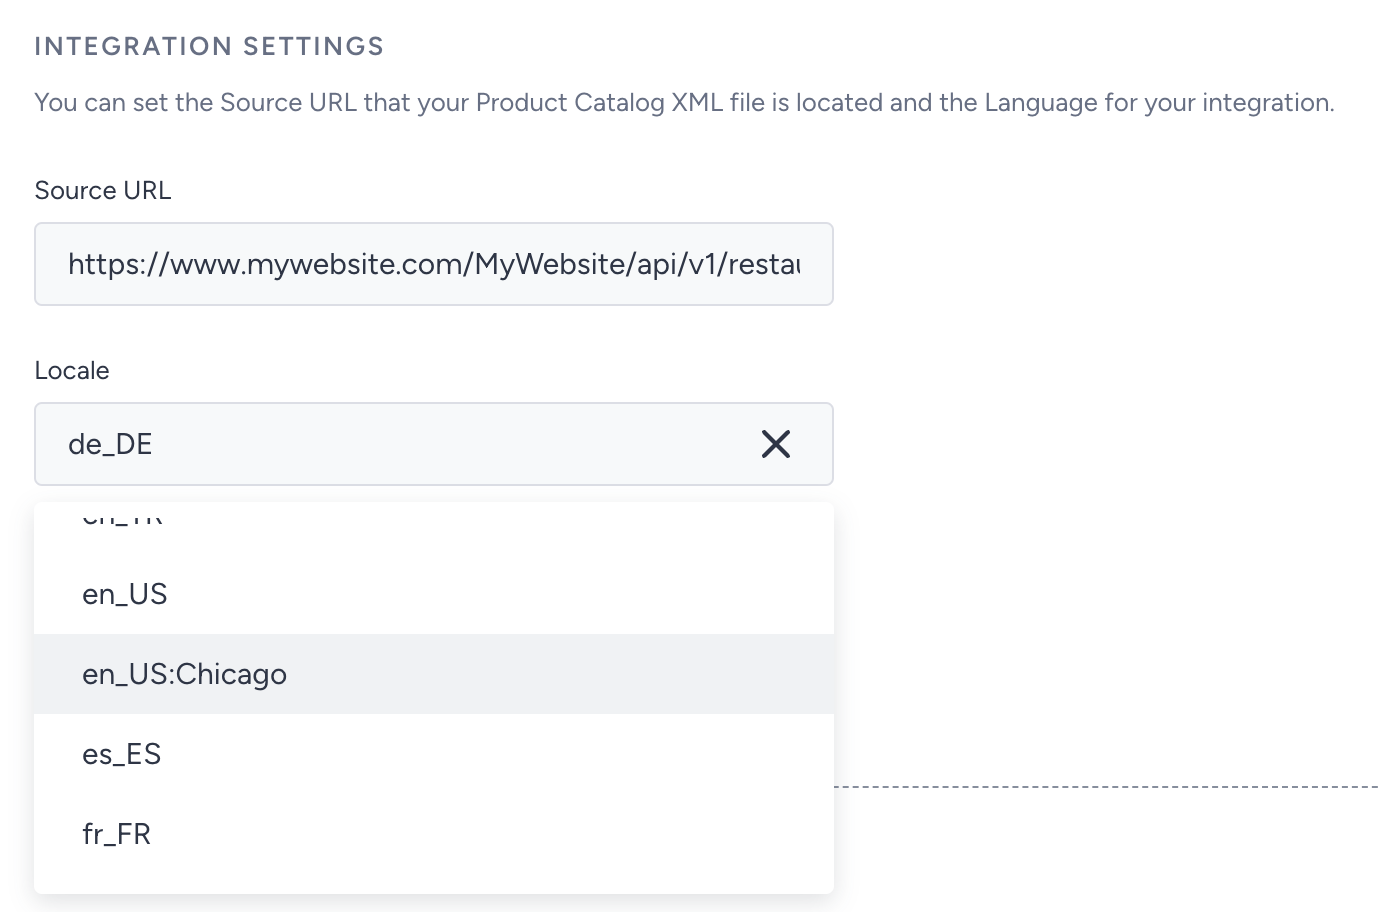
For Clickstream and Catalog API integrations, no action is required other than creating locales and stores. However, for XML Integration, you should follow the steps below:
In the Integration Settings screen, the Locale box indicates for which locale or store the added XML is intended. You can create a mapping for both locale and store. For example:
- To map to the tr_TR locale, select "tr_TR" from the dropdown.
- To map to the Ankara store within the tr_TR locale, select "tr_TR" from the dropdown.
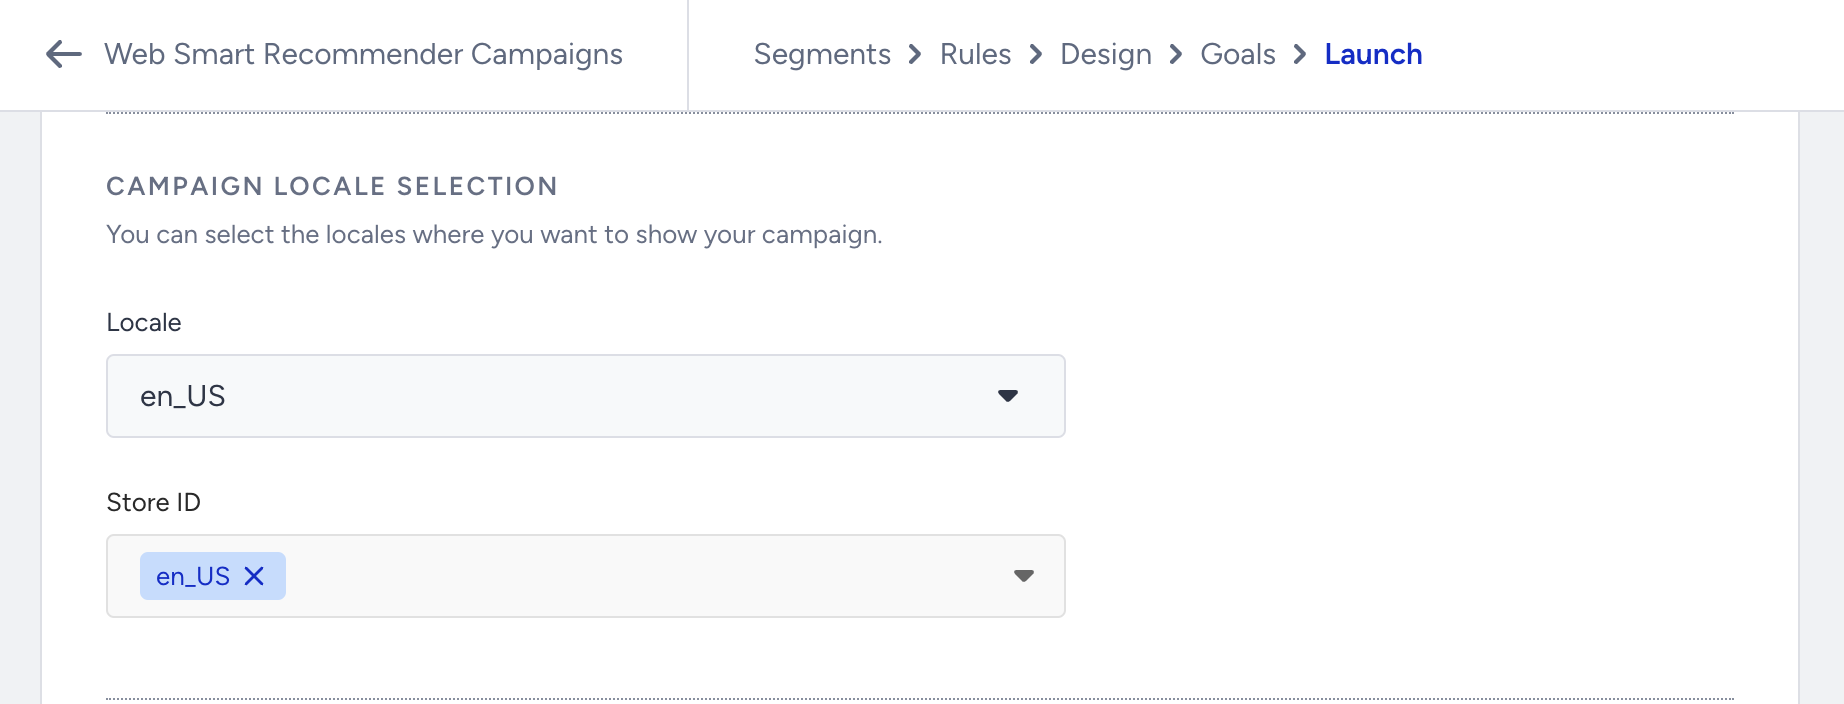
Launch a campaign with locales and stores
In the Campaign Launch screen, thanks to the locale and store dropdown, you can:
- Create campaigns at the single-store level
- Create campaigns for specific stores under a particular locale.
You can also refer to the video below to learn better about the Locale:
Limitations
- Newly created locales must adhere to ISO standards.
- Product catalog insert and update operations cannot be performed on locales not created in the Catalog Settings.
- Only one XML integration can be done for each locale or store.