You cannot make any changes to External Platform Integrations without having either an Administrator or an Editor with PII access in InOne. Refer to User Roles for further information.
You can create only one Insider One to Snowflake integration per Insider One account.
Snowflake is your cloud-based data warehouse, offering a secure and scalable platform to store and manage all your organizational data. This includes customer information, website interactions, purchase history, and more. With its performance and storage capacity, Snowflake empowers you to analyze massive datasets and gain valuable insights.
In this article, you can find answers to the following questions:
Use Cases
360-Degree Customer View
Integrate campaign data on customers with additional business and consumer information within Snowflake to understand your customers fully.
Audience Segmentation
Unlock more granular segmentation by combining Insider One's channel engagement and user data collected from 12+ channels or cross-channel journeys with your existing data on Snowflake.
Contact Data Enrichment
Supplement existing contact profiles by adding details from marketing interactions and campaign involvement.
How can I configure Snowflake as a destination?
Integrating Snowflake as a destination enables you to pull data from Insider One to Snowflake, which will help you maximize the impact of your campaigns and strategies. You can follow the steps below to start setting up Insider One as a destination:
1. Navigate to InOne > Components > Integrations > External Integrations. .png) 2. Select the Snowflake from the list.
2. Select the Snowflake from the list. 
3. Select the integration type as Destination. This means Snowflake will be the Destination. Click the Save button to proceed.
4. Fill in your:
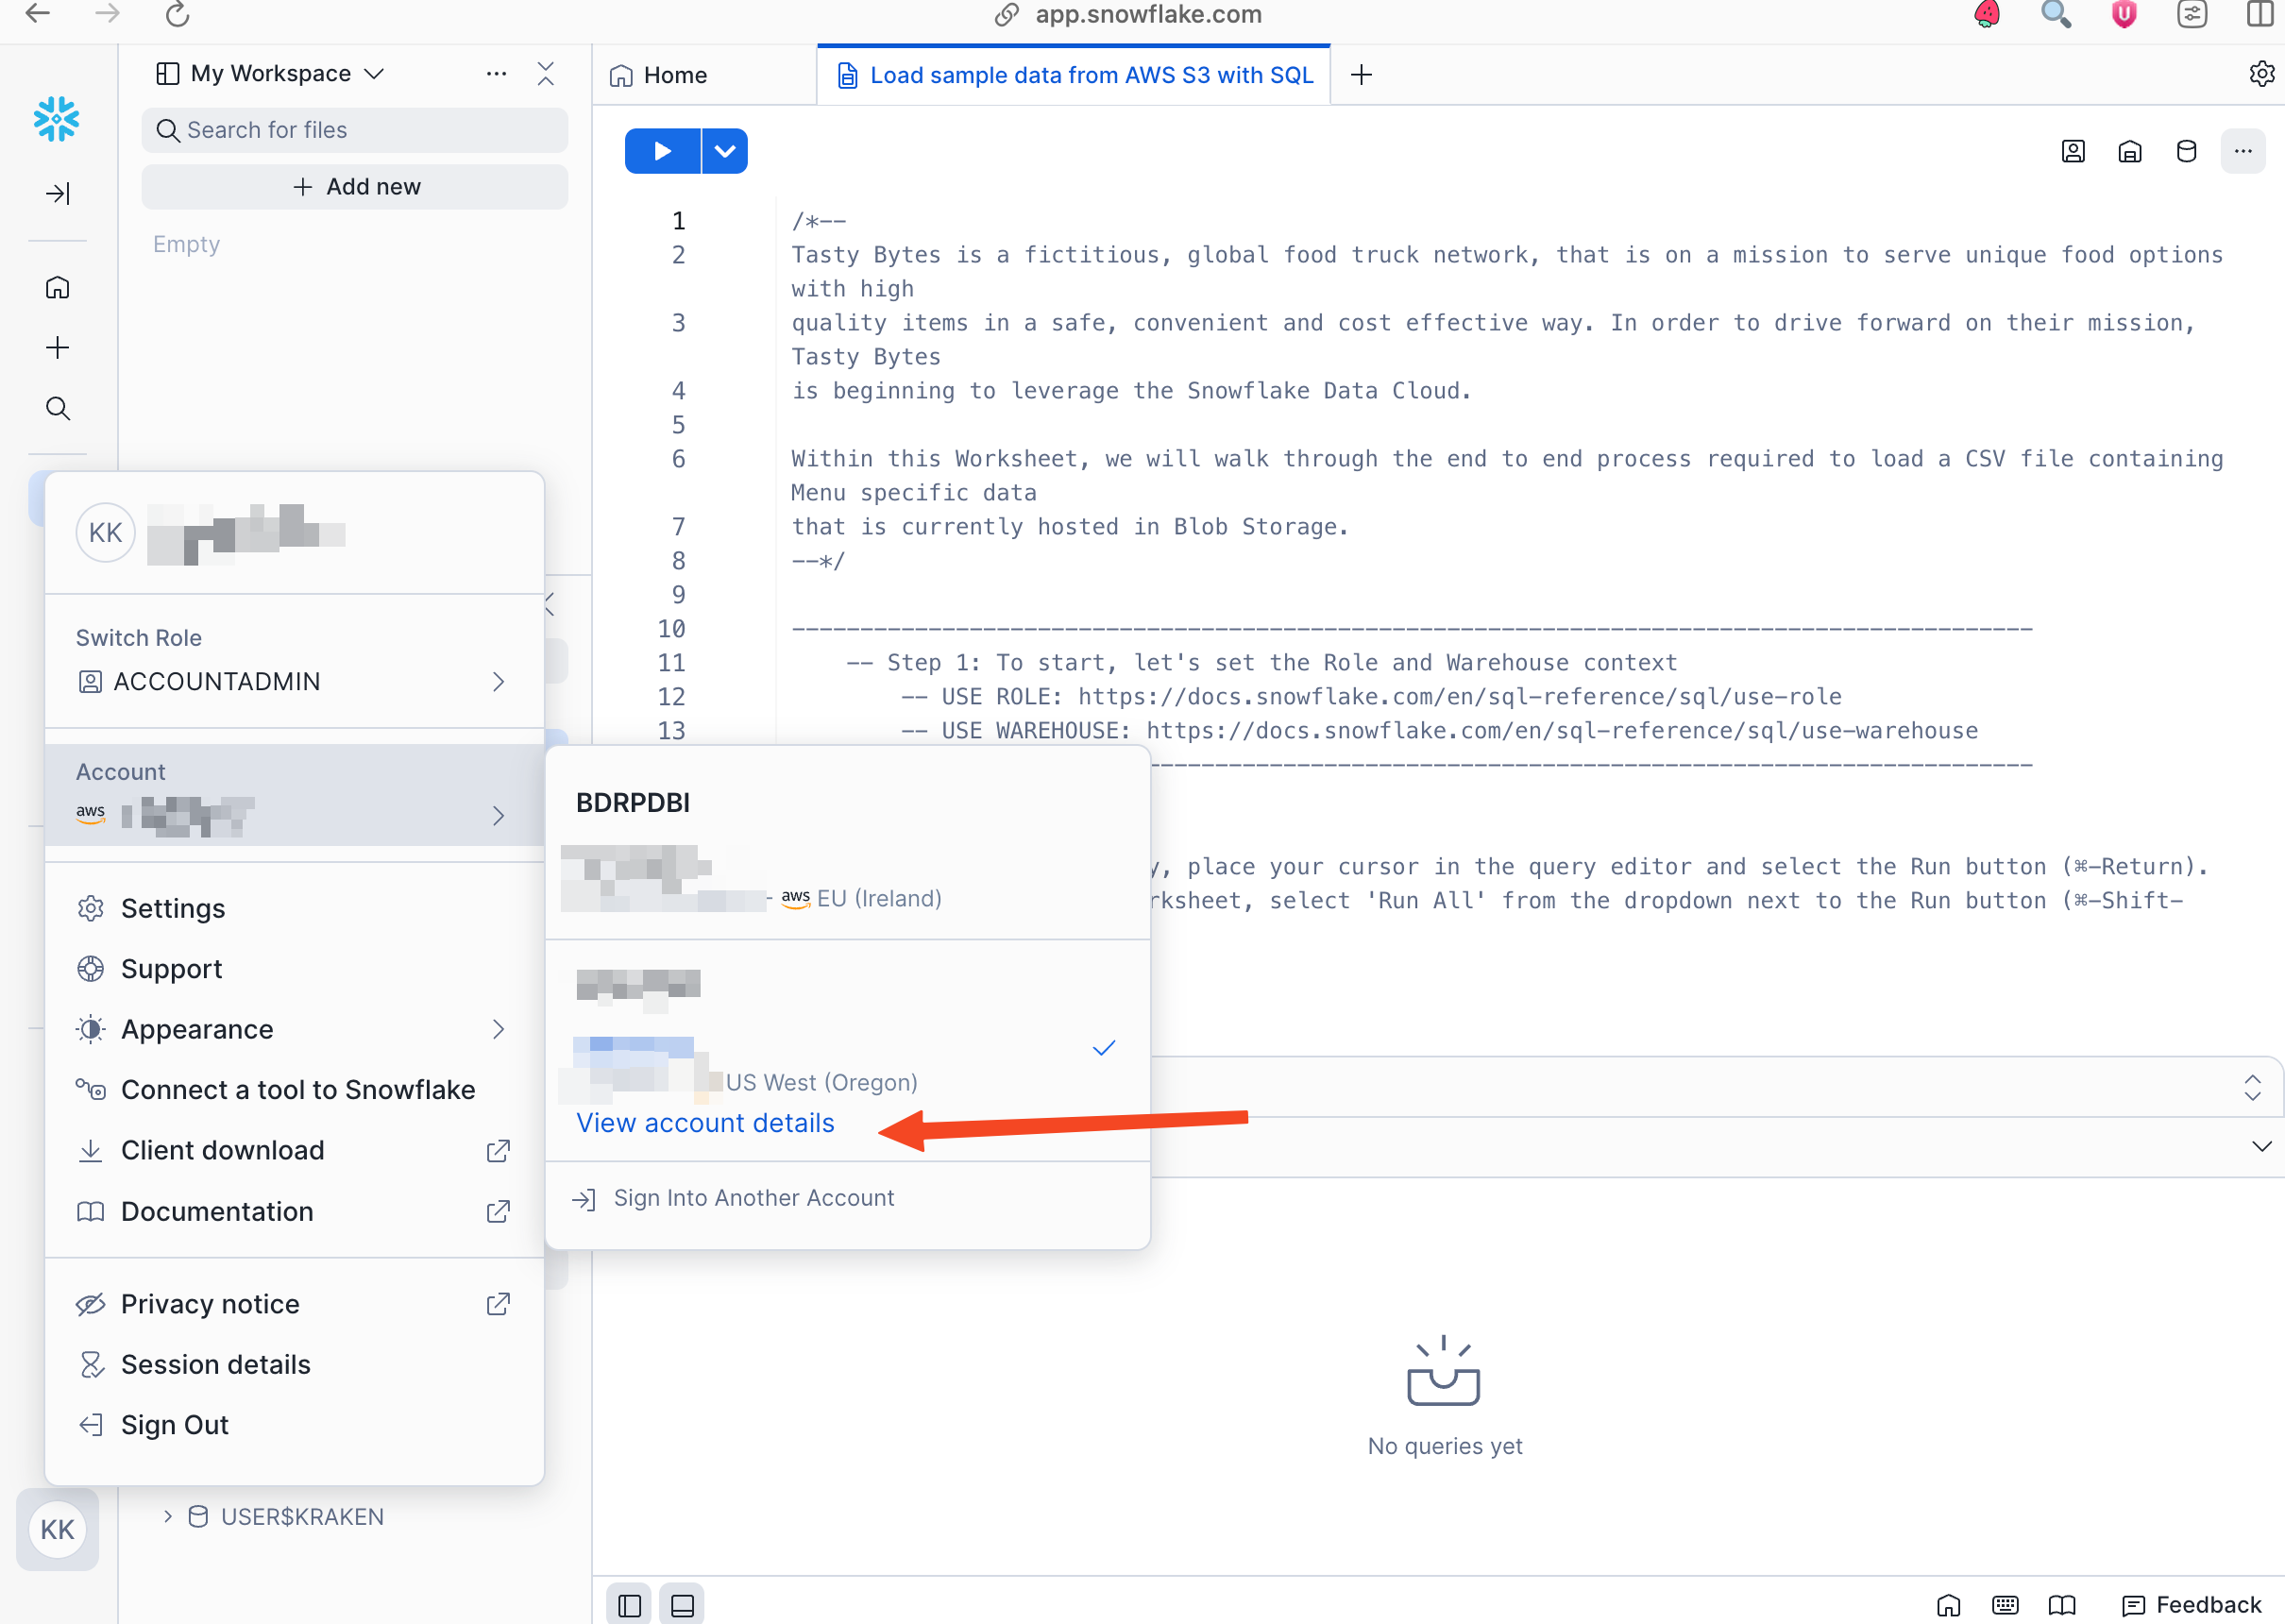
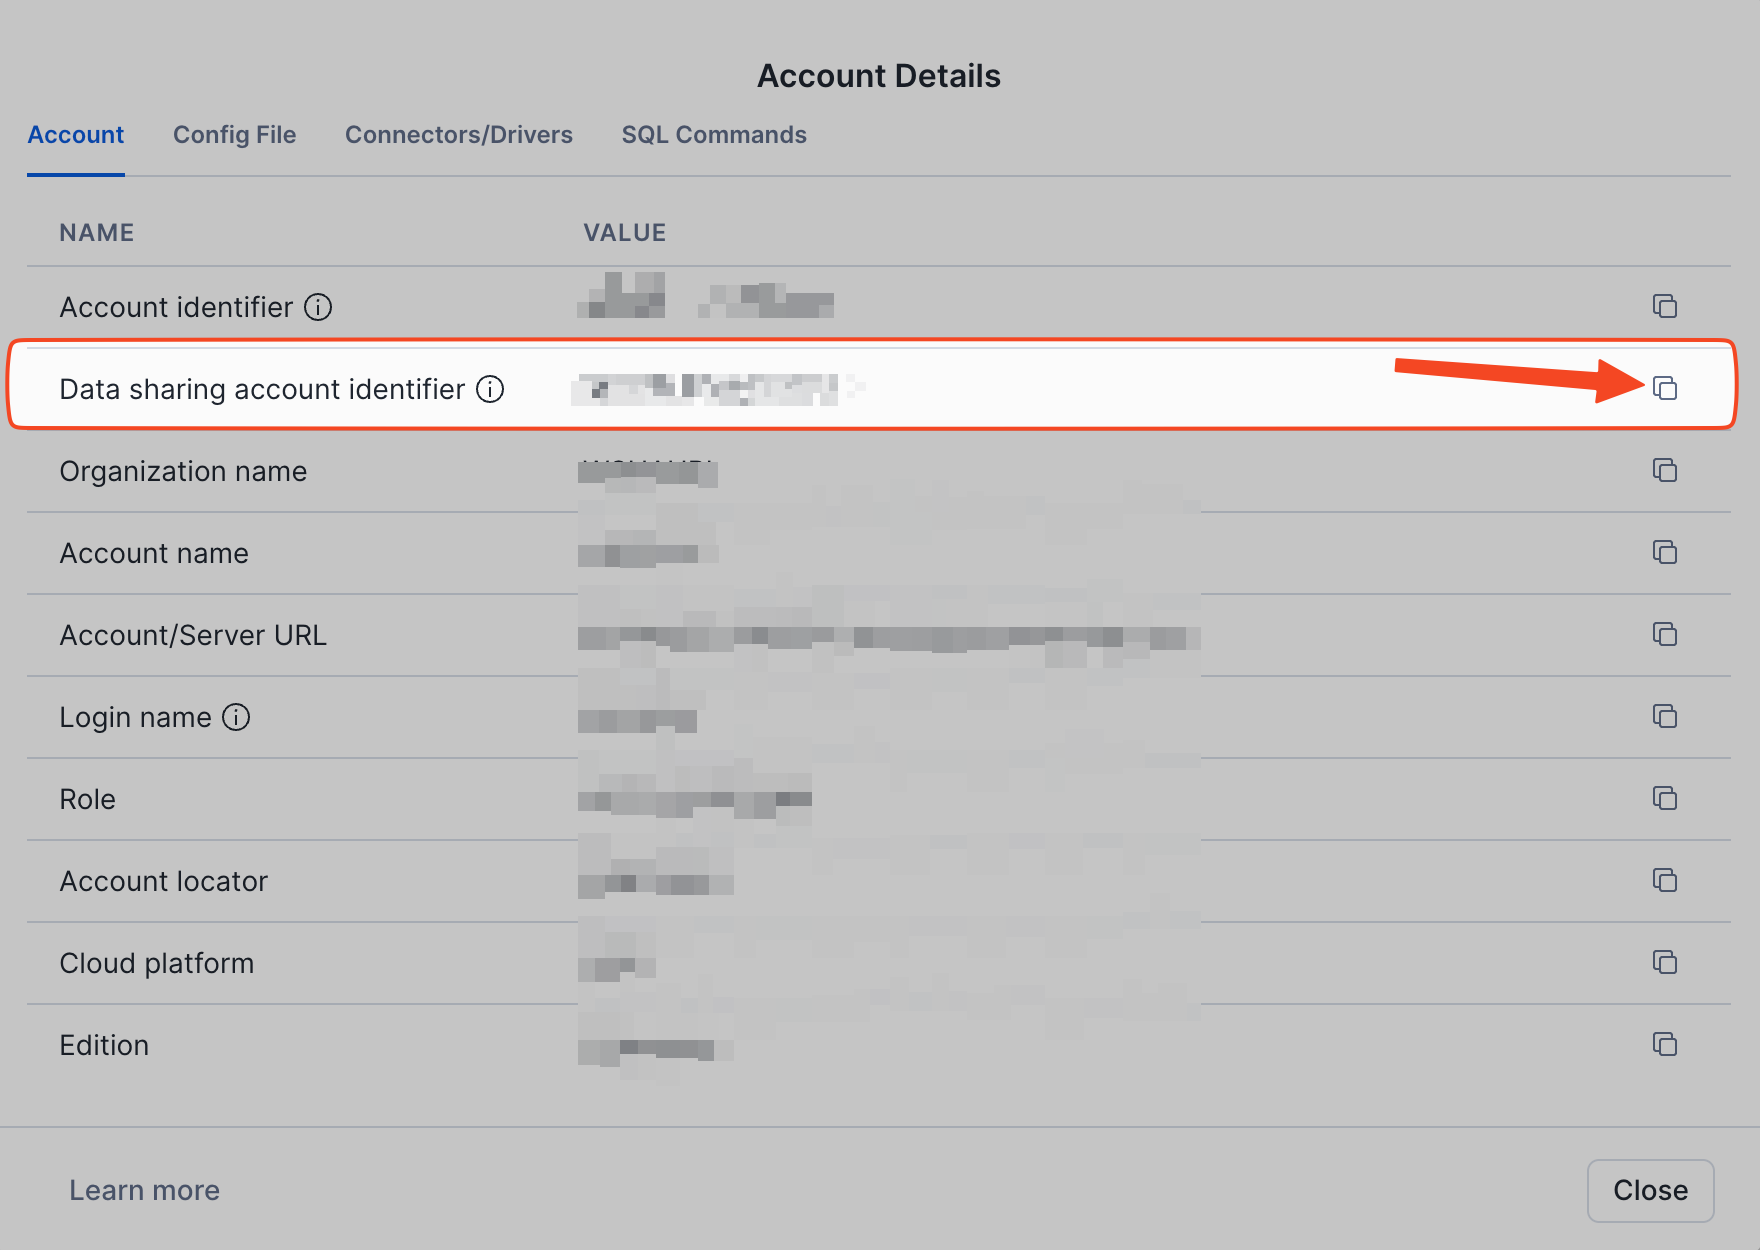
Your Snowflake Account ID. You can refer to Account Identifiers to learn how to obtain your account identifier.
Insider One Snowflake Share Name (provided by Insider)
Insider One Snowflake Account ID (provided by Insider)
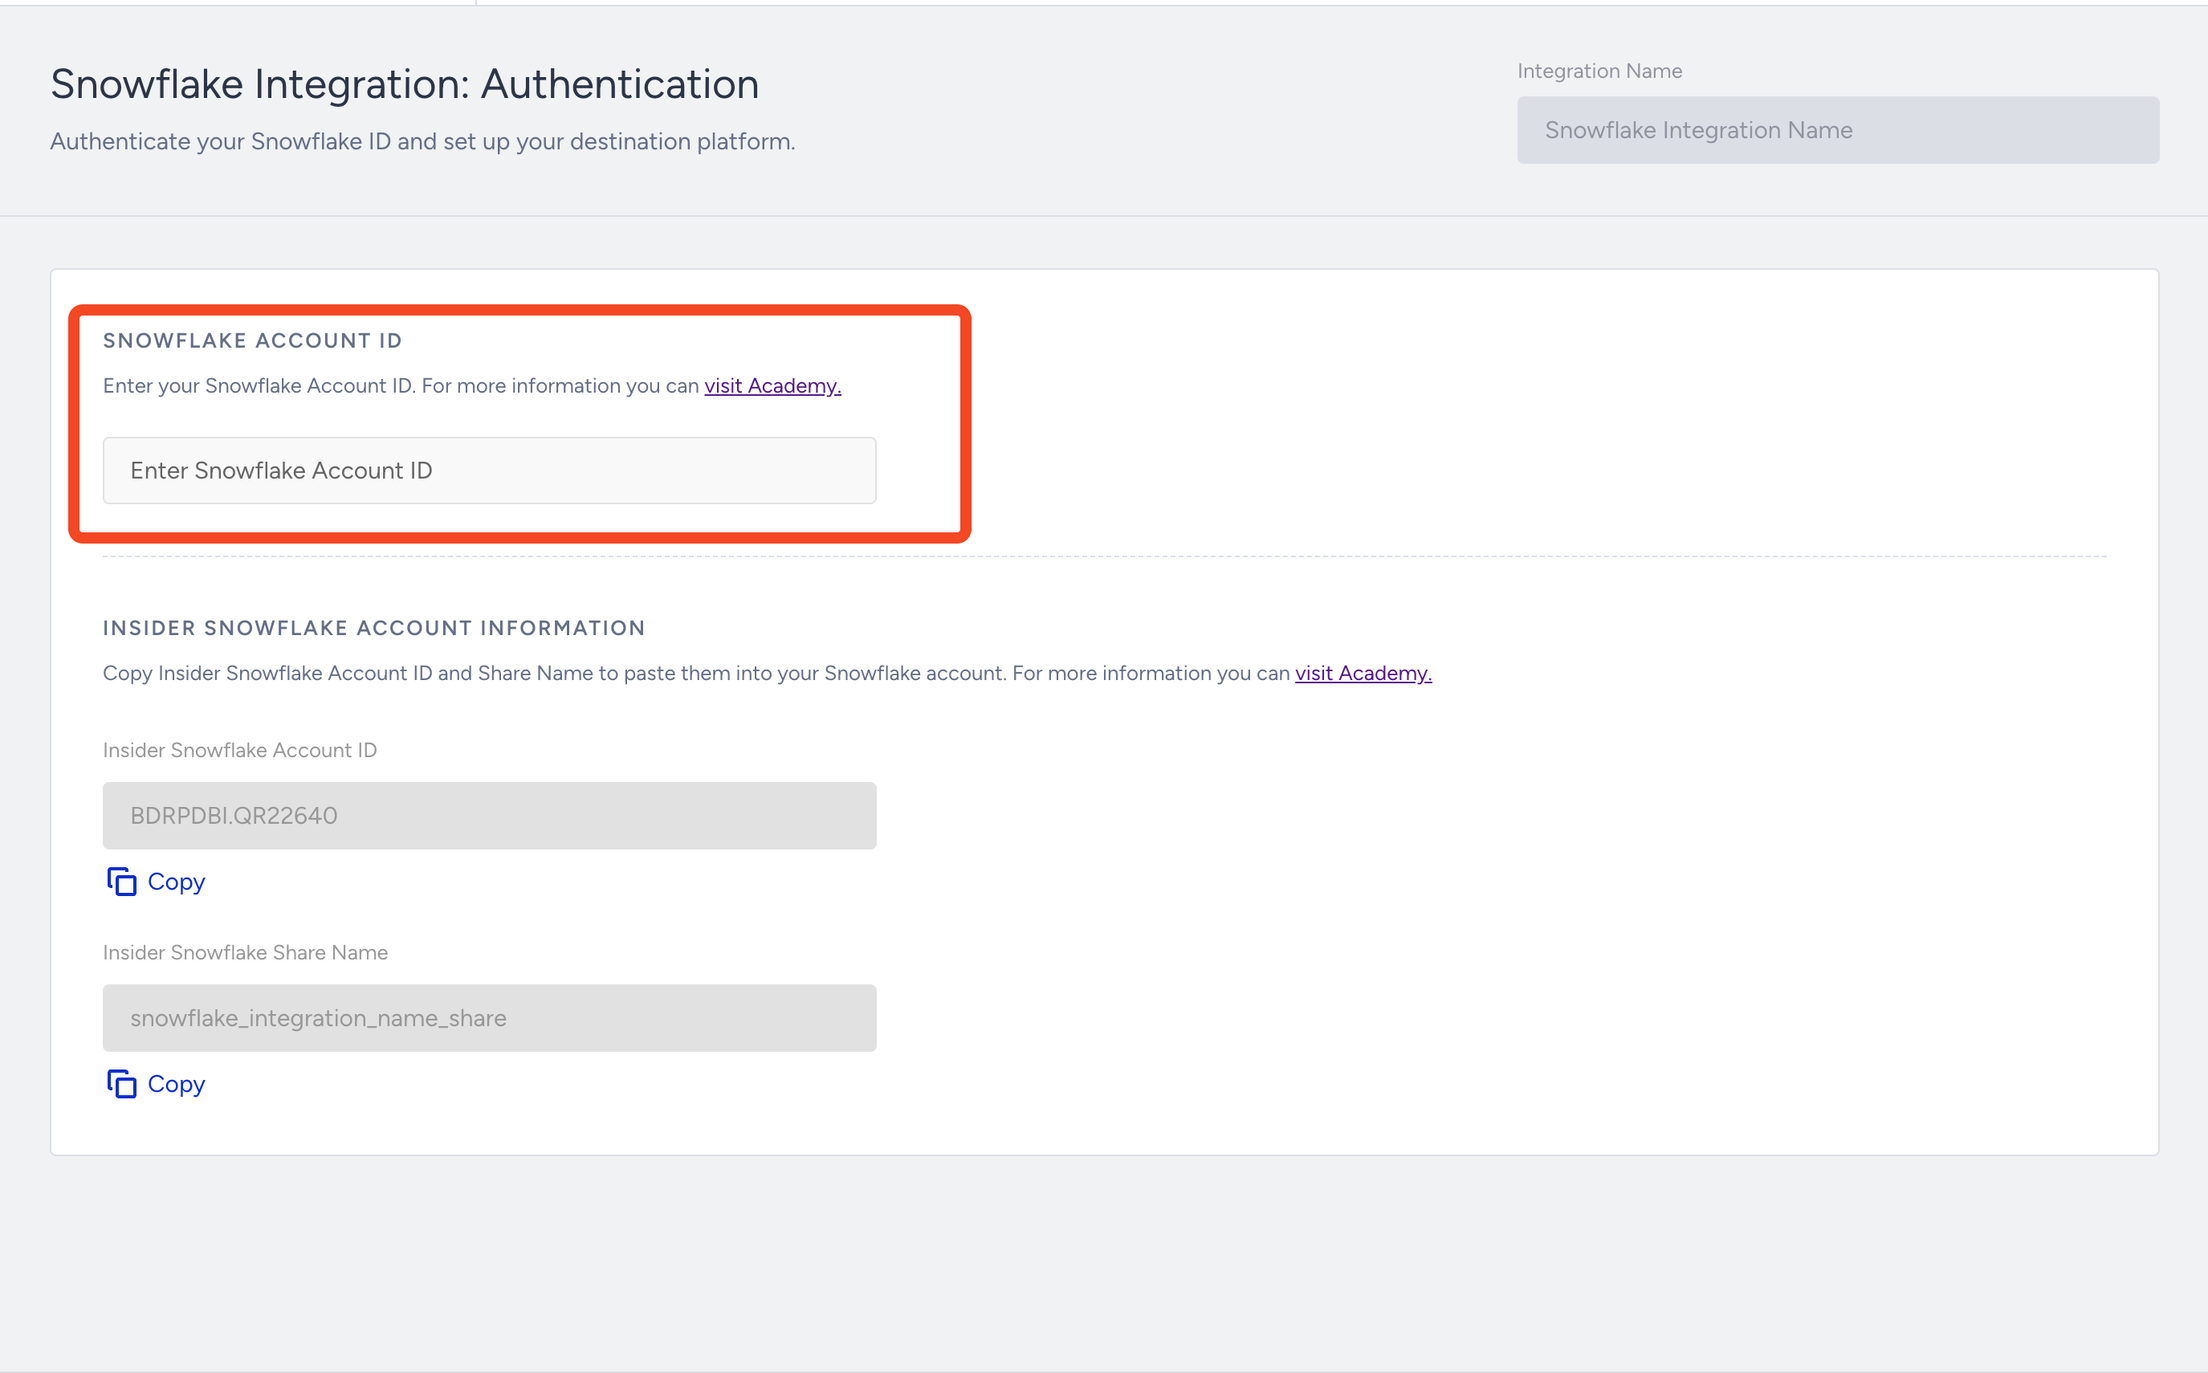
You should note Insider One's Snowflake Account ID and Share Name, as you will be required to read data using these credentials.
Once this step is configured, Insider One will provide access to your provided Snowflake Account ID to read data from Insider One's own Snowflake Account.
5. After completing your Integration Key and Identifiers, you will continue with the Configure step. You can select one or more Events to send Snowflake in the tabs here.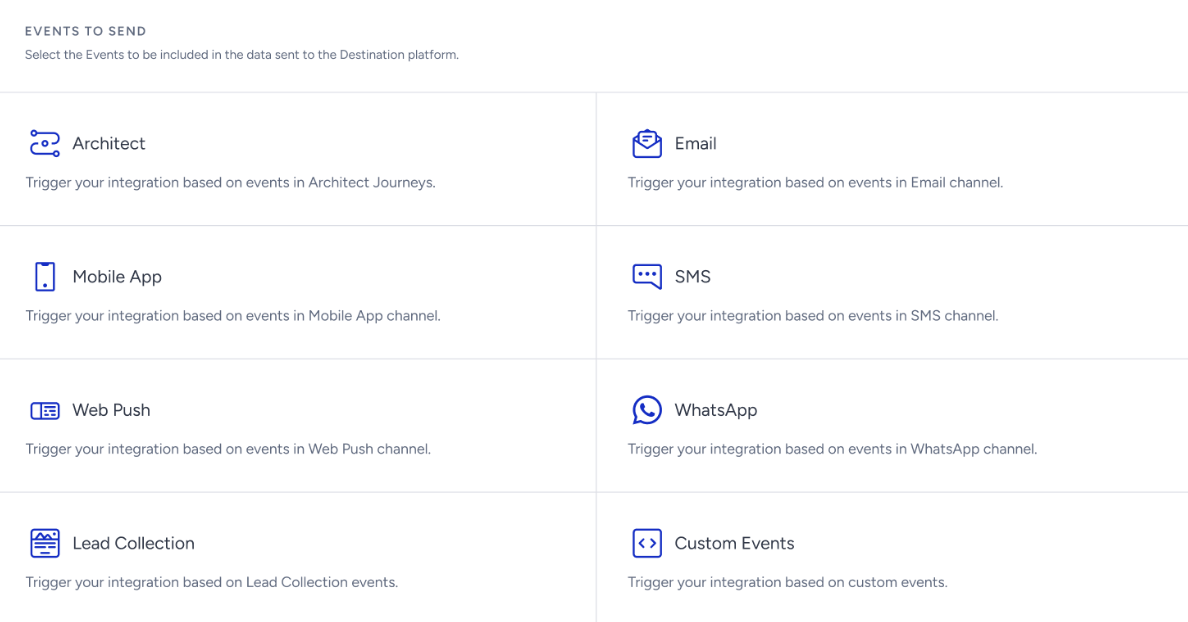 6. After you select the first event type you want to trigger the data collection, you can see the events based on the type and select or deselect the ones you want to collect. You can also add other event types via the same section.
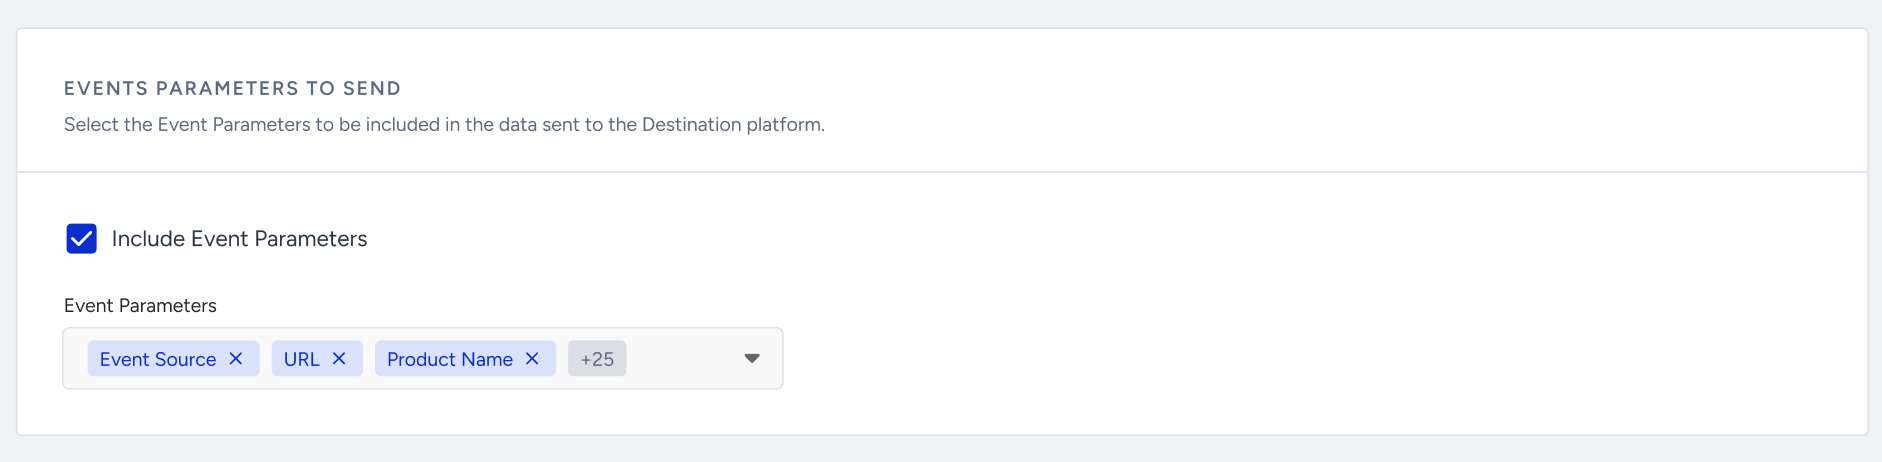
7. The Event Parameter section will be enabled after you select an event. You can select the parameters of your events through the dropdown that you want to send to your destination.
8. You can select the additional attributes to be included in the data sent to the endpoint. If you want to include additional attributes while sending the event data to your destination, add them here. For example, if you are sending an email open event, you can also select the email address to be sent to your destination. This way, you can understand which email address opened which email campaign.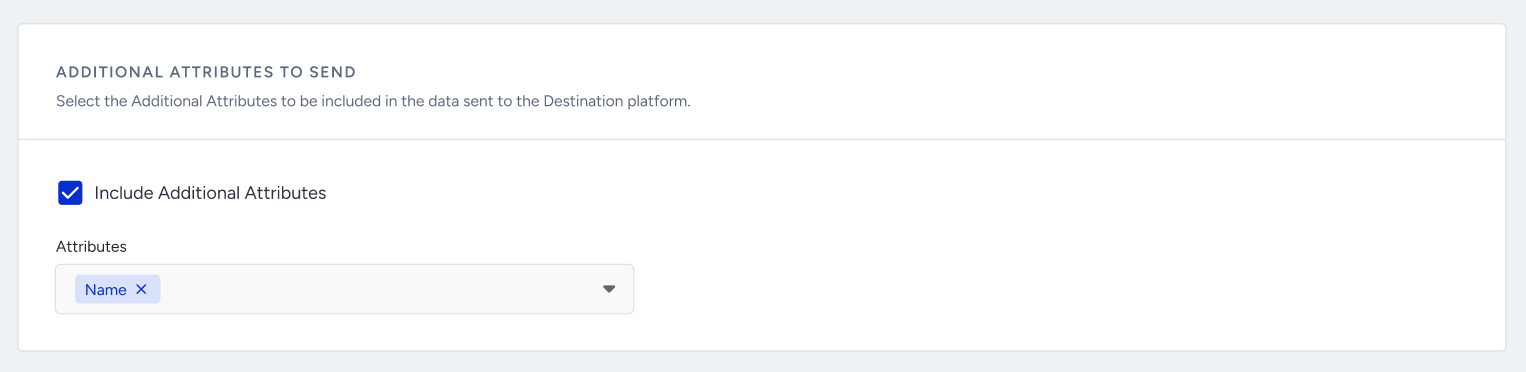 9. Launch is the last step to complete the integration. On this page:
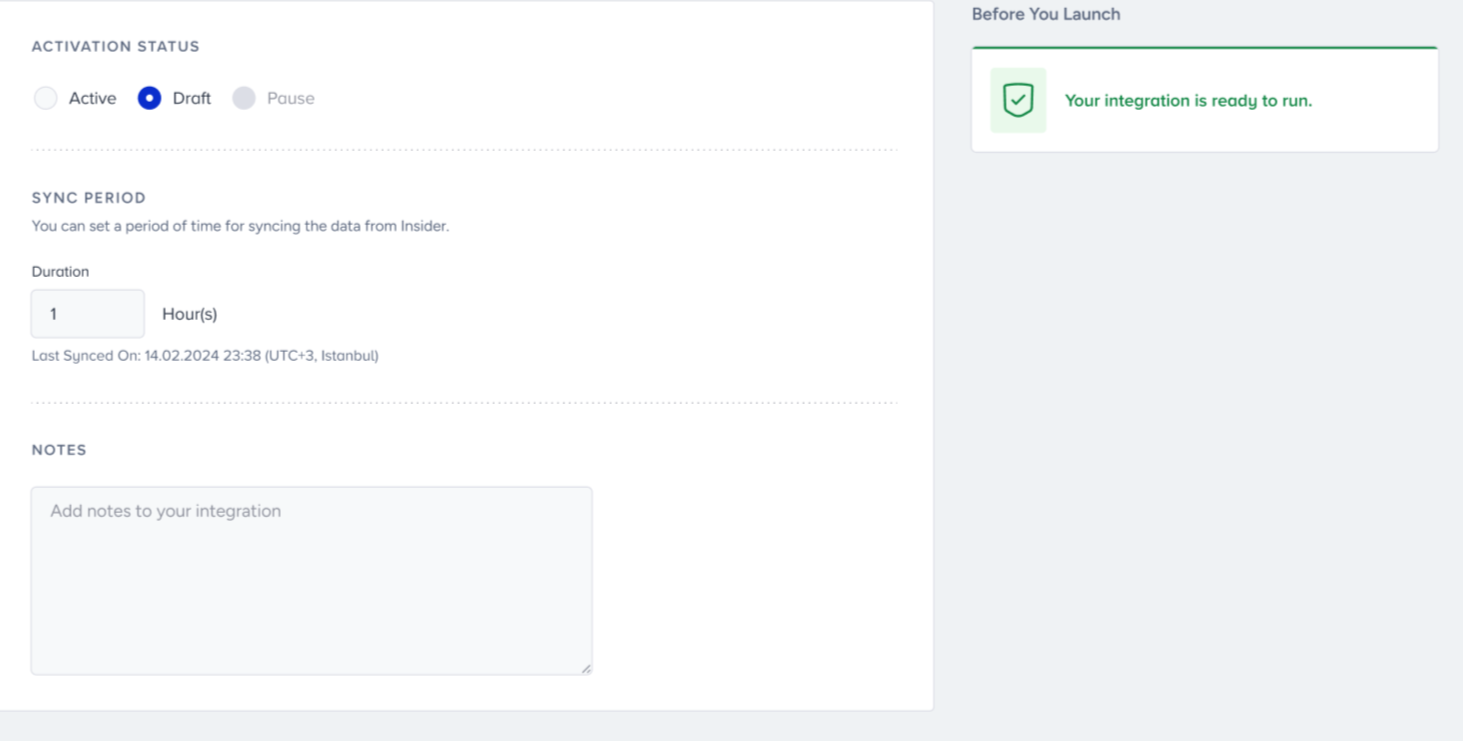
You can choose launch options as draft, active, or paused. The draft option is selected by default.
The Sync Period section allows you to customize the frequency of syncing event data to Snowflake. You can choose intervals of up to 24 hours. Beneath the input field, you'll find the timestamp indicating the last sync of events.
You can also add notes via the Notes box to enter additional information for your integration.
The Before You Launch section helps you understand if there is an issue with the integration you set up before launching it.
10. After you finish all the steps above, the Insider One team will be notified to accept the data-sharing request. Once the Insider One team approves the data-sharing request, you will be able to access your data using the Snowflake Data Sharing feature.
If an anonymous user has an event on Insider One, you will also see it in the Snowflake table.
If a user is created and deleted within the sync period, you can still see that user in your Snowflake table.
How can I read the data from Insider One’s Snowflake account?
Snowflake’s Data Sharing enables you to access the data from your Snowflake account without any hassle. This concept is crucial because shared data does not occupy any storage space in your account, meaning it does not add to your monthly data storage costs. You are only billed for the computing resources, like virtual warehouses, utilized to query the shared data. You can refer to Secure Data Sharing for further information.
To activate data sharing, you can use the credentials shared with you at the third step of the integration.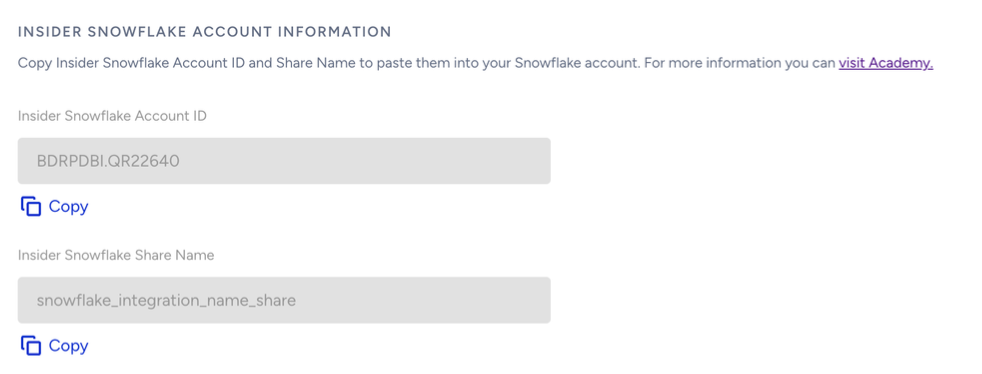
The Insider One team will review and approve your listing when you publish or update the Snowflake integration. Since this process might take some time, the data might not appear in your Snowflake account immediately.
Depending on your Snowflake region and provider, you might experience up to a one-hour delay in viewing your data. This delay occurs because Snowflake’s data synchronization might begin after Insider One’s. When Insider One’s synchronization frequency is set to every hour, data will sync at the start of each hour (e.g., 12:00, 1:00). However, Snowflake’s data sharing might happen at different intervals, such as on the half-hour (e.g., 12:30, 1:30) or quarter-past (e.g., 12:15, 1:15), so updated data might only be visible at those times.
When you edit a Snowflake integration, previously shared data remains accessible. Each update creates a new table and view in the share:
If you rename the integration, the new name is reflected in the table and view names.
If you keep the same integration name, the timestamp suffix (
YYYYMMDD_HHMMSS) is updated to distinguish the new objects.As a result, you might see multiple tables and views in the same share (for example,
{panelName}_{integrationName}_TABLE_20260609_071750). The object with the most recent timestamp represents the latest integration configuration.
FAQ
Q: I cannot see the data shared by Insider One in my Snowflake account. What should I do?
A: Here are the steps you should take when you cannot see the data shared by Insider One in your Snowflake account:
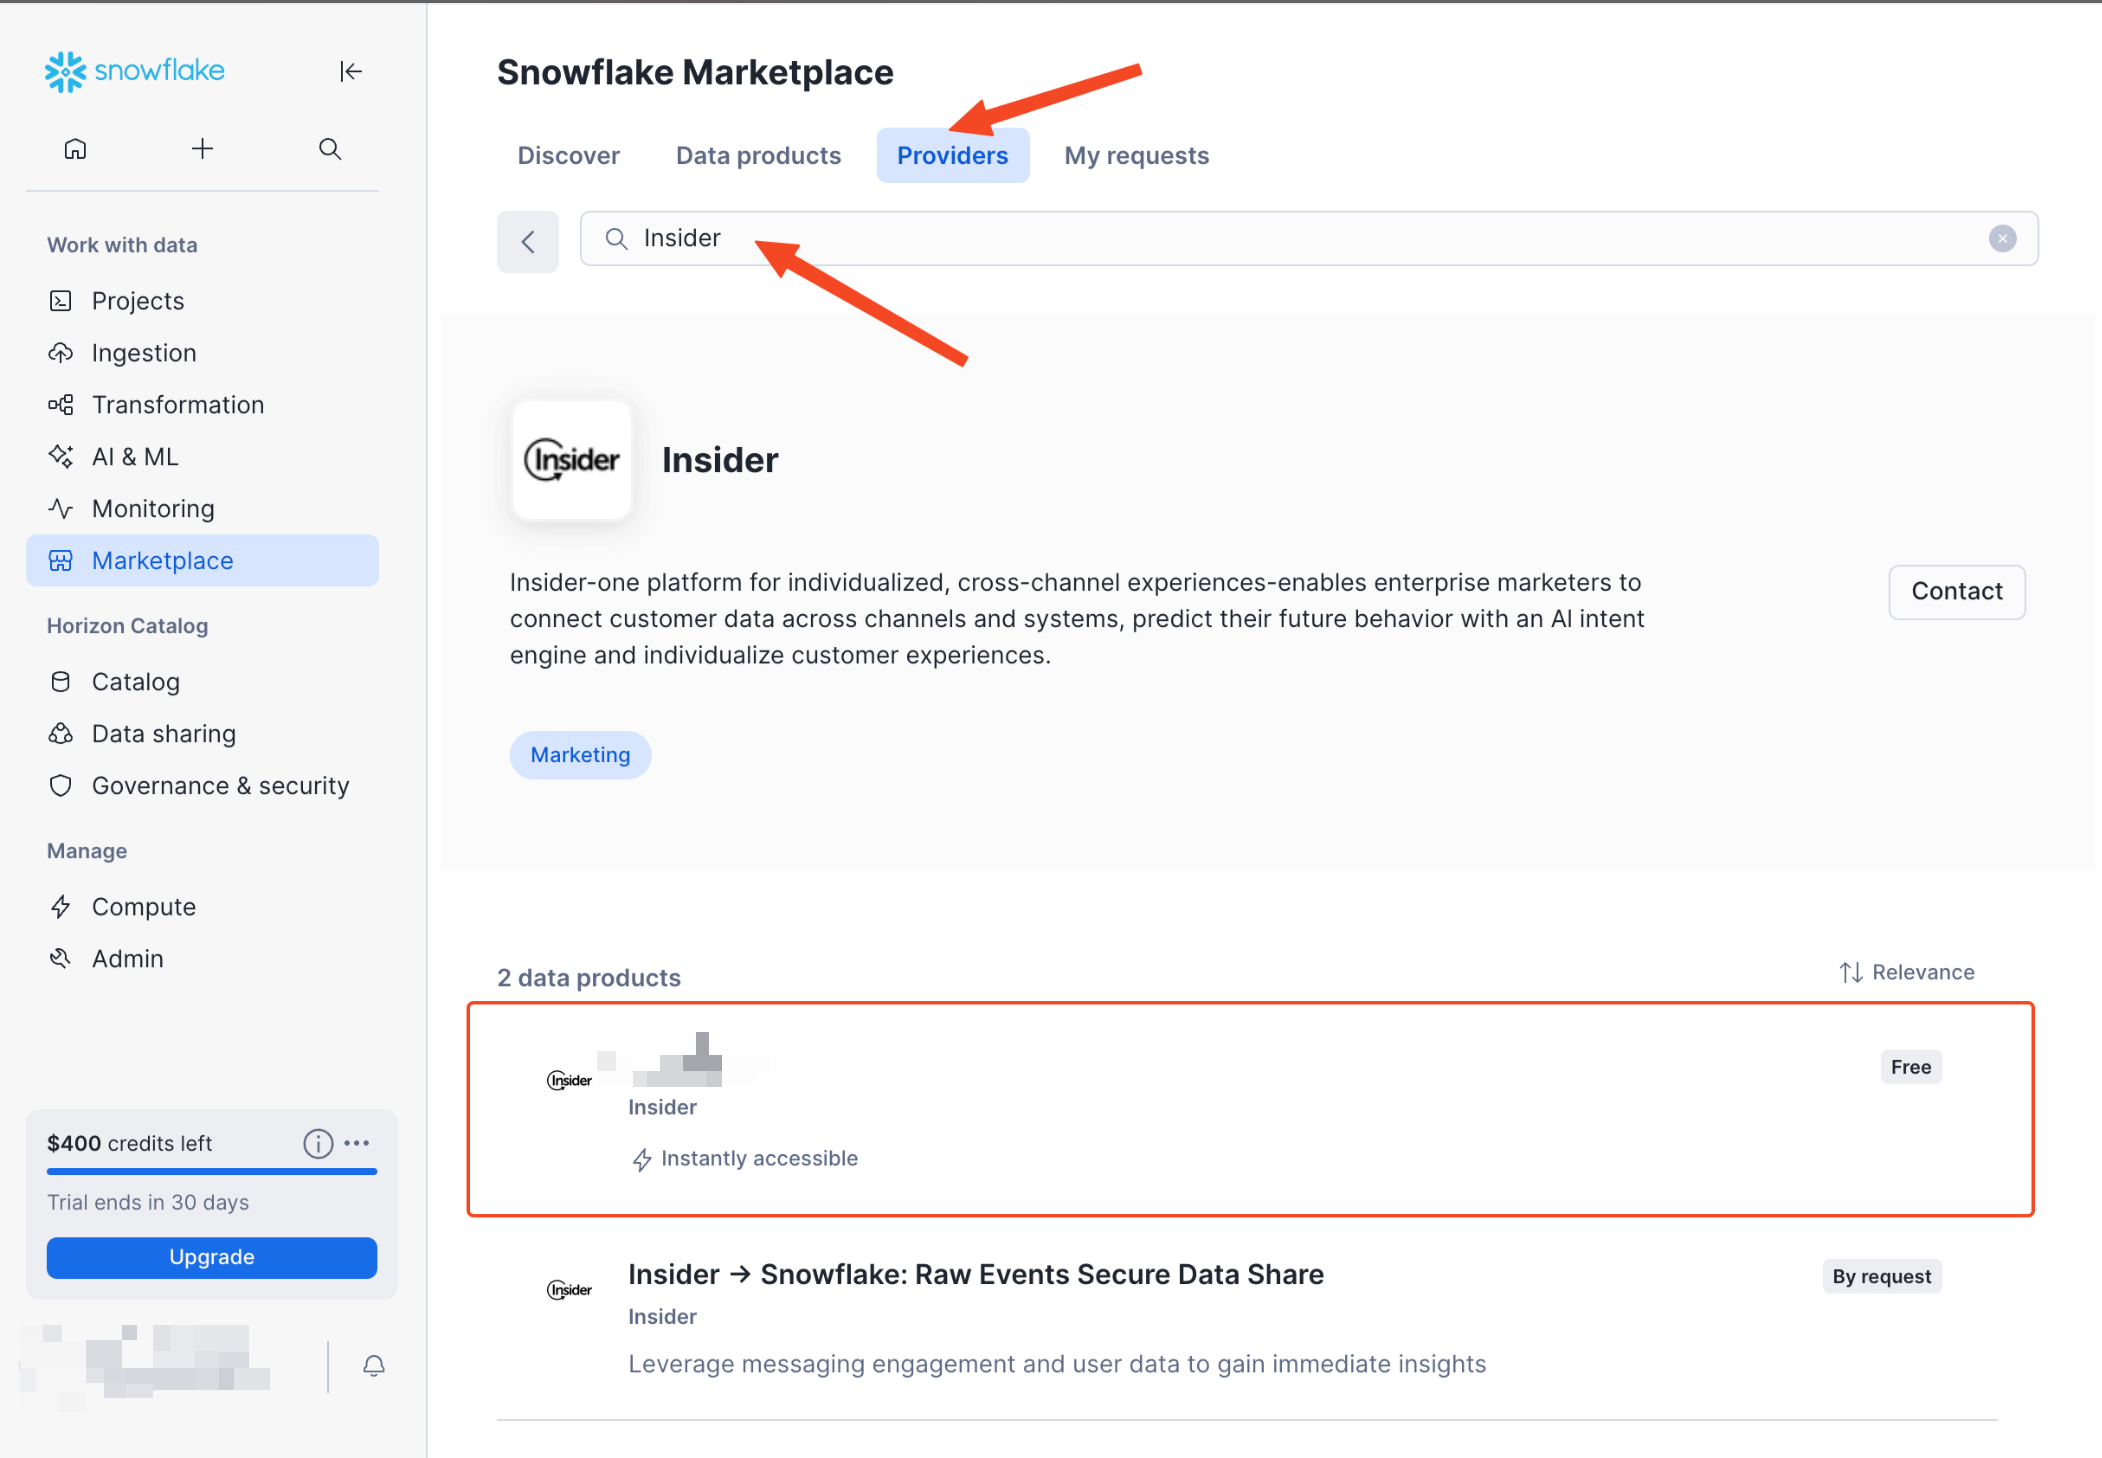
1. After the first sync is completed (and if it includes any data), go to the Snowflake Marketplace.
2. Search for Insider One under Providers.
3. Find the data product that has been shared with you — make sure to select the free one.
4. Click the Get button to add it to your account.