You cannot make any changes to External Platform Integrations without having either an Administrator or an Editor with PII access in InOne. Refer to User Roles for further information.
After you complete Integrating Insider One with Google Tag Manager (GTM), you can easily integrate Insider Object into your website via Google Tag Manager (GTM) with the following steps:
- How does the Insider Object integration with Google Tag Manager (GTM) work?
- How can you configure Insider Object?
- How can you configure each object type?
How does it work?
Insider Object is an object similar to Google's Data Layer and enables Insider to collect data from your website. Insider One generates data directly from Google's Data Layer (except for the Page View event) and populates the Insider Object. Insider templates mirror the data present in the Data Layer into the Insider Object.
How can you configure Insider Object?
1. After completing the Insider Tag integration, go to Tags and click the New button.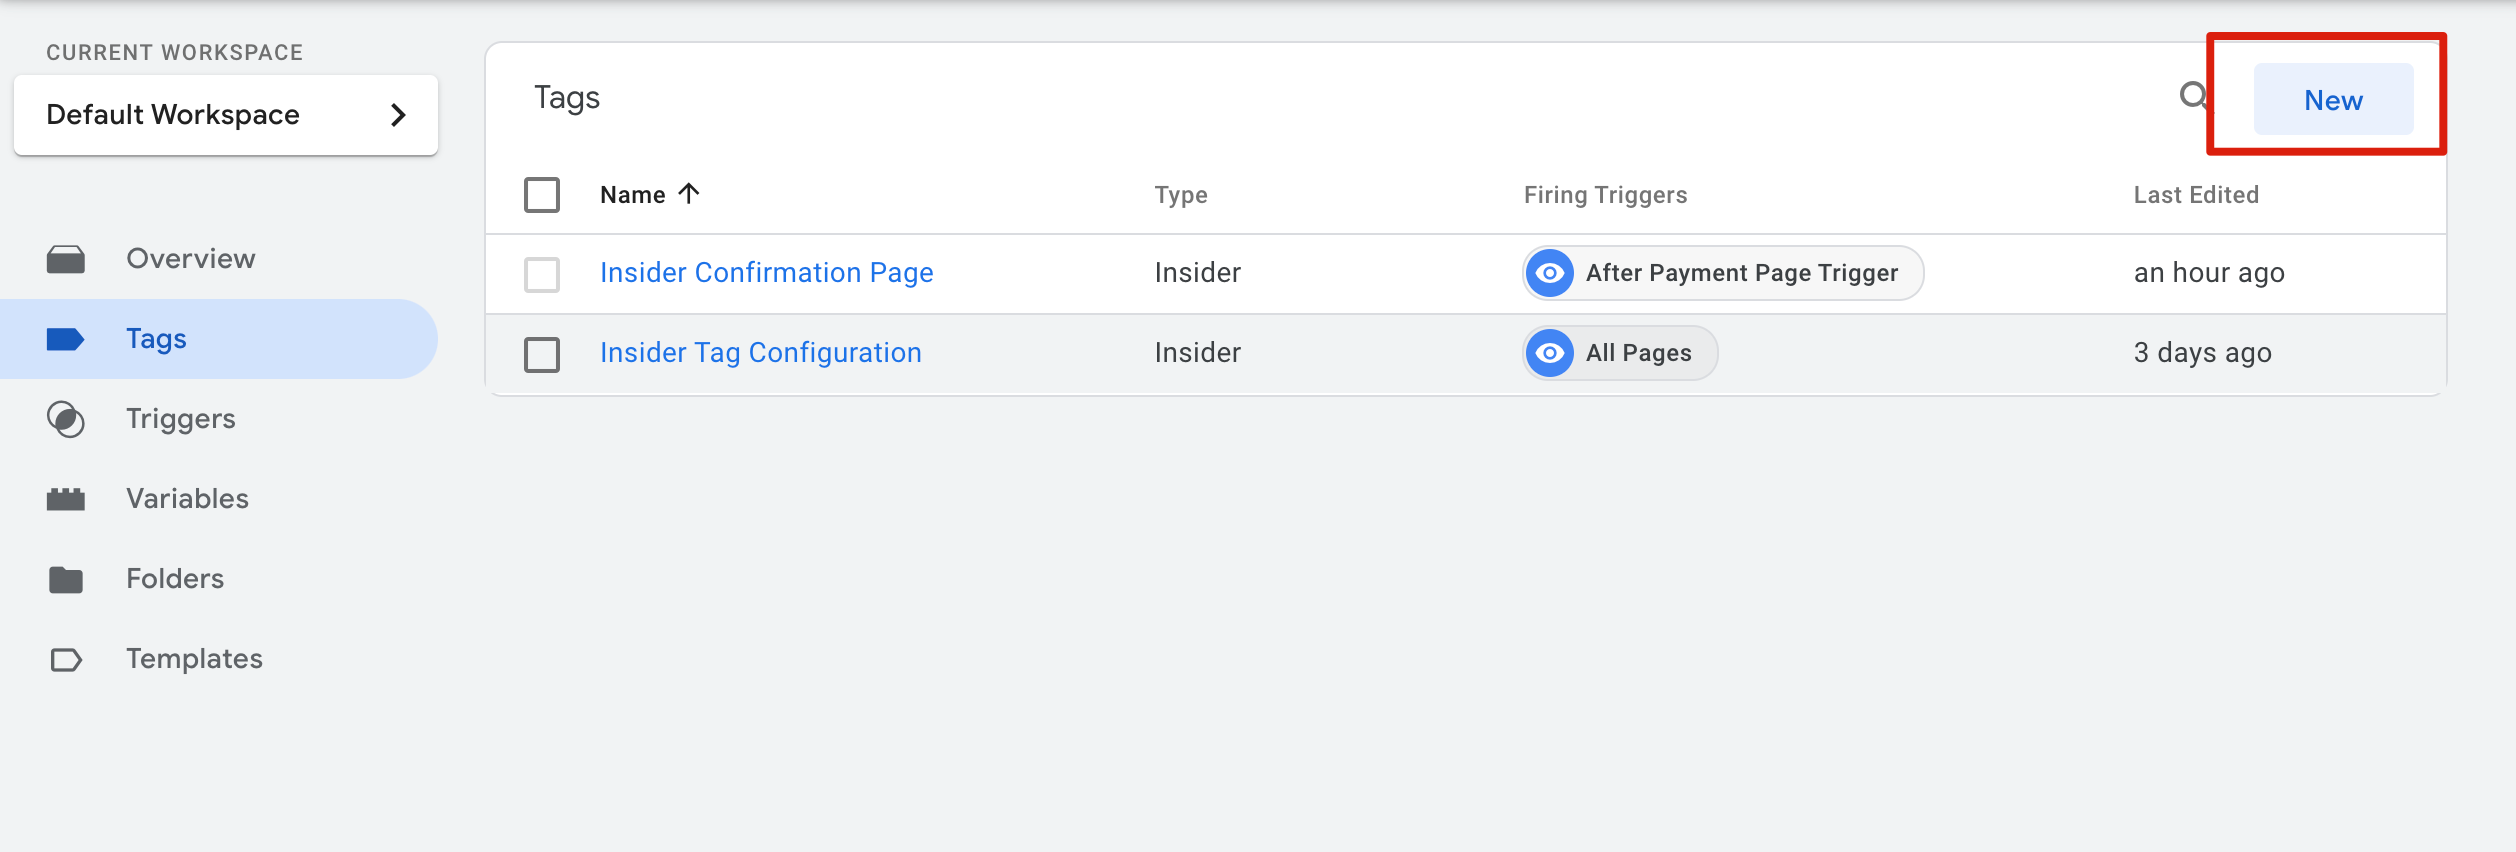
2. Click Tag Configuration and select Insider on the Choose tag type window.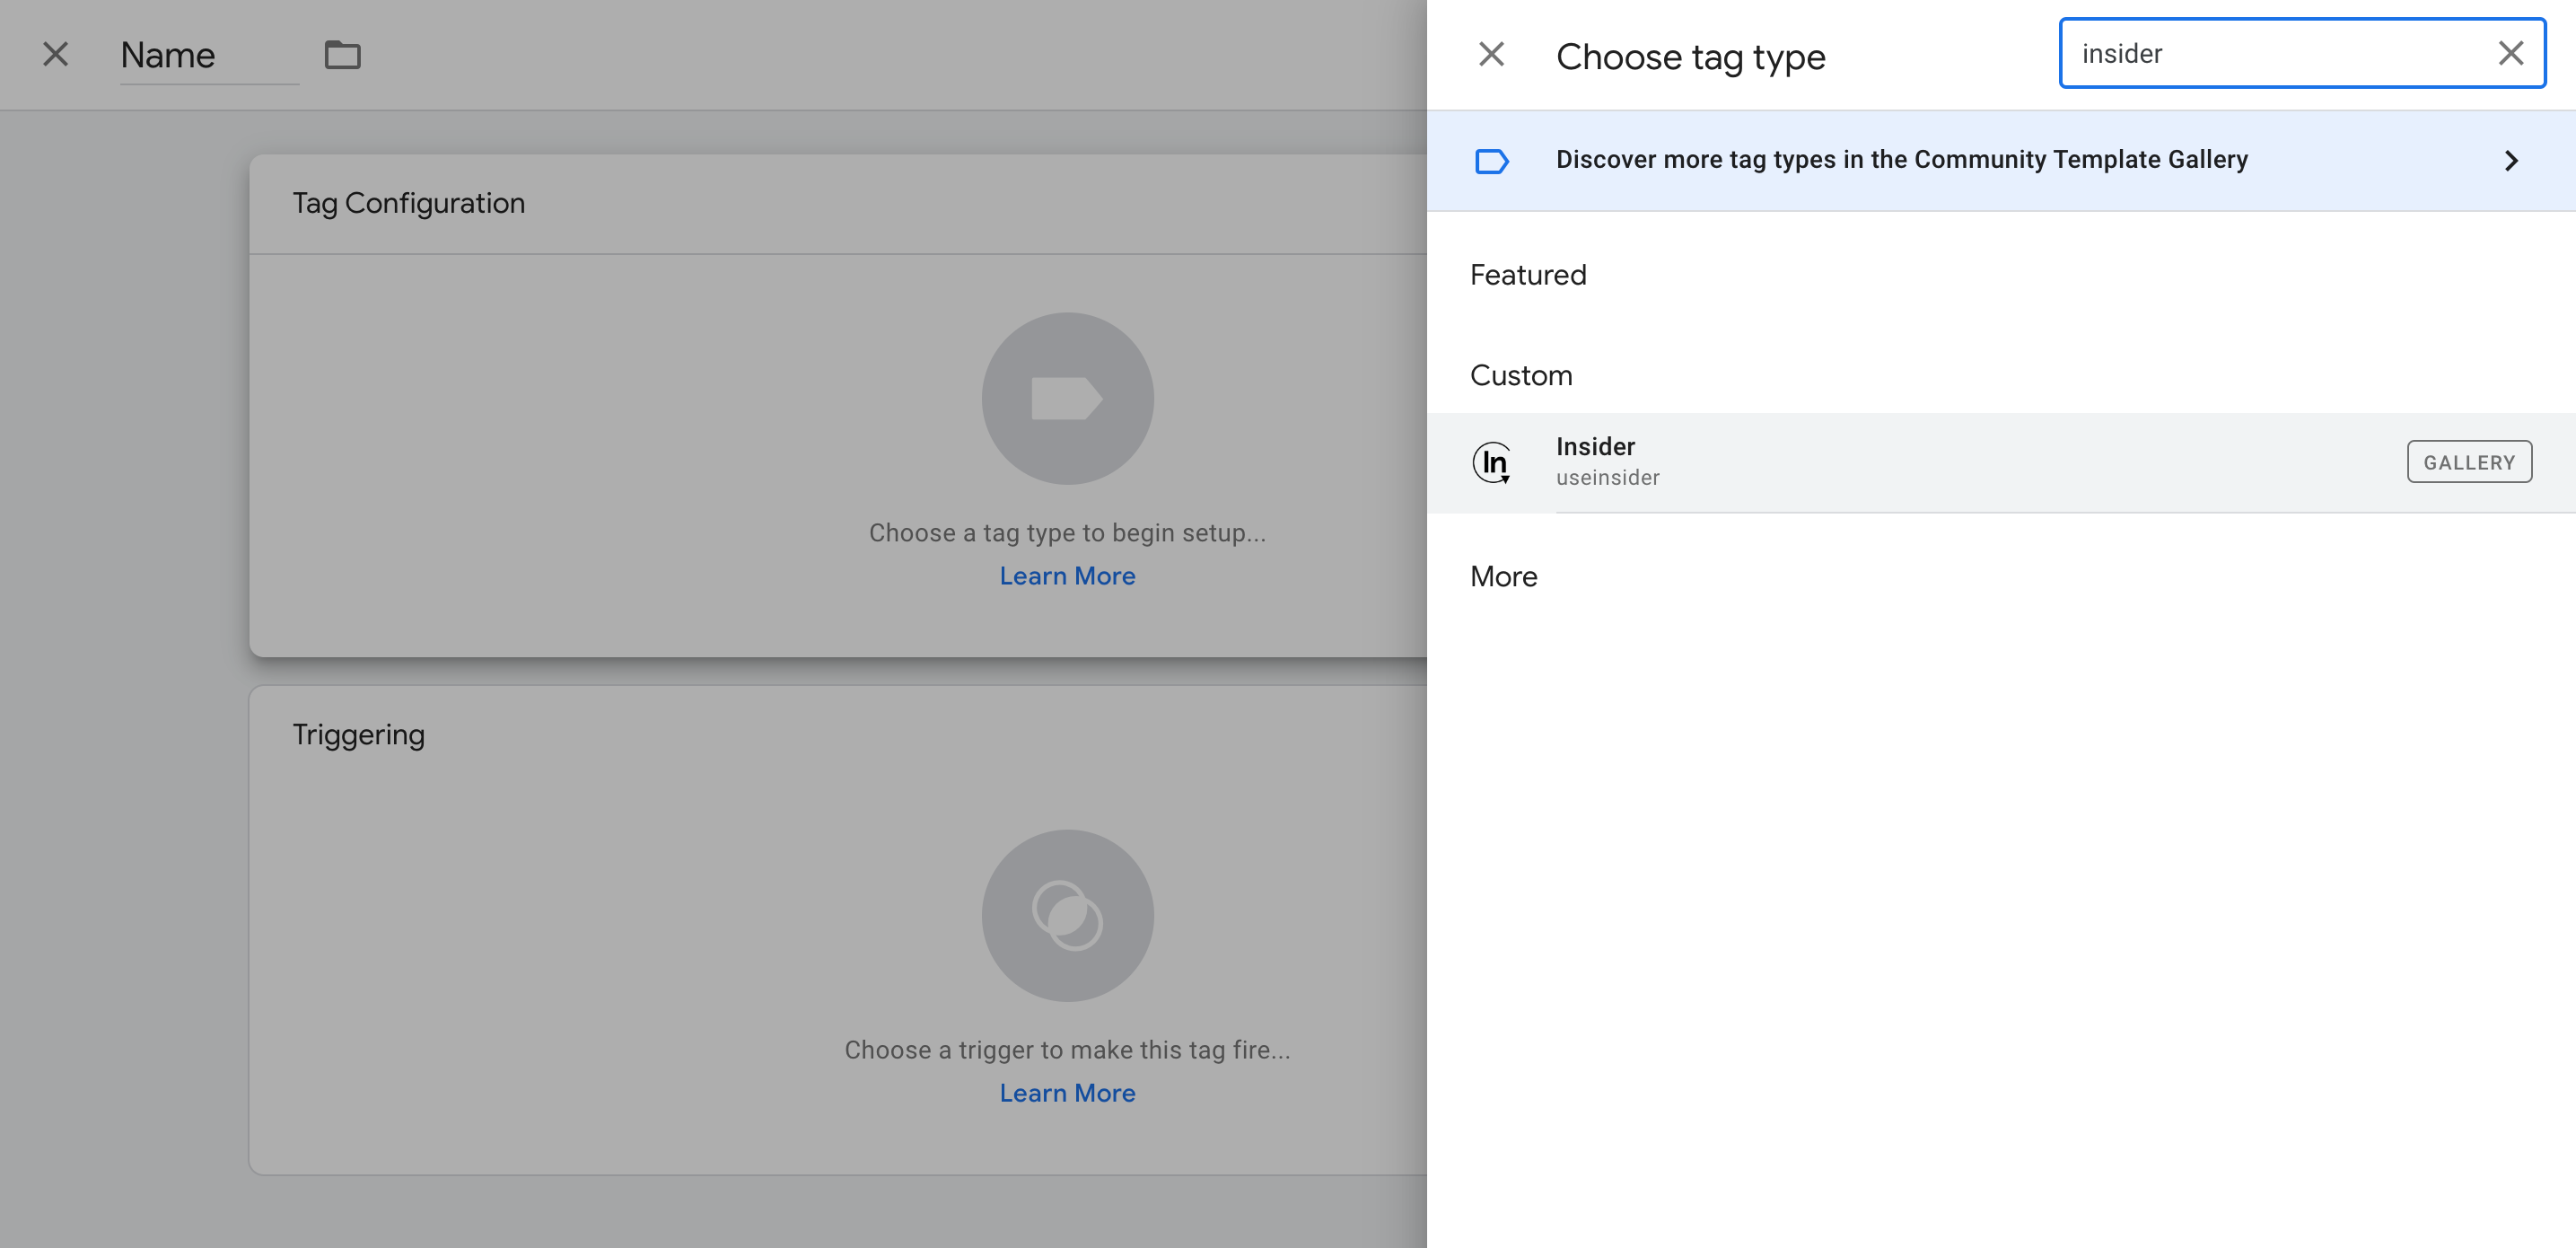
After selecting Insider, you will need to set up the following Object Types.
Object Types for Insider Object
| Object Type | Description | Trigger Condition |
|---|---|---|
| Page View | Page type | Selected page |
| Basket | Details of items in the cart | All pages |
| Listing | Details of items on the category page | Category page |
| Product | Details of a specific item | Product detail page |
| User | Attributes of a logged-in user | All pages |
How can you configure each object type?
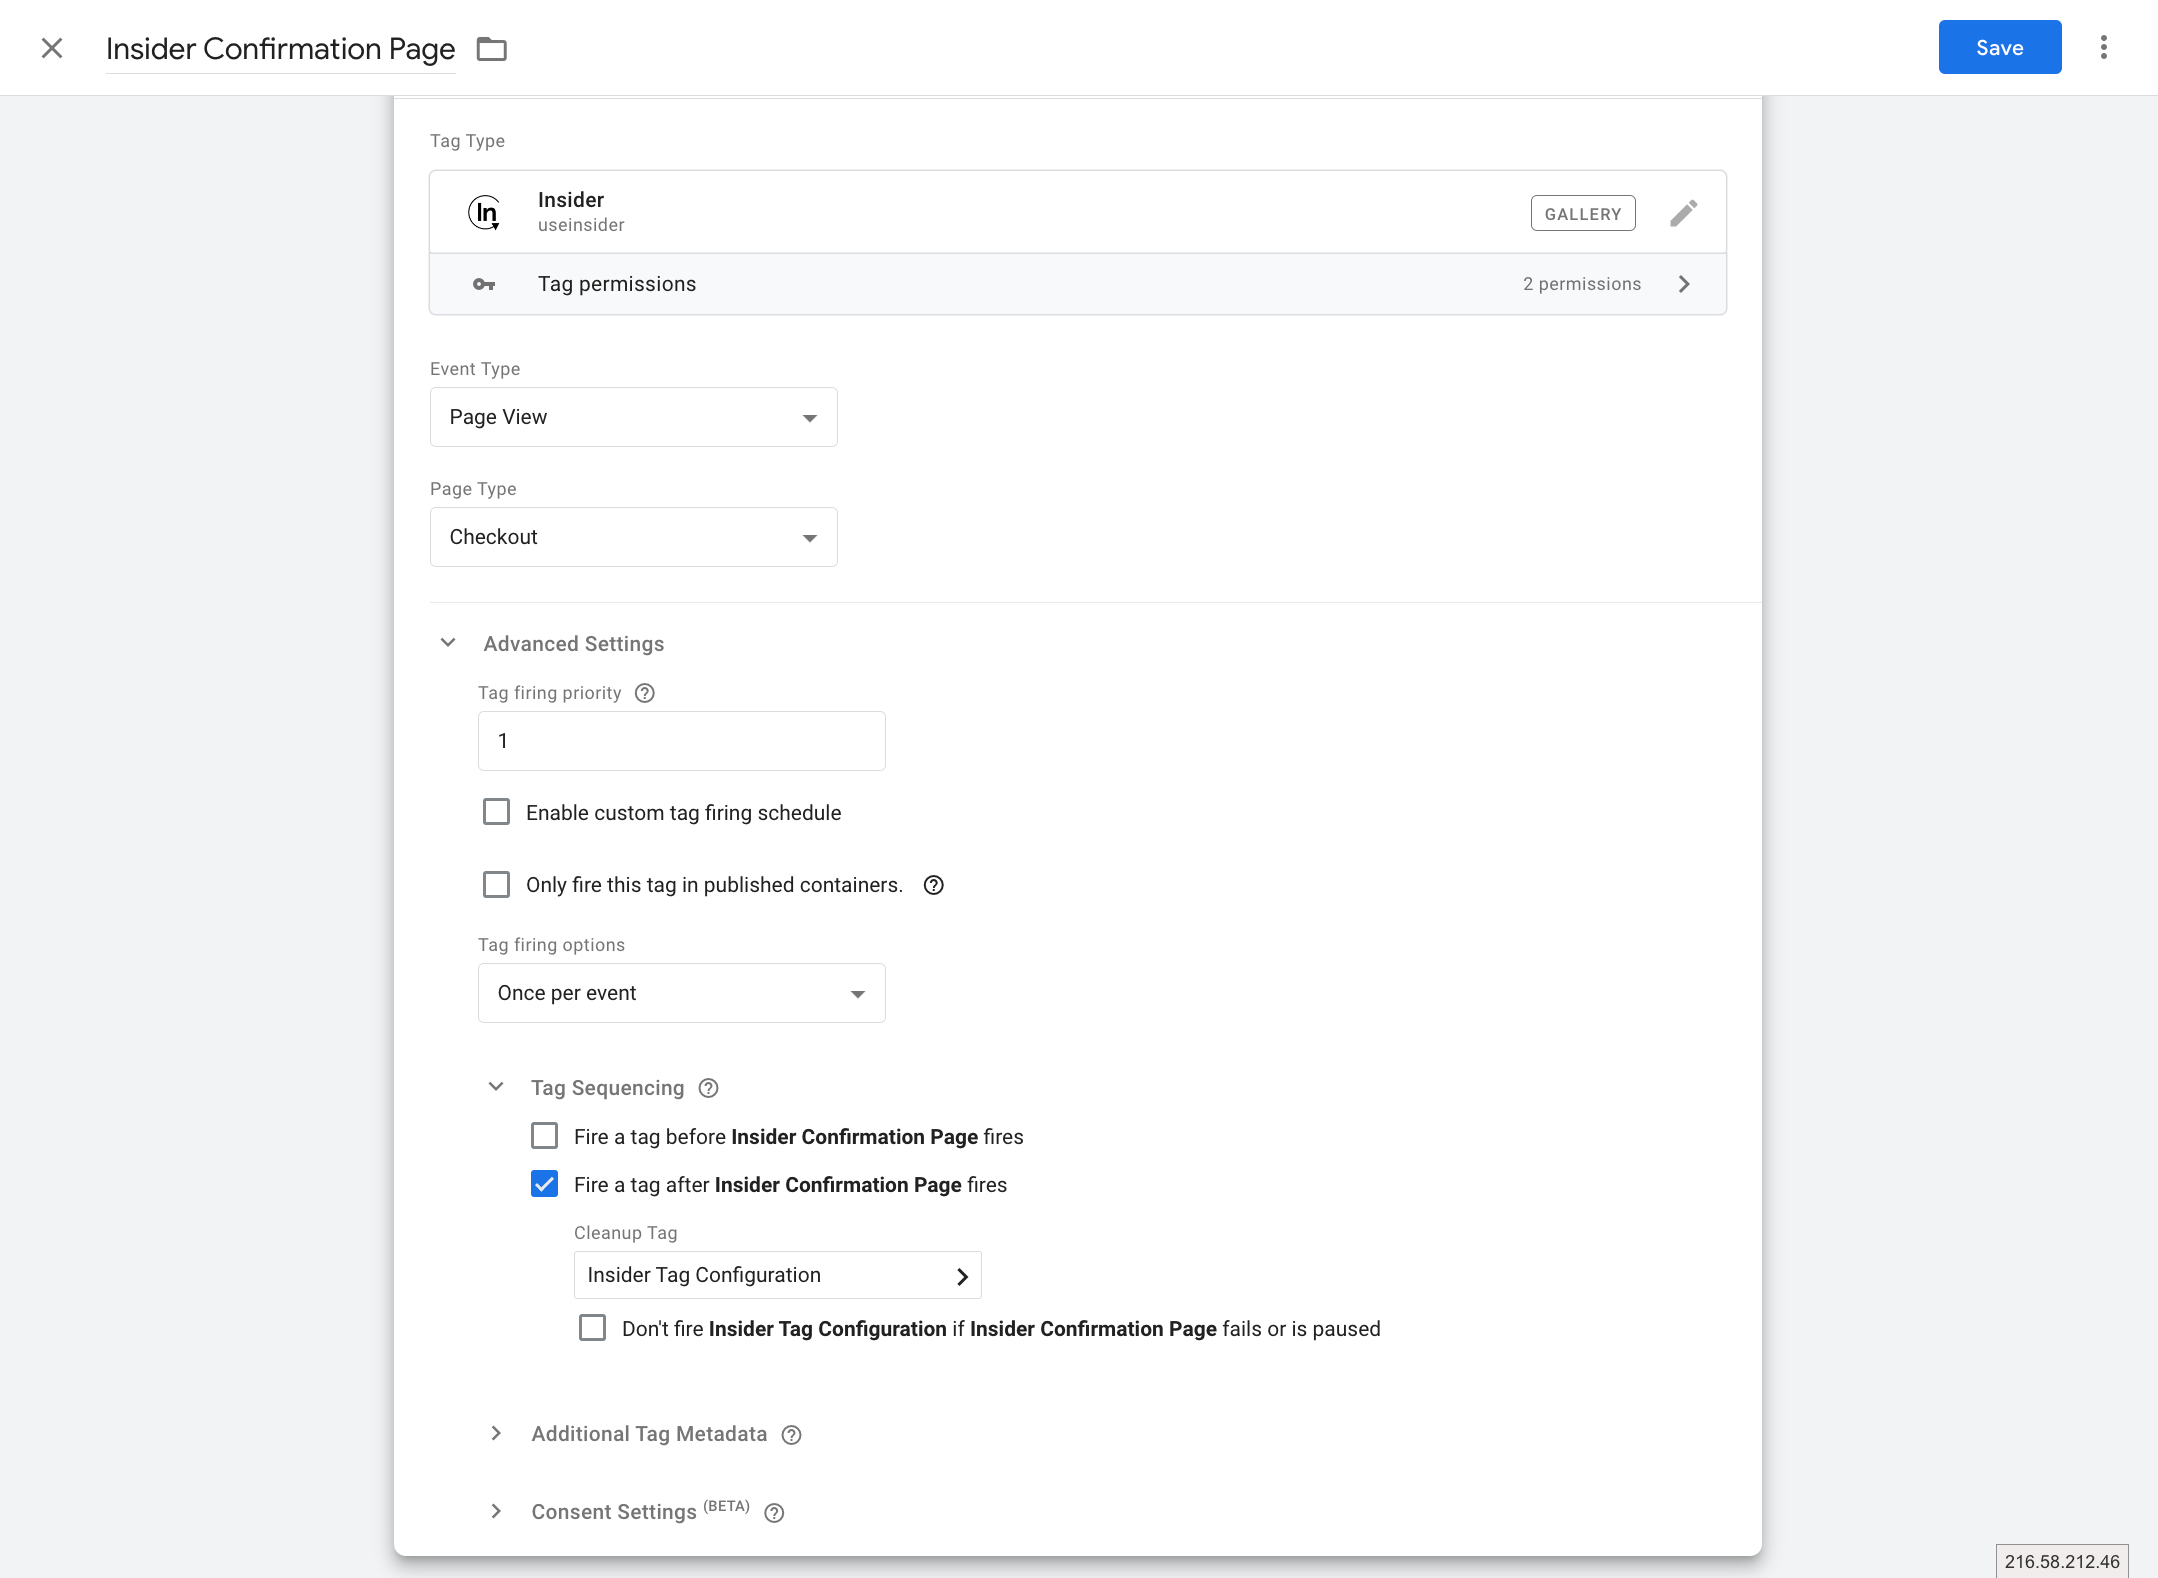
- To enable the event to load before the Insider Tag, expand the Advanced Settings.
- The Tag firing priority should be higher than that of the Insider Tag. If none is specified for any tag, the default priority is 0, so the respective event can be set to 1 as in the example.
- After setting the priority, click Tag Sequencing and enable "Fire a tag after the event type fires". Then select Insider Tag as the Cleanup Tag.
- It loads before the Insider Tag (ins.js).
- If it is a single page, be sure that the page object includes the correct information. For example, once a user navigates to another page after the Confirmation page, the page object should also state this change and not display the type as Confirmation.
Page View Event
Page view information lets Insider One understand the page type that the user is browsing.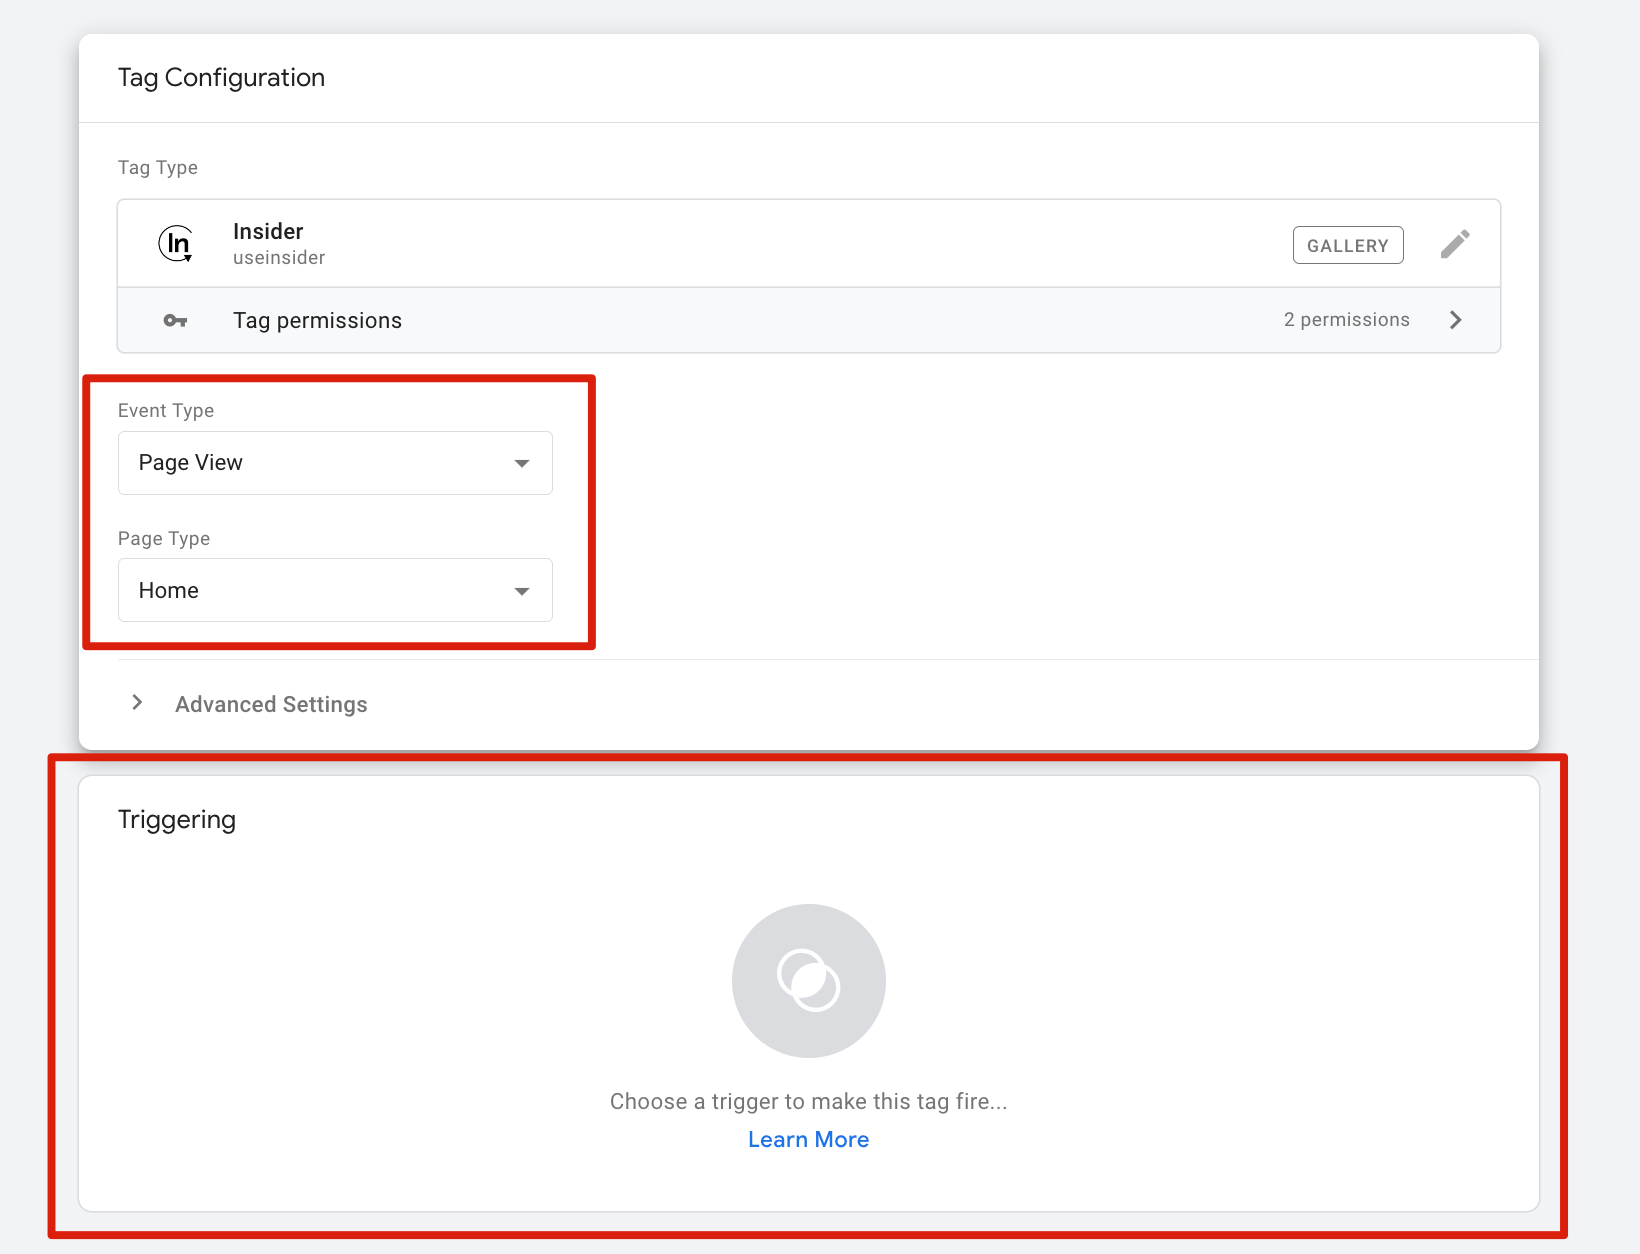
Page Types and Trigger Conditions
Insider One can recognize eight different page types when a user is browsing your website. Each page type needs to be set up separately, and the trigger condition needs to be selected as in the table below.
| Page Type | Description | Trigger Condition |
|---|---|---|
| Home | Homepage | Homepage |
| Product | Product Detail Page | Product Detail Page |
| Category | Category Page | Category Page |
| Search | Search Results Page | Search Results Page |
| Basket | Cart Page | Cart Page |
| Checkout | Checkout Page | Checkout Page |
| Confirmation | After Payment Page | After Payment Page |
| Content | Content Page | Content Page |
Basket/Listing/Product/User Objects
Each object gets its data directly from the Data Layer. If you have the information that is listed in any event type, make sure that you have set up its path correctly from the Insider Template.
Object Types for Insider Object
| Object Type | Description | Trigger Condition |
|---|---|---|
| Basket | Details of items in the cart | All Pages |
| Listing | Details of items on the category page | Category Page |
| Product | Details of a specific item | Product Detail Page |
| User | Attributes of a logged-in user | All Pages |
Fields for Object Types
| Transaction | User | Basket | Product | Listing |
|---|---|---|---|---|
| Basket Currency | User Unique ID | Basket Currency | Product ID | Product ID |
| Basket Total | Gender | Basket Total | Product Name | Product Name |
| Shipping Cost | Birthday | Shipping Cost | Product Categories | Product Categories |
| Product Parent Object | Has Transacted | Product Parent Object | Product Currency | Product Currency |
| Product ID | Transaction Count | Product ID | Product Unit Price | Product Unit Price |
| Product Name | GDPR Optin | Product Name | Product Unit Sale Price | Product Unit Sale Price |
| Product Categories | Firstname | Product Categories | Product URL | Product URL |
| Product Currency | Lastname | Product Currency | Product Stock | Product Stock |
| Product Unit Price | Username | Product Unit Price | Product Color | Product Color |
| Product Unit Sale Price | Email Address | Product Unit Sale Price | Product Size | Product Size |
| Product URL | Email Optin | Product URL | Product Image URL | Product Image URL |
| Product Stock | Phone Number | Product Stock | Product Custom Fields | Product Custom Fields |
| Product Color | SMS Optin | Product Color | Product Quantity | - |
| Product Size | WhatsApp Optin | Product Size | Product Subtotal | - |
| Product Image URL | Language Code | Product Image URL | - | - |
| Product Custom Fields | Is Returning User | Product Custom Fields | - | - |
| Product Quantity | Contact List IDs | Product Quantity | - | - |
| Product Subtotal | - | Product Subtotal | - | - |
| Delivery | - | - | - | - |
| Bank Name | - | - | - | - |
| Payment Type | - | - | - | - |
| Order ID | - | - | - | - |
Each field needs to be connected to a path in the Data Layer. If you have this information in your Data Layer, you need to map it to the respective field. If you do not have any information regarding an object field, it cannot be mapped in the Insider Object.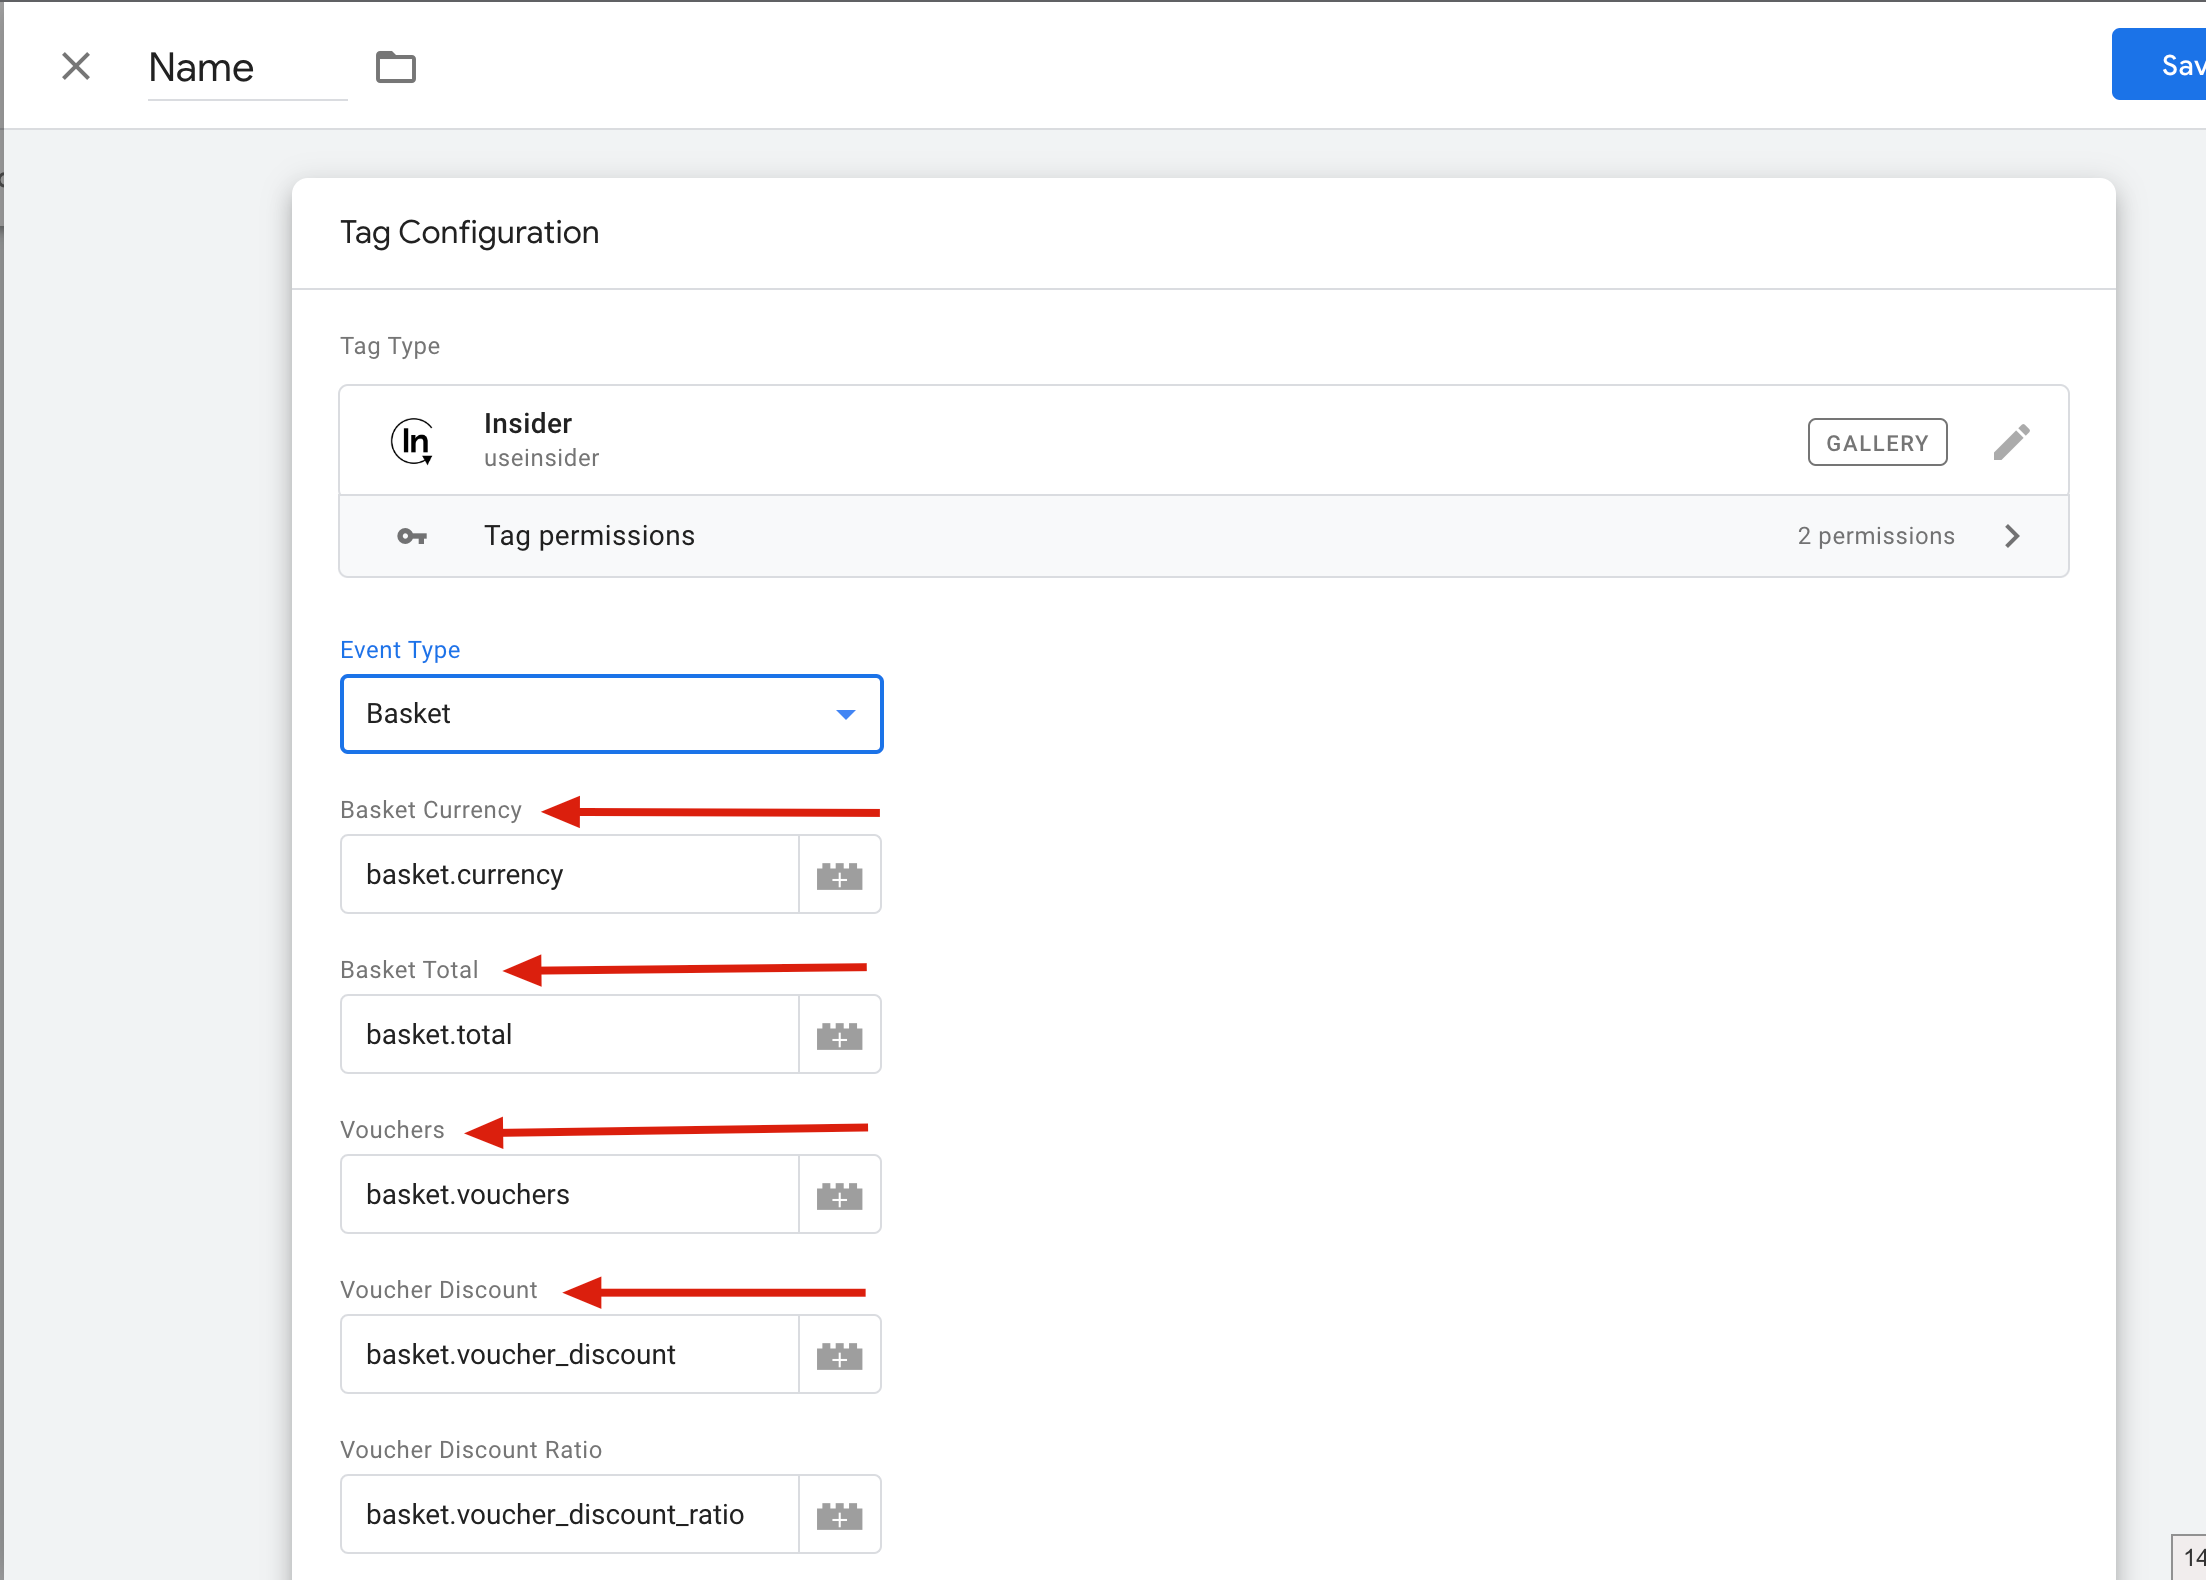
Once you complete mapping the fields for each object, your integration is completed.