A Static Segment is a fixed list of users that does not update automatically. Unlike dynamic segments, which continuously re-evaluate users against conditions, a static segment contains exactly the users you add to it and changes only when you manually add new users or remove existing ones.
Use static segments when your audience is defined by a one-time selection or an external list rather than by behavioral conditions. Use dynamic segments when you want the audience to stay up to date automatically based on user attributes or events.
You can use Dynamic and Static segments in Email, Web Push, WhatsApp, SMS, Architect, and Web Templates products.
Use cases
List cleaning: Exclude users who received your last 20 emails but did not open them.
Cross-selling: Target users who purchased a specific product but have not bought related products.
Lapsed-user campaigns: Reach users who have never purchased in a category or visited specific pages.
Loyalty programs: Identify customers who spent above a defined threshold.
Phone number import: Upload a list of users with phone numbers directly into the InOne panel.
Static Segments listing page
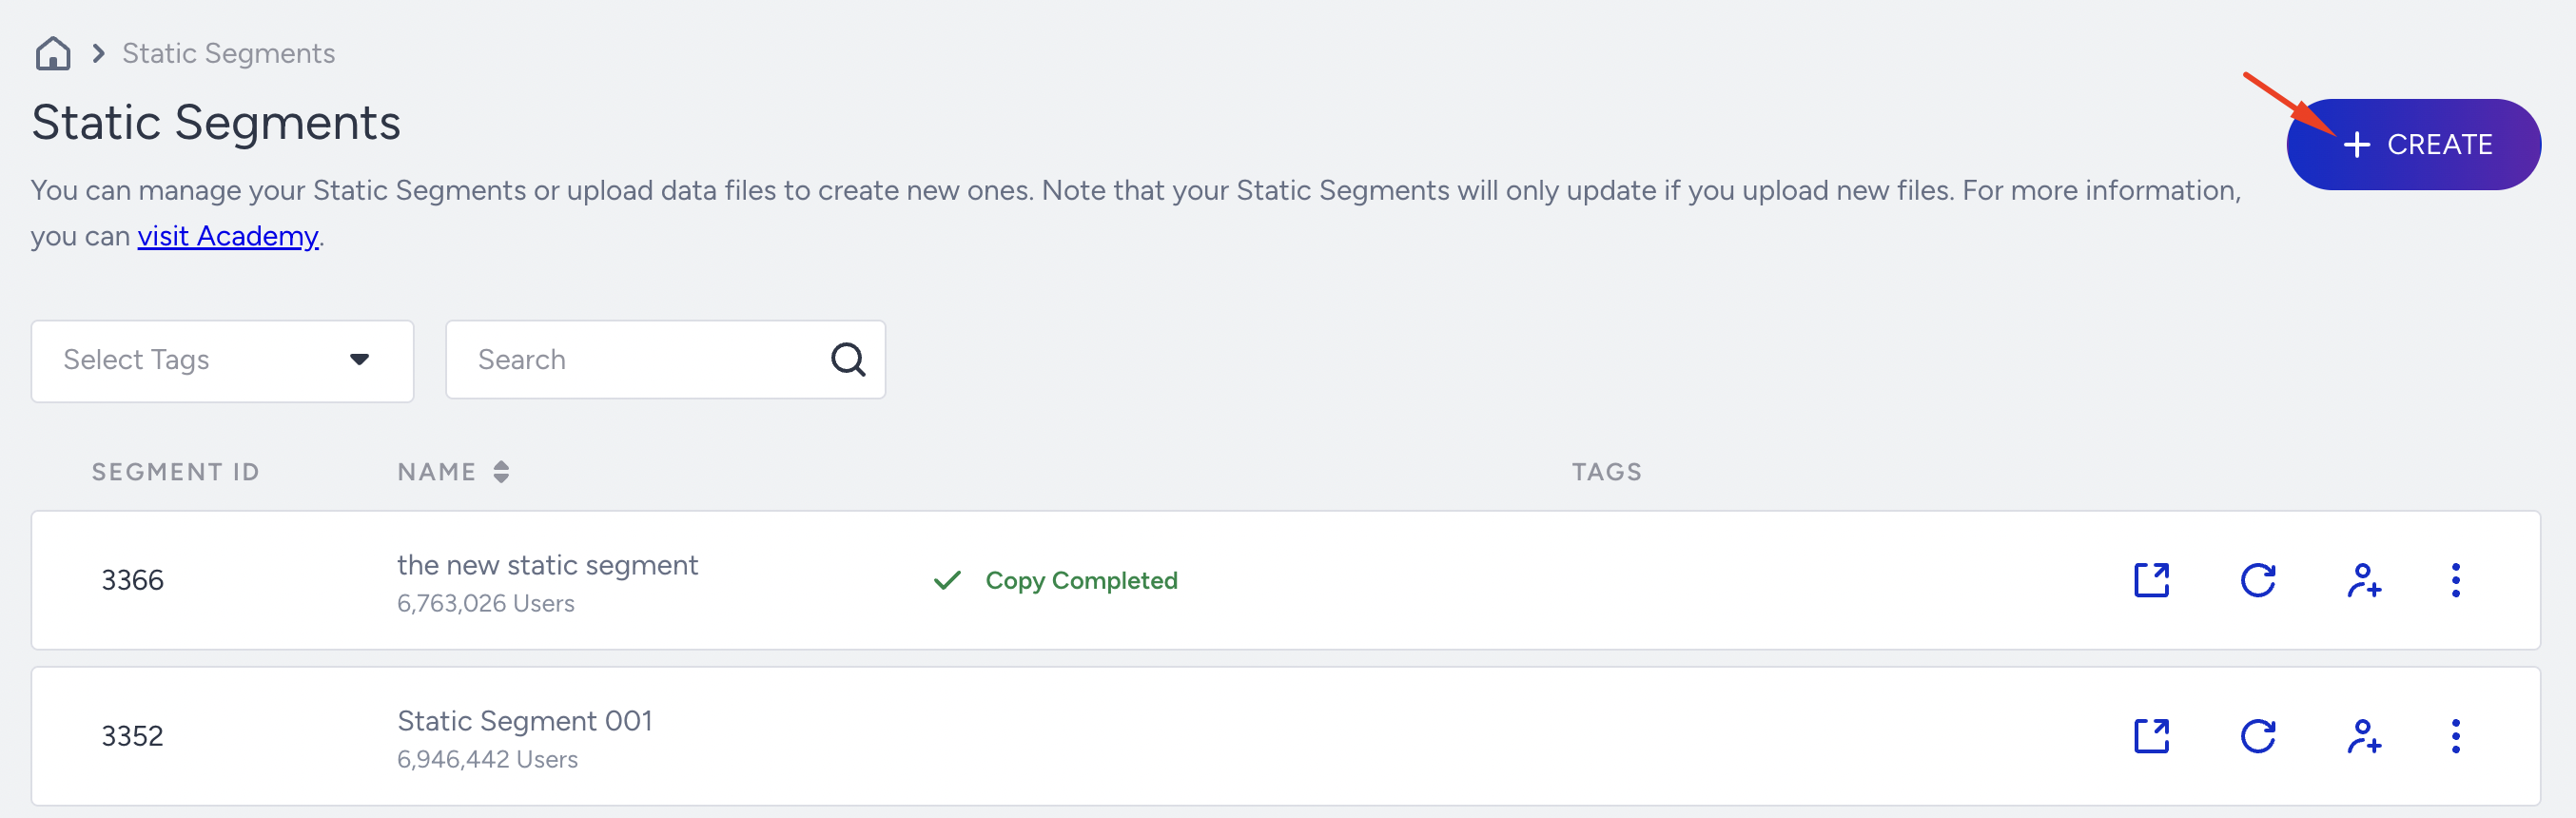
To view the Static Segments listing page, navigate to Audience > Segments > Static Segments. You can find the following details of your Static Segments on this page:

Select Tags: Displays the segments based on the tags.
Search: Describes the search criteria. You can search for a segment by email, name, UUID, or phone number.
Segment ID: Displays a unique ID to differentiate the segments.
Name: Specifies the name of the segment you assign while creating segments. When you click the Segment Name or Filters, you are redirected to the Details page.
Created On: Specifies the creation date of the segment.
Tags: Displays the tags that you have assigned.
Export: Exports the details of the Static Segment to a CSV file.
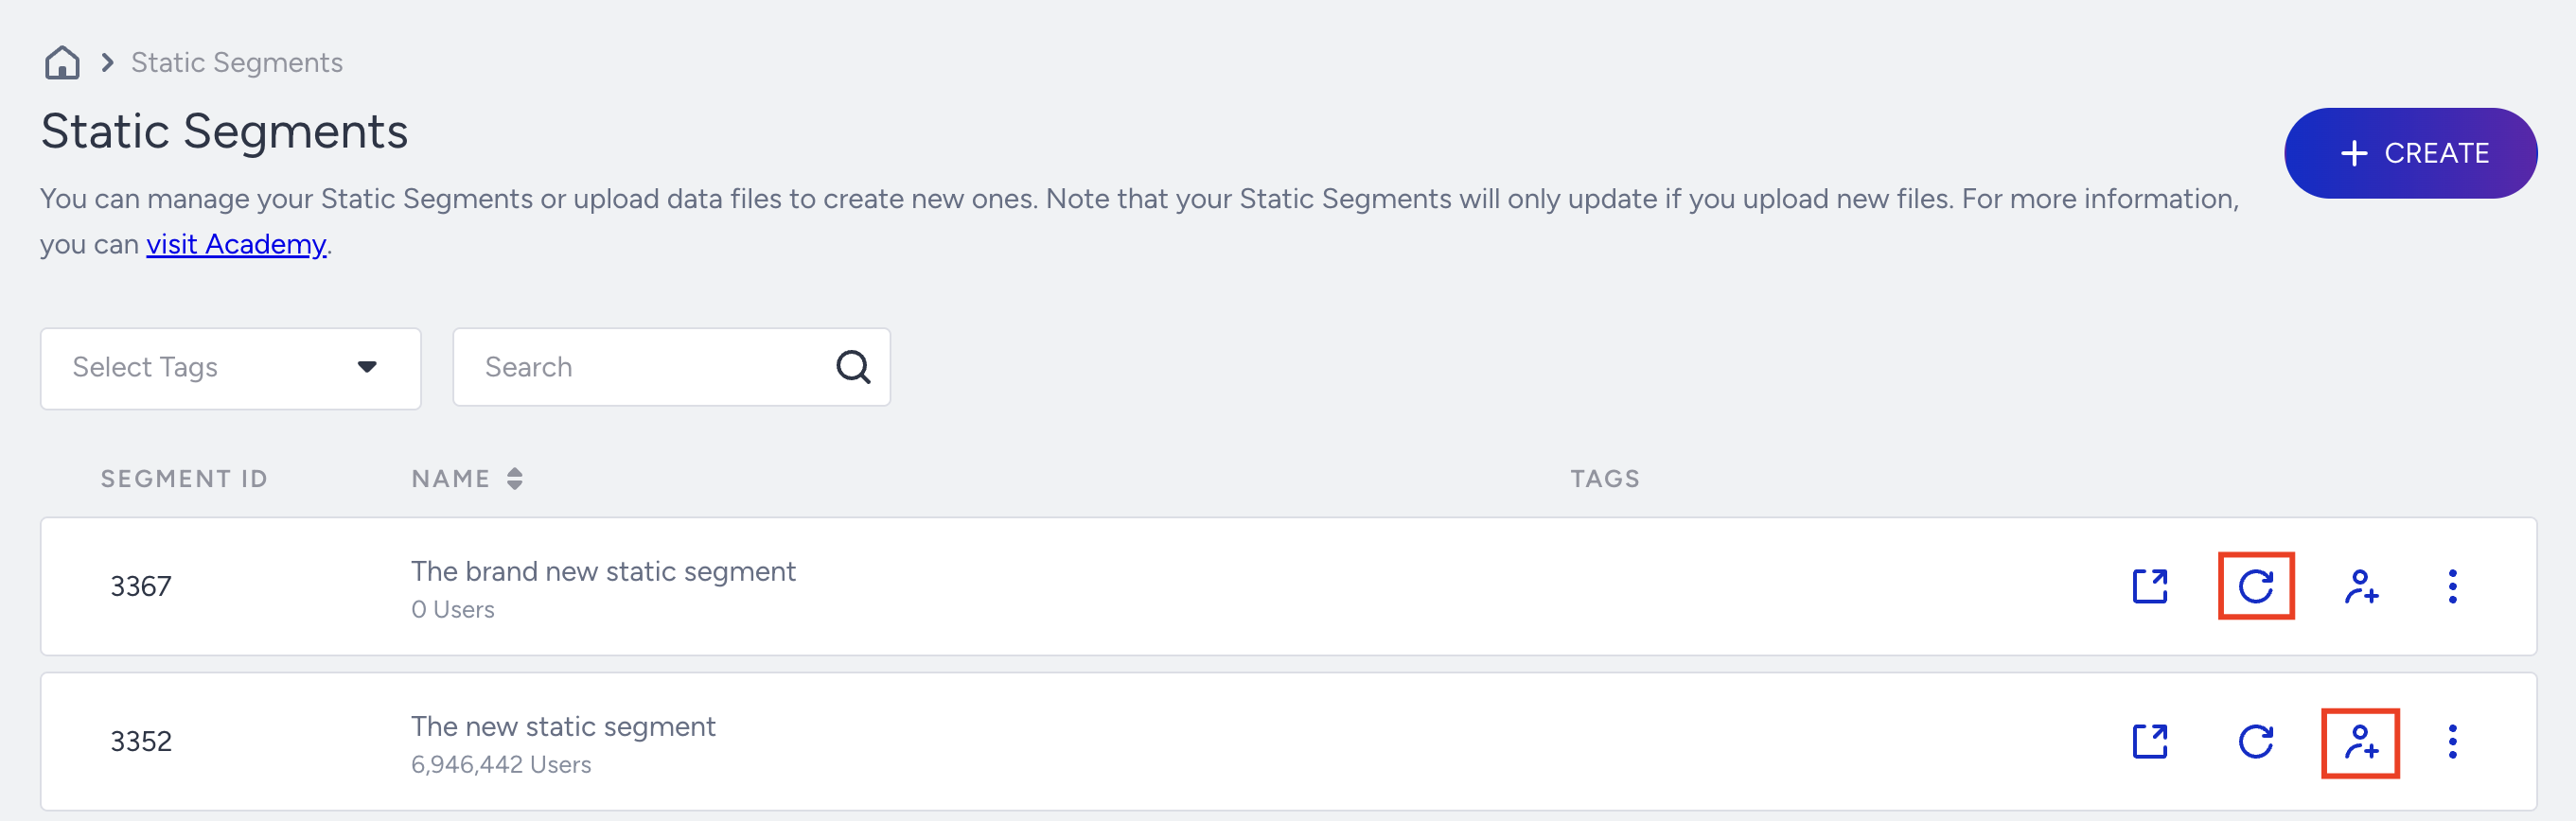
Update Count: Updates the segment upon click. This is a manual process when you use a static segment.
Add Users: Adds users to the segment.
Menu (three vertical dots): If you click the menu against a segment, you can see the following options:
Pin to Top: Use it to pin the selected dynamic segment at the top. If the dynamic segment is already pinned, this becomes Unpin.
Edit Tags: Use it to edit the tags assigned to the segment.
Duplicate: Use it to clone a segment for experiments. You can change the name by clicking the segment name and editing the input field.
Delete: Use it to permanently remove a segment. Confirm that no active campaigns are using the segment before deleting.
Click Update Count to get the most up-to-date profile numbers. The listing page uses caching, so numbers may not always be live.
You can add additional users to your previously saved Static Segment lists by clicking the Add Users button.
Create a Static Segment
To create a Static Segment to narrow down your users,
Click the Create button on the top right of the screen.
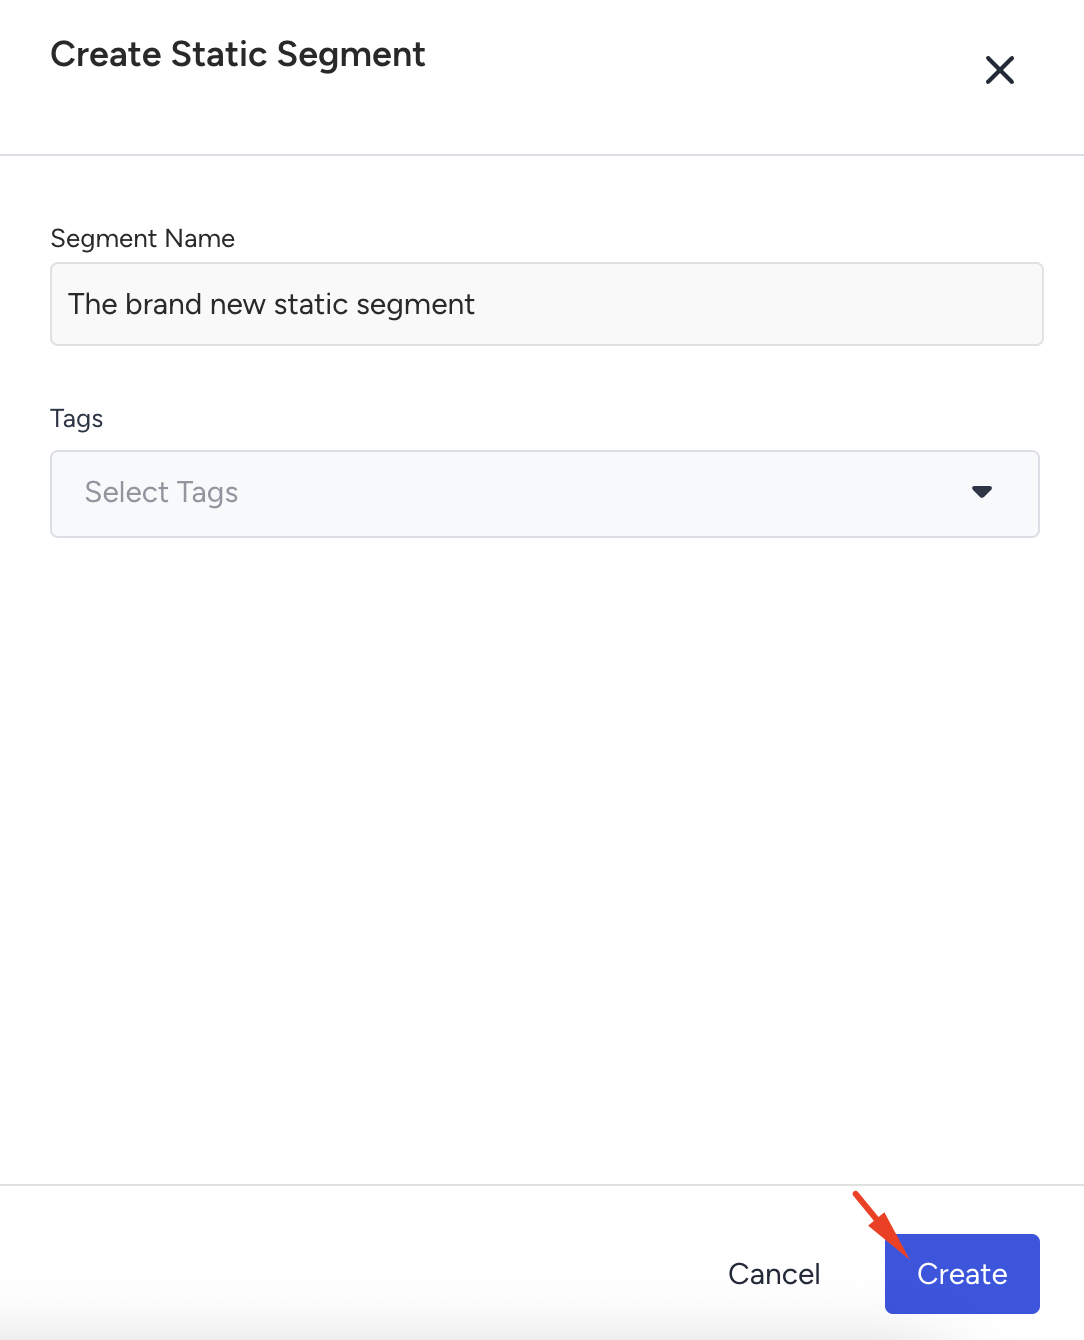
Enter a short, descriptive name and click the Create button. You can also select tags or create new ones to use as a filter later on.
When uploading the static segment, you must select at least one identifier to add and match user data. Supported identifiers include email, phone number, and UUID. The identifiers available for matching depend on your Identity Resolution Management Settings configuration.
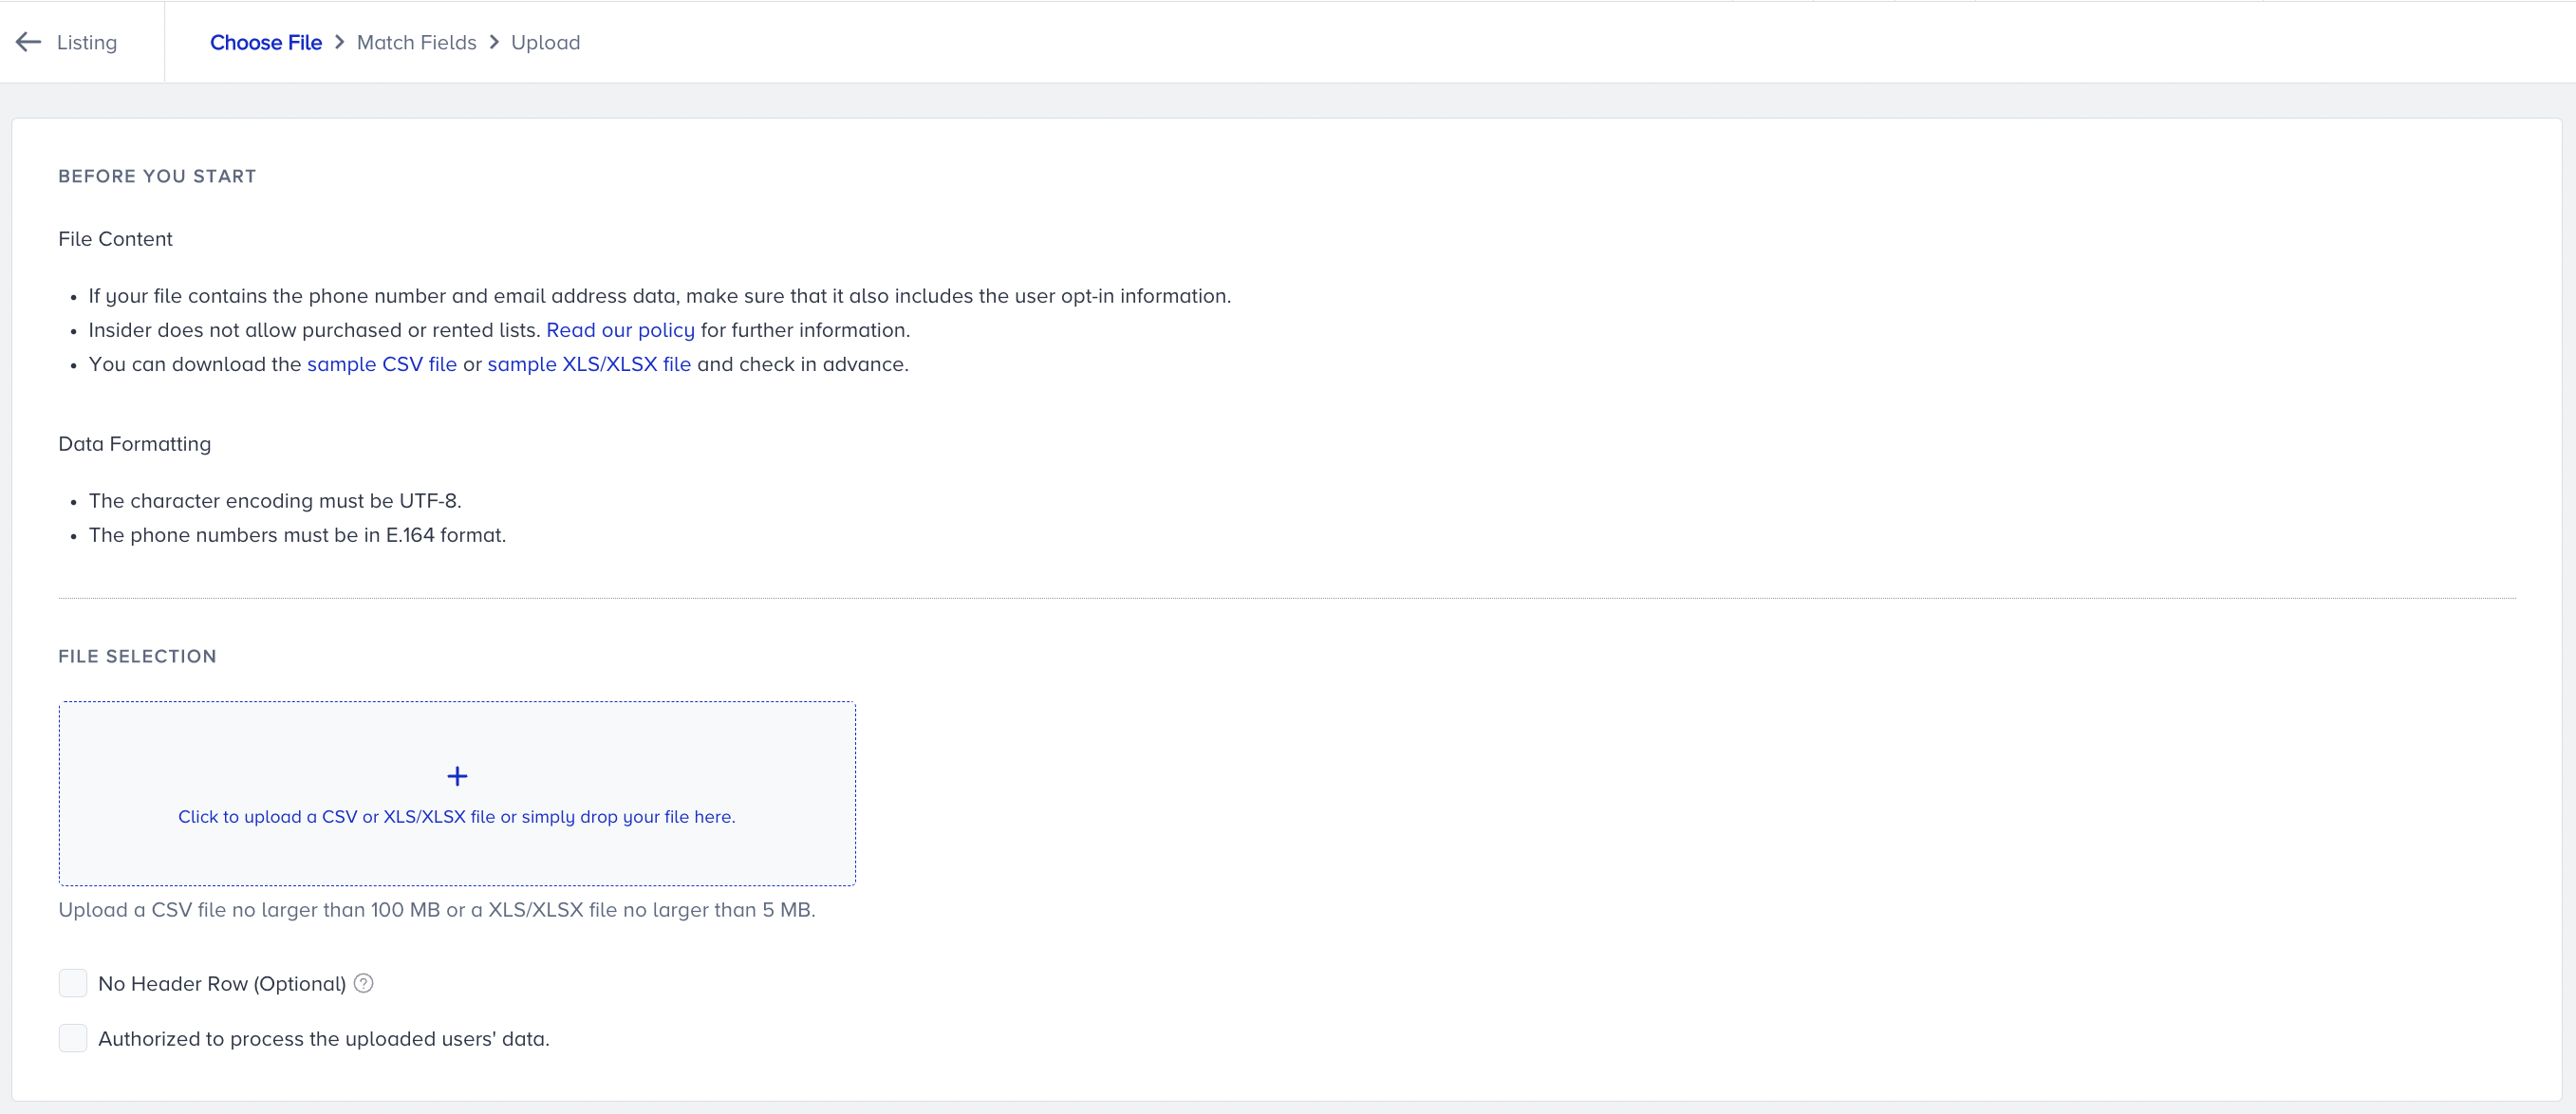
After selecting which identifiers match user data, you need to upload a CSV file. Ensure you check the last two checkboxes to confirm that all users on the list have permission.
Upload time varies depending on the number of rows, columns, and file size.
The following points should be taken into consideration while importing contacts:
Only the first three rows of your file are validated before upload. If rows beyond the first three contain invalid data, those contacts will be processed incorrectly. Review your full file before uploading.
To add a date to the document, the date format must be YYYY-MM-DD.
The identifier field name must be matched.
Different columns cannot be assigned to the same field.
While uploading data, only the first three contacts in your document are validated. Therefore, if your document contains another incorrect row, the contact information in the system will be incorrect. Please prepare the document correctly to ensure a clean dataset.
Phone numbers must be in E.164 format only.
If you are uploading an attribute that will be matched with Country, we strongly recommend using the ISO-3166 alpha-2 country code format. While other formats may be accepted by the system, they do not guarantee optimal behavior in Segmentation and Architect.
Array-type attributes (string arrays or multi-value fields) cannot be uploaded via CSV. Ensure all uploaded attributes are single-value before uploading the CSV file.
When you select the “Authorized to process the uploaded users’ data” checkbox, you are confirming that you have the necessary permission to upload and process this data within the platform.
This confirmation does not indicate or create GDPR consent (user opt-in) for the individuals contained in your file.
It simply affirms that you, as the uploader, are authorized to handle and share this data in accordance with your own internal policies and applicable regulations.
Before uploading, ensure that:
You are legally permitted to process the data you are submitting.
Any required user consents or permissions have already been collected by your organization.
Troubleshoot “Identifier(s) Not Matched”
If this message appears:
Confirm that the intended field is configured as an identifier under Components > Identity Resolution.
Confirm that every identifier selected during segment setup is mapped to the correct CSV column.
Check that the identifier column contains valid, non-empty values.
If the required identifier is not configured, update the Identity Resolution configuration before retrying the upload.
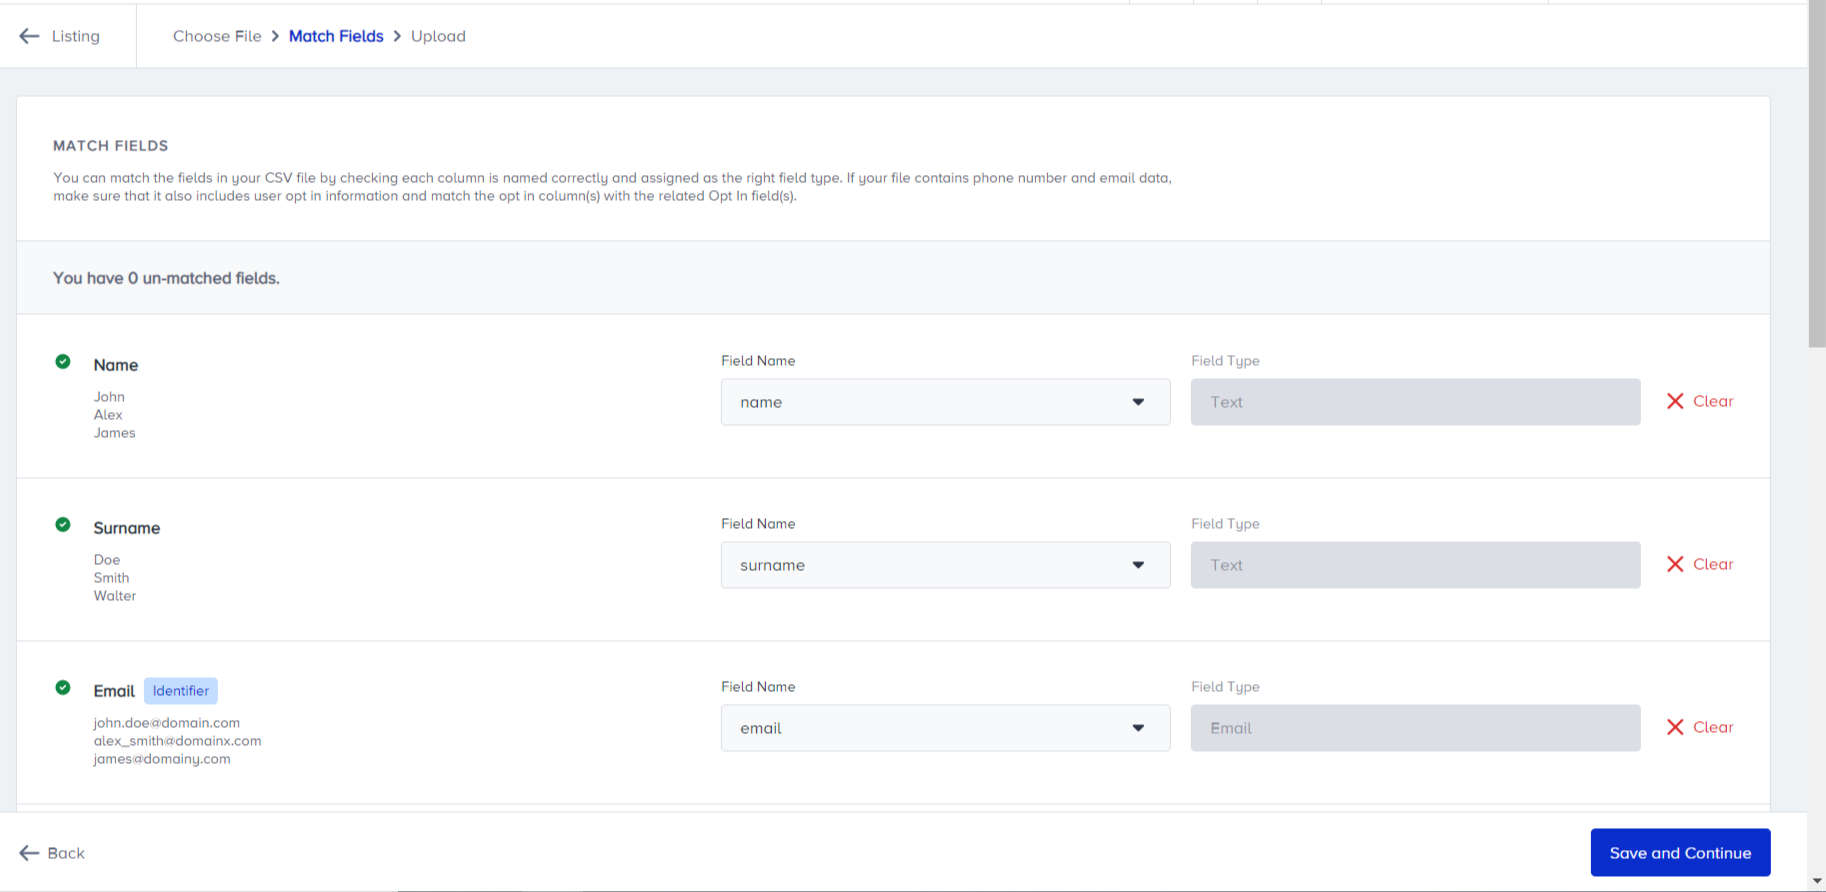
Once you have matched all the data you want to upload, click the Save and Continue button to proceed.
How User Profiles are handled during upload
Insider One uses the identifiers selected during field mapping to determine whether the uploaded record belongs to an existing user.
If the identifiers do not match an existing profile, a new user profile is created with the selected identifiers and uploaded attributes.
If the identifiers match an existing profile, the existing profile is updated with the uploaded attribute values.
If the file contains attributes that are not already present on the existing profile, those attributes are added to the profile.
If an uploaded attribute already exists, its value may be updated with the value from the file.
To reduce unintended profile creation, use identifiers that are accurate, consistently formatted, and aligned with the identifiers used in your other integrations. Map all reliable identifiers available in the file, but do not use placeholder, shared, or unverified values.
If your data contains non-UTF-8 characters, any code injections (website links with “question marks (?)”, line breaks, or extra commas) will result in a warning.
You can refer to the video below to better understand how to create a Static Segment:
If this video does not load in your region, you can watch it on our YouTube Channel.
Investigate upload issues
If your upload contained issues, click Download the issues file to receive a file with issue codes added next to each affected cell.
#No Issues#: No issues with this cell.
#Non-UTF-8 Character Coding#: The cell contains non-UTF-8 character encoding.
#Computer Code#: Code injection detected. Typically caused by a URL containing question marks (?) with an incorrect data type.
#Line Breaks#: The cell contains a line break.
#Additional Commas#: The cell contains an extra comma.
Example issues file (note that the values shown are not absolute):
.png)
After reviewing and correcting the issues in your file, re-upload the corrected version.
Review the column mapping. Each column in your CSV should be assigned to the correct field name and type. Use Clear on any column you do not want to import.
The Label indicator next to a field means the attribute will be treated as an identifier. Ensure your identifier is unique across users.
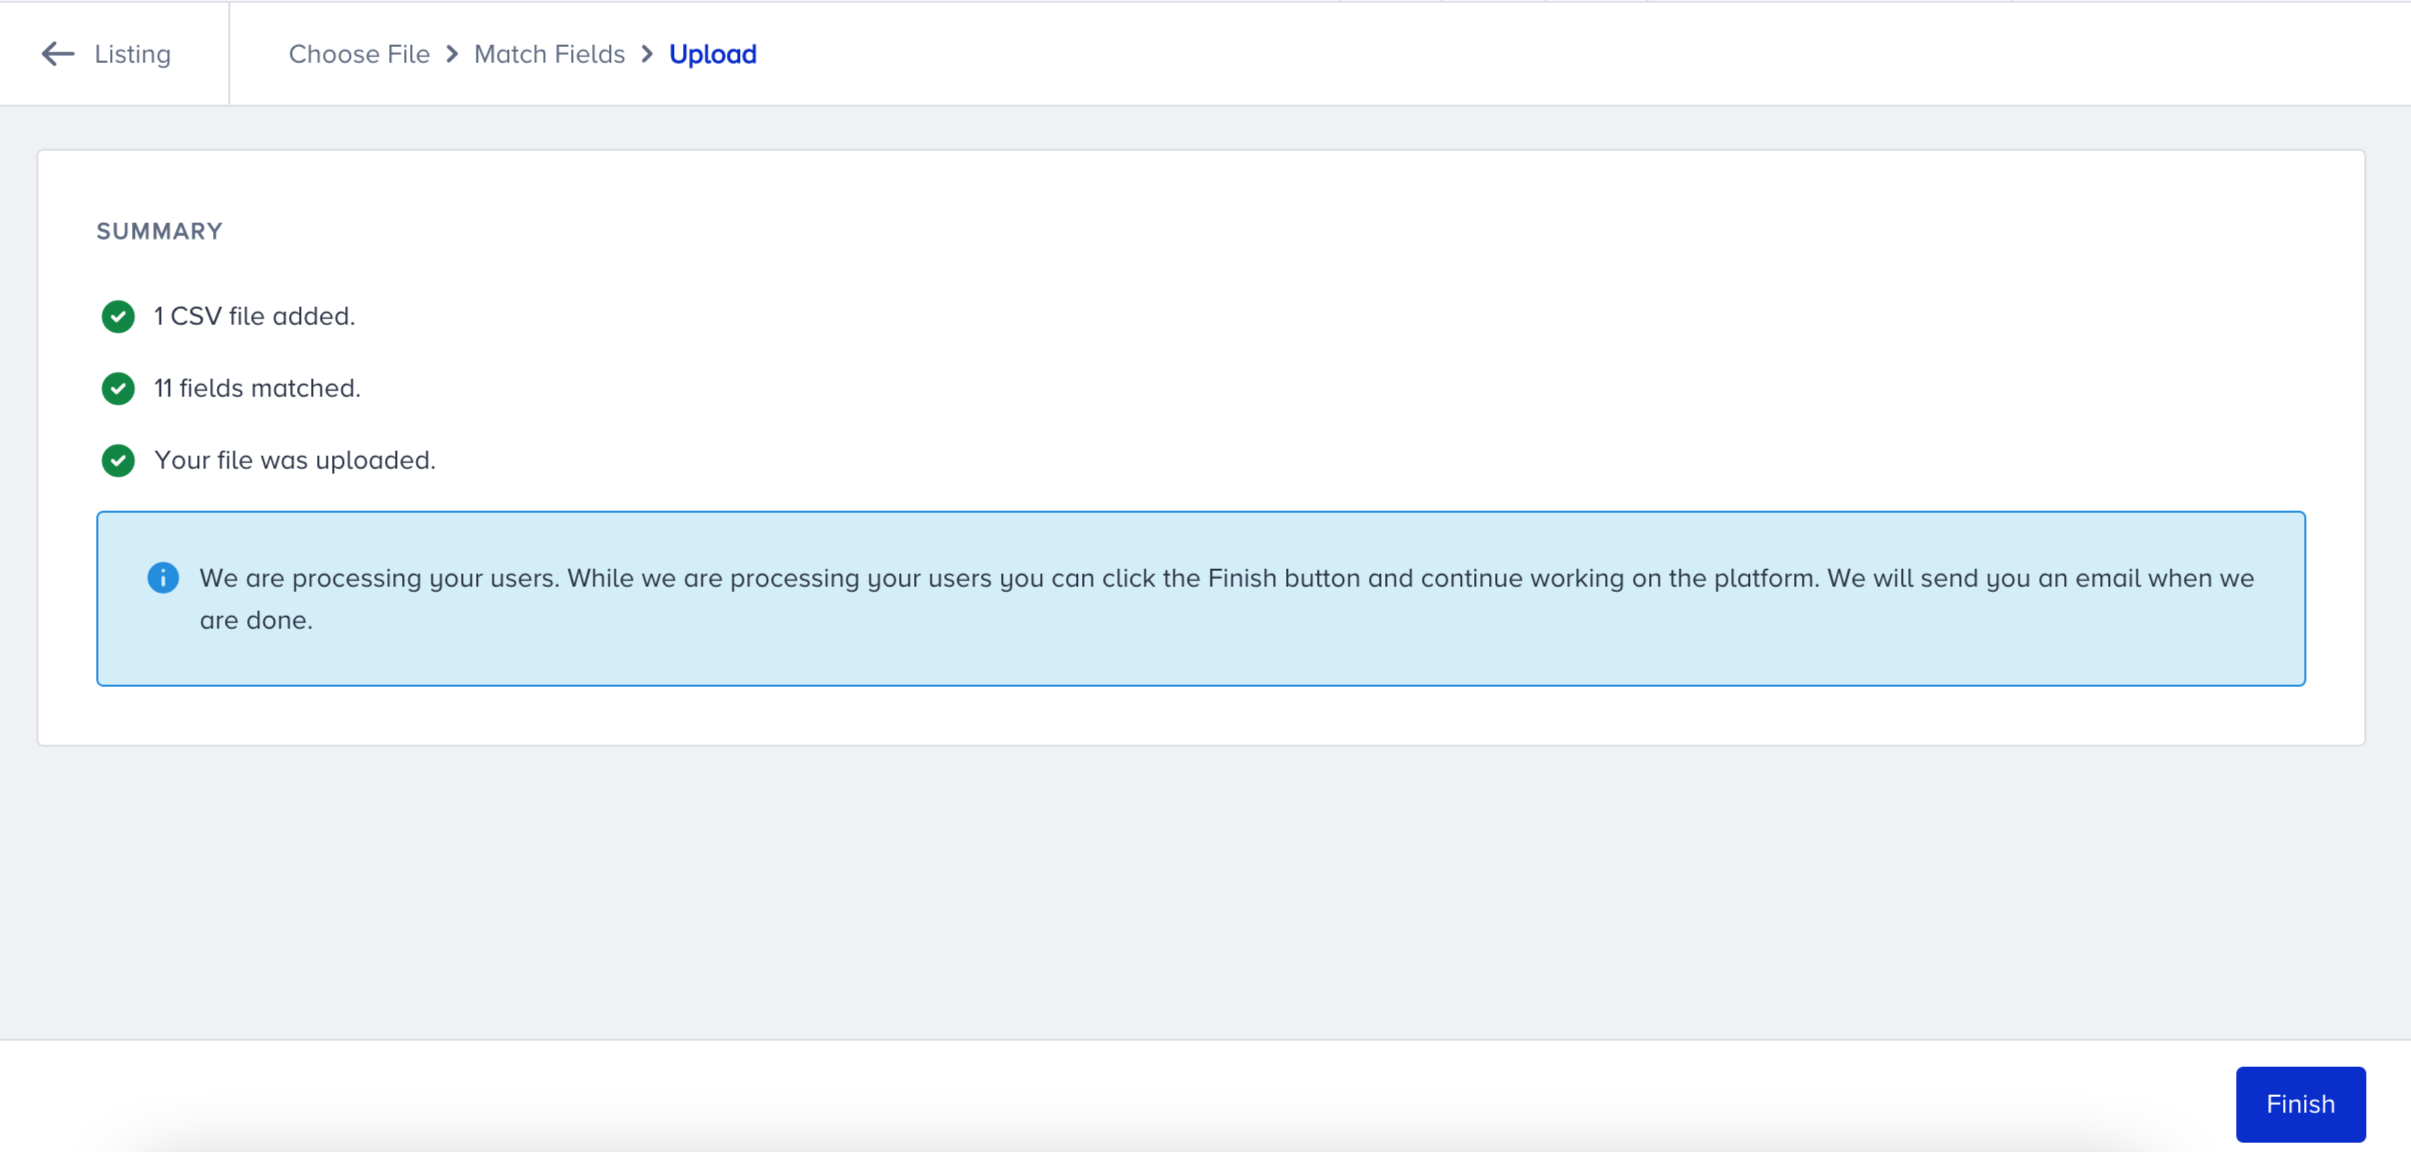
The summary screen confirms your upload has been submitted. Processing continues in the background. You will receive an email when the file processing is complete. Invalid records are listed in that email.
Once you save your segment, you can see the filters within it on the listing screen and use your segment in products while working with UCD.
Click Update Count to get the most up-to-date profile numbers. The listing page uses caching, so numbers may not always be live.
You can add additional users to your previously saved Static Segment lists by clicking the Add Users button.
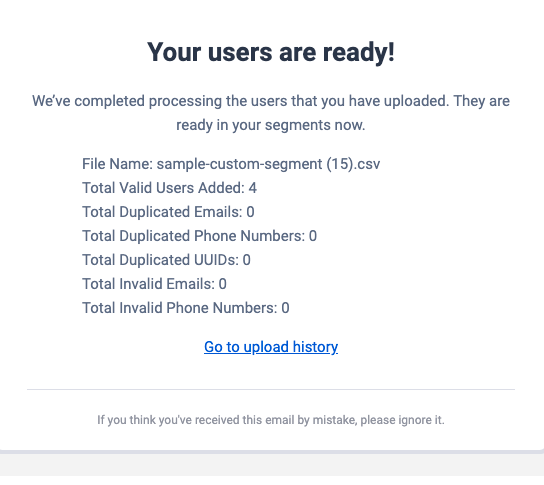
Interpret the upload summary email
After the CSV processing is complete, you receive an upload summary email listing any invalid records and the reason each was rejected. See Interpret the User Upload Summary Email for a full breakdown of error types and how to resolve them.
You can refer to Interpret the User Upload Summary Email for more information.
Static Segment details page
You can find the following details of your Static Segments on this page:
Segment Name: Displays the name of the segment that you assigned. You can also search for the segment by entering the name.
Segment ID: Displays a unique ID to differentiate the segments.
Search: Enter an email address for the search.
Total Counts: Displays the total number of users. You can also refresh the count to check.
Profile ID: Displays each user's profile ID.
Email: Displays the user's email address.
Created On: Displays the creation date of the user profile.
Last Updated: Displays when you last manually updated the user data.
Learn More: Displays detailed information about the user profile.
Delete: Deletes the user profile data.
View Profile option has restricted access. If you have limited access to the panel, the email addresses are displayed as muted values. To get access, contact your account administrator.
Review and manage your Static Segment
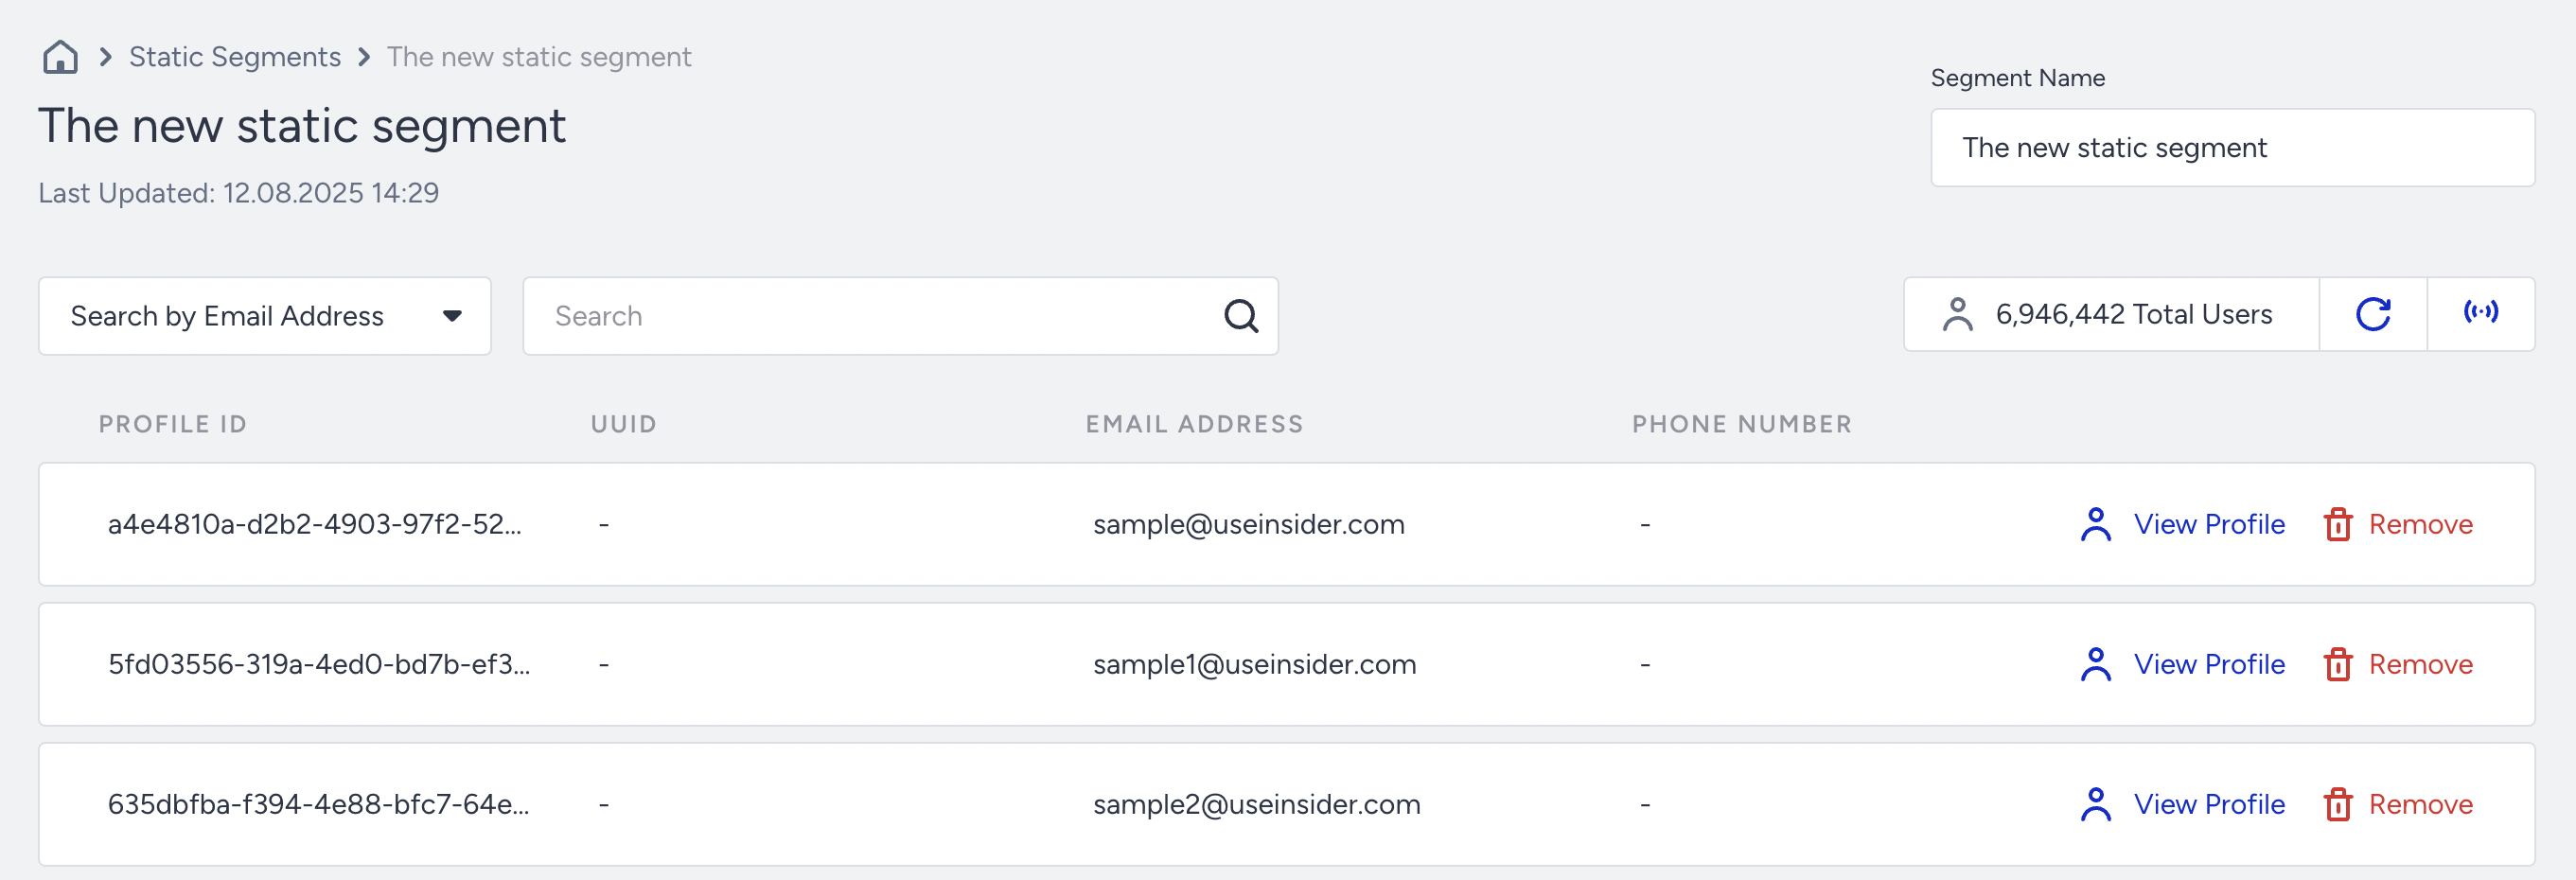
To access the Static Segment overview page, click on the segment name from the listing page.

On the Overview page, you can see all users included in the selected static segment.
Search for a user: Use the search bar to find a specific user quickly.
View user details: Click the Profile icon next to a user’s name to open their profile.
View Profile option has restricted access. If you have limited access to the panel, the email addresses are displayed as muted values. To get access, contact your account administrator.
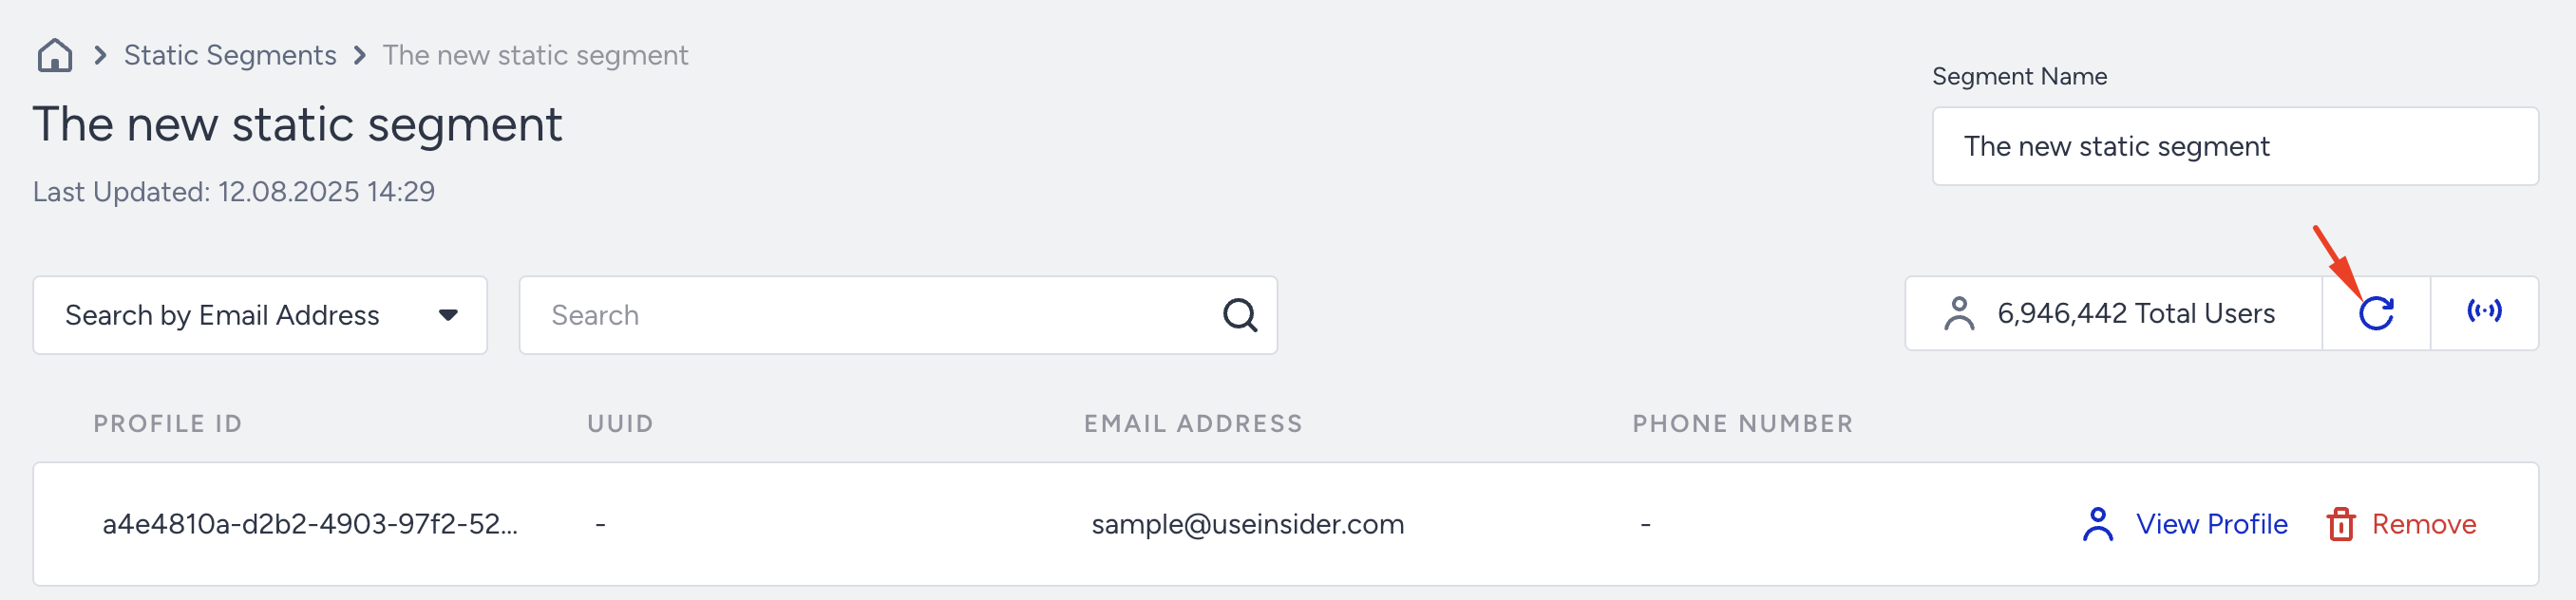
To ensure you’re viewing the most recent data, click Refresh. This updates the user count and displays the latest list of users in the static segment.
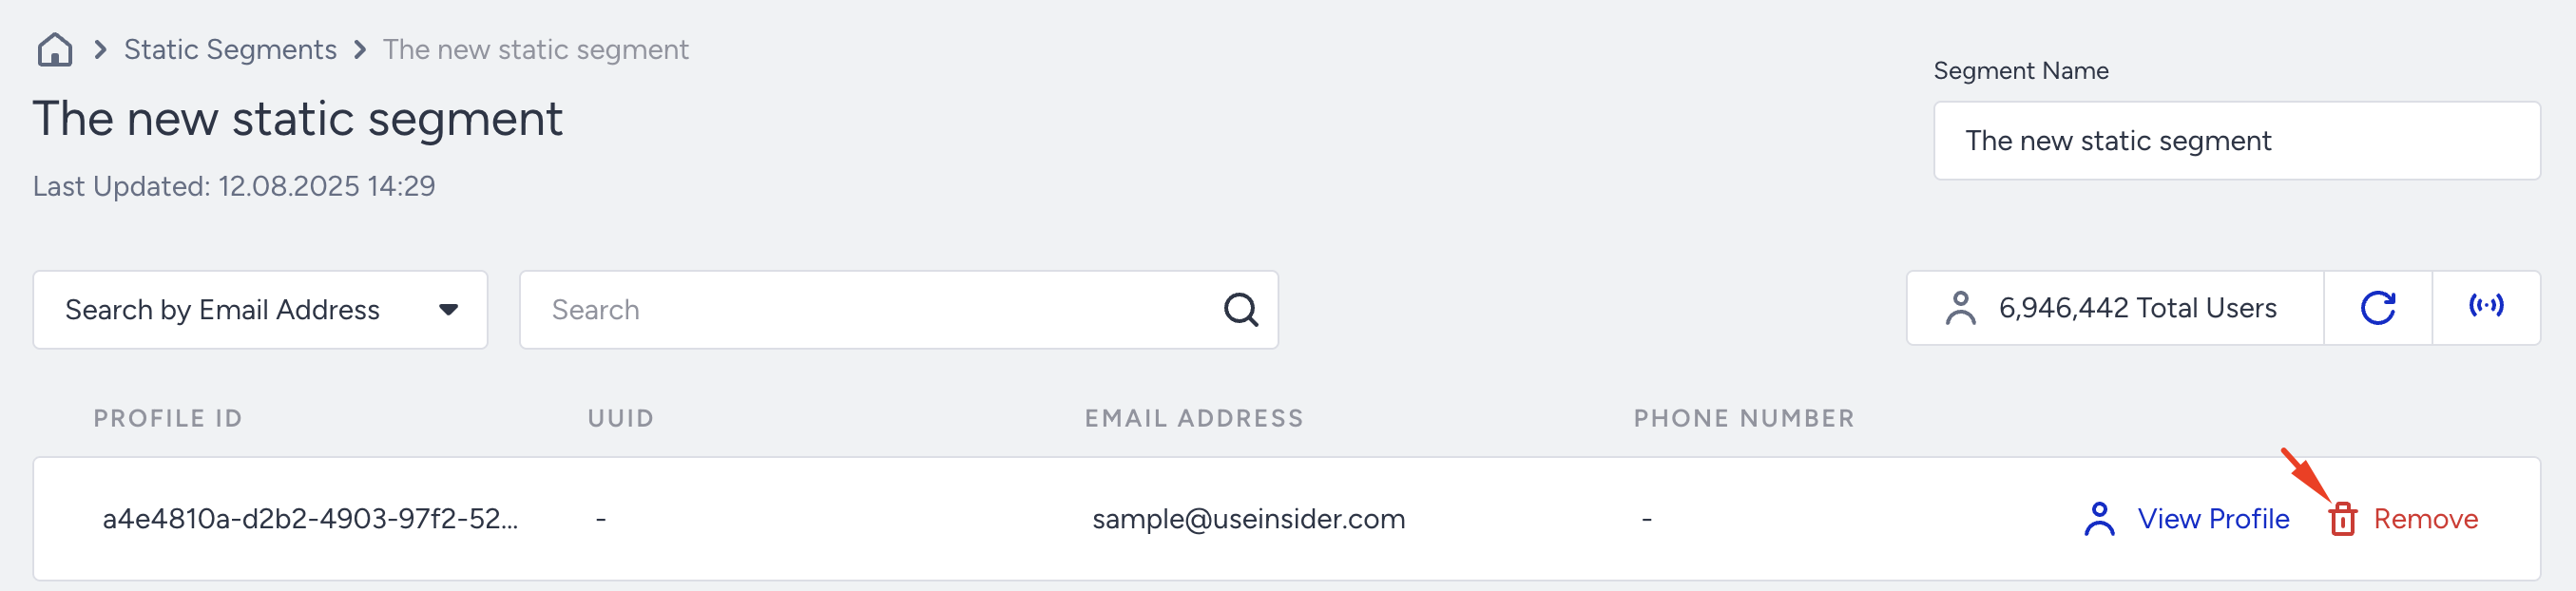
To remove a user from a static segment, click Remove next to their entry.
Reachability by Channel
To view the number of reachable users per channel for this static segment, click the Reachability icon.

The currently estimated reachable number of users by the channels is listed:
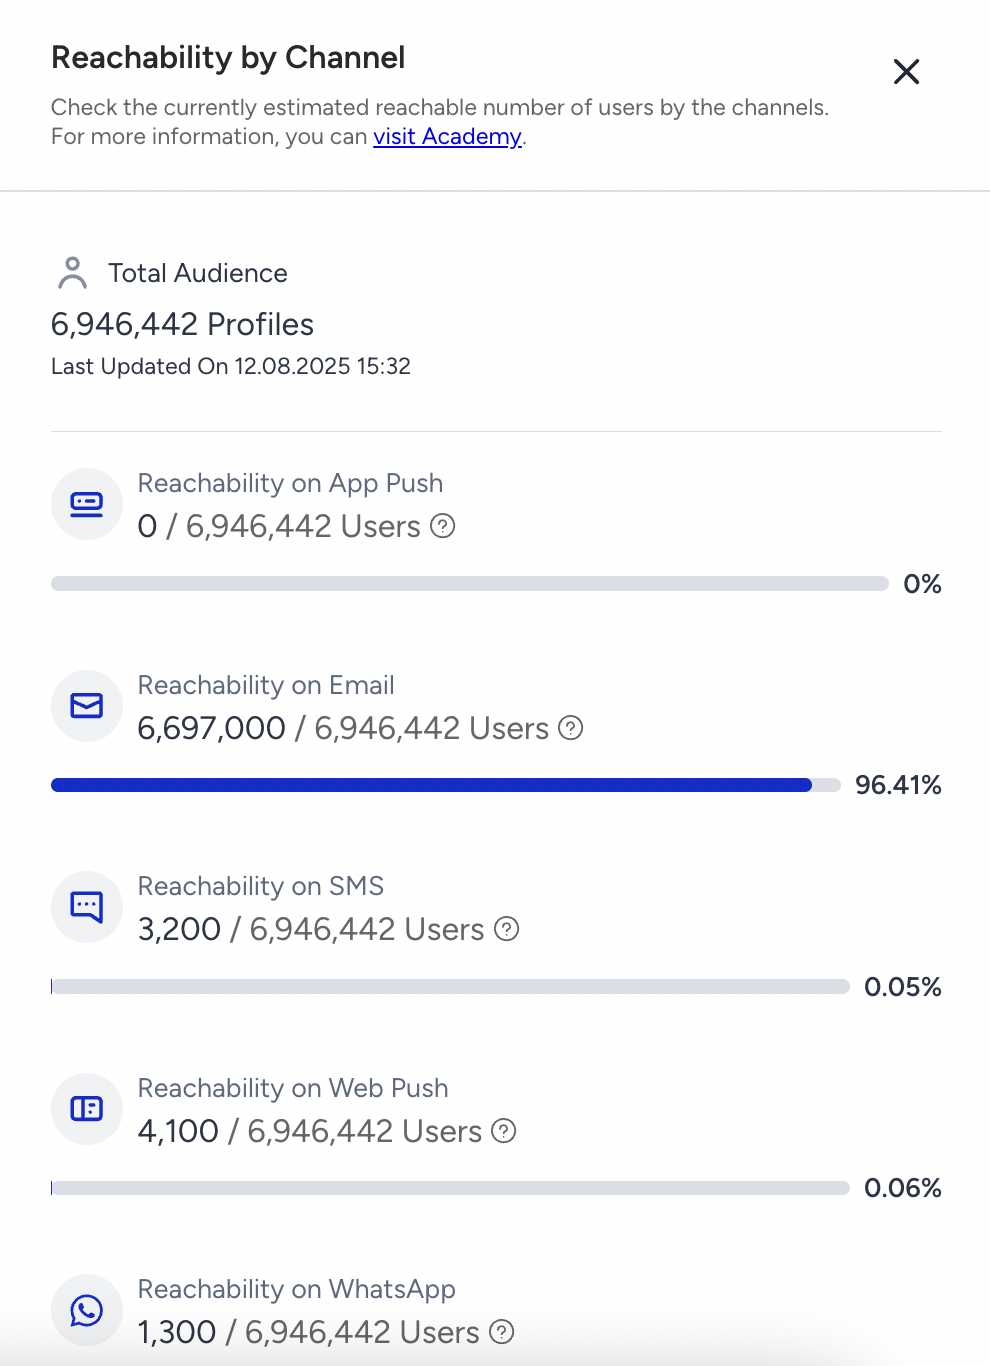
Total Audience is the number of users in the selected static segment.
Reachable user count: This is an estimate based on sample data to give you an idea before sending your campaign. The exact number will be shown at the Launch step of your campaign.
Channels displayed: Only channels enabled in your panel are shown. If a channel is enabled but has no reachable users, it will display N/A.
Updating reachability: If you’ve added new users or want the latest data, click Update Reachability by Channel. You can update once every five minutes.