In this step, you will complete the integration of your selected user data via your website using Insider’s Web SDK Integration Wizard. This process is essential for enabling accurate data collection, segmentation, personalization, and analytics from your web platform.
The Web SDK Integration Wizard provides a step-by-step process to help you implement the Web SDK on your website. This integration will simplify data management, conversion tracking, website mapping, and targeted marketing, thereby enhancing user engagement and website analytics. Make sure all defined user events, event parameters, and attributes are integrated correctly, and also verify the integration for a successful setup.
Currently, Google Tag Manager is only available in this wizard.
It is mandatory to complete the Integrate Insider Tag and Test Insider Tag Integration steps to start the Web SDK integration.
Custom events, parameters, and attributes will not be included in the Web SDK integration wizard unless the user data plan is confirmed and the custom data is created in the Create Custom User Data step.
Step 1: View User Data
The user events, parameters, and attributes defined during the User Data Planning step will be listed on this page. You can select the event parameters, previously defined in the User Data Planning step, that you want to include in your Web integration.
(4).png)
Step 2: Integration Method
You can select your preferred data integration method and your website structure to complete Insider’s Web SDK Integration. Once completed, you can immediately start tracking your customer data like purchases, revenue, identification, and more.
Currently, Google Tag Manager is only available in this wizard.
(5).png)
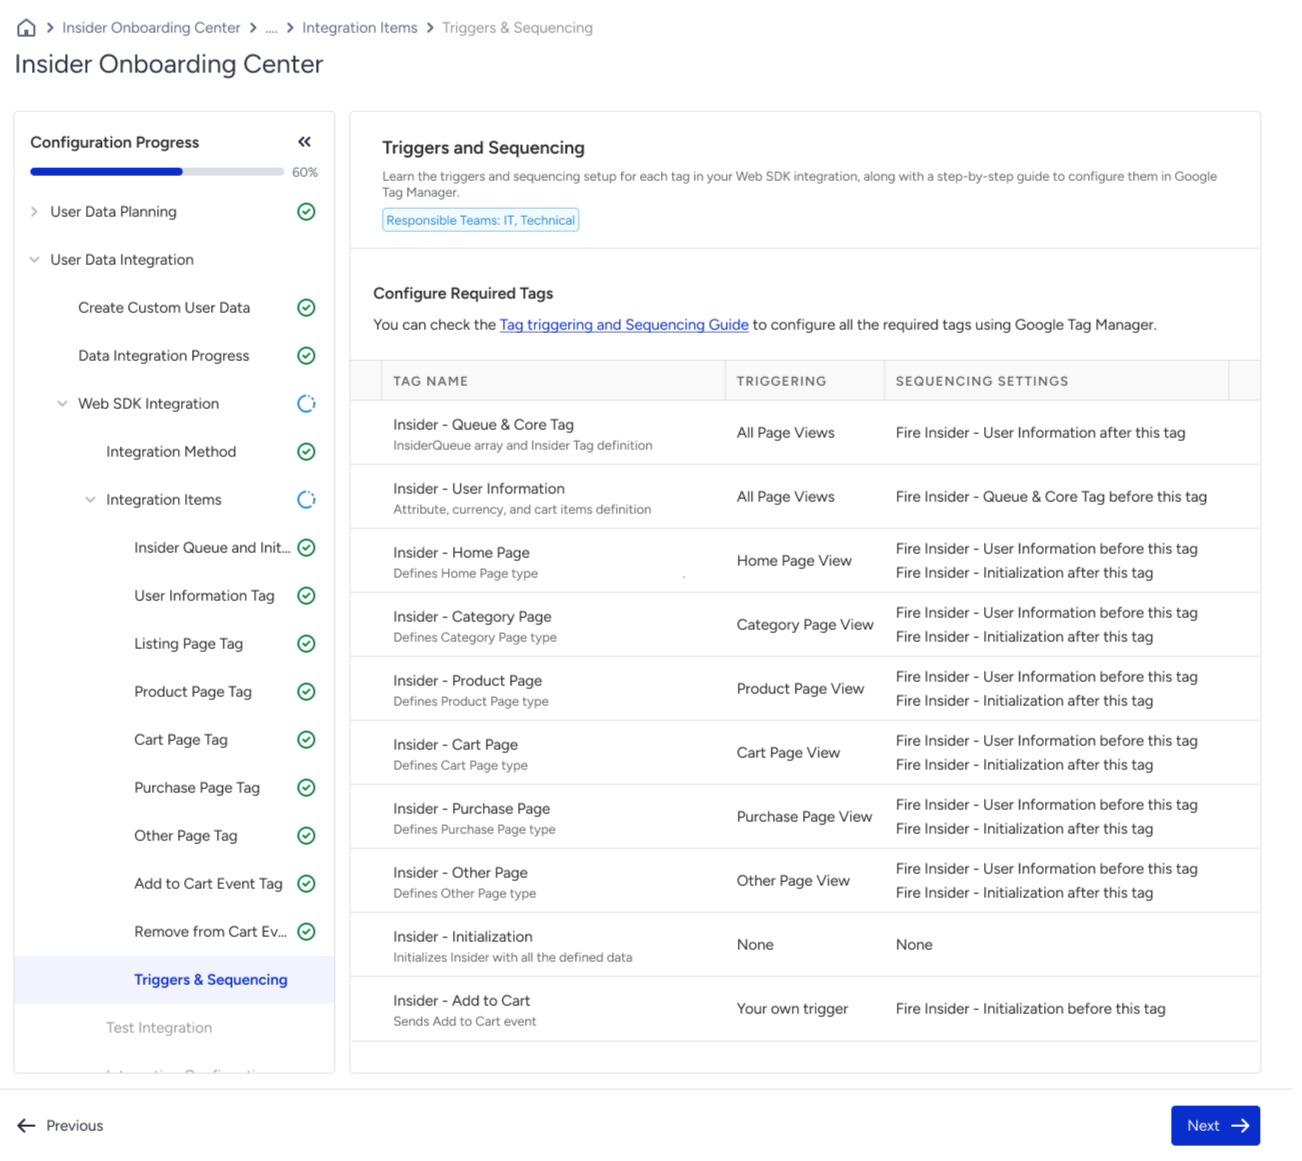
Step 3: Integration Items
Follow the instructions at each step to create each tag item in Google Tag Manager to match your integration structure. Each tag comes with ready-to-use Custom HTML code. You can add the generated code to your tag and replace the sample values in the script with real data from your website, and ensure each value matches the correct data type as defined in the provided data list.
(5).png)
You can also learn the triggers and sequencing setup for each tag in your Web SDK integration, along with a step-by-step guide to configure them in Google Tag Manager, in the last step of the Integration Item.
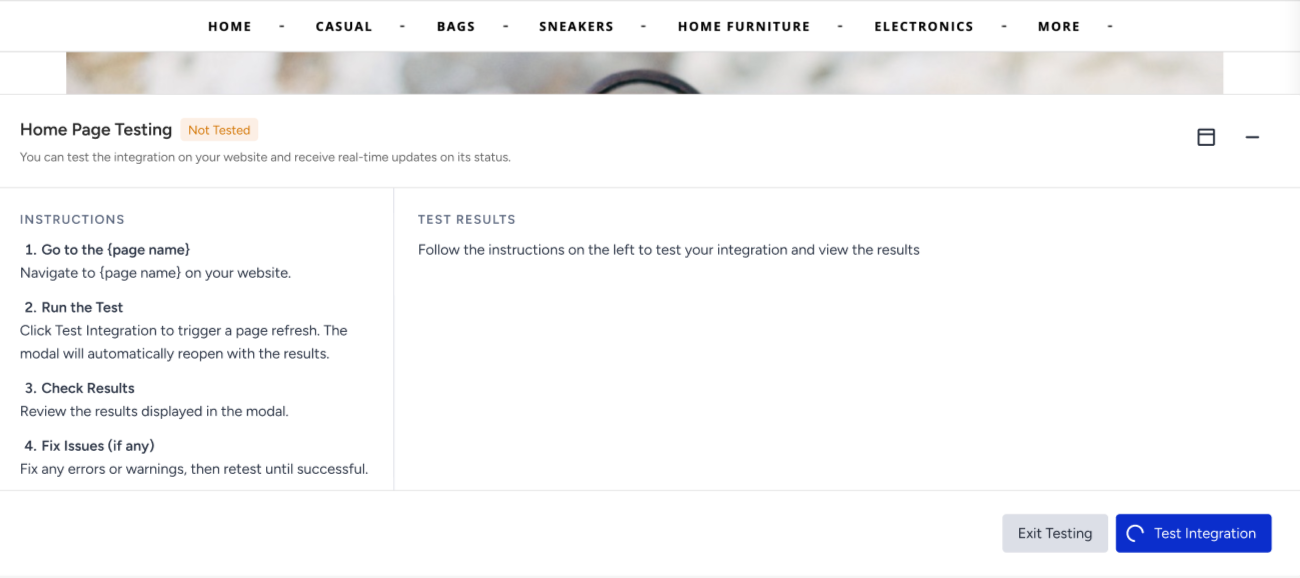
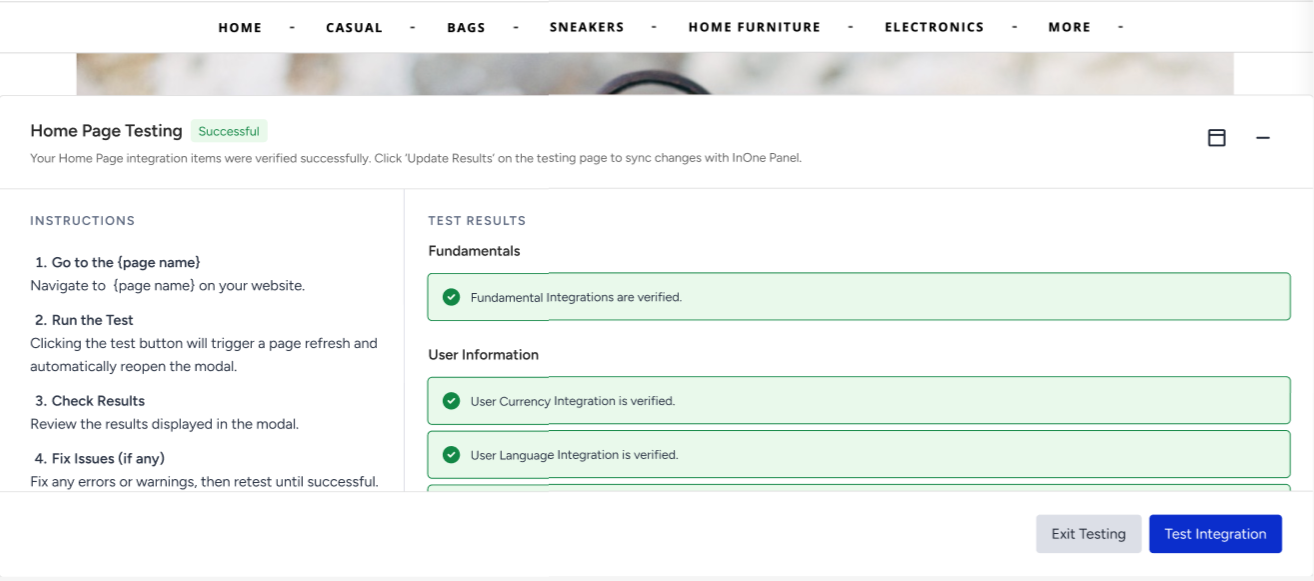
Step 4: Test Integration
You can test the items of your Web SDK integration to ensure it works as expected. During this step, all required data items are tested in real time to confirm the correct setup. All required items must pass before you can continue, while optional items can be skipped.
(4).png)
After starting the Test Integration, you will be redirected to your website in another tab, and the Testing Modal will be triggered automatically. The Testing Modal will provide the instructions you need to complete your tests, and you will see real-time updates on test status.
Step 5: Integration Confirmation
Confirm that all required integration steps have been completed on your side. Once you confirm the integration, the Insider One team will review and approve your integration.
If your Web SDK integration is rejected by the Insider One team for a reason, you will get an email with more information on the required updates. Once you complete the updates, you can resubmit the integration for re-examination by the Insider One team.