You cannot make any changes to External Platform Integrations without having either an Administrator or an Editor with PII access in InOne. Refer to User Roles for further information.
The Google Sheets integration lets you sync data from your spreadsheet directly into Insider One. Once set up, InOne reads your sheet on a scheduled basis and creates or updates user profiles and behavioral events automatically.
The table below summarizes the key capabilities and behavior of the integration.
Capability | Details |
|---|---|
Auth method | OAuth Authorization Code (Google account login) |
Data flow | One-way: Google Sheets to Insider One |
Sync behavior | Fetches all rows on every run |
Supported data | User identifiers, profile attributes, events, and event parameters |
Scheduling | Configurable cron schedule (UTC) |
Requirements
Ensure you have the required information before setting up the integration.
Information | Notes |
|---|---|
Google Spreadsheet URL | Full URL of the sheet, e.g. |
Sheet Name | Tab name within the spreadsheet, e.g. |
Google OAuth Client ID | From Google Cloud Console under APIs and Services > Credentials |
Google OAuth Client Secret | From Google Cloud Console under APIs and Services > Credentials |
The integration requires the following OAuth scopes:
spreadsheets,drive.file,drive.readonly. Ensure your Google Cloud app has these enabled. The integration reads data only; it never writes back to your spreadsheet.
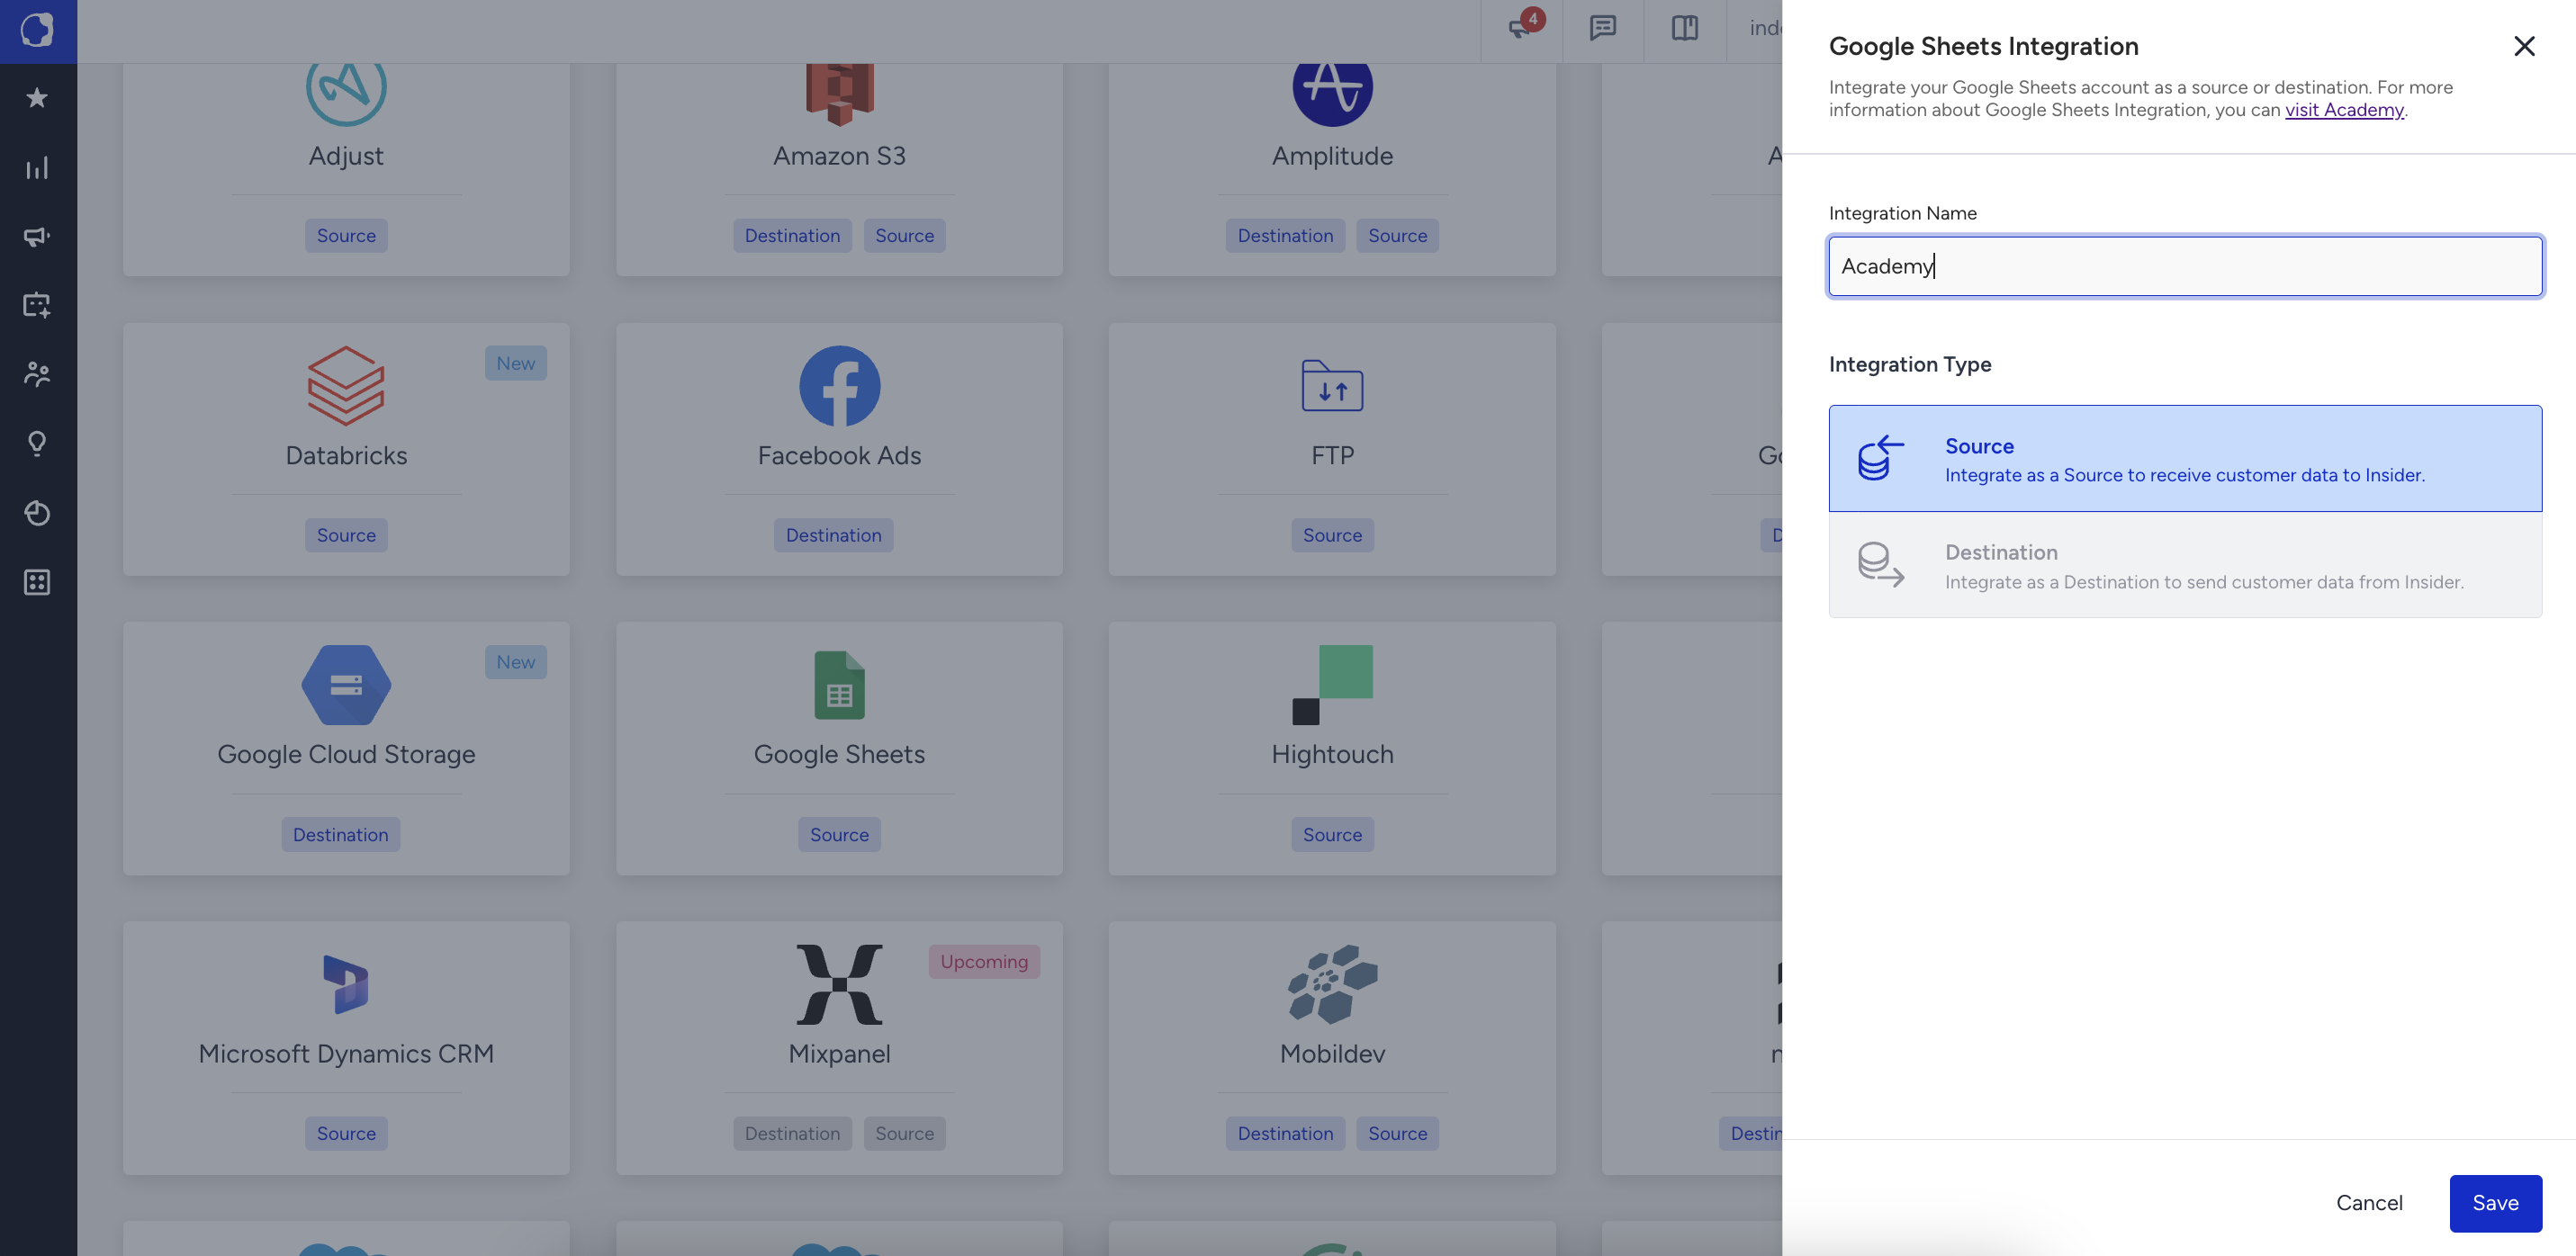
Step 1: Create a new integration
Navigate to InOne > Components > Integrations > External Integrations.
.png)
Search for Google Sheets and select it.

Give the integration a unique name and click Save.
Step 2: Connect your Google Account
To connect your Google account, you first need to create and configure a Google Cloud project and enable the required APIs. Follow the steps below to set up your Google Sheets app before completing the connection.
Step 2.1: Create a project
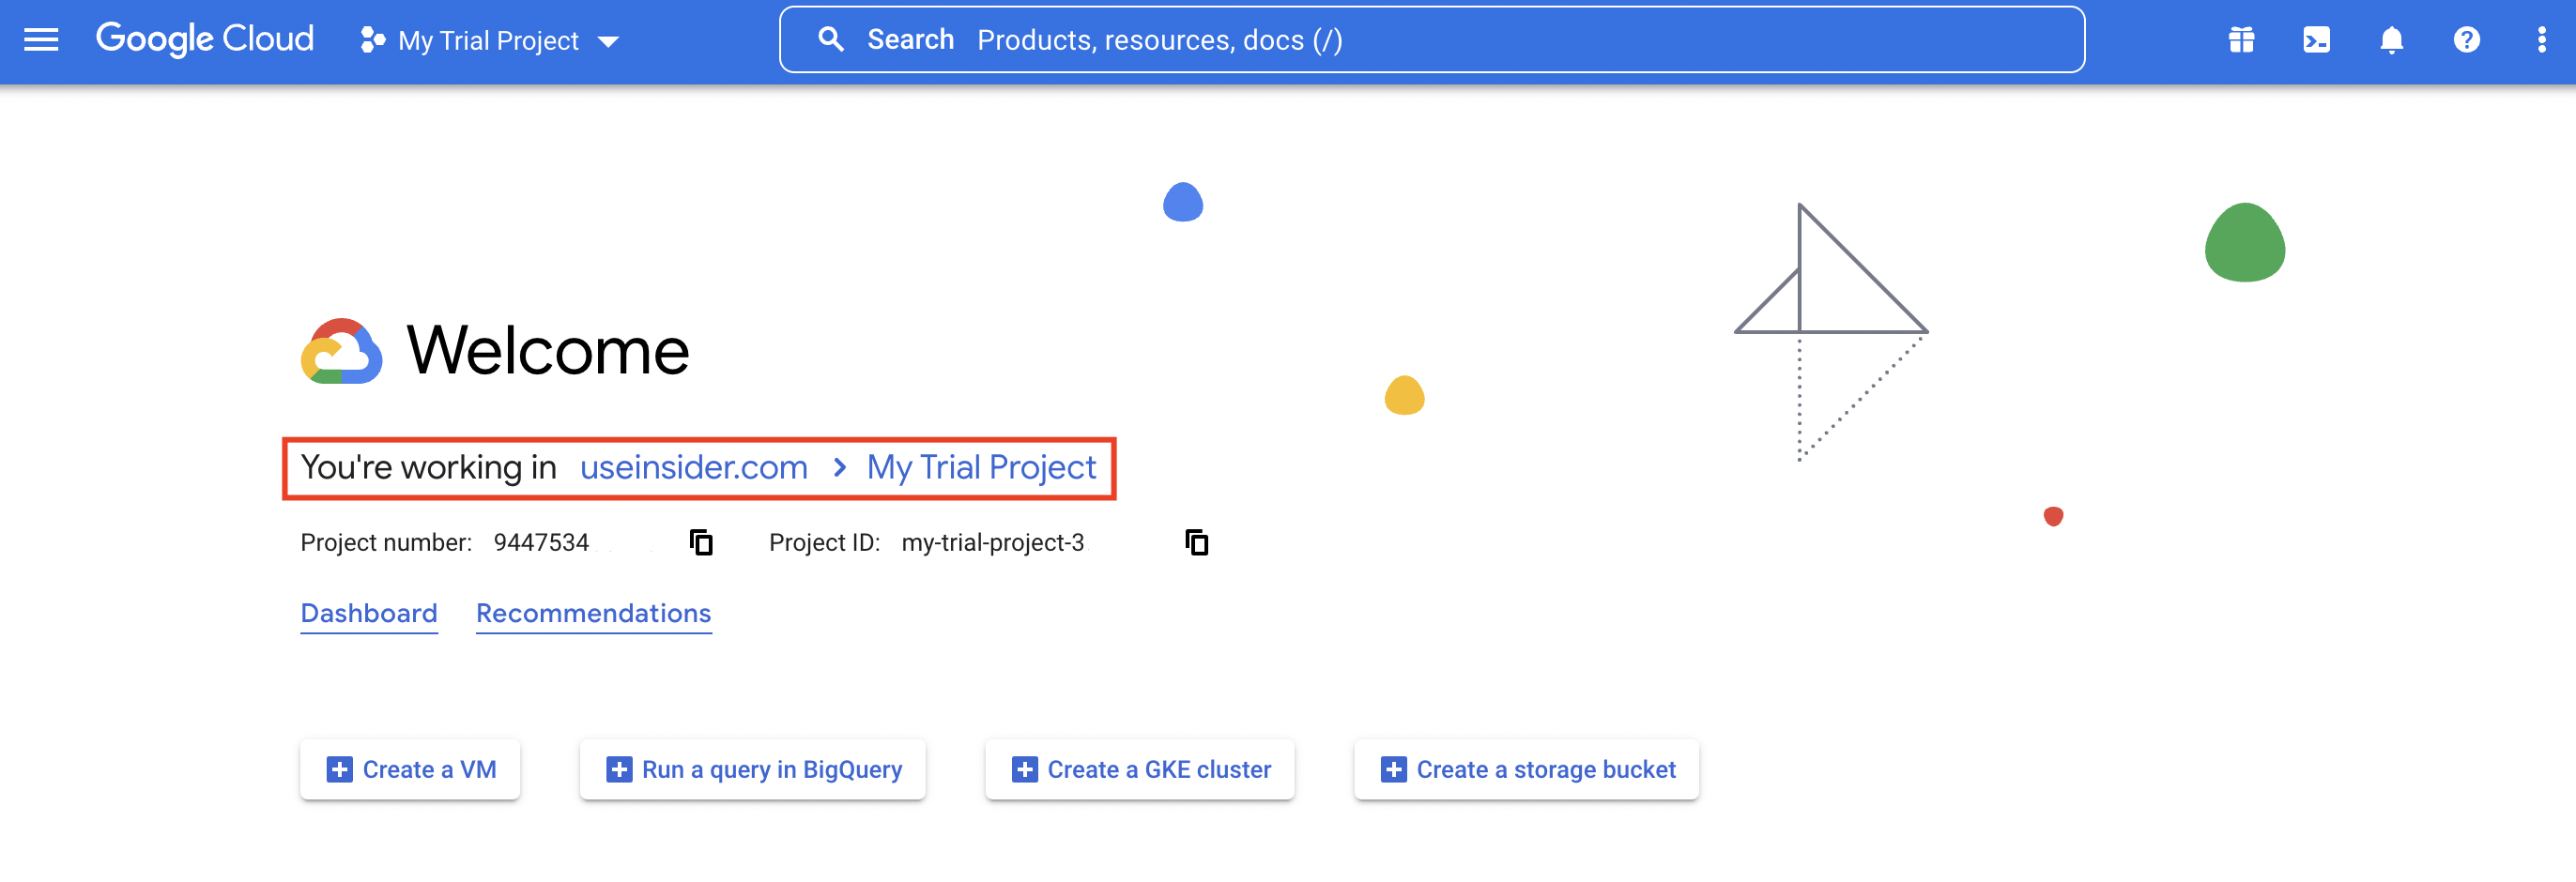
To create a project on Google Cloud, you need to sign up for a Google account or log in to your existing account if you have one. Then, go to the Google Developers' Console to create your Project and enable the relevant Google APIs.
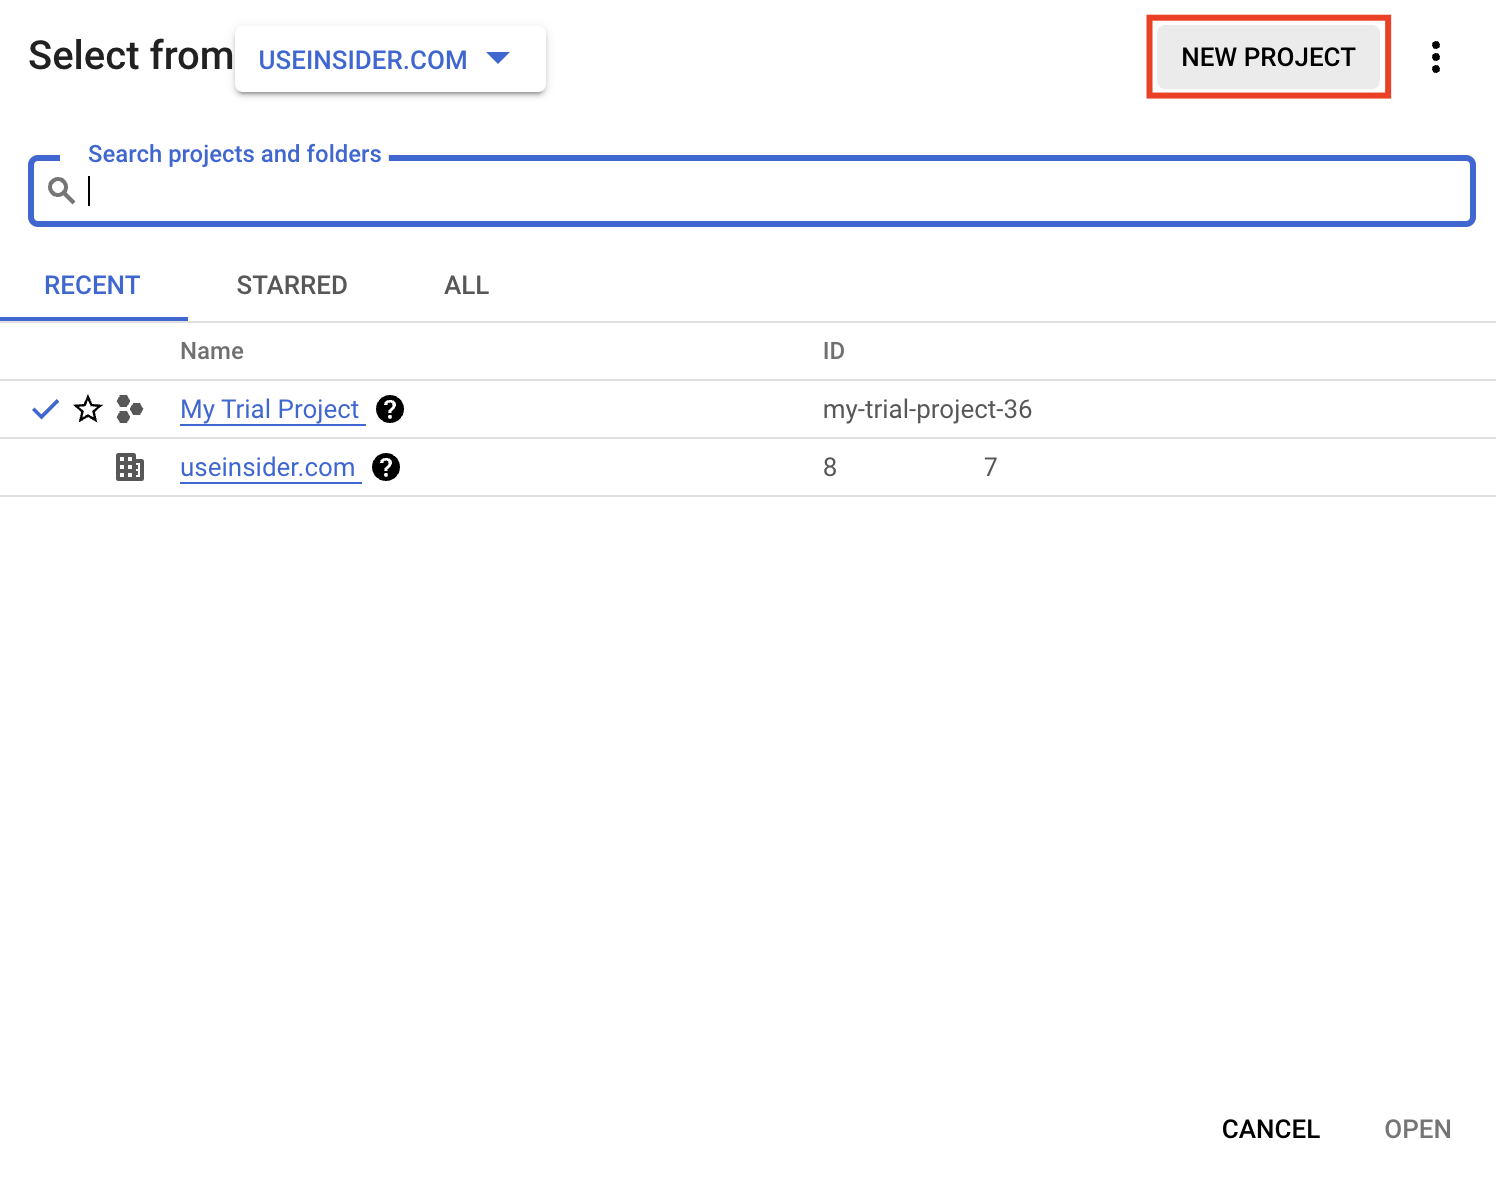
To view your existing projects, click your organization name at the top to open a pop-up.
Click the New Project button in the top right.
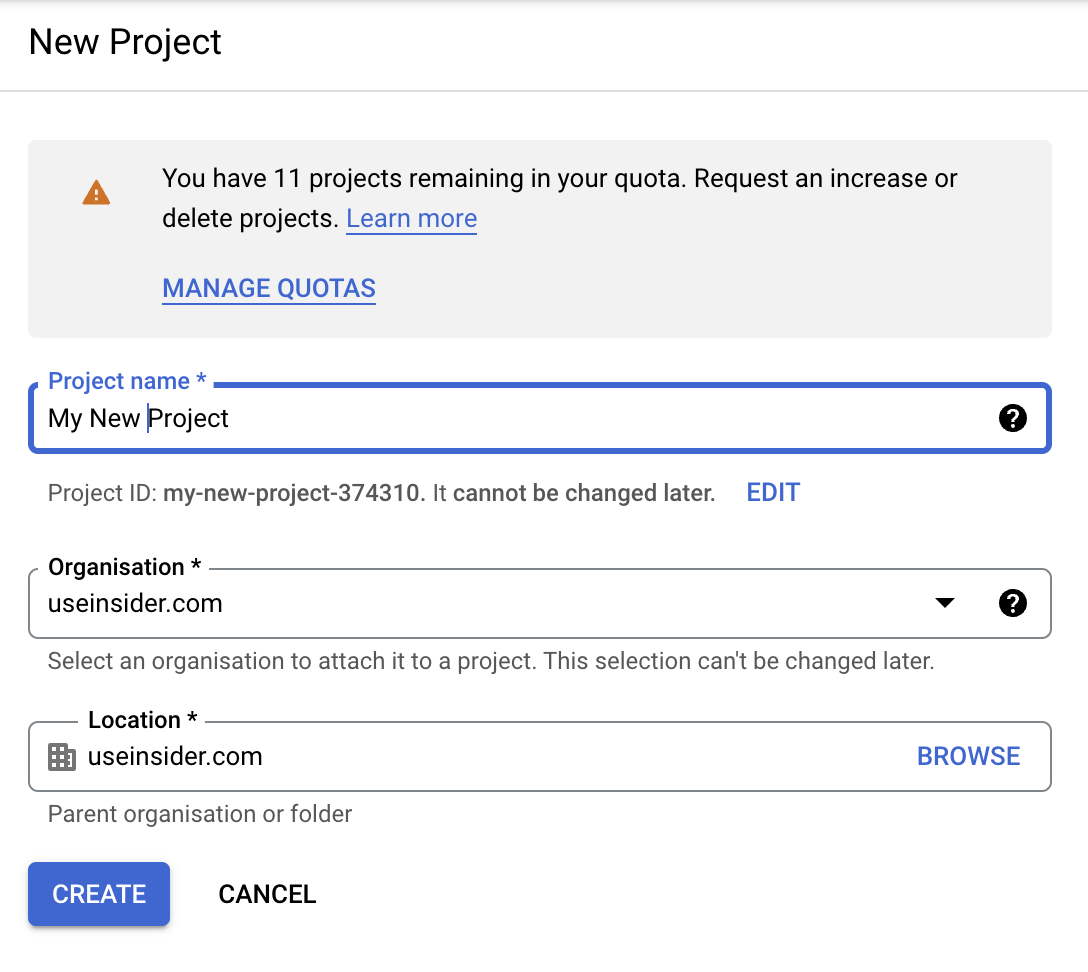
Enter a name for your Project (it can be the name of your product), and optionally set the Project ID to something other than the suggested value. Click the Create button.
Step 2.2: Enable Google APIs
Google's services, such as Sheets, Gmail, Calendar, etc., are offered as separate APIs that you must individually enable within the Google API Console for your project.
For each API you require, follow these steps:
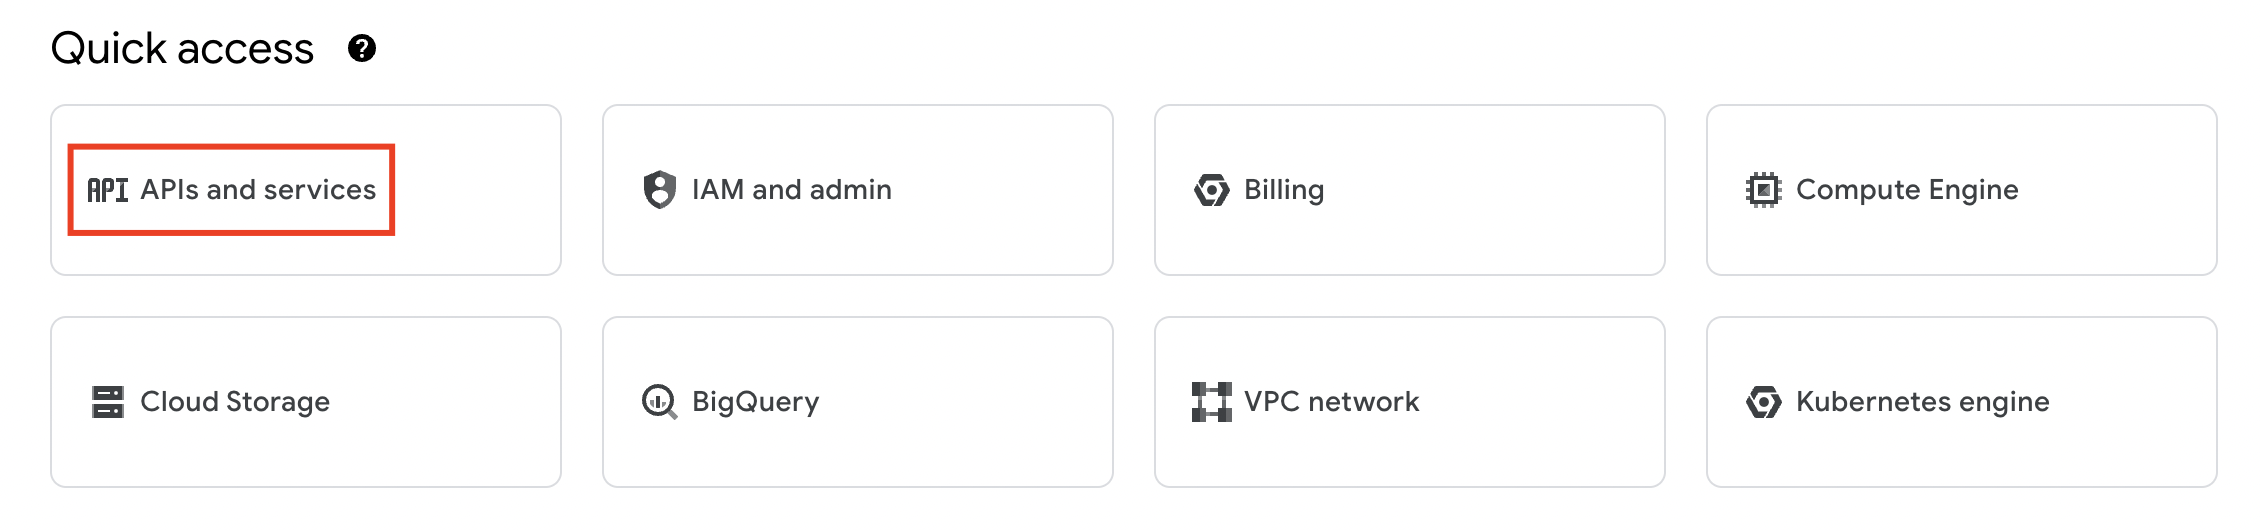
From the Google API Console, go to APIs & Services.
On the Dashboard, click the + Enable APIs and Services button at the top.
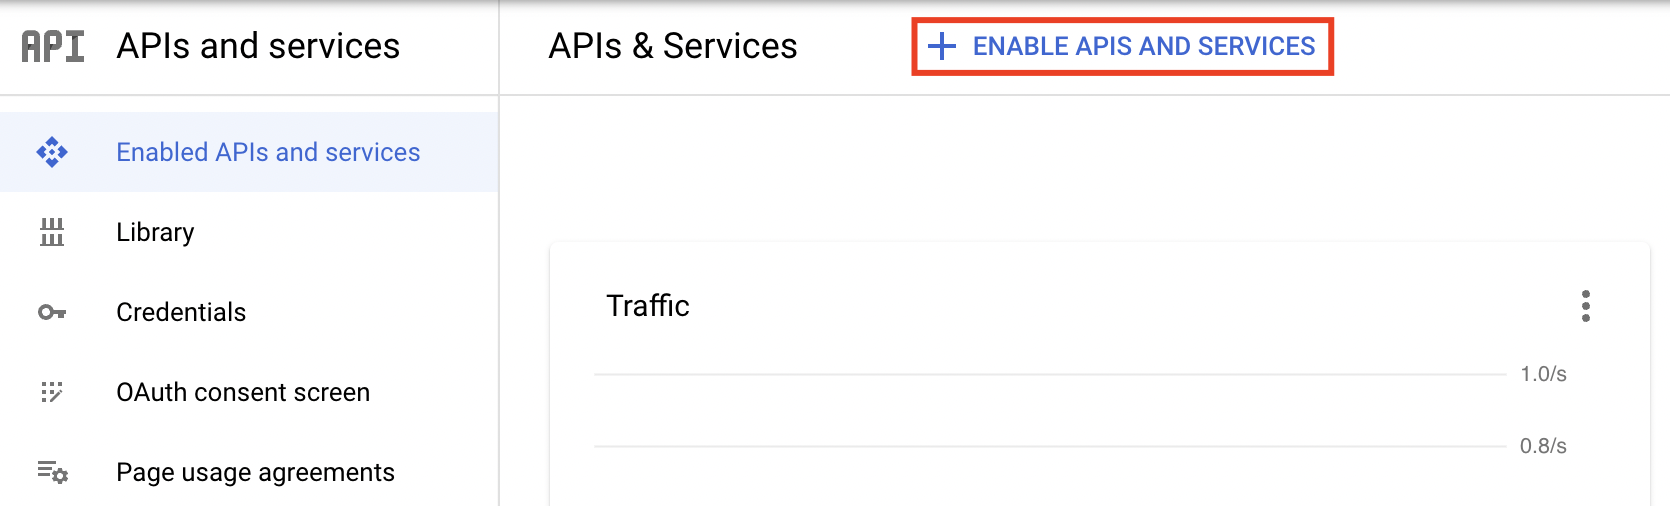
Either enter part of the name of a Google API, or scroll to find Sheets.

Click the API's large button when shown. On the next page, click Enable.
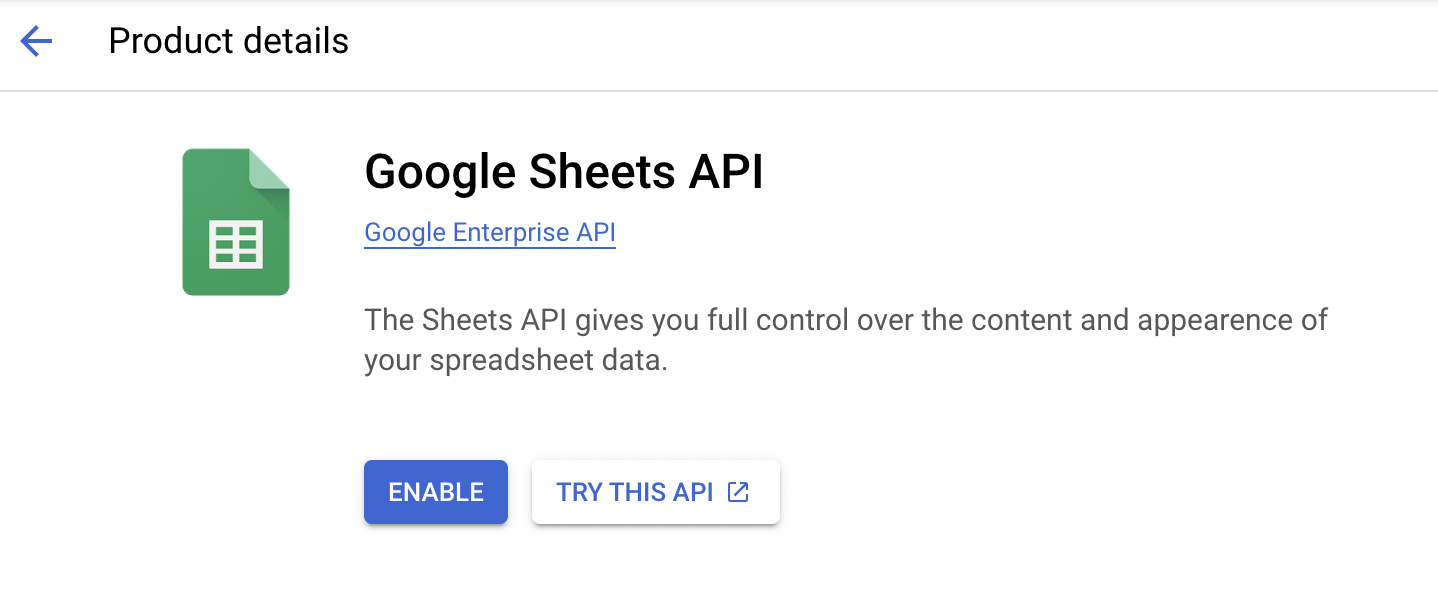
Return to the APIs & Services page. For Google Sheets, you need to enable both the Google Sheets API and Google Drive API.
Step 2.3: Set up application details
Navigate to APIs & Services Dashboard.
Choose the OAuth consent screen on the left. Values you enter here will be shown to your users when they authenticate an Insider Google Connector.
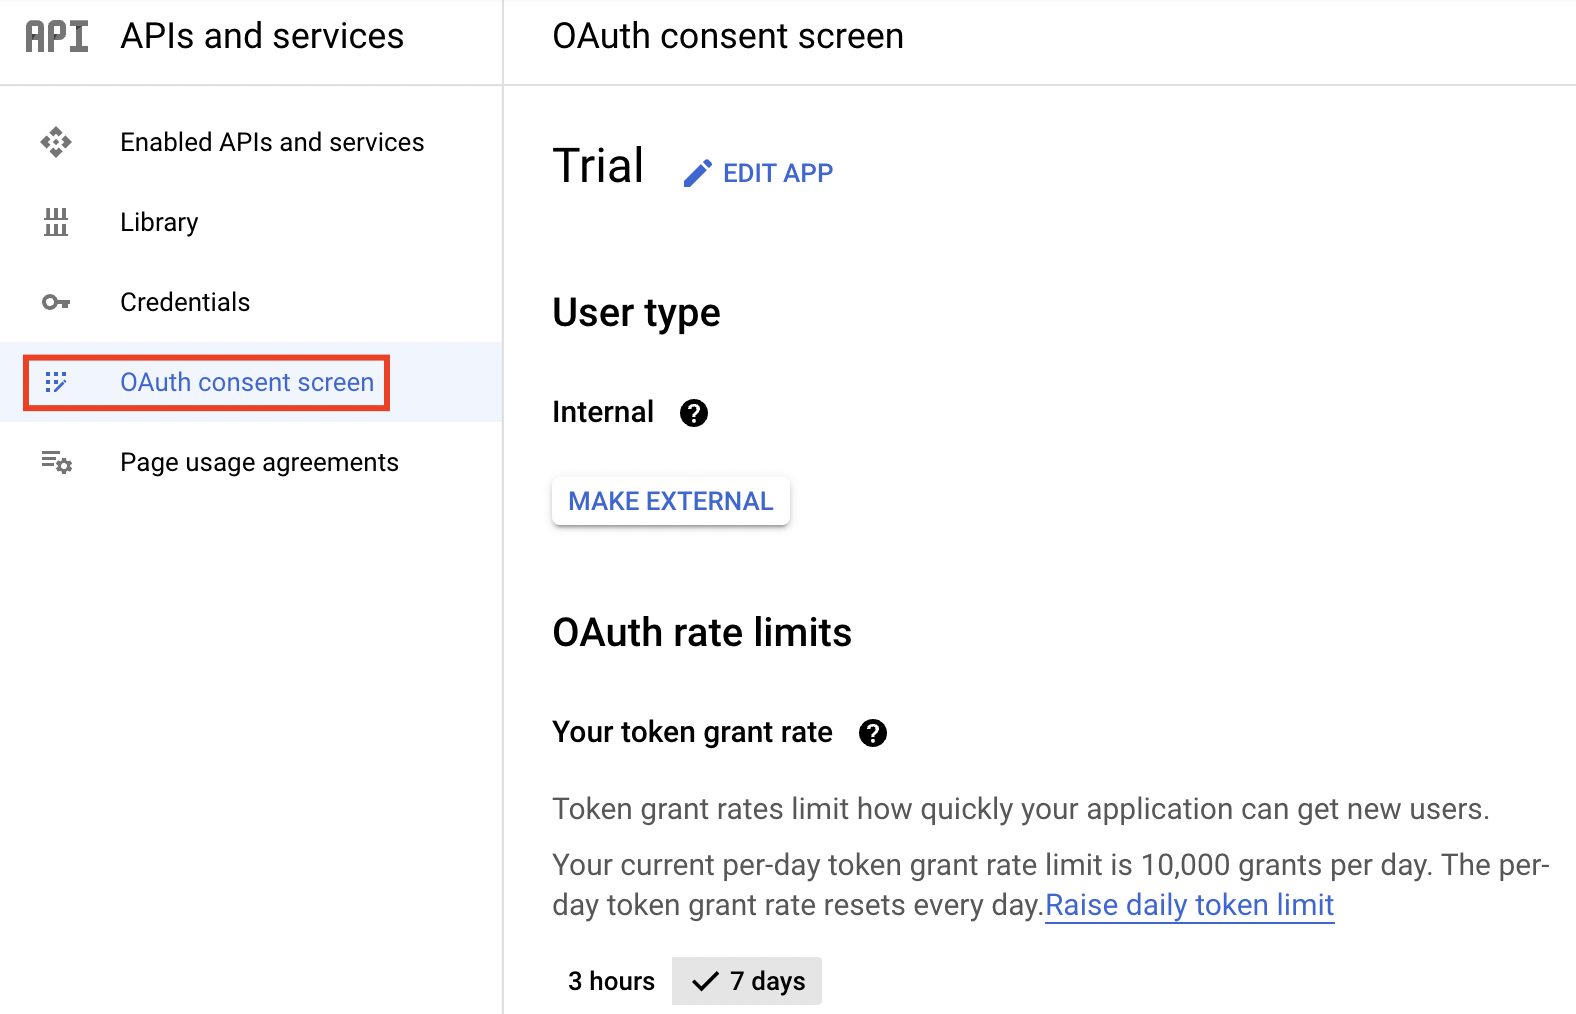
Set Application Type to External.
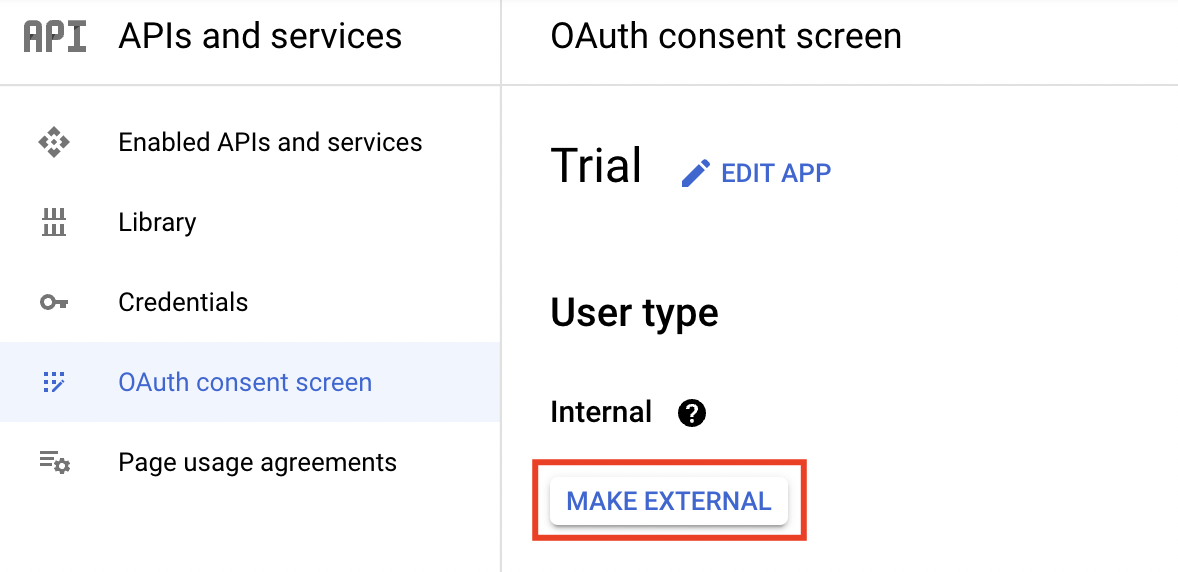
Click Edit App to enter a suitable name for your application (e.g., "My Product Integrations"), upload a logo, and set an appropriate contact email address.
Under Authorised domains, add your Service Domain as
https://oauth2.connect.insiderone.com/callback, then click Save and Continue.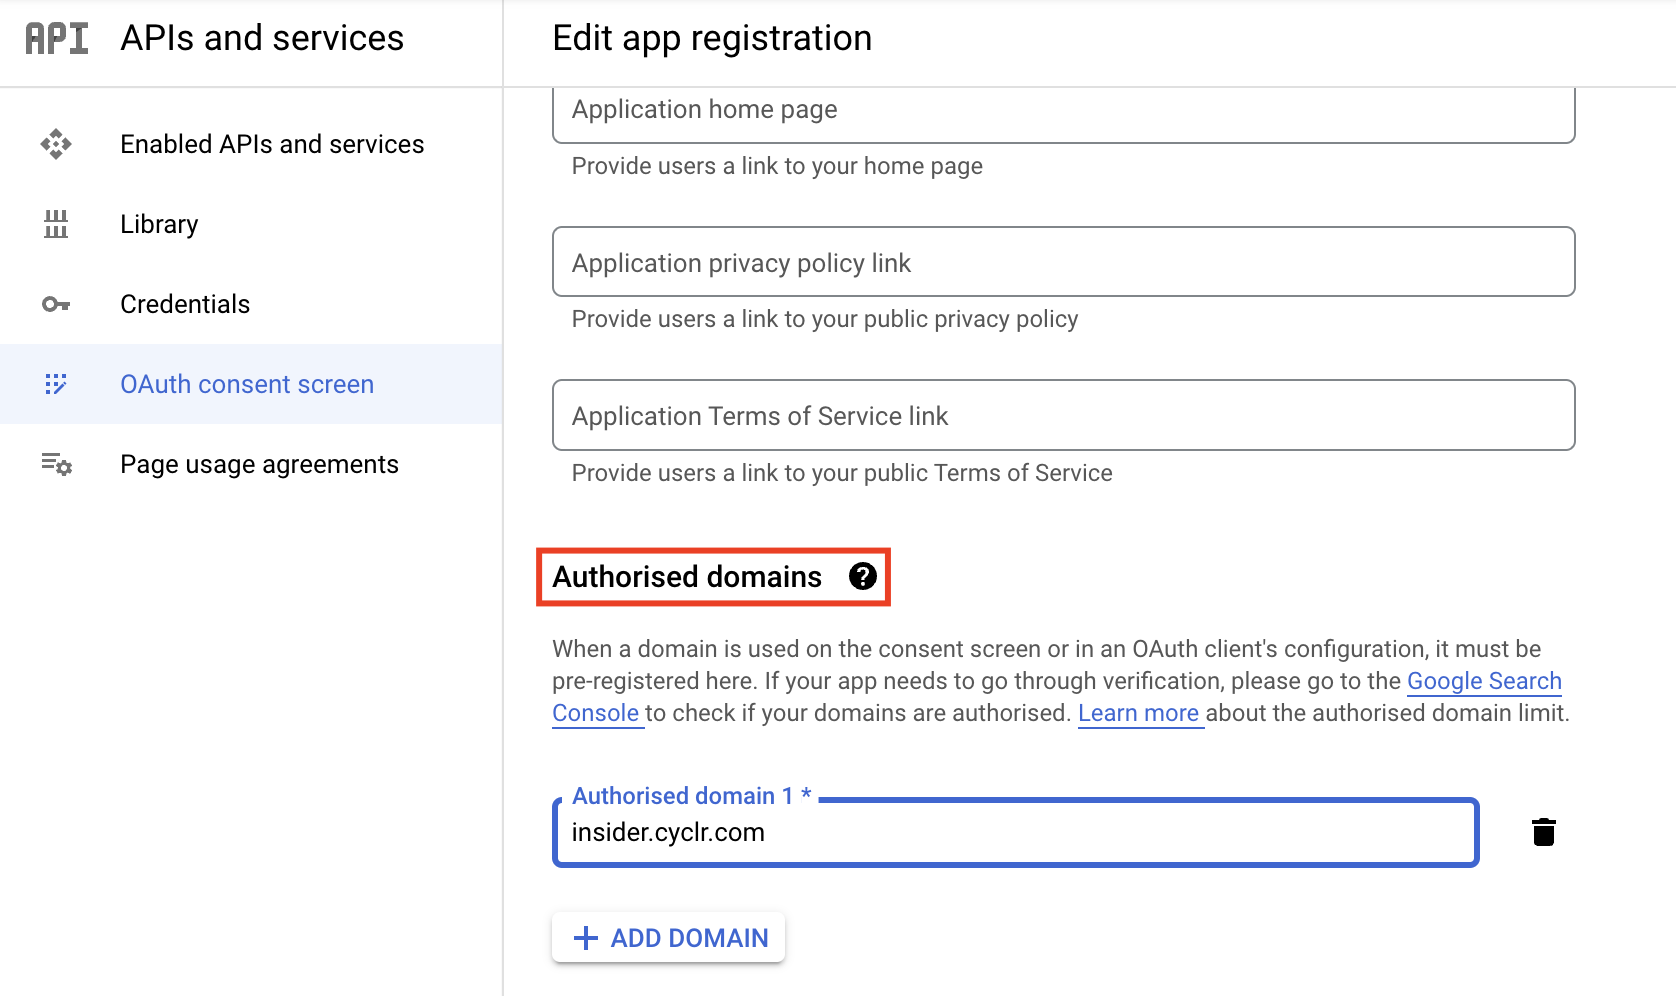
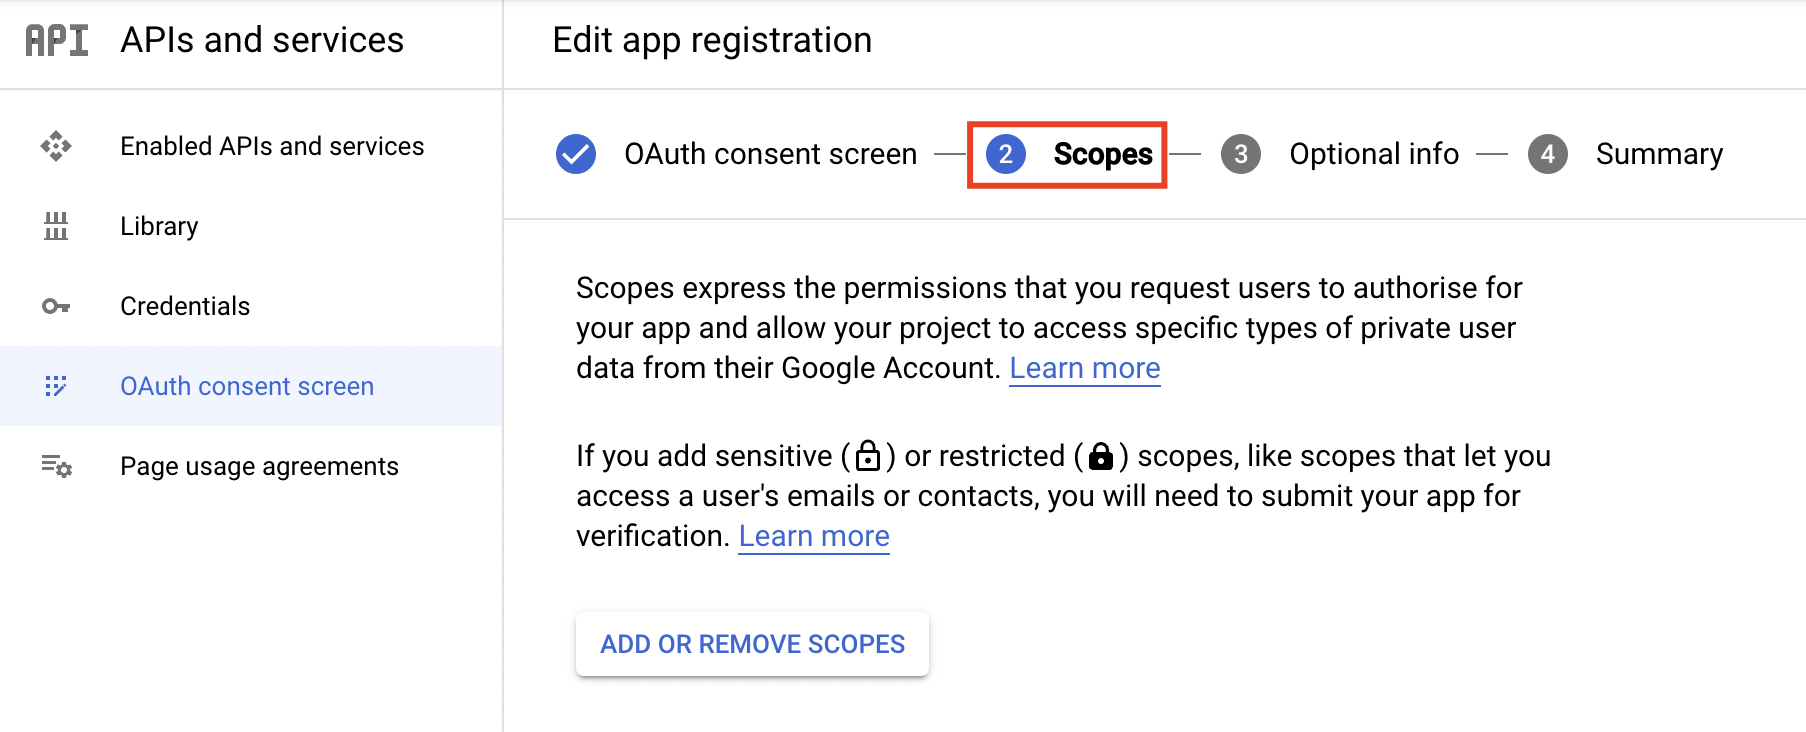
On the Scopes page, you can leave the default scopes. Click Save and Continue to proceed.
Step 2.4: Create Google Credentials
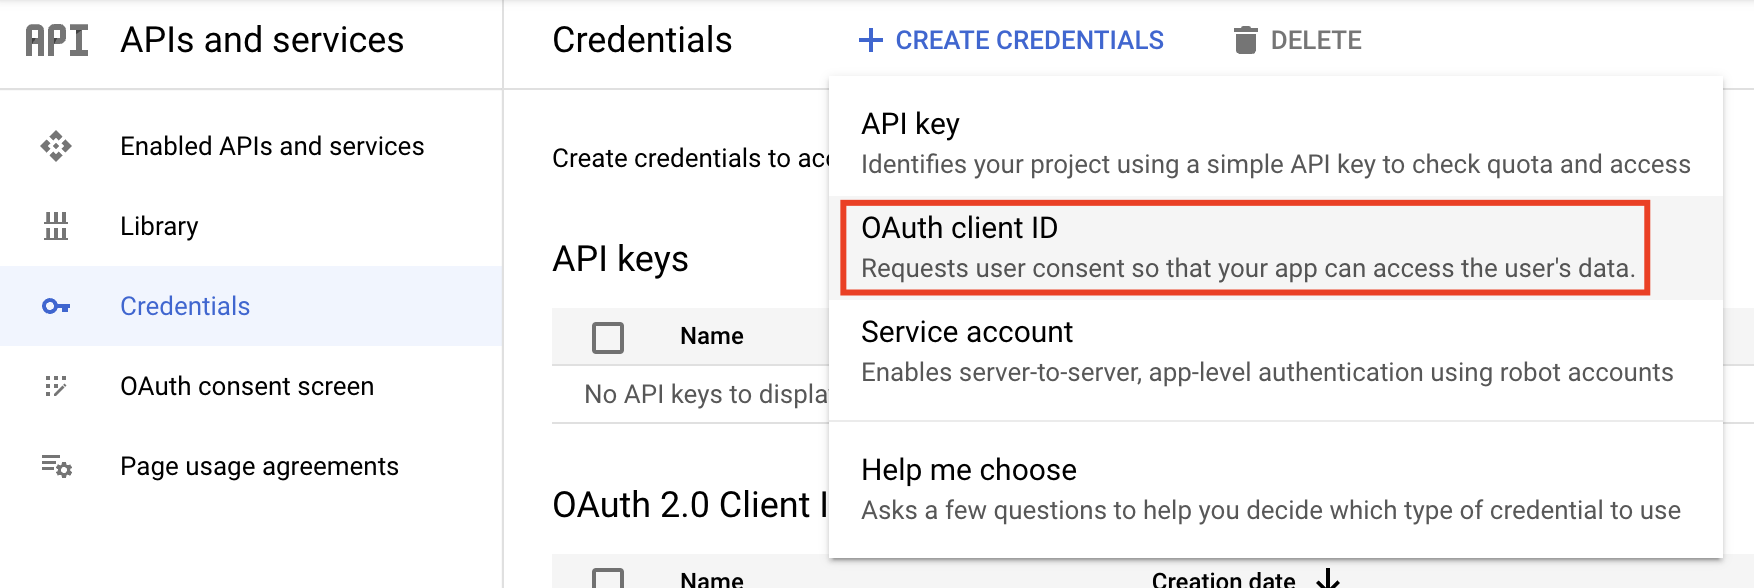
Go to the APIs & Services dashboard and select the Credentials section. Click + Create Credentials.
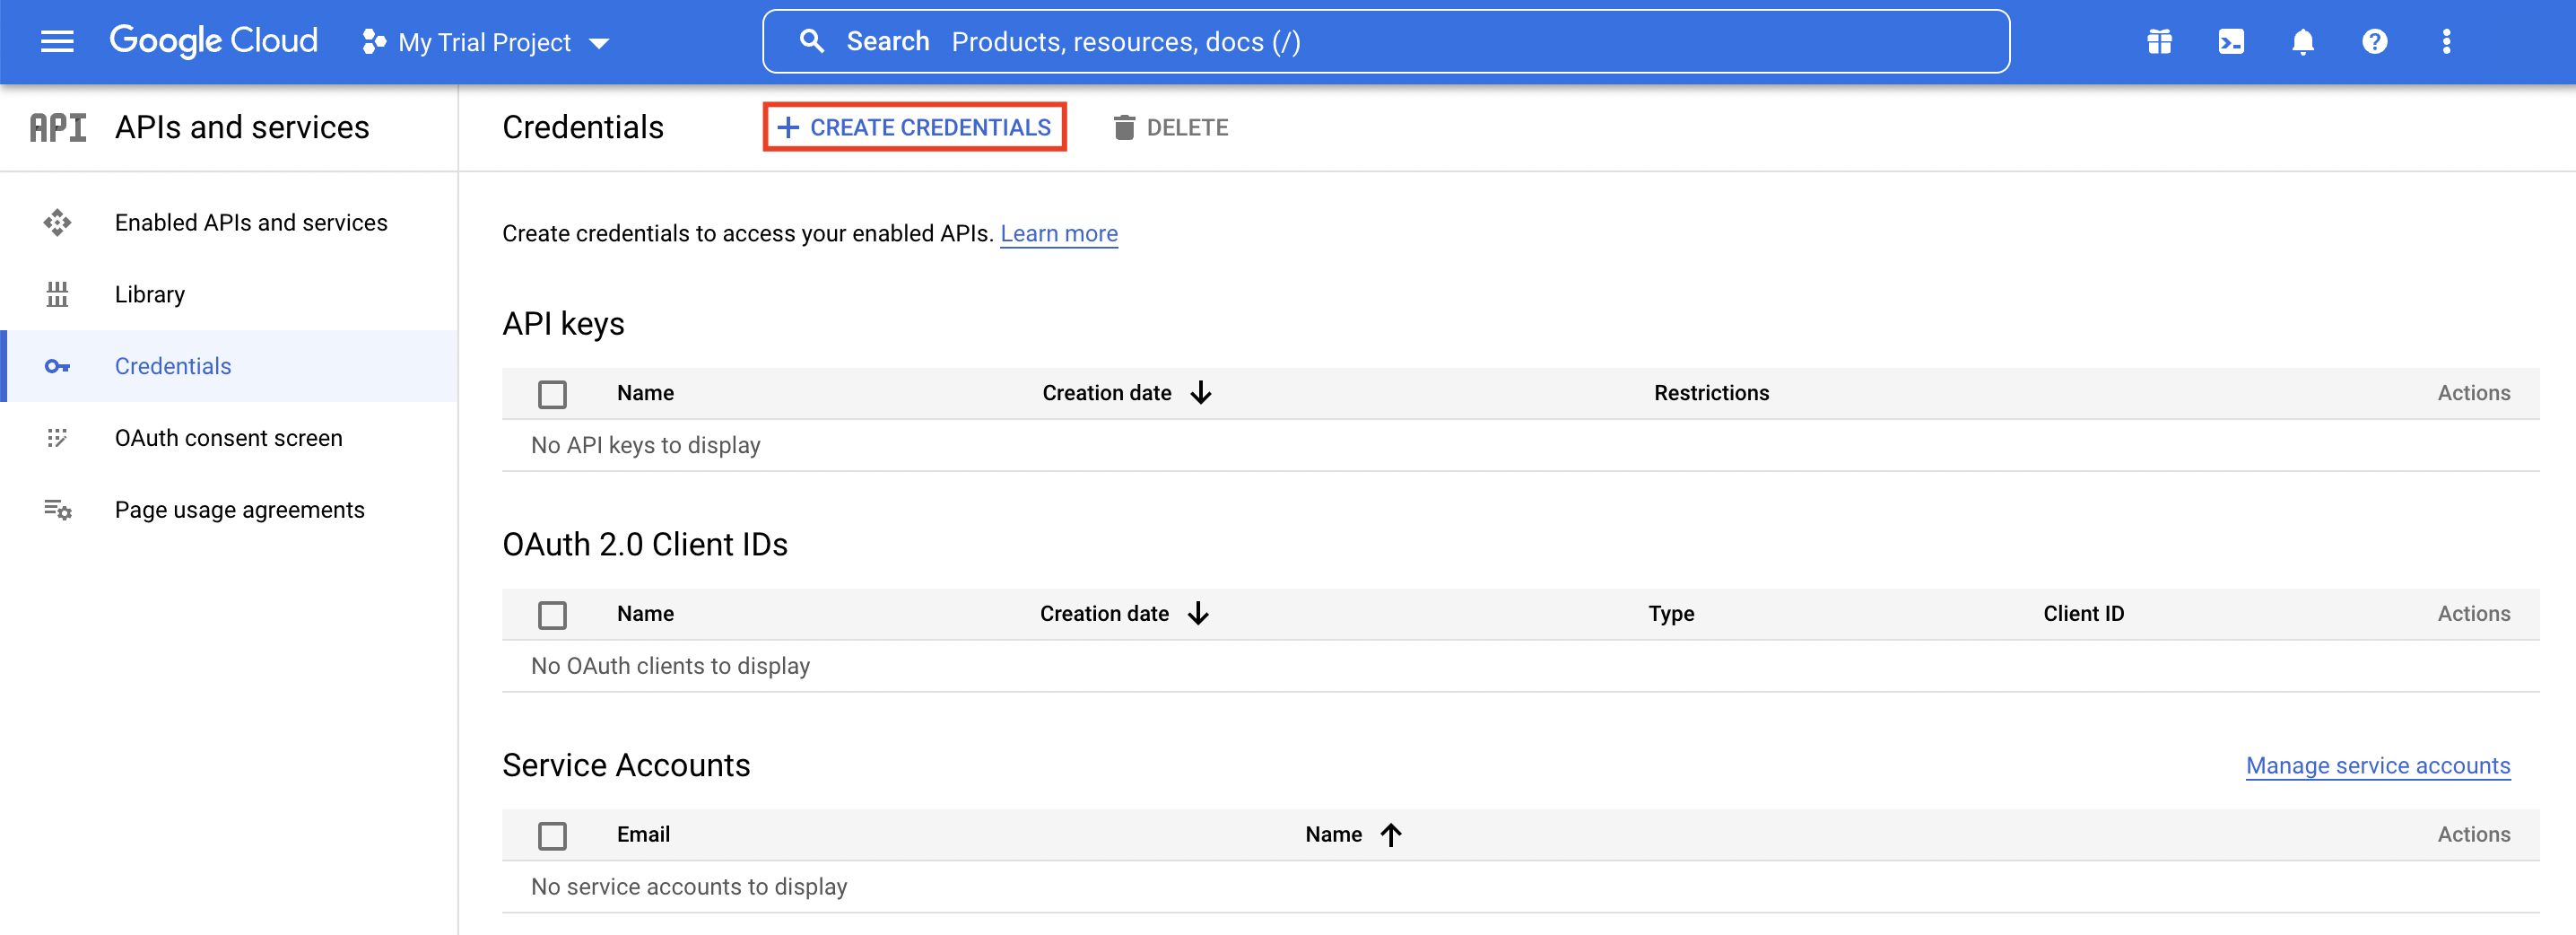
Select the OAuth client ID option from the dropdown menu.
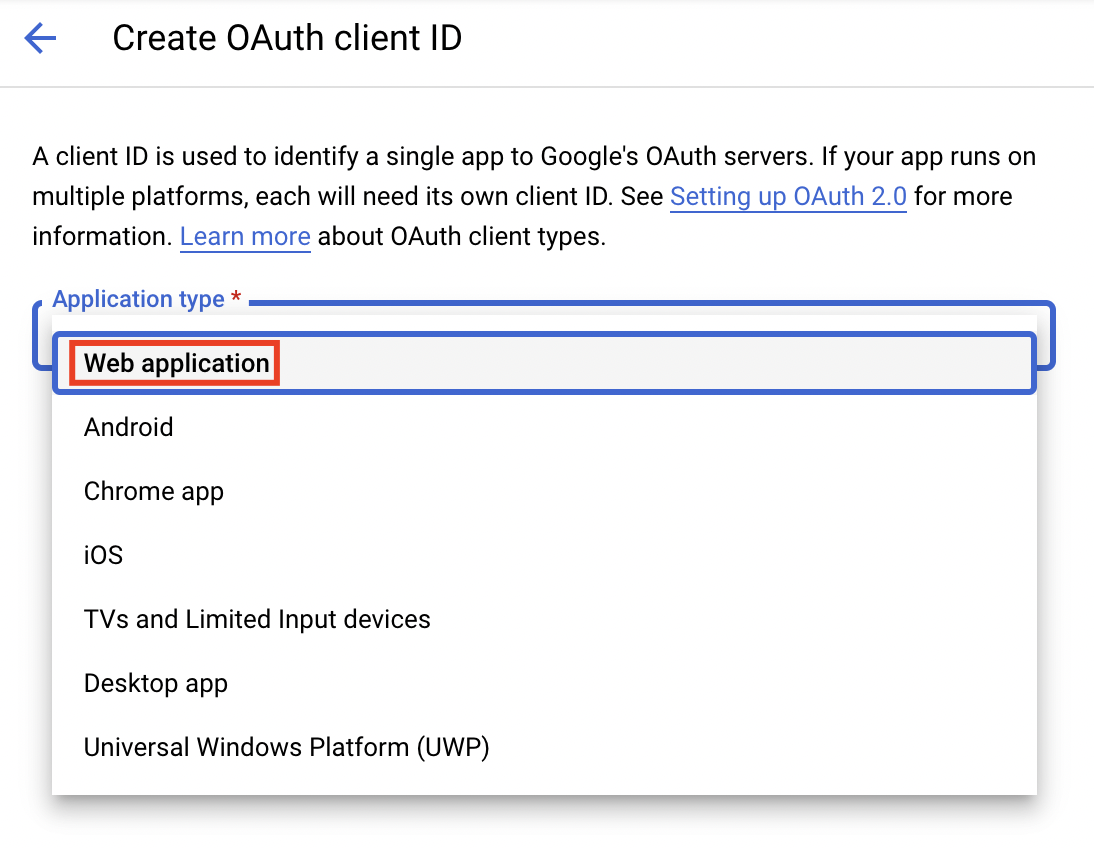
Choose Web Application as the application type.
Enter a Name for the OAuth 2.0 client ID. This name is only used to identify the client in the console, and end users will not see it.
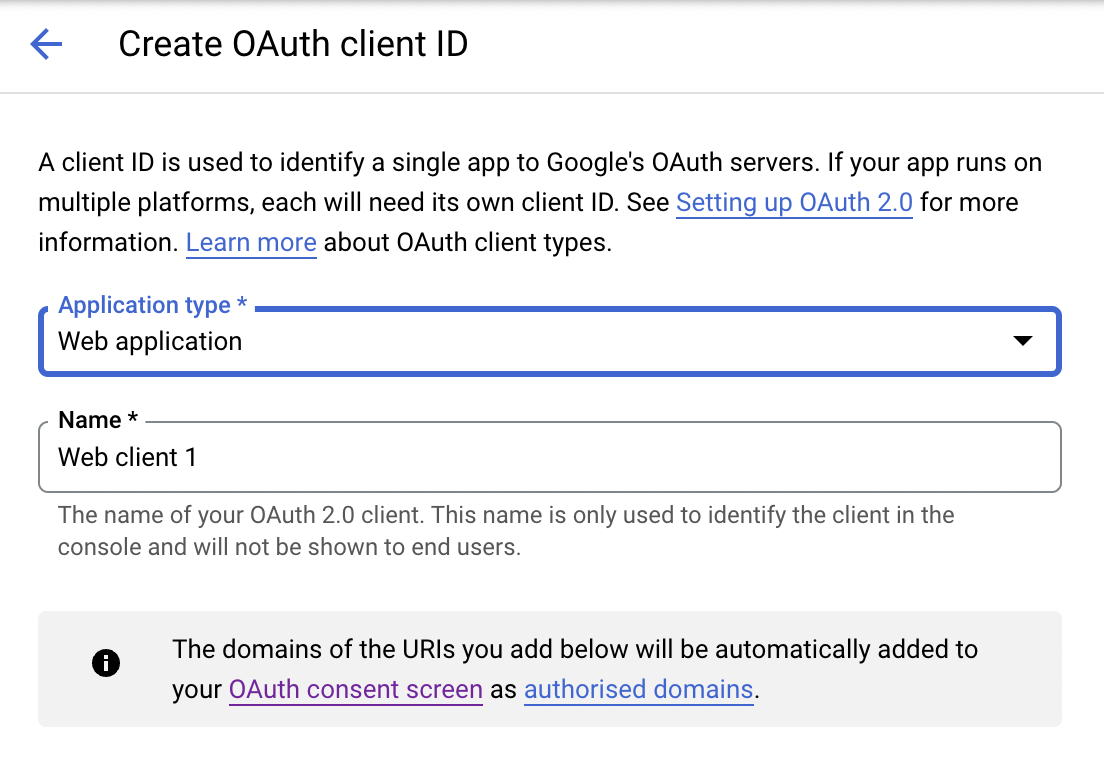
Under Authorised redirect URIs, add
https://oauth2.connect.insiderone.com/callback.
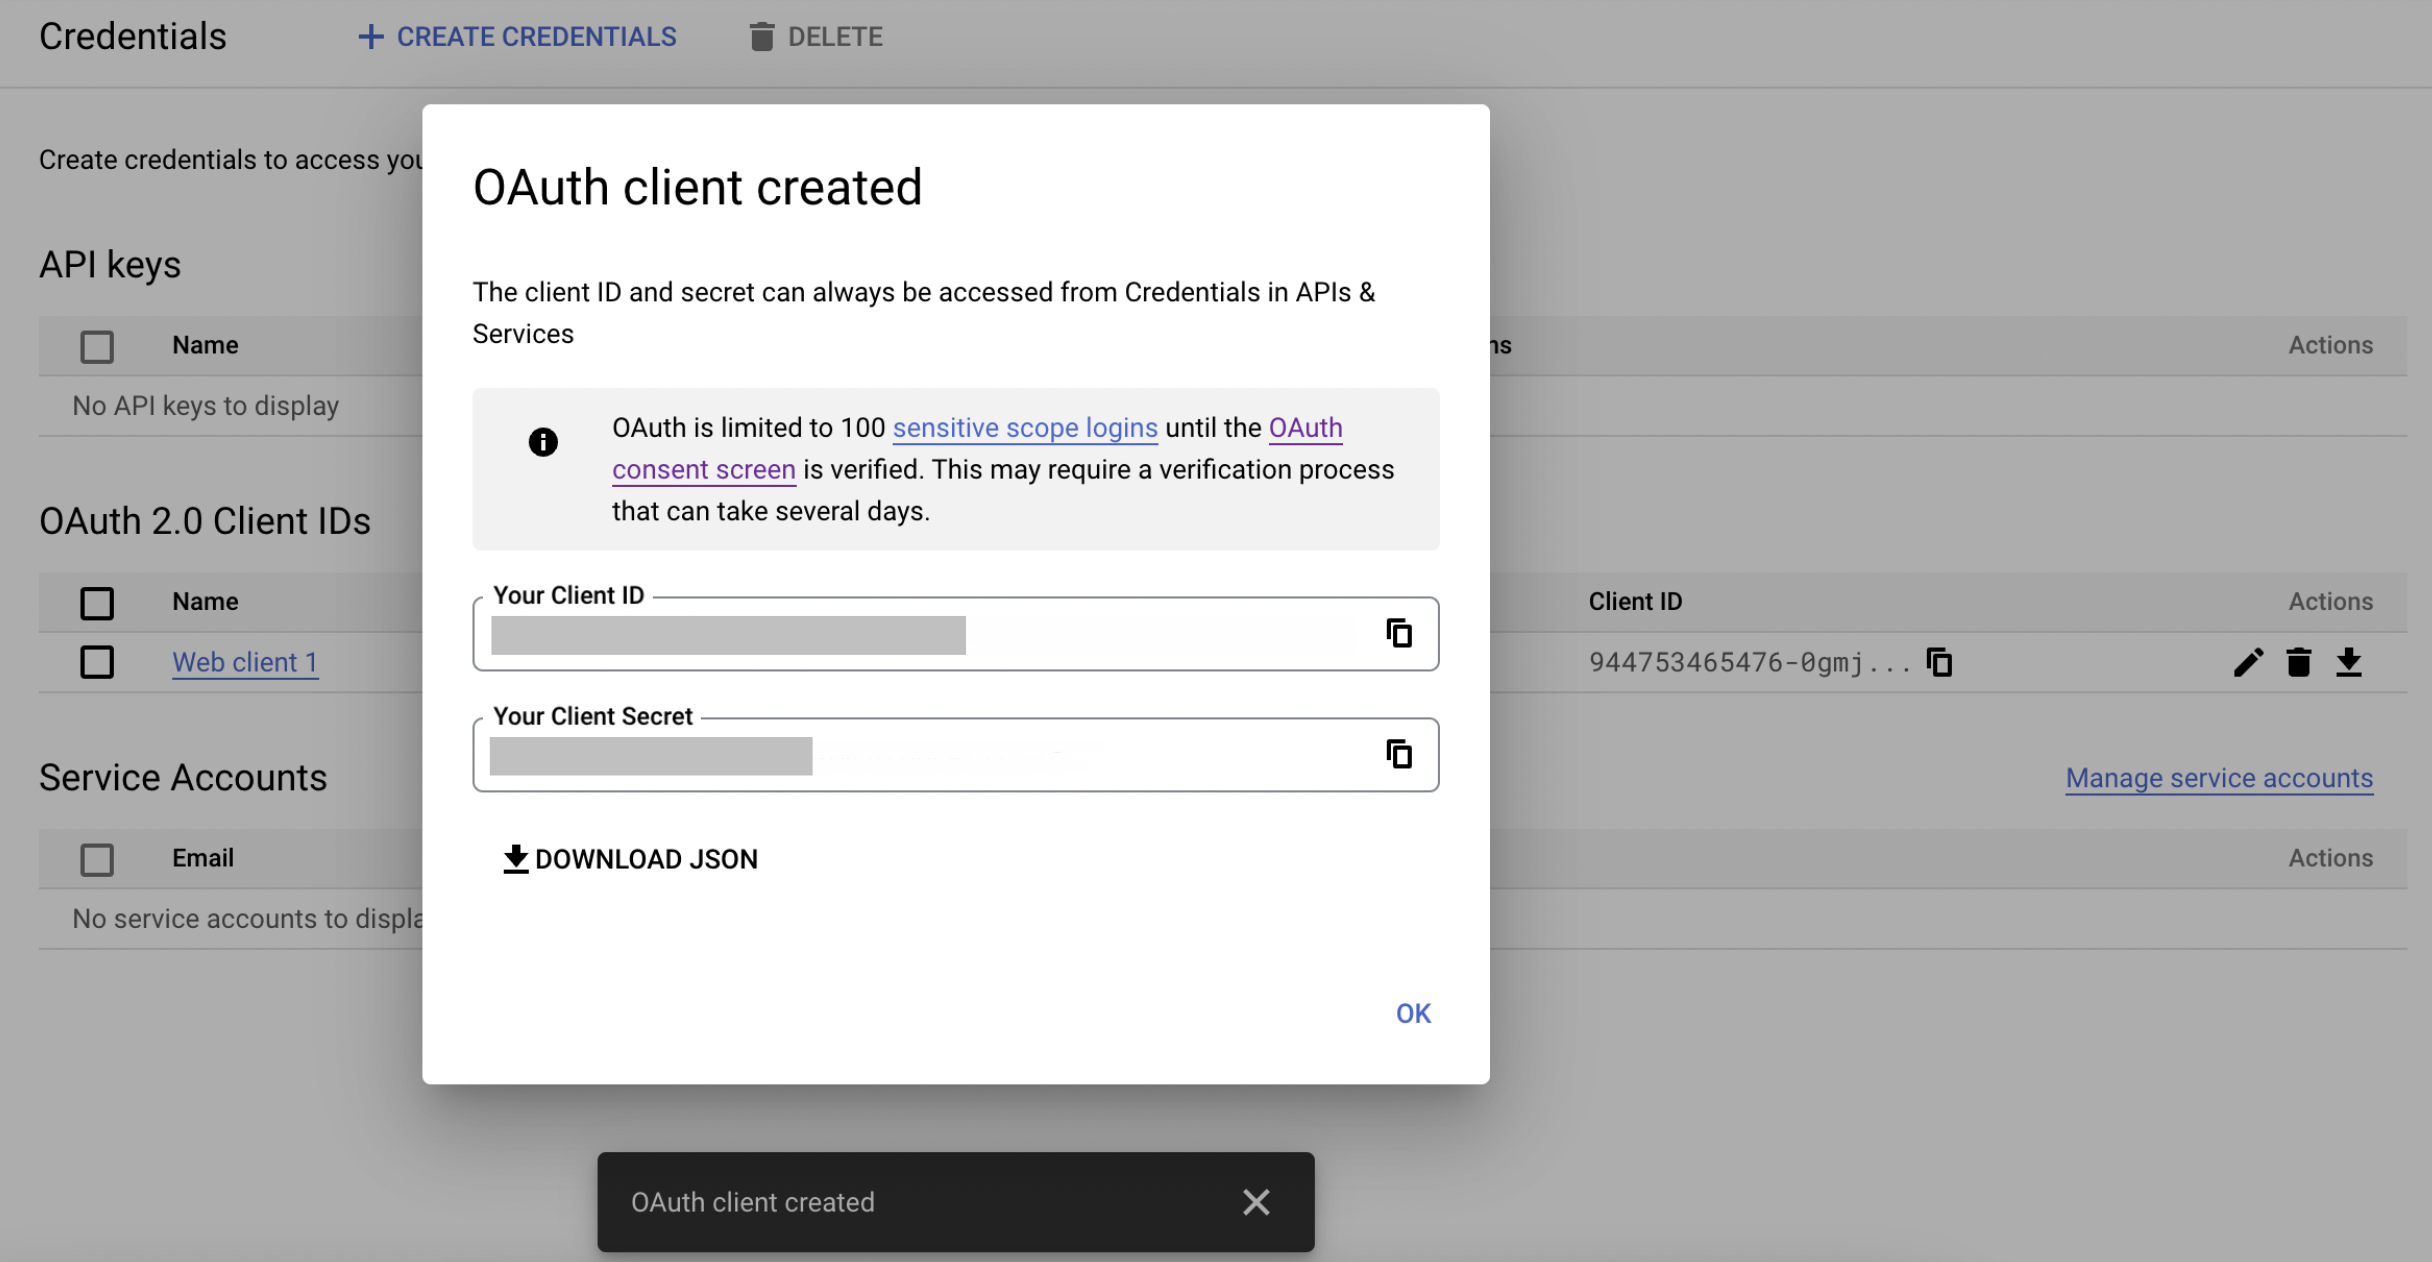
Click Create. You will then see your Google Project's OAuth client ID and client secret. Note these for later use.
Field | Description |
|---|---|
Client ID | The OAuth Client ID from your Google Cloud Console app registration. |
Client Secret | The OAuth Client Secret from your Google Cloud Console app registration. |
Click Connect. A browser pop-up opens asking you to sign in to Google and authorize access. After completing the login, close the pop-up tab. The status indicator turns green to confirm the connection.
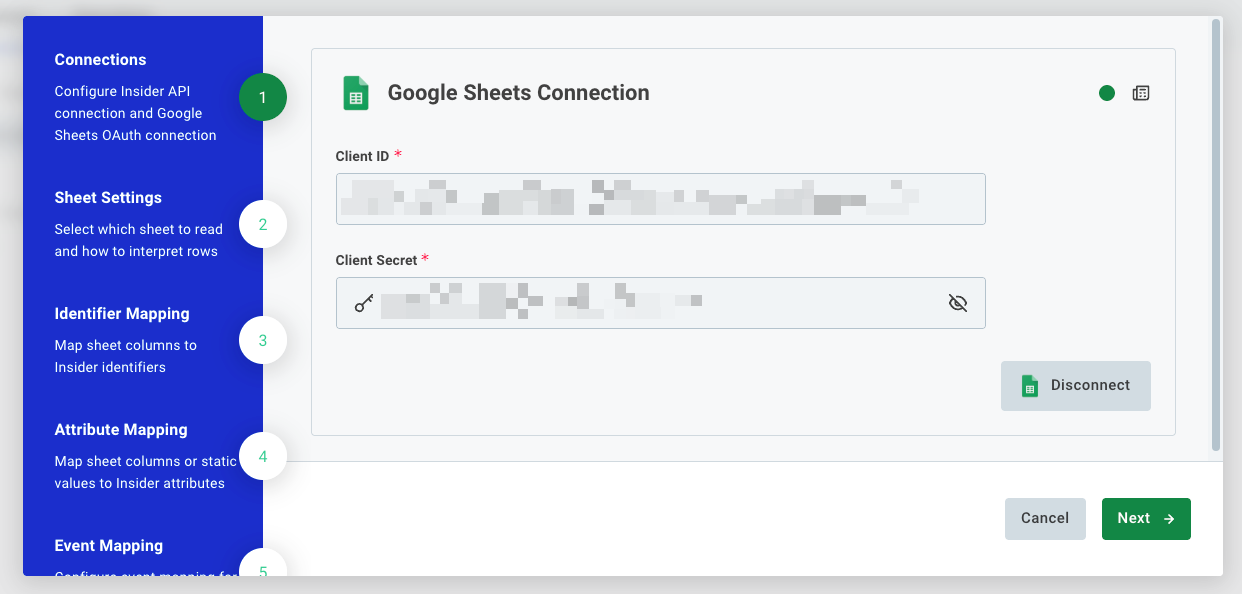
Click Next to proceed.
Step 3: Configure the sheet
In the Sheet Settings step, fill in the information in the table below.
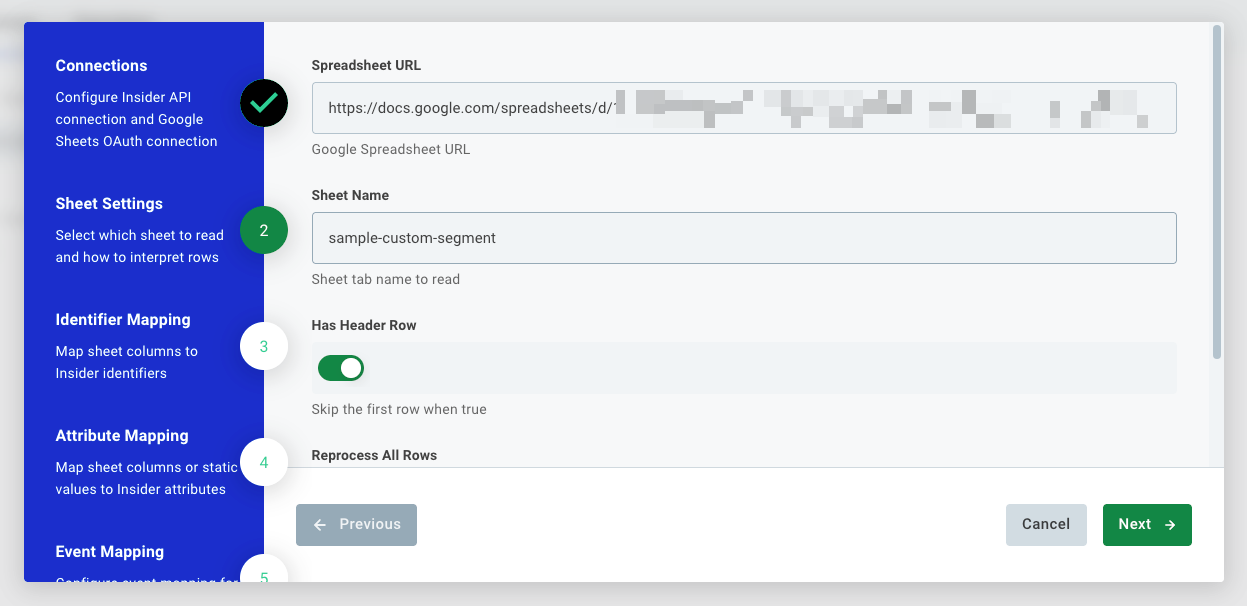
Field | Description |
|---|---|
Spreadsheet URL | Full URL of the Google Spreadsheet to read from. |
Sheet Name | Name of the tab (worksheet) to read. Must match exactly, including capitalization. |
Click Next when done.
Step 4: Identifier Mapping
Map spreadsheet columns to Insider One identifier types. At least one mapping is required. Rows with no valid identifier value are skipped.
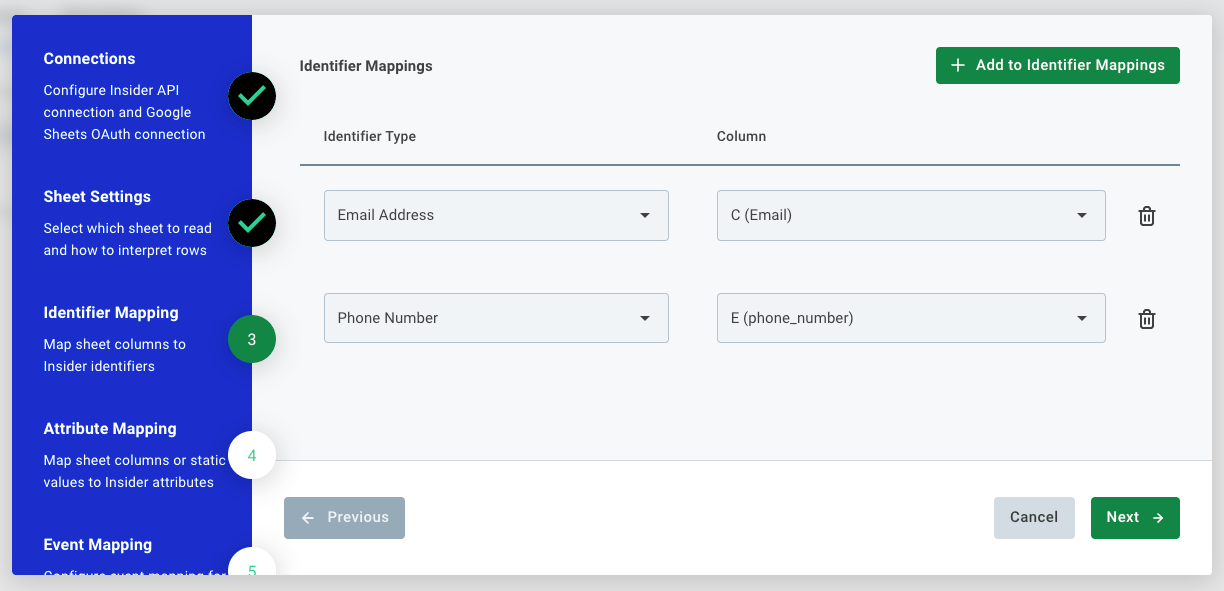
Field | Description |
|---|---|
Identifier Type | The Insider One identifier type: Email Address, Phone Number, UUID, or any custom identifier configured for your account. |
Column | The spreadsheet column providing the value for this identifier. |
Click + Add to Identifier Mappings to add rows. Click Next when done.
Step 5: Attribute Mapping
Map spreadsheet columns to Insider One user profile attributes.
Column Mappings: Each row maps a spreadsheet column to an Insider One attribute. The value from each row is written to the matched user profile.
Fixed Value Mappings: Sets a static value for an attribute on every synced record, regardless of spreadsheet content. Common use: set
data_sourcetogoogle_sheetsto tag all imported users by origin.
Click Next when done.
Step 6: Event Mapping (Optional)
You can skip this step if you only need to sync user attributes. Enable event sending by checking Map events.
Field | Description |
|---|---|
Event name source | Fixed value: every row triggers the same event type. |
Event name | Visible when the “Fixed value” is selected. Select an existing Insider One event or type a custom name. |
Timestamp source | Processing time: uses the sync execution time. |
Step 7: Event Parameter Mapping (Optional)
Active only when event mapping is enabled in Step 6. Maps spreadsheet columns or fixed values to event parameters such as product_id, order_value, or currency.
Step 8: Sync Options
Field | Default | Description |
|---|---|---|
Skip Hook | Off | Suppresses Architect journey triggers for all users upserted in this run. Enable for large historical imports. |
Schedule | Required | Cron expression (UTC) for how often the integration runs. Example: |
Phone Number Settings | — | Normalizes phone values to E.164 format and optionally adds a country code prefix. |
Boolean Settings | — | Configures how boolean columns are interpreted (e.g. |
Click Finish to save and activate the integration.
Troubleshooting
Symptom | What to check |
|---|---|
Google authorization pop-up fails | Confirm Client ID and Client Secret are correct, and the Google Cloud app has Sheets and Drive scopes enabled. |
Sheet not found | Verify the Spreadsheet URL is correct, and the authorized Google account has read access to the file. |
Columns not appearing in mapping steps | Confirm the Sheet Name matches the tab name exactly, including capitalization. |
Records not syncing to Insider One | Confirm that at least one Identifier Mapping is configured and the identifier column has valid, non-empty values in the sheet. |
Events generating duplicates | All rows are fetched on every run. If event mapping is enabled, the same row fires an event on each execution. Schedule less frequently or disable event mapping for pure profile syncs. |
Sync is not triggering on schedule | Verify the cron expression is valid, and the integration status is active on the Integrated Platforms tab. |
Frequently Asked Questions
Q: Does this sync only new or changed rows, or all rows every time?
A: All rows are fetched on every run. The integration does not track row-level changes. For large sheets, use a less frequent schedule to keep API usage manageable.
Q: Can I sync multiple tabs from the same spreadsheet?
A: Each integration instance reads one tab. Create a separate integration instance for each tab you need to sync.
Q: Will re-syncing rows create duplicate user profiles?
A: No. The Insider upsert API is idempotent for user profiles. Re-sending the same record updates the existing profile instead of creating a new one.
Q: Will re-syncing rows send duplicate events?
A: Yes, if event mapping is enabled. Each run fires one event per row, so repeated runs on the same data generate duplicate events in Insider One.
Q: What happens if a row has no value in the identifier column?
A: The row is skipped. No profile is created or updated without a valid identifier.
Q: Will the integration trigger Architect journeys for synced users?
A: By default, yes. To suppress this for large imports, enable Skip Hook in Sync Options.