This guide lists the steps you need to complete on Microsoft Azure AD to:
- Create necessary roles for Insider
- Set up provisioning
- Update mappings
- Add more users to the application
The steps might differ for each Identity Provider. However, you should configure the role names and attribute mapping for a different identity provider based on the namings in this guide.
Creating necessary roles for Insider
To create the necessary roles for Insider:
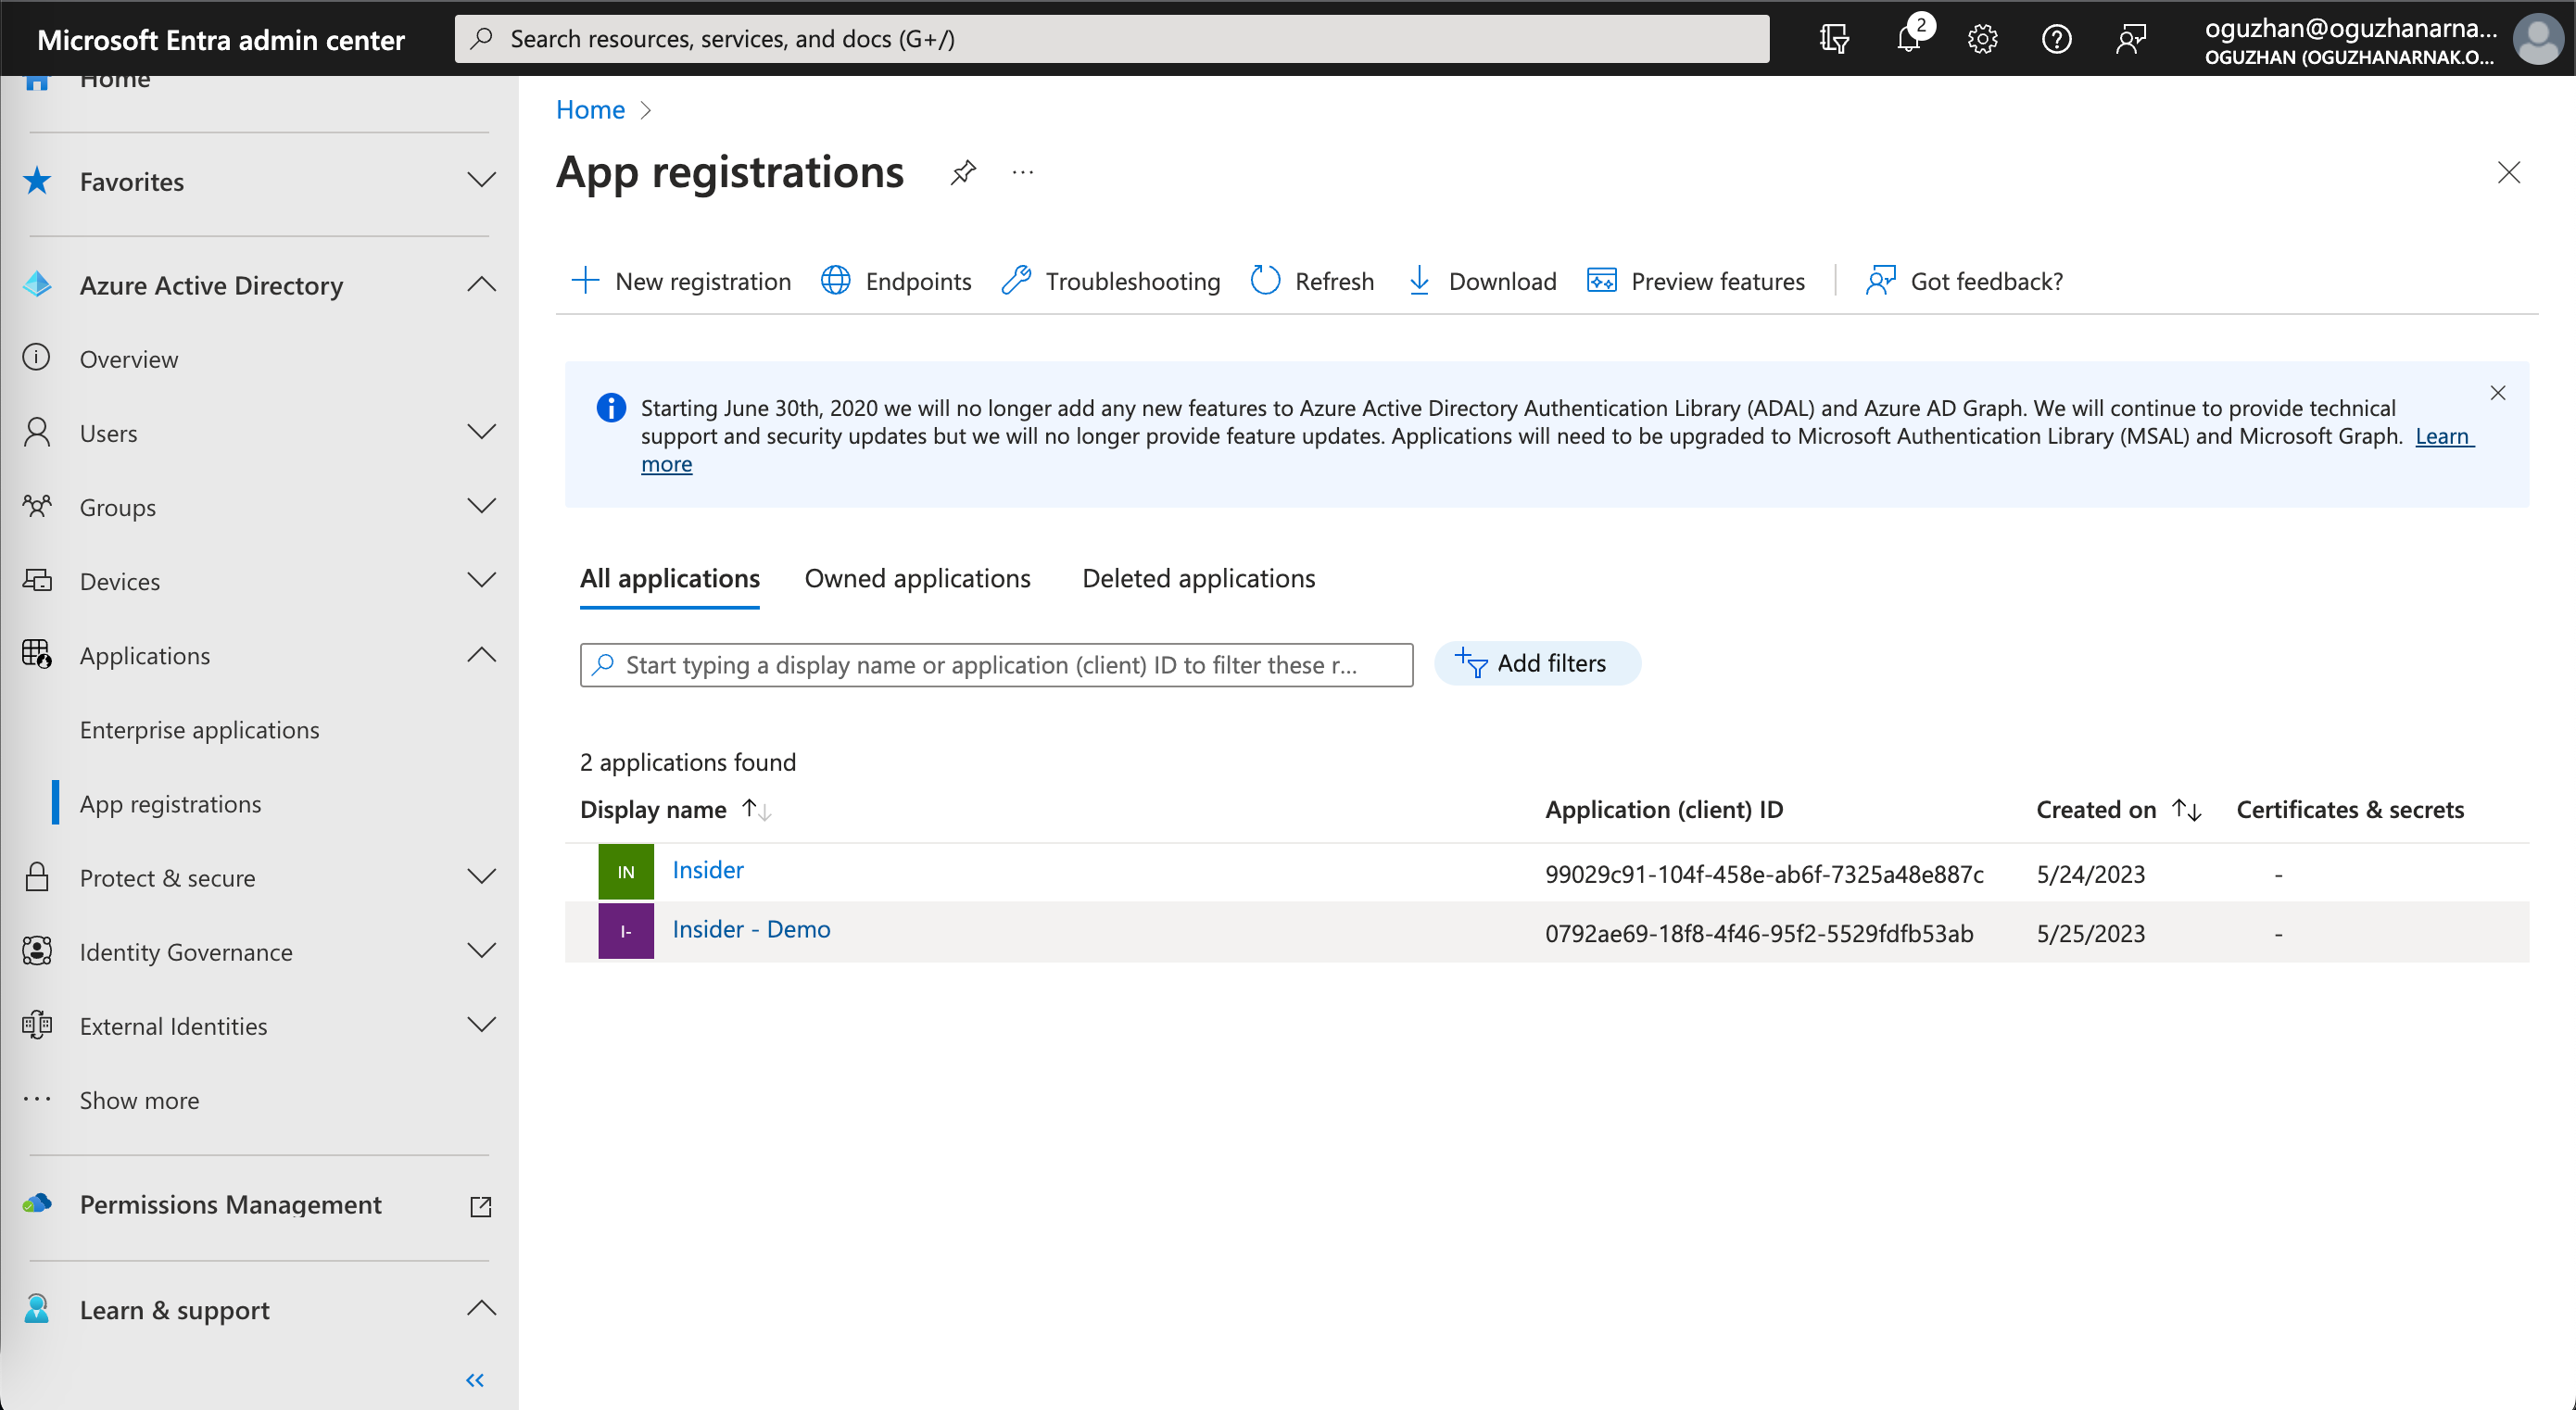
1. Go to Applications > App registrations on the left menu, and select the Insider application you created earlier under All applications.
2. Navigate to Manage > App roles to click the + Create app role button.
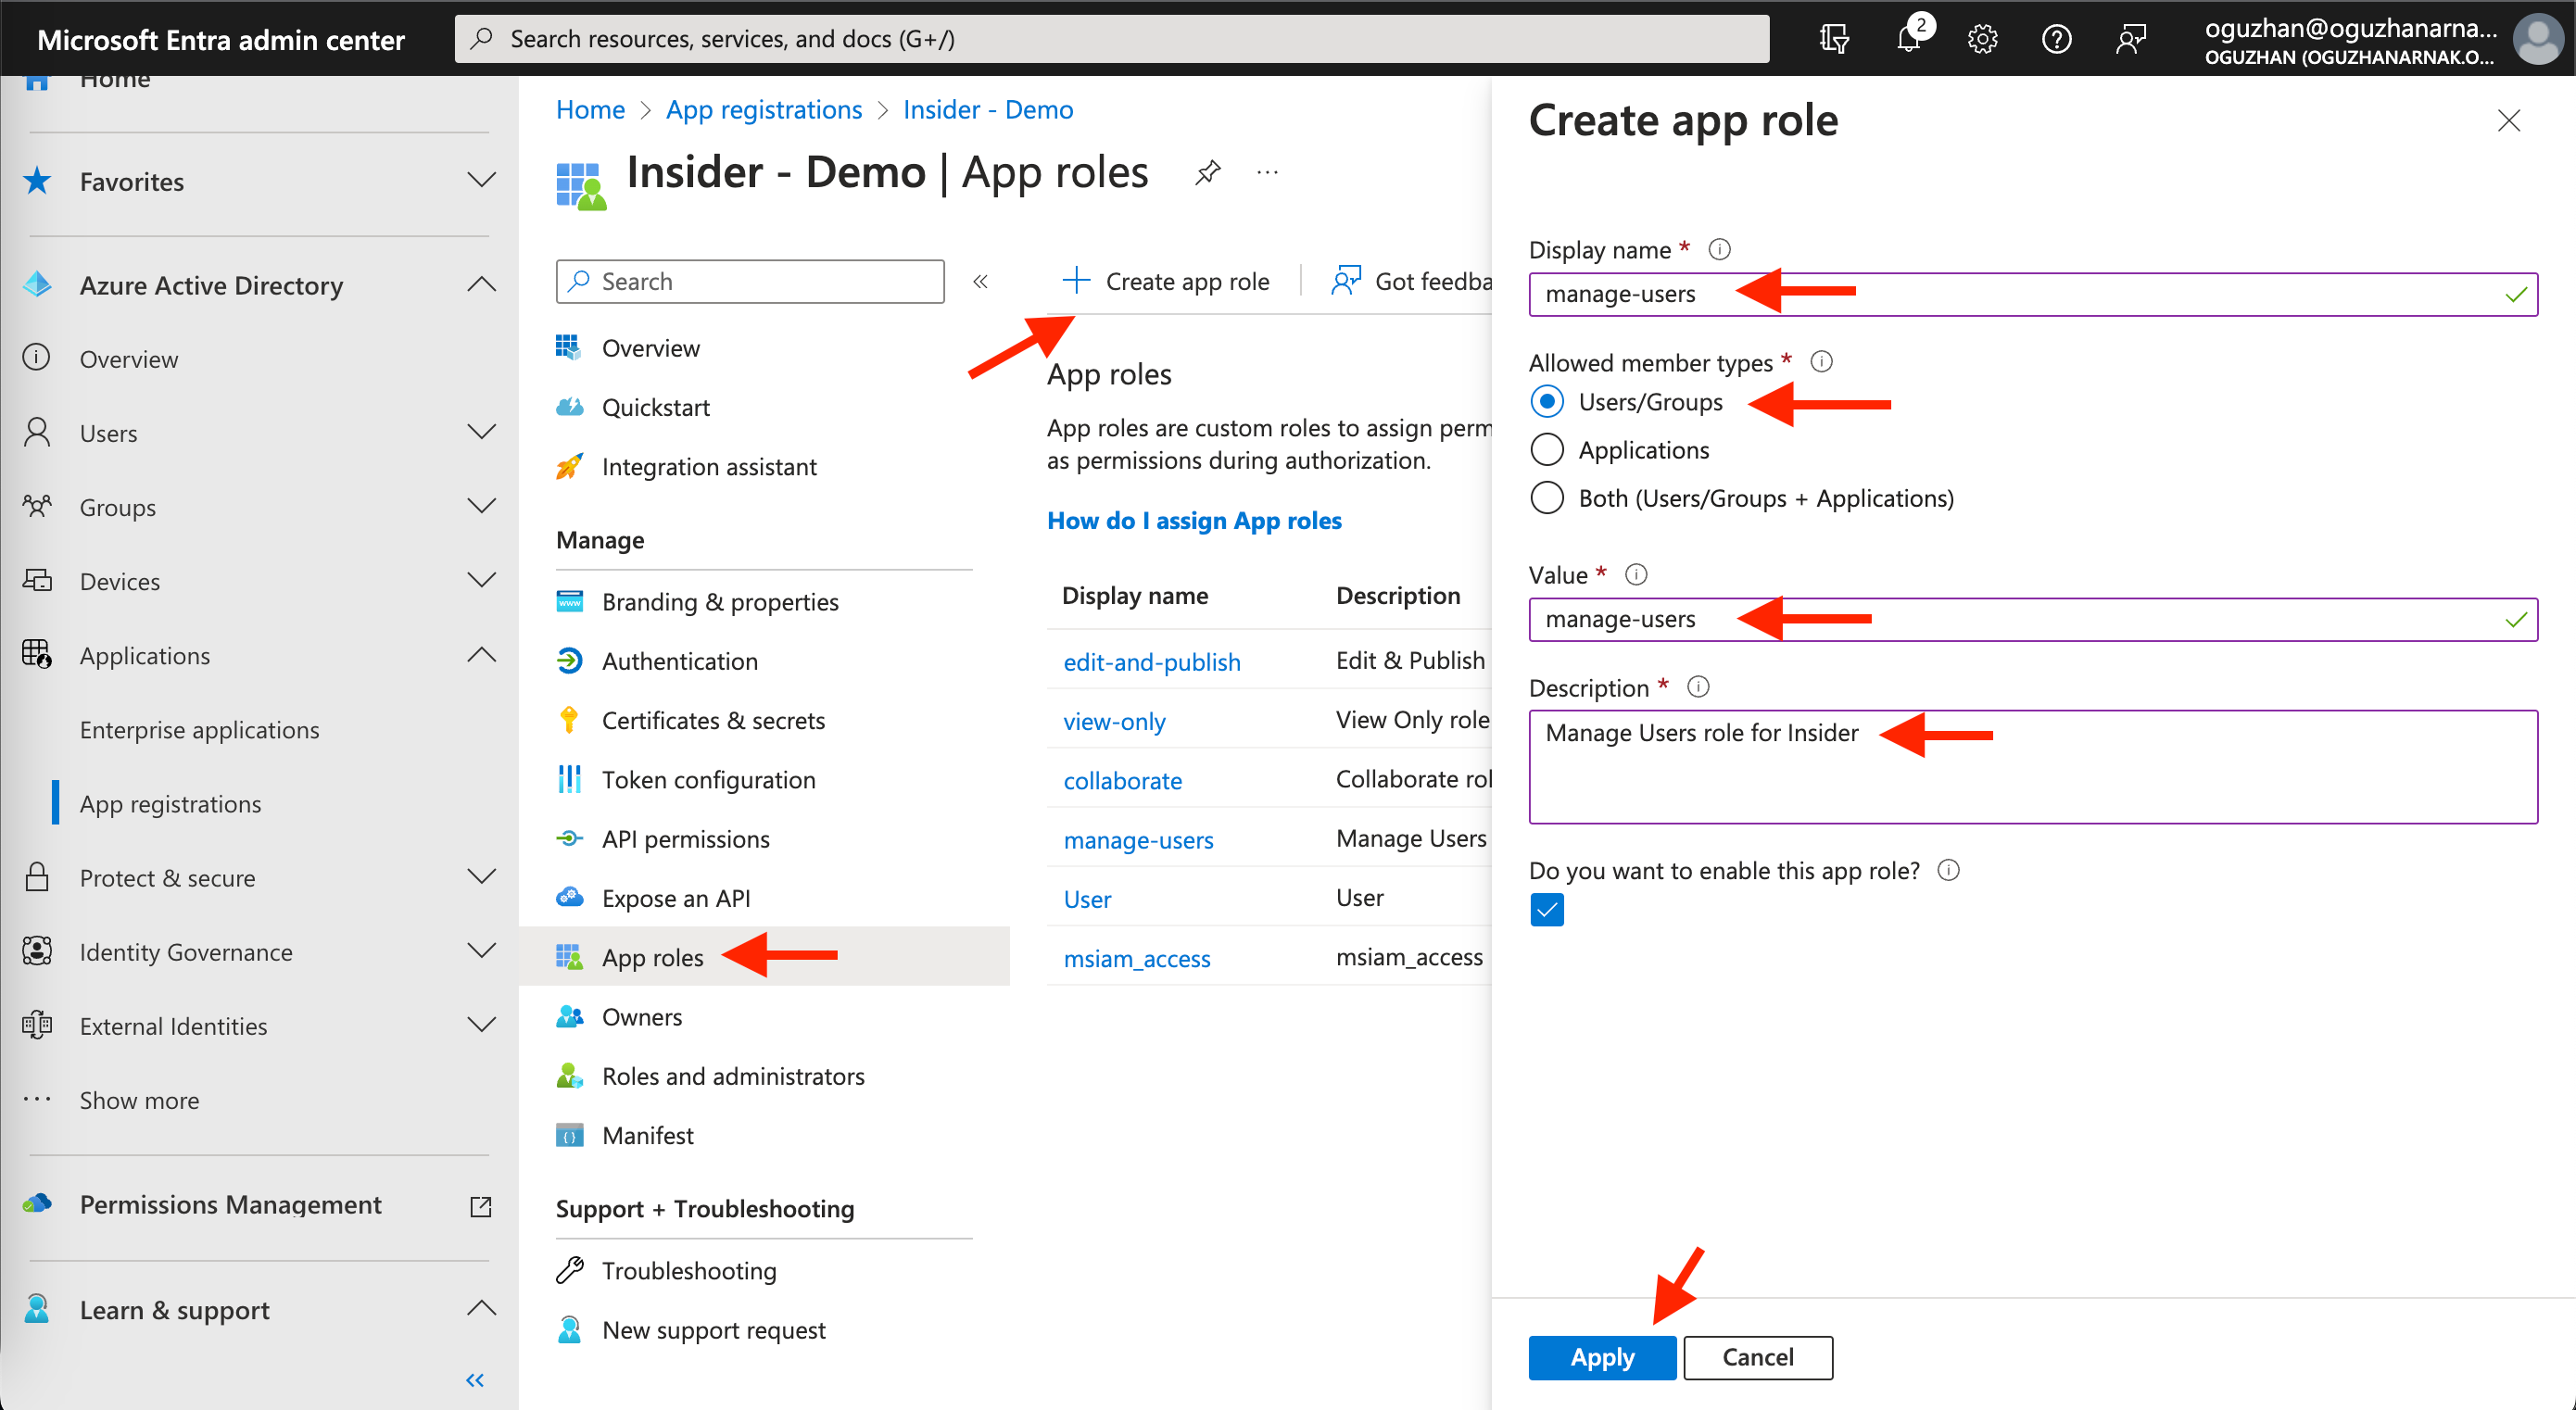
3. Add the Display name, value, and description values, and select the Allowed member types as listed in the table below for each role. Click the Apply button to save the role.
| Display Name | Allowed Member Type | Value | Description |
|---|---|---|---|
| manage-users | Users/Groups | manage-users | Administrator role for Insider |
| edit-and-publish | Users/Groups | edit-and-publish | Editor role for Insider |
| collaborate | Users/Groups | collaborate | Collaborator role for Insider |
| view-only | Users/Groups | view-only | Viewer role for Insider |
| change-campaign-status-only | Users/Groups | change-campaign-status-only | Campaign Status Updater role for Insider |
| outsource | Users/Groups | outsource | Outsourcer role for Insider |
Setting up provisioning
To set up provisioning:
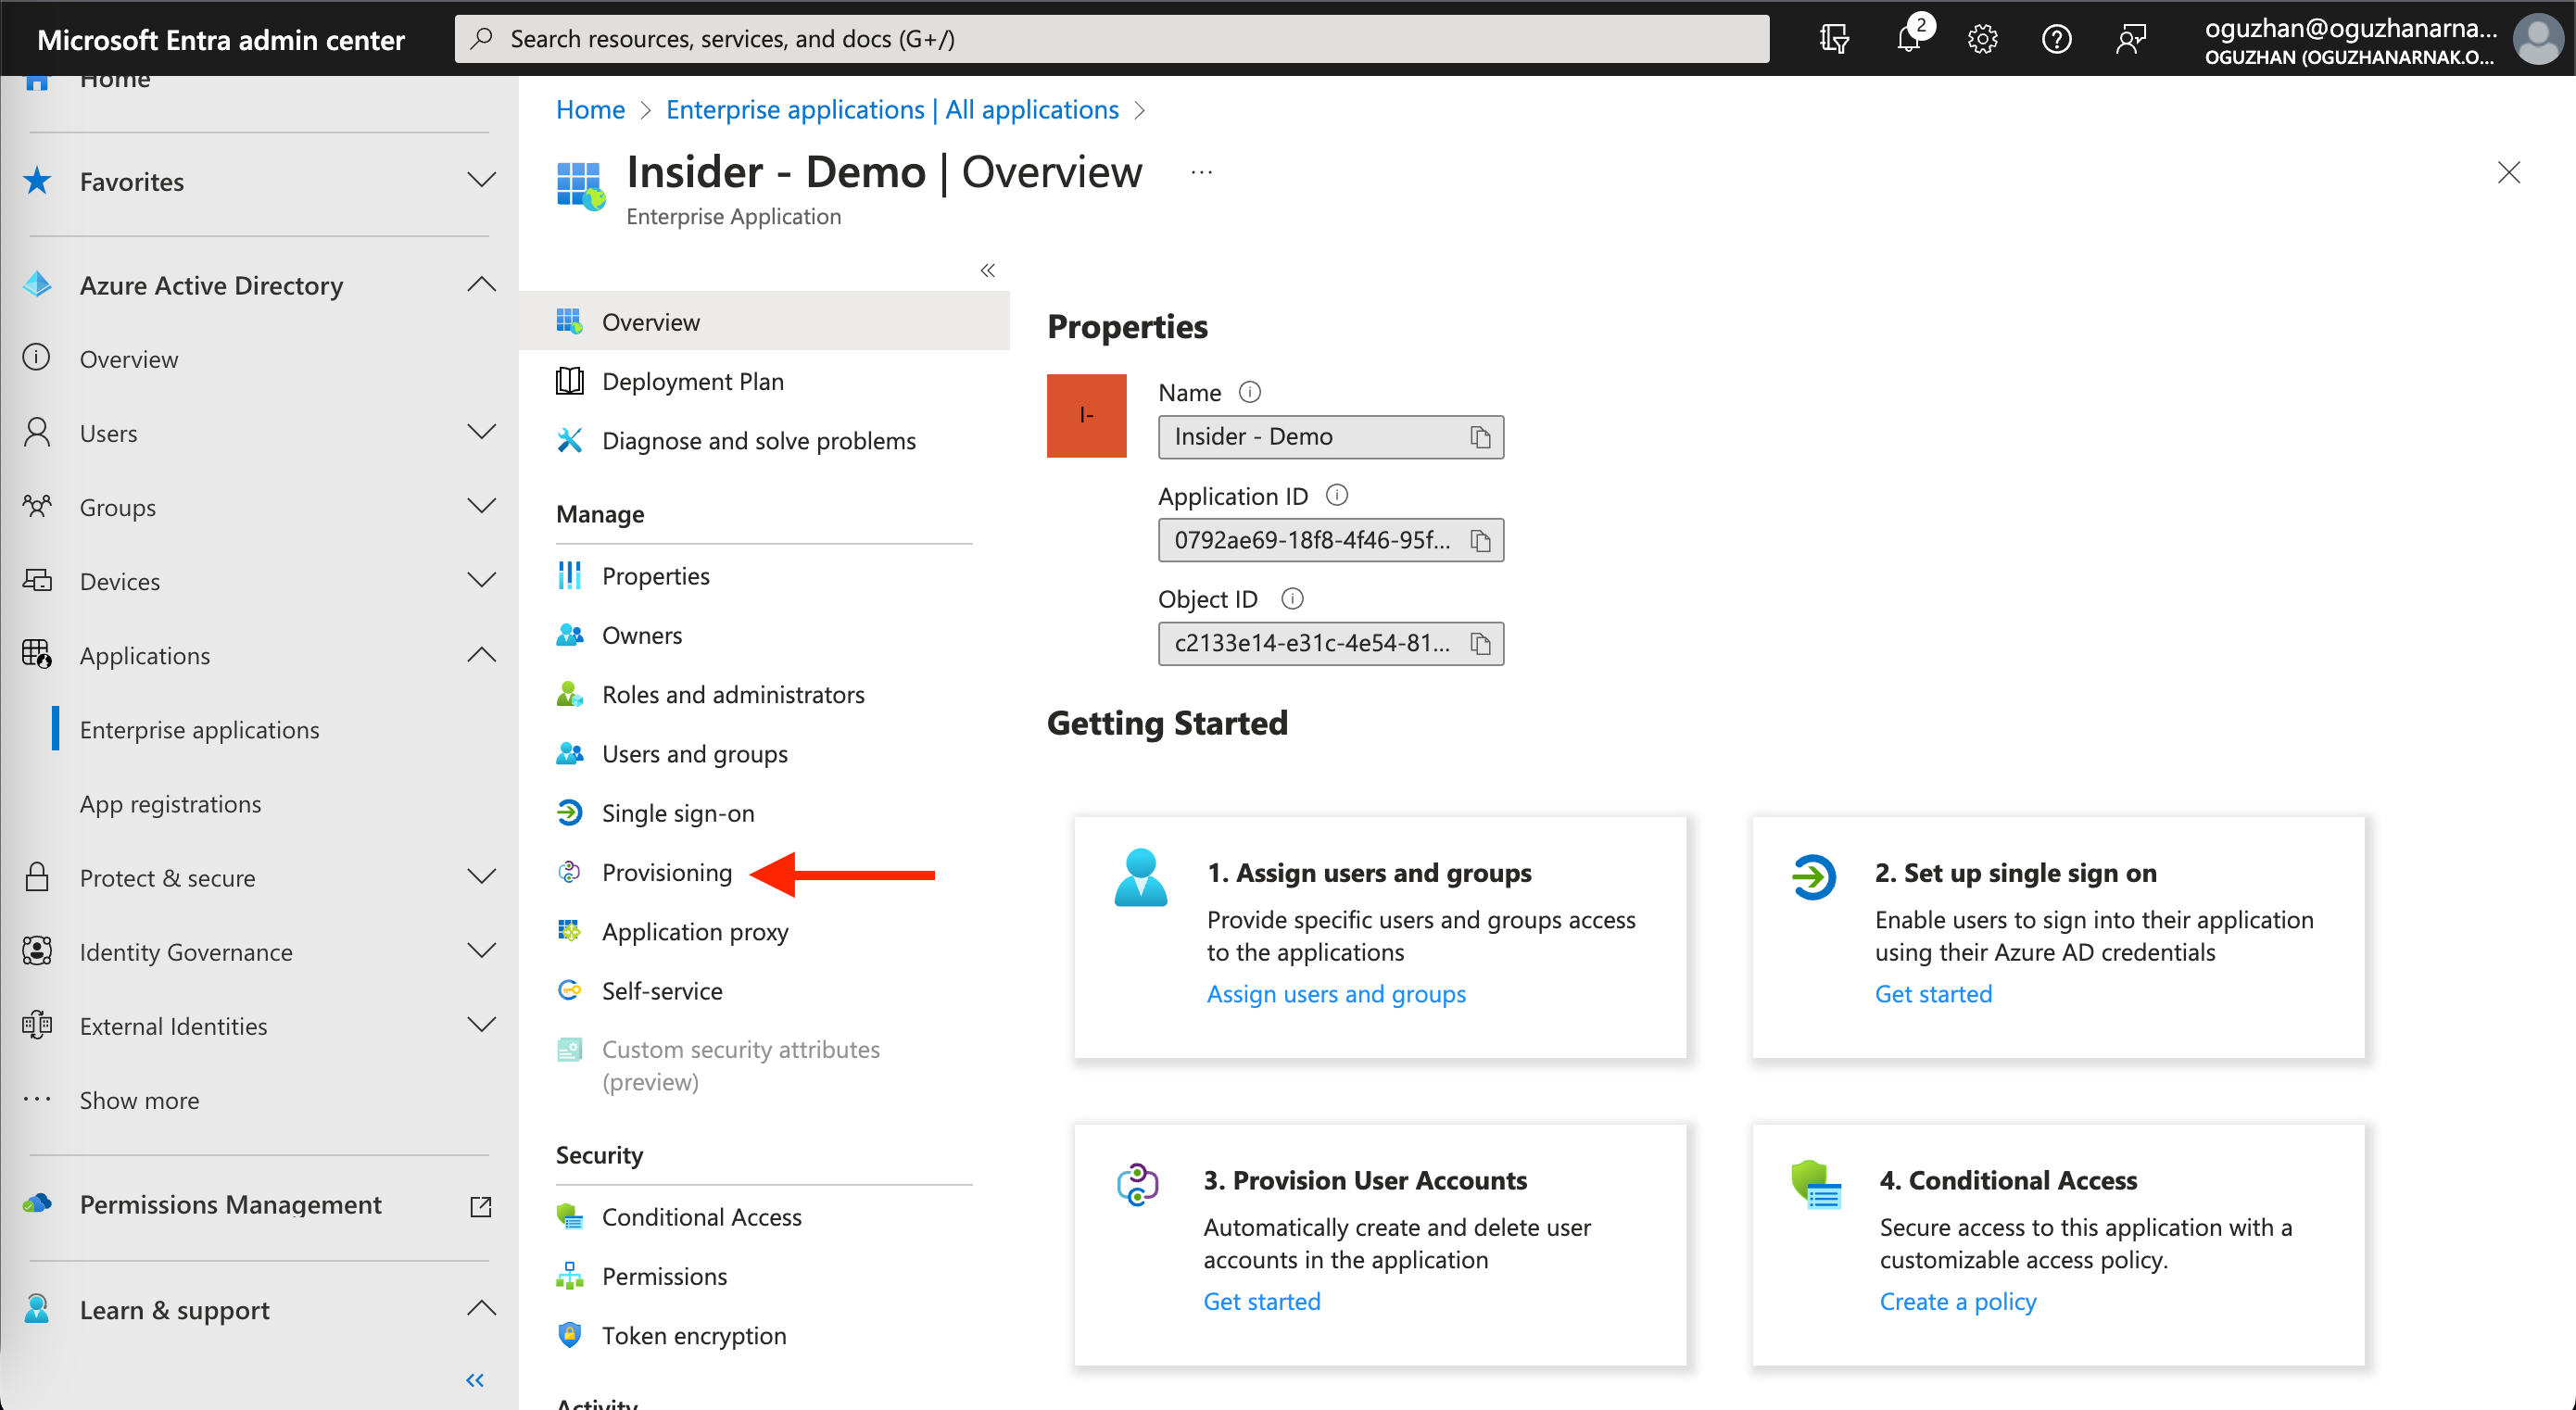
1. Go to Applications > Enterprise applications on the left menu, and click Manage > Provisioning.
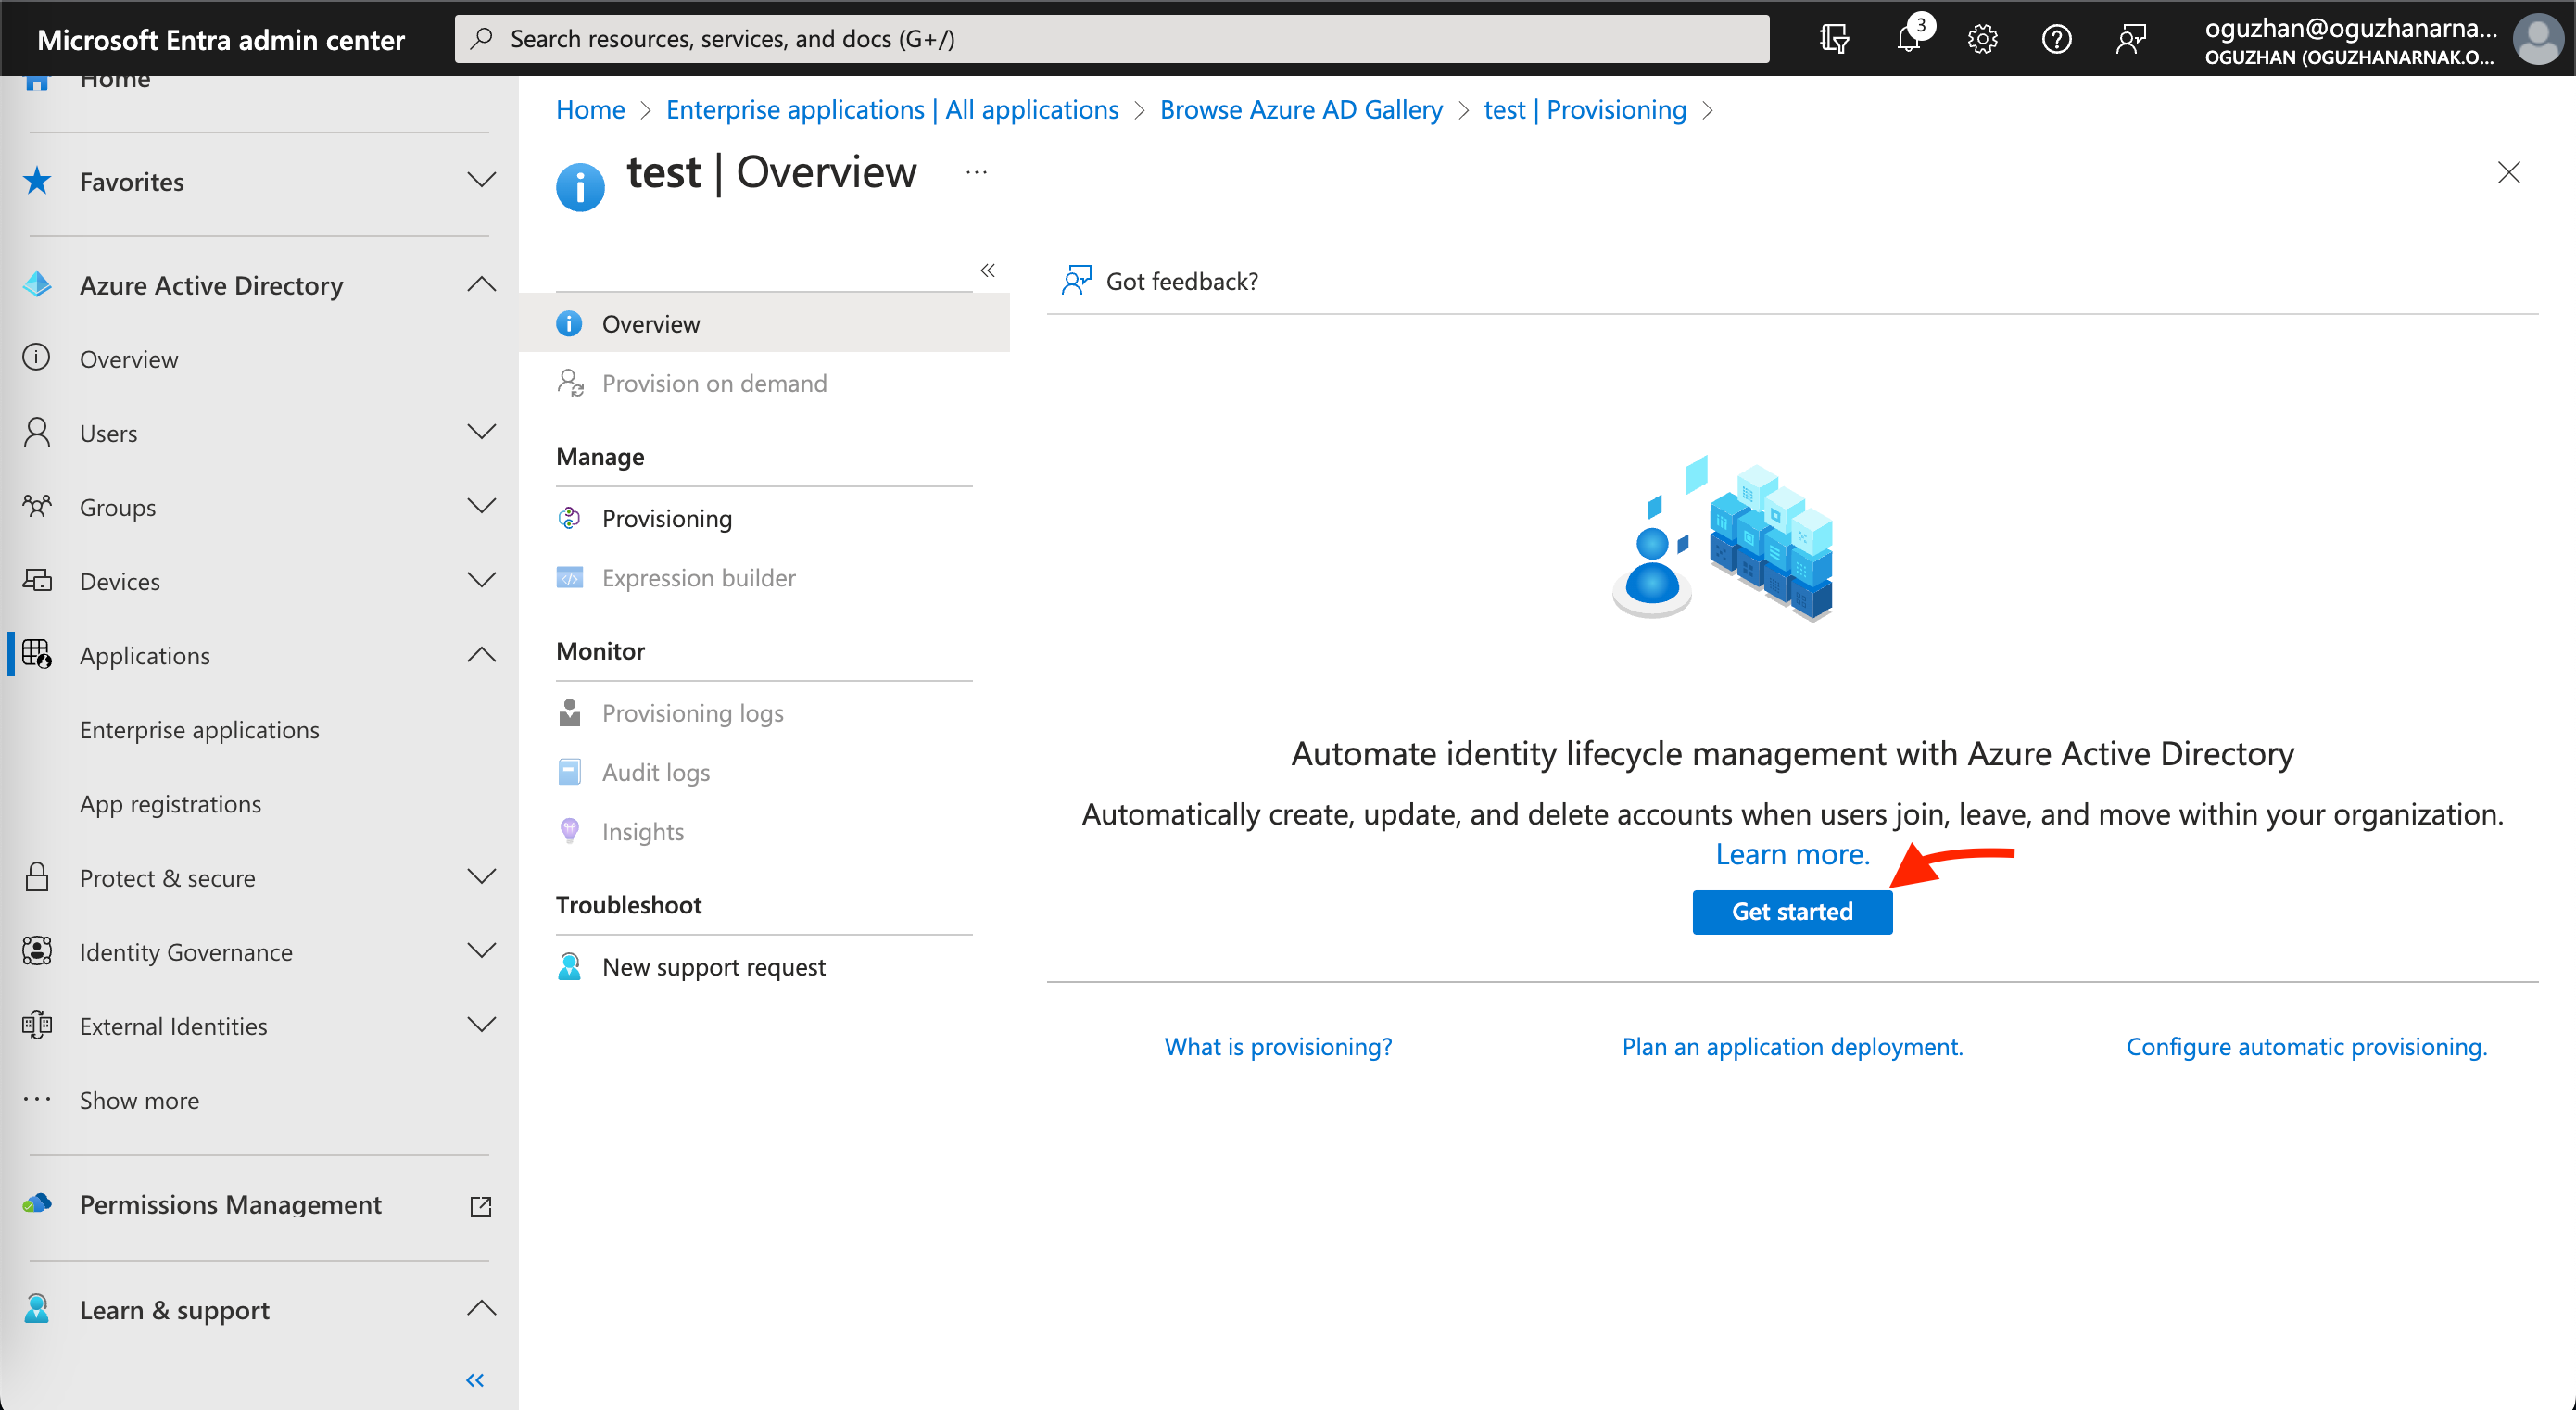
2. Click the Get Started button to start the SCIM (System for Cross-domain Identity Management) integration.
3. On the following page, fill out the necessary input fields as displayed below.
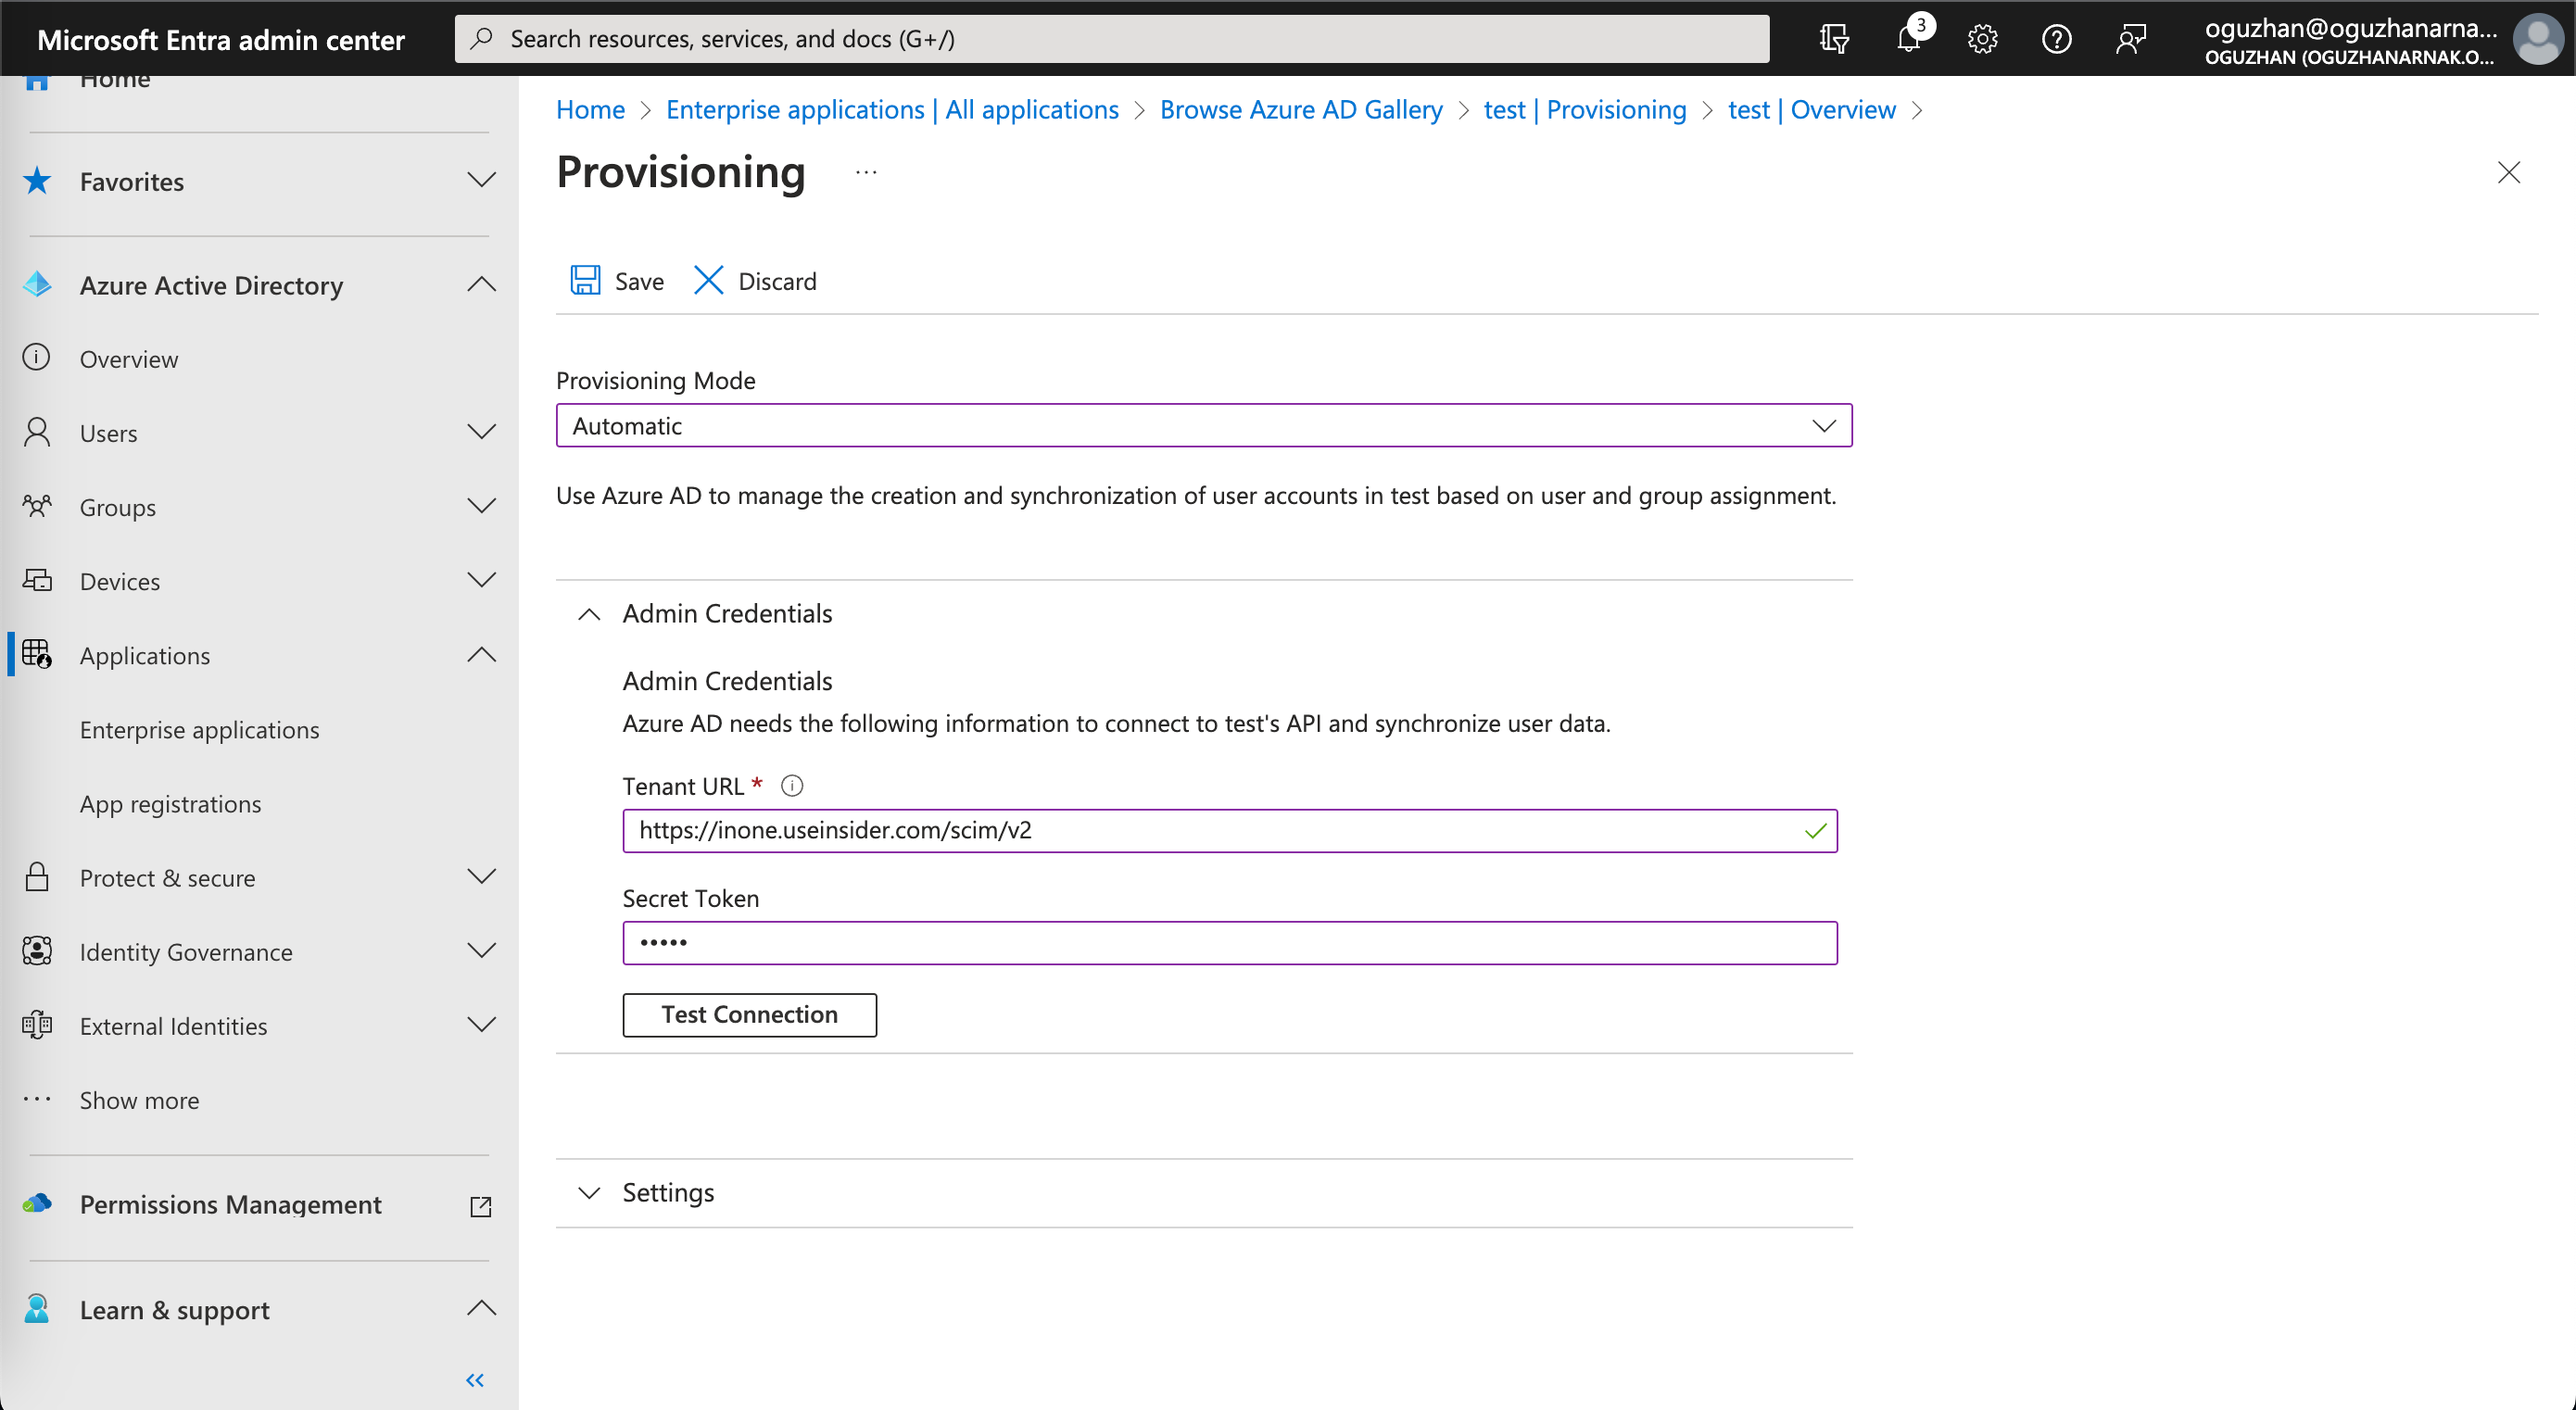
| Field | Value |
|---|---|
| Provisioning Mode | Automatic |
| Tenant URL | https://inone.useinsider.com/scim/v2 |
| Secret Token | The SCIM API token you can get from Inone Settings > Security. |
4. After copying the token from Insider and pasting it to Azure, go to Inone Settings > Security on Inone panel to click the Save on the right bottom corner. If you do not save this page, you will receive an error during the Test Connection.
5. Click the Test Connection button on Inone Settings > Security to see if the setup is successful for the Active Directory. Then click the Save button to save your changes.
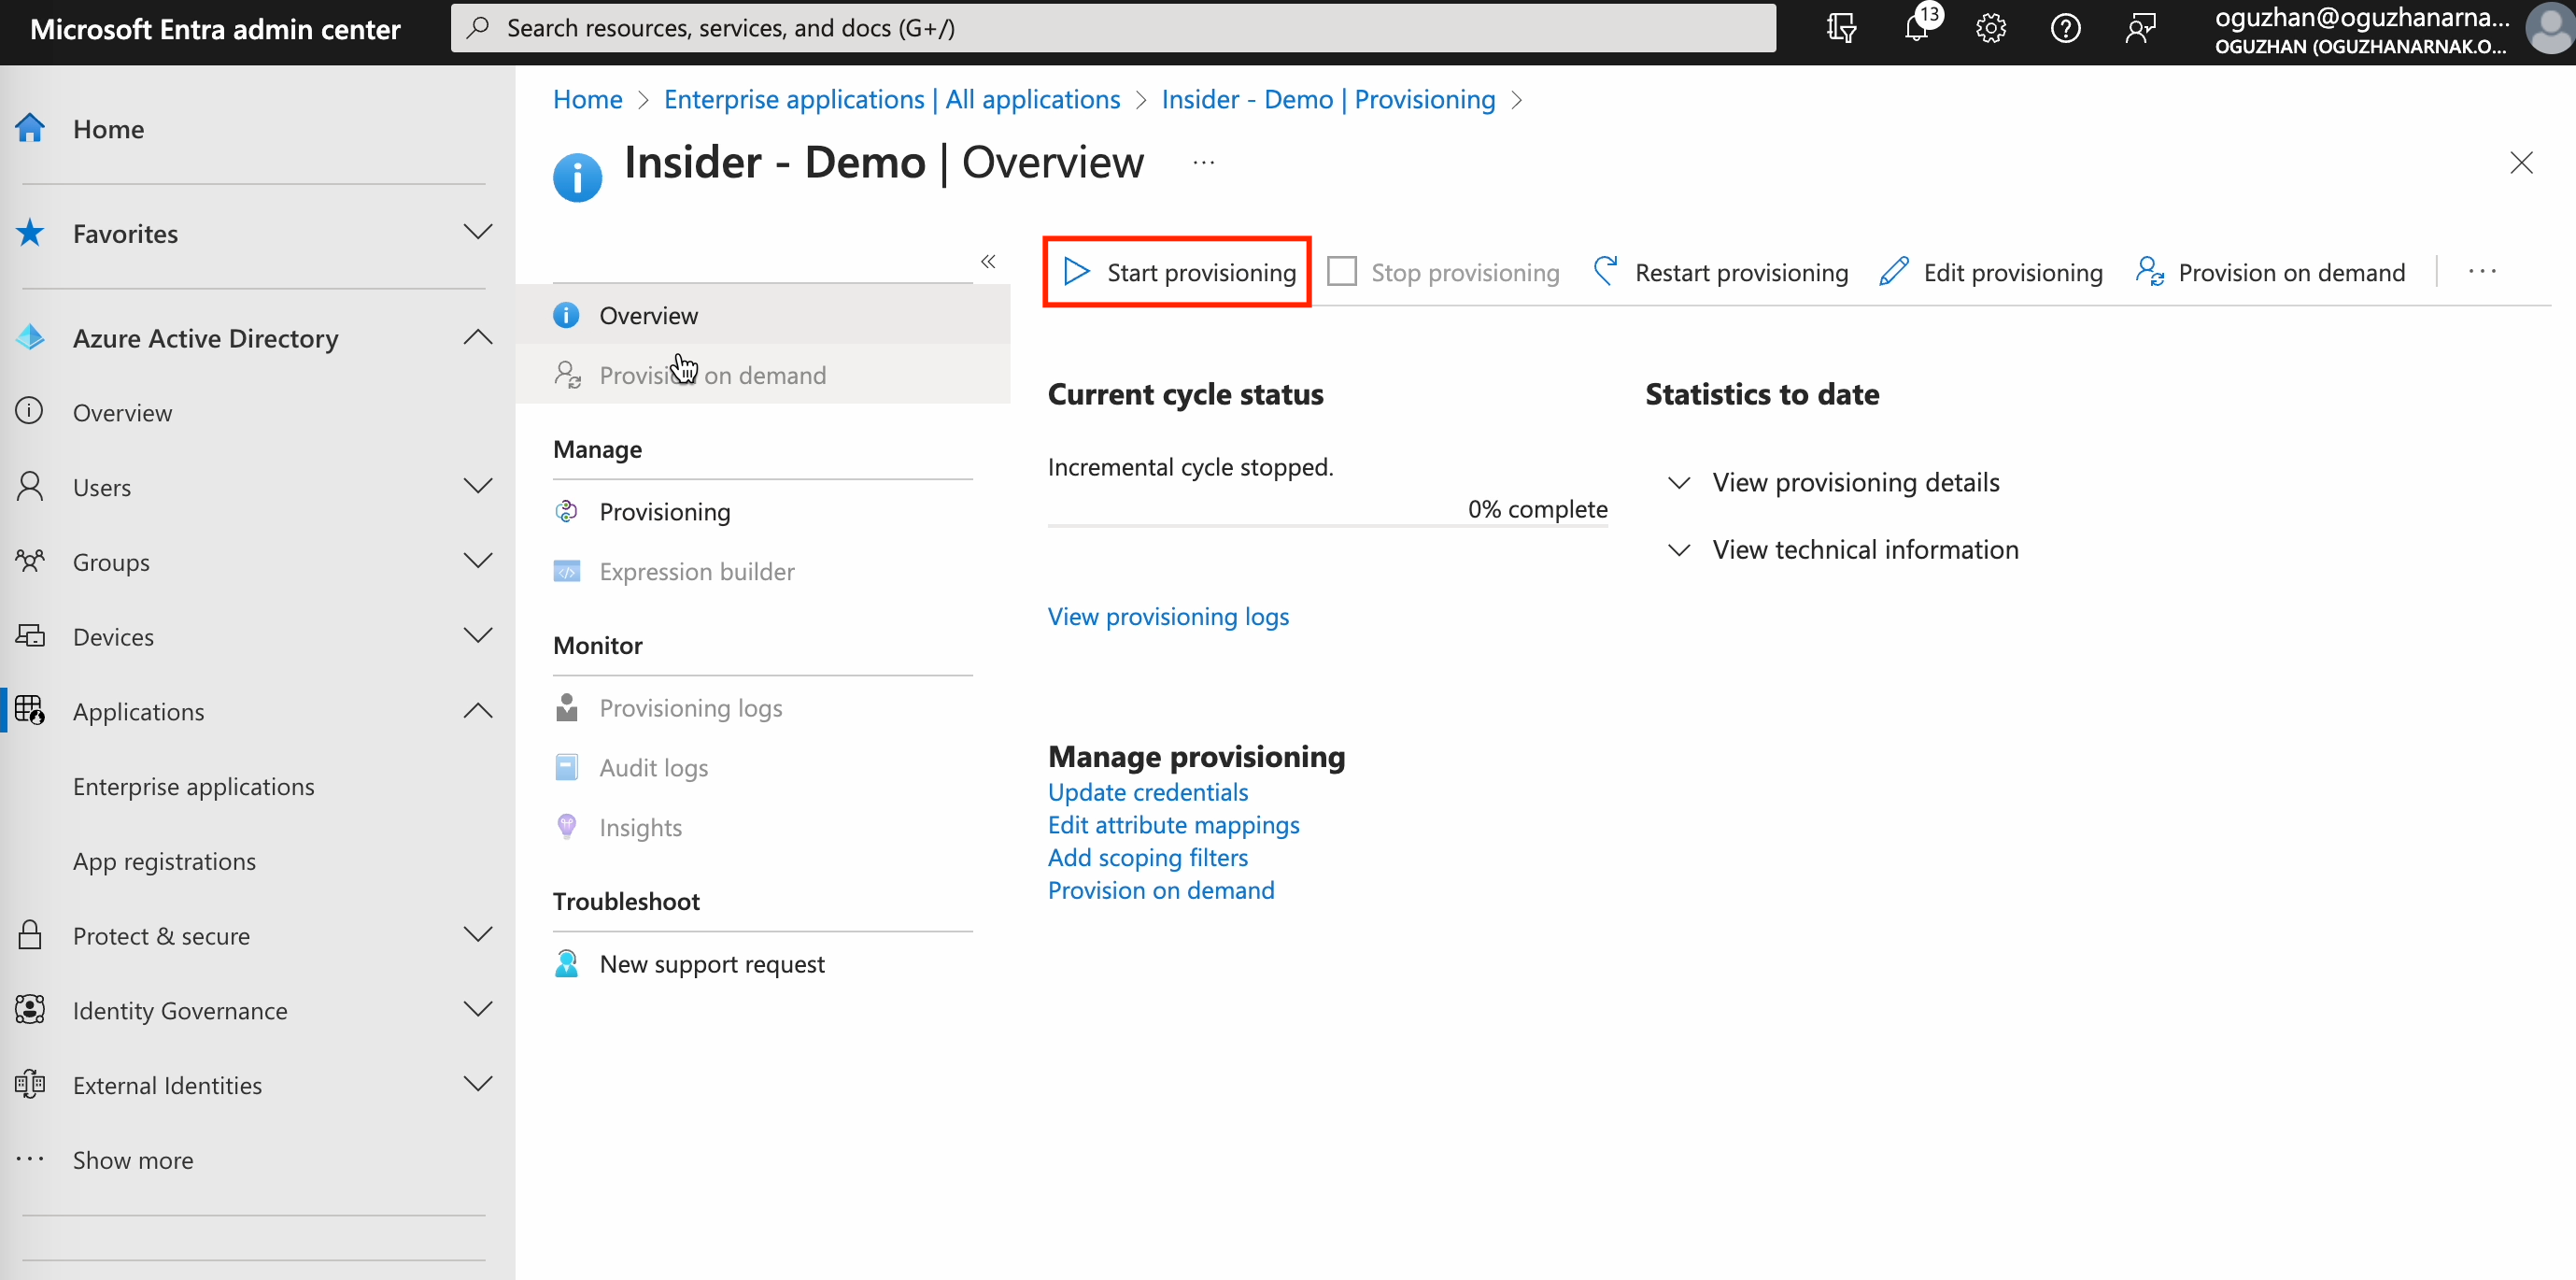
6. Finally, click the Start Provisioning button to enable the provisioning process for your panel users. You can also click the Stop Provisioning button next to it to stop this process.
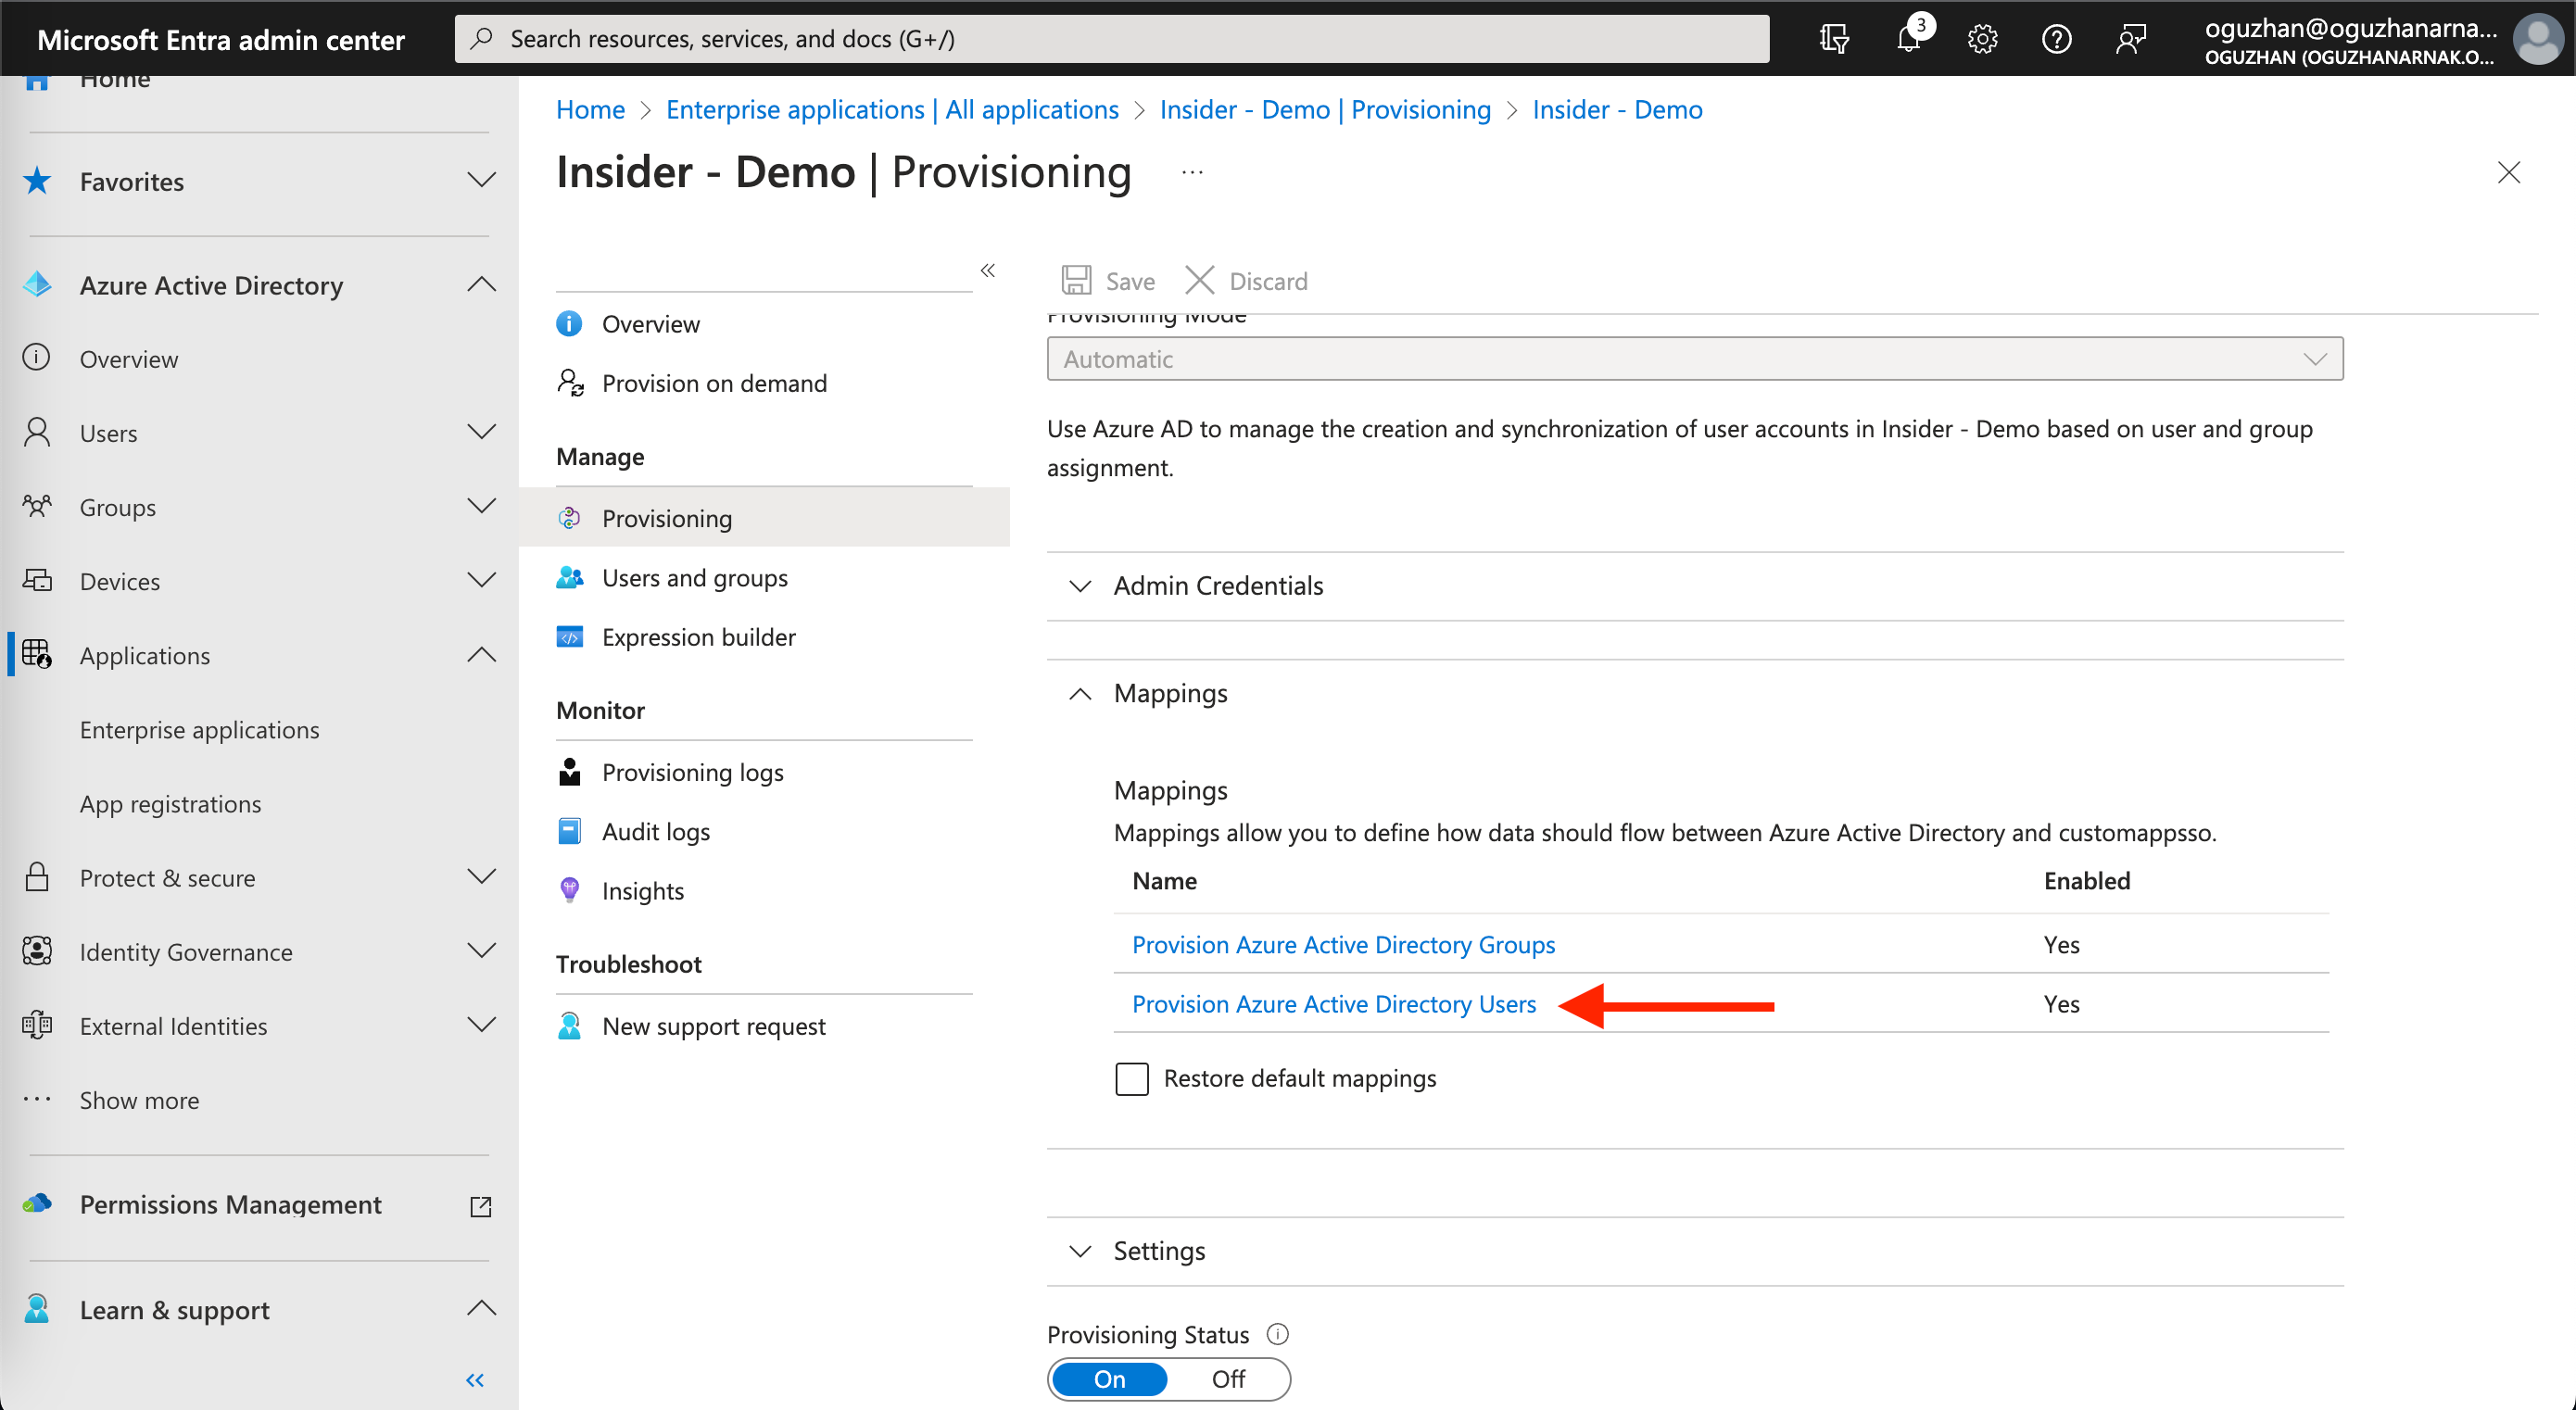
Updating mappings
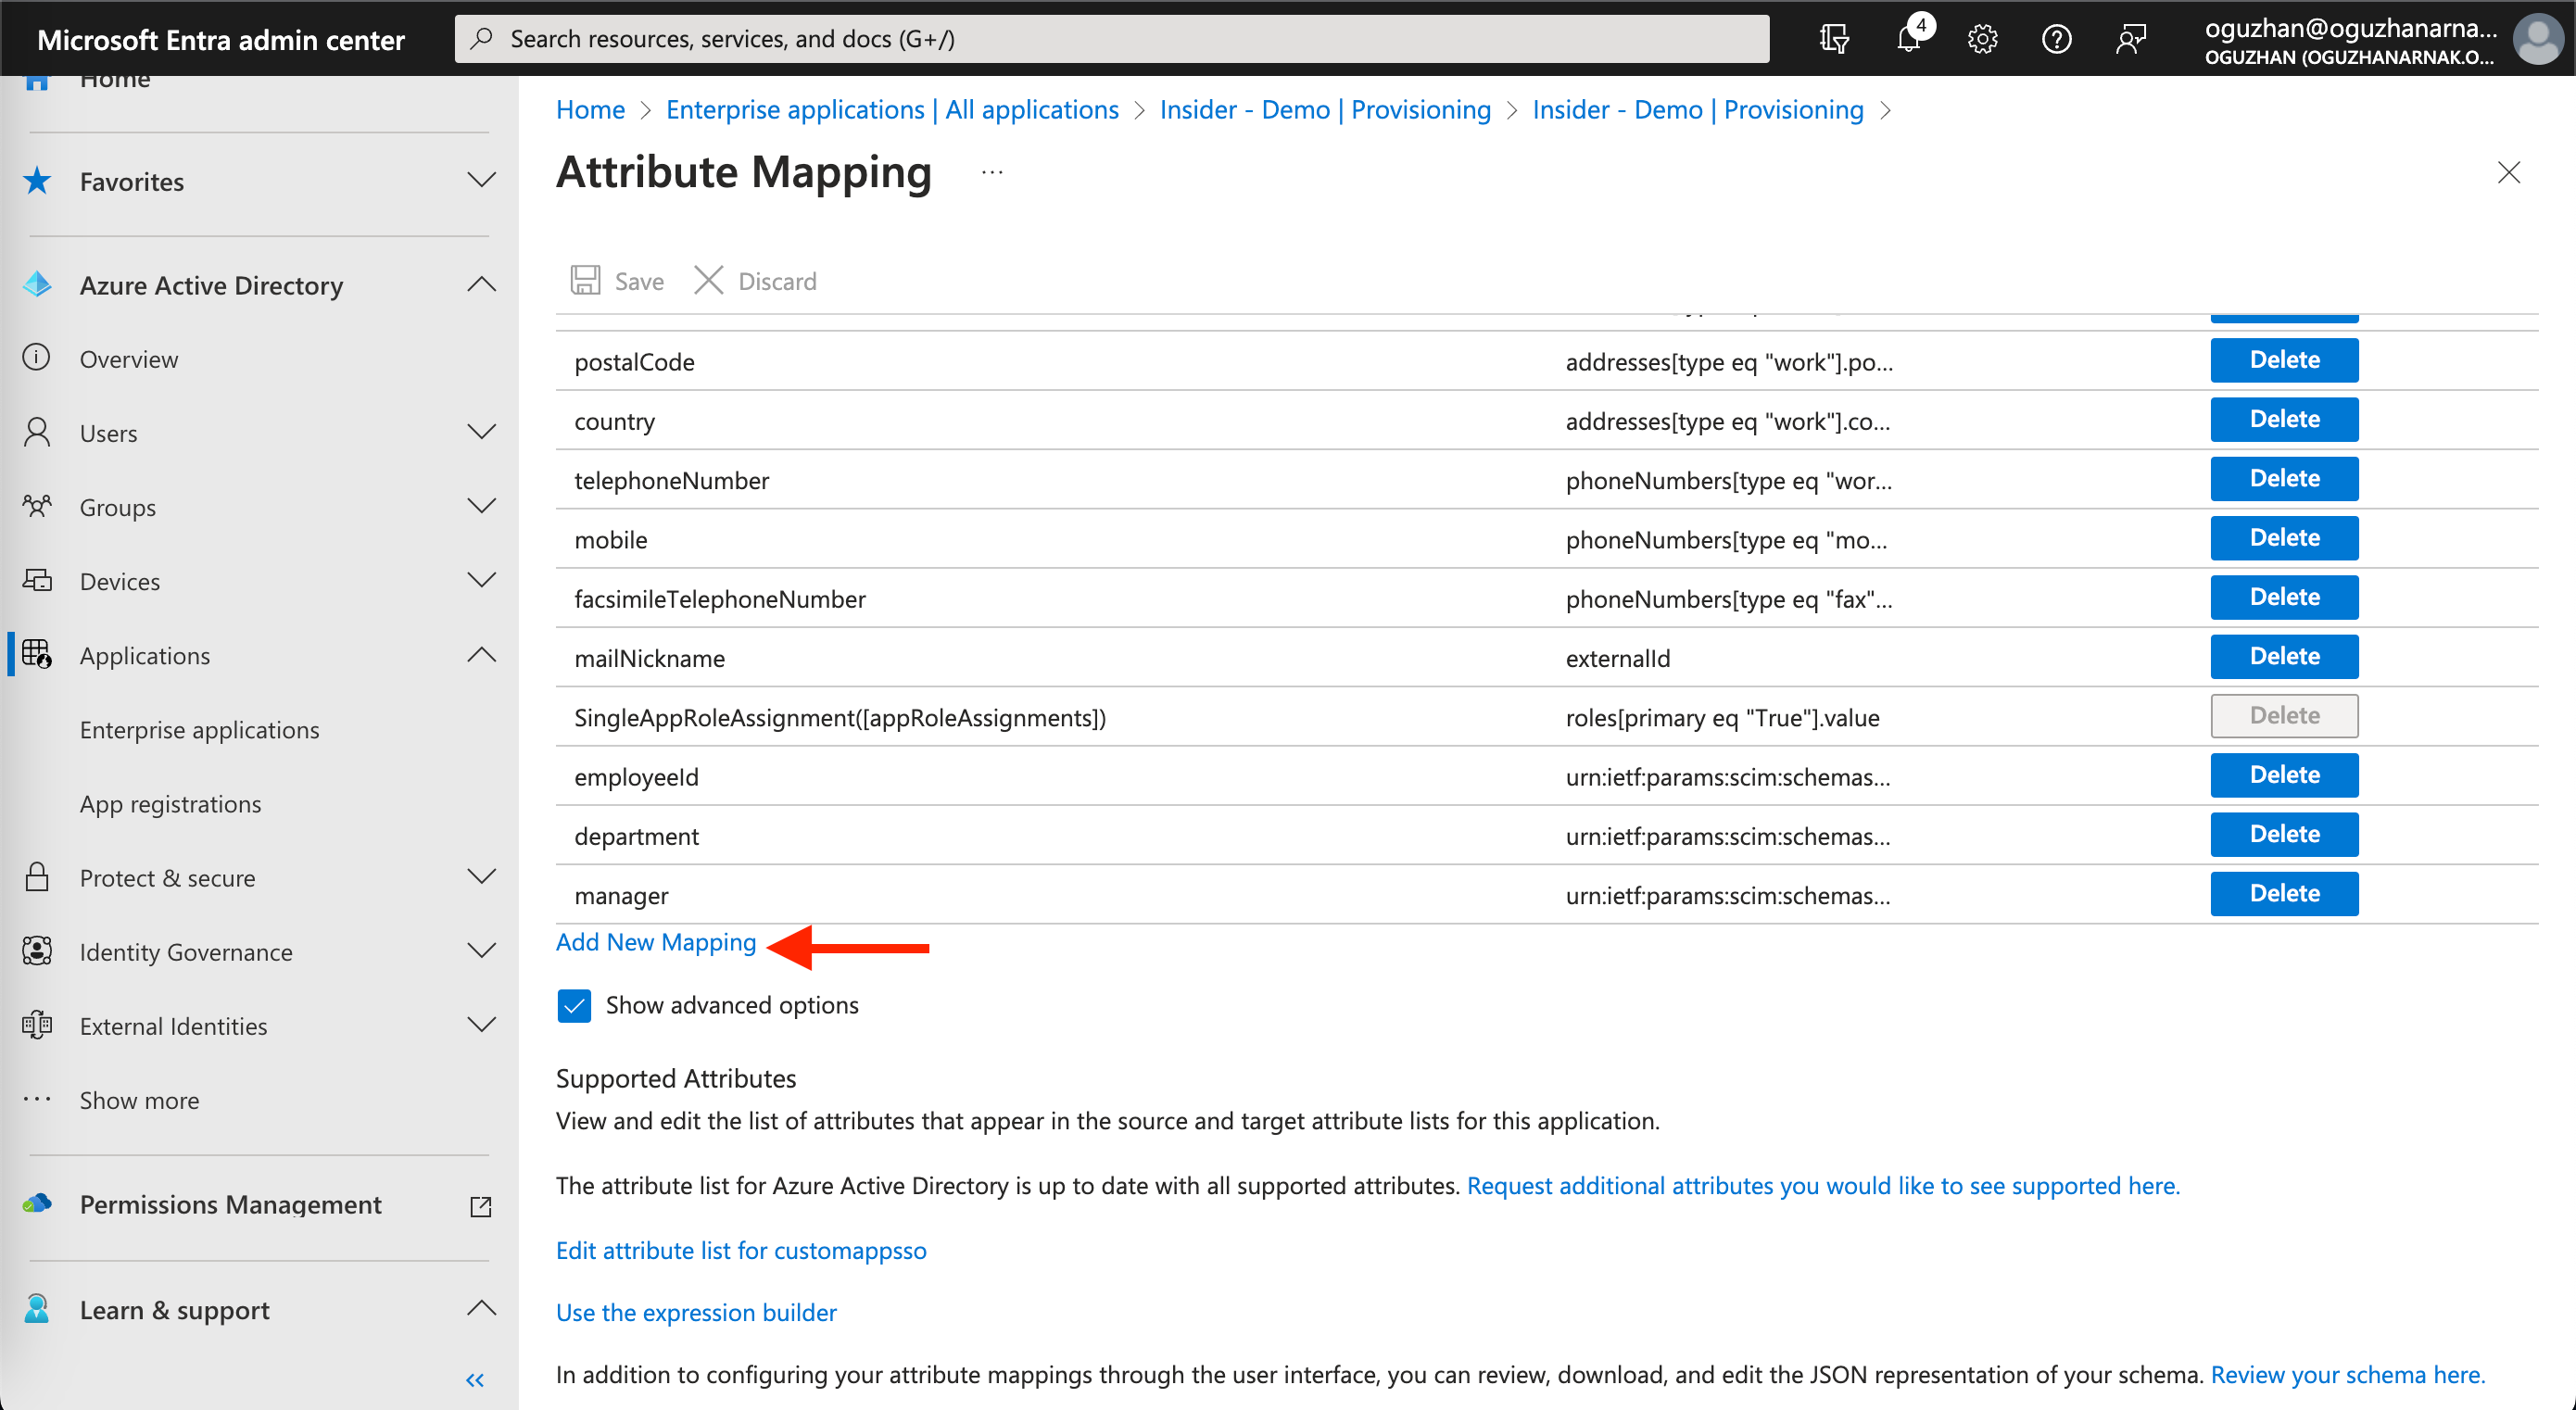
After saving your changes, you will see the Mappings section under the Admin Credentials section. If you can not see the Mappings section, please hit the refresh button on your browser and refresh the page.
1. Click the Provision Azure Active Directory Users link under the Mappings section to update mapping for user attributes.
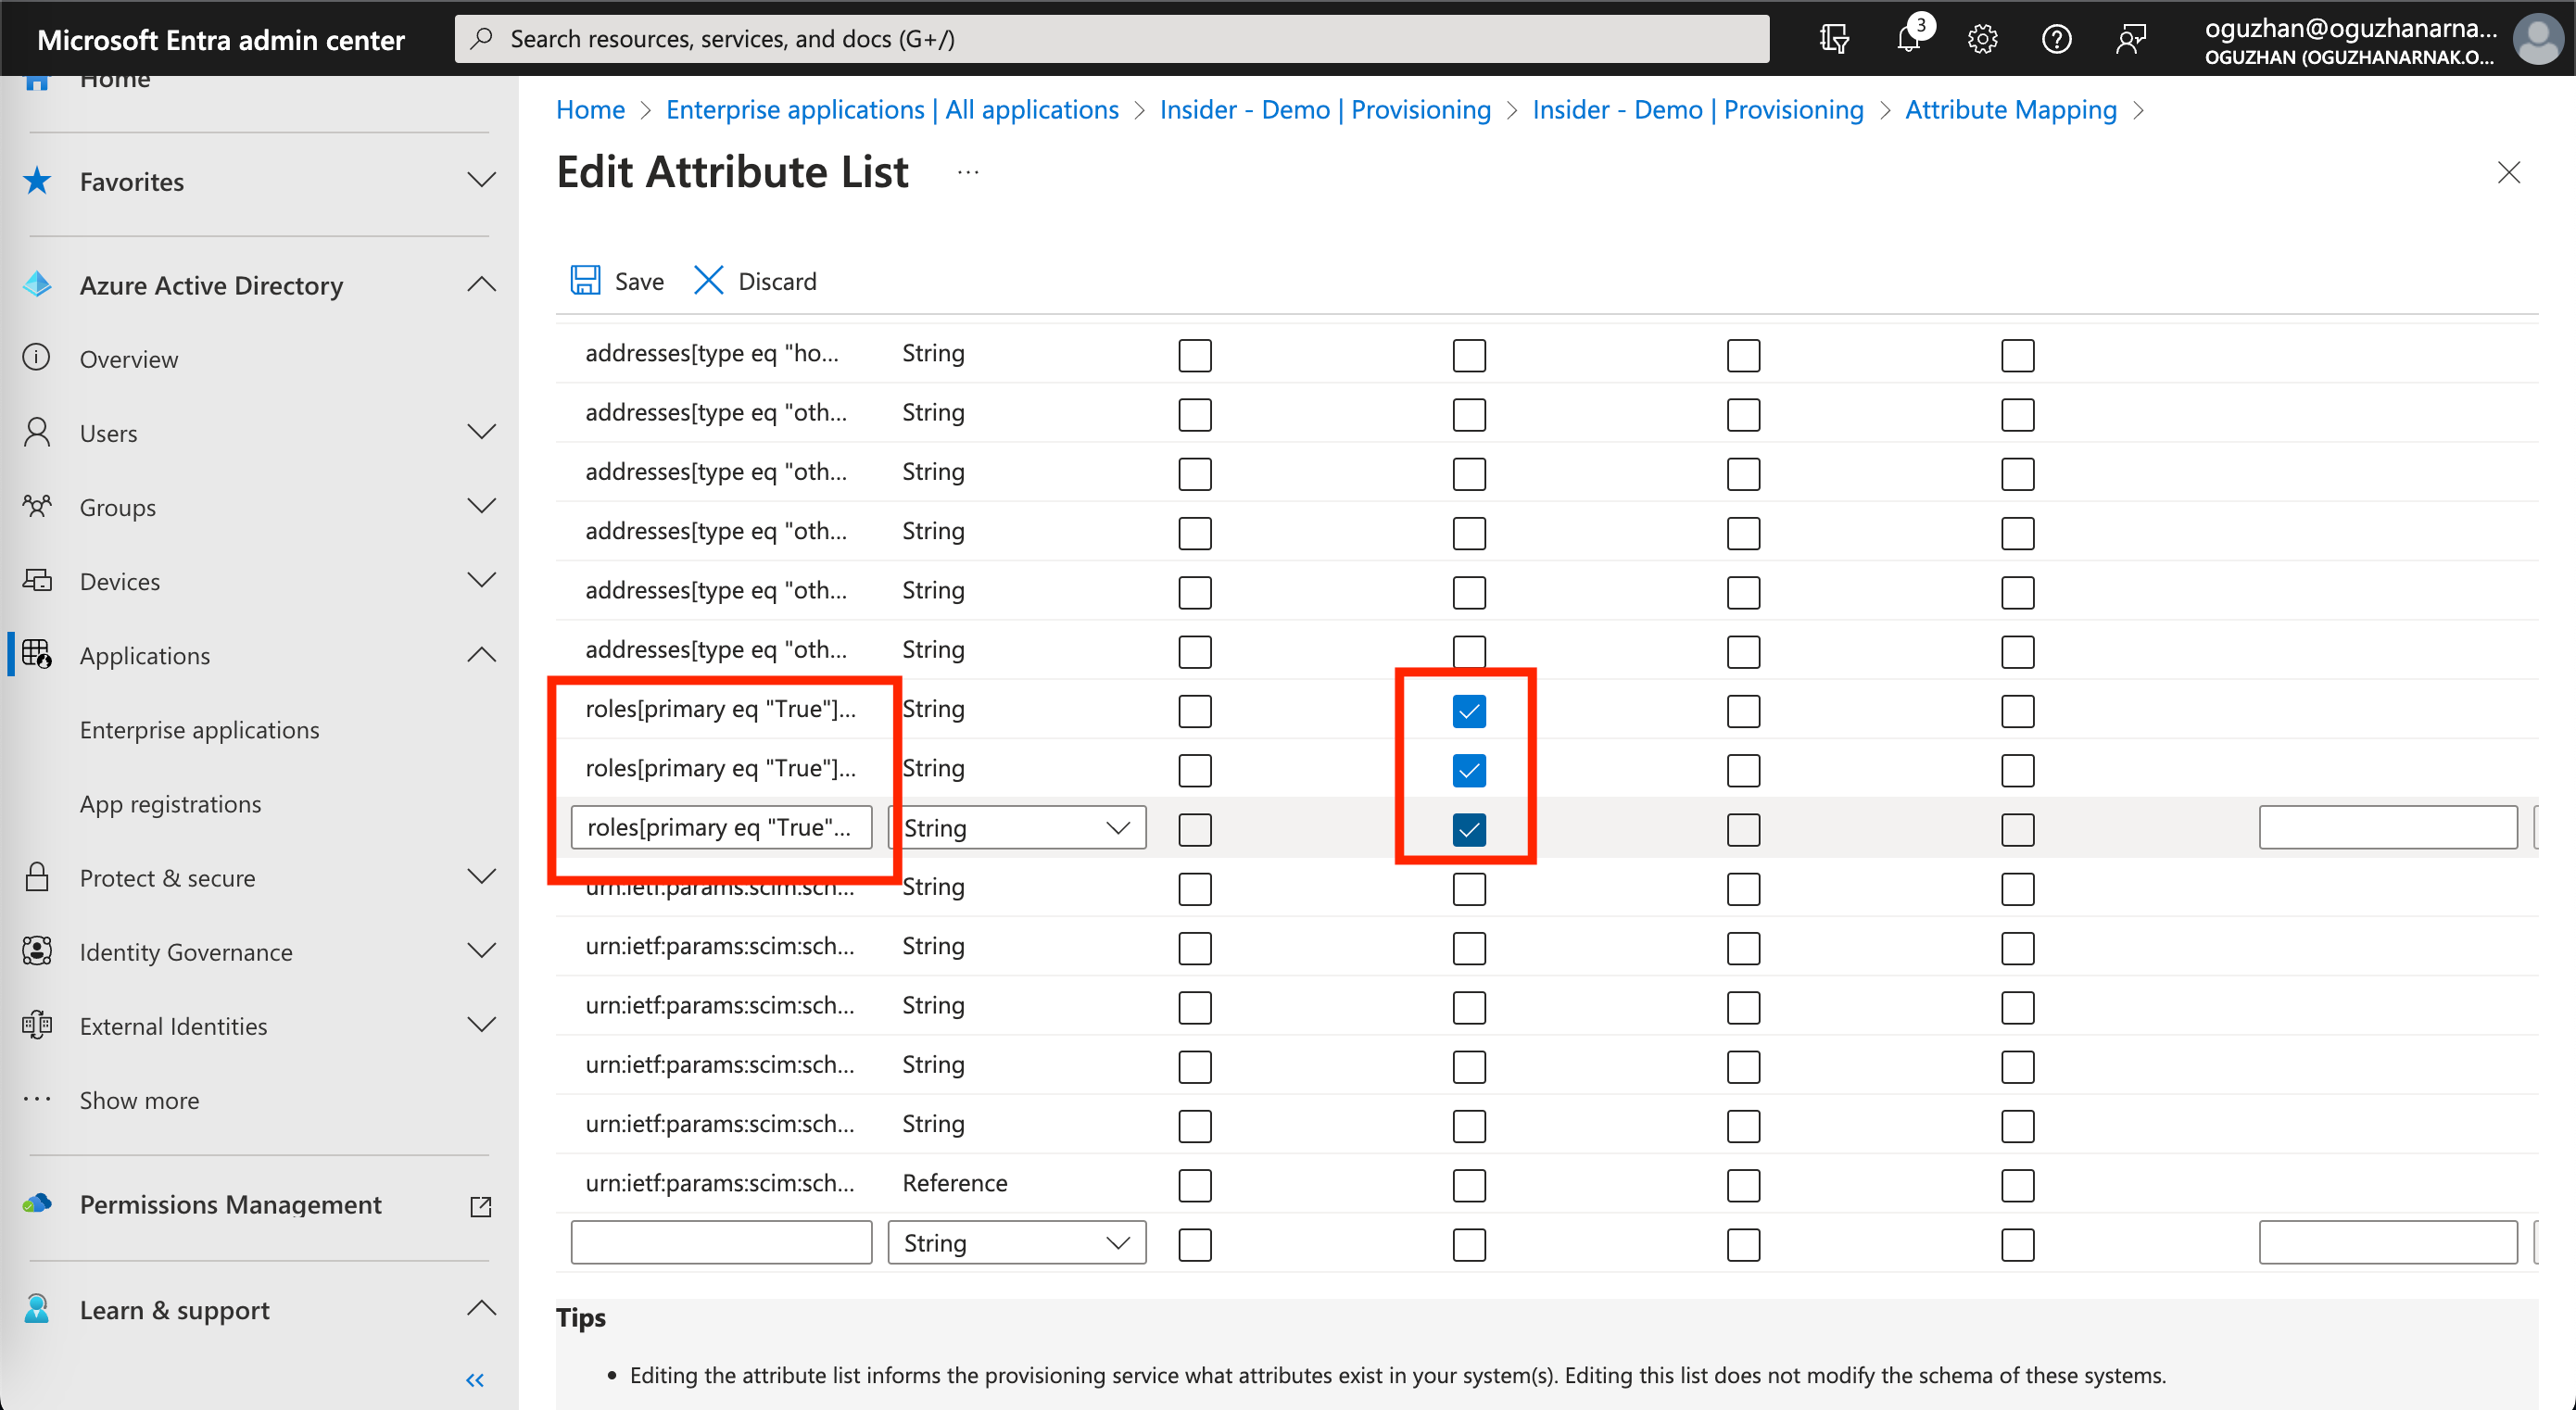
2. On the following page, scroll down to the bottom of the page and make sure to check the Show advanced options box. Then click the Edit attribute list for customappsso link under the advanced options.
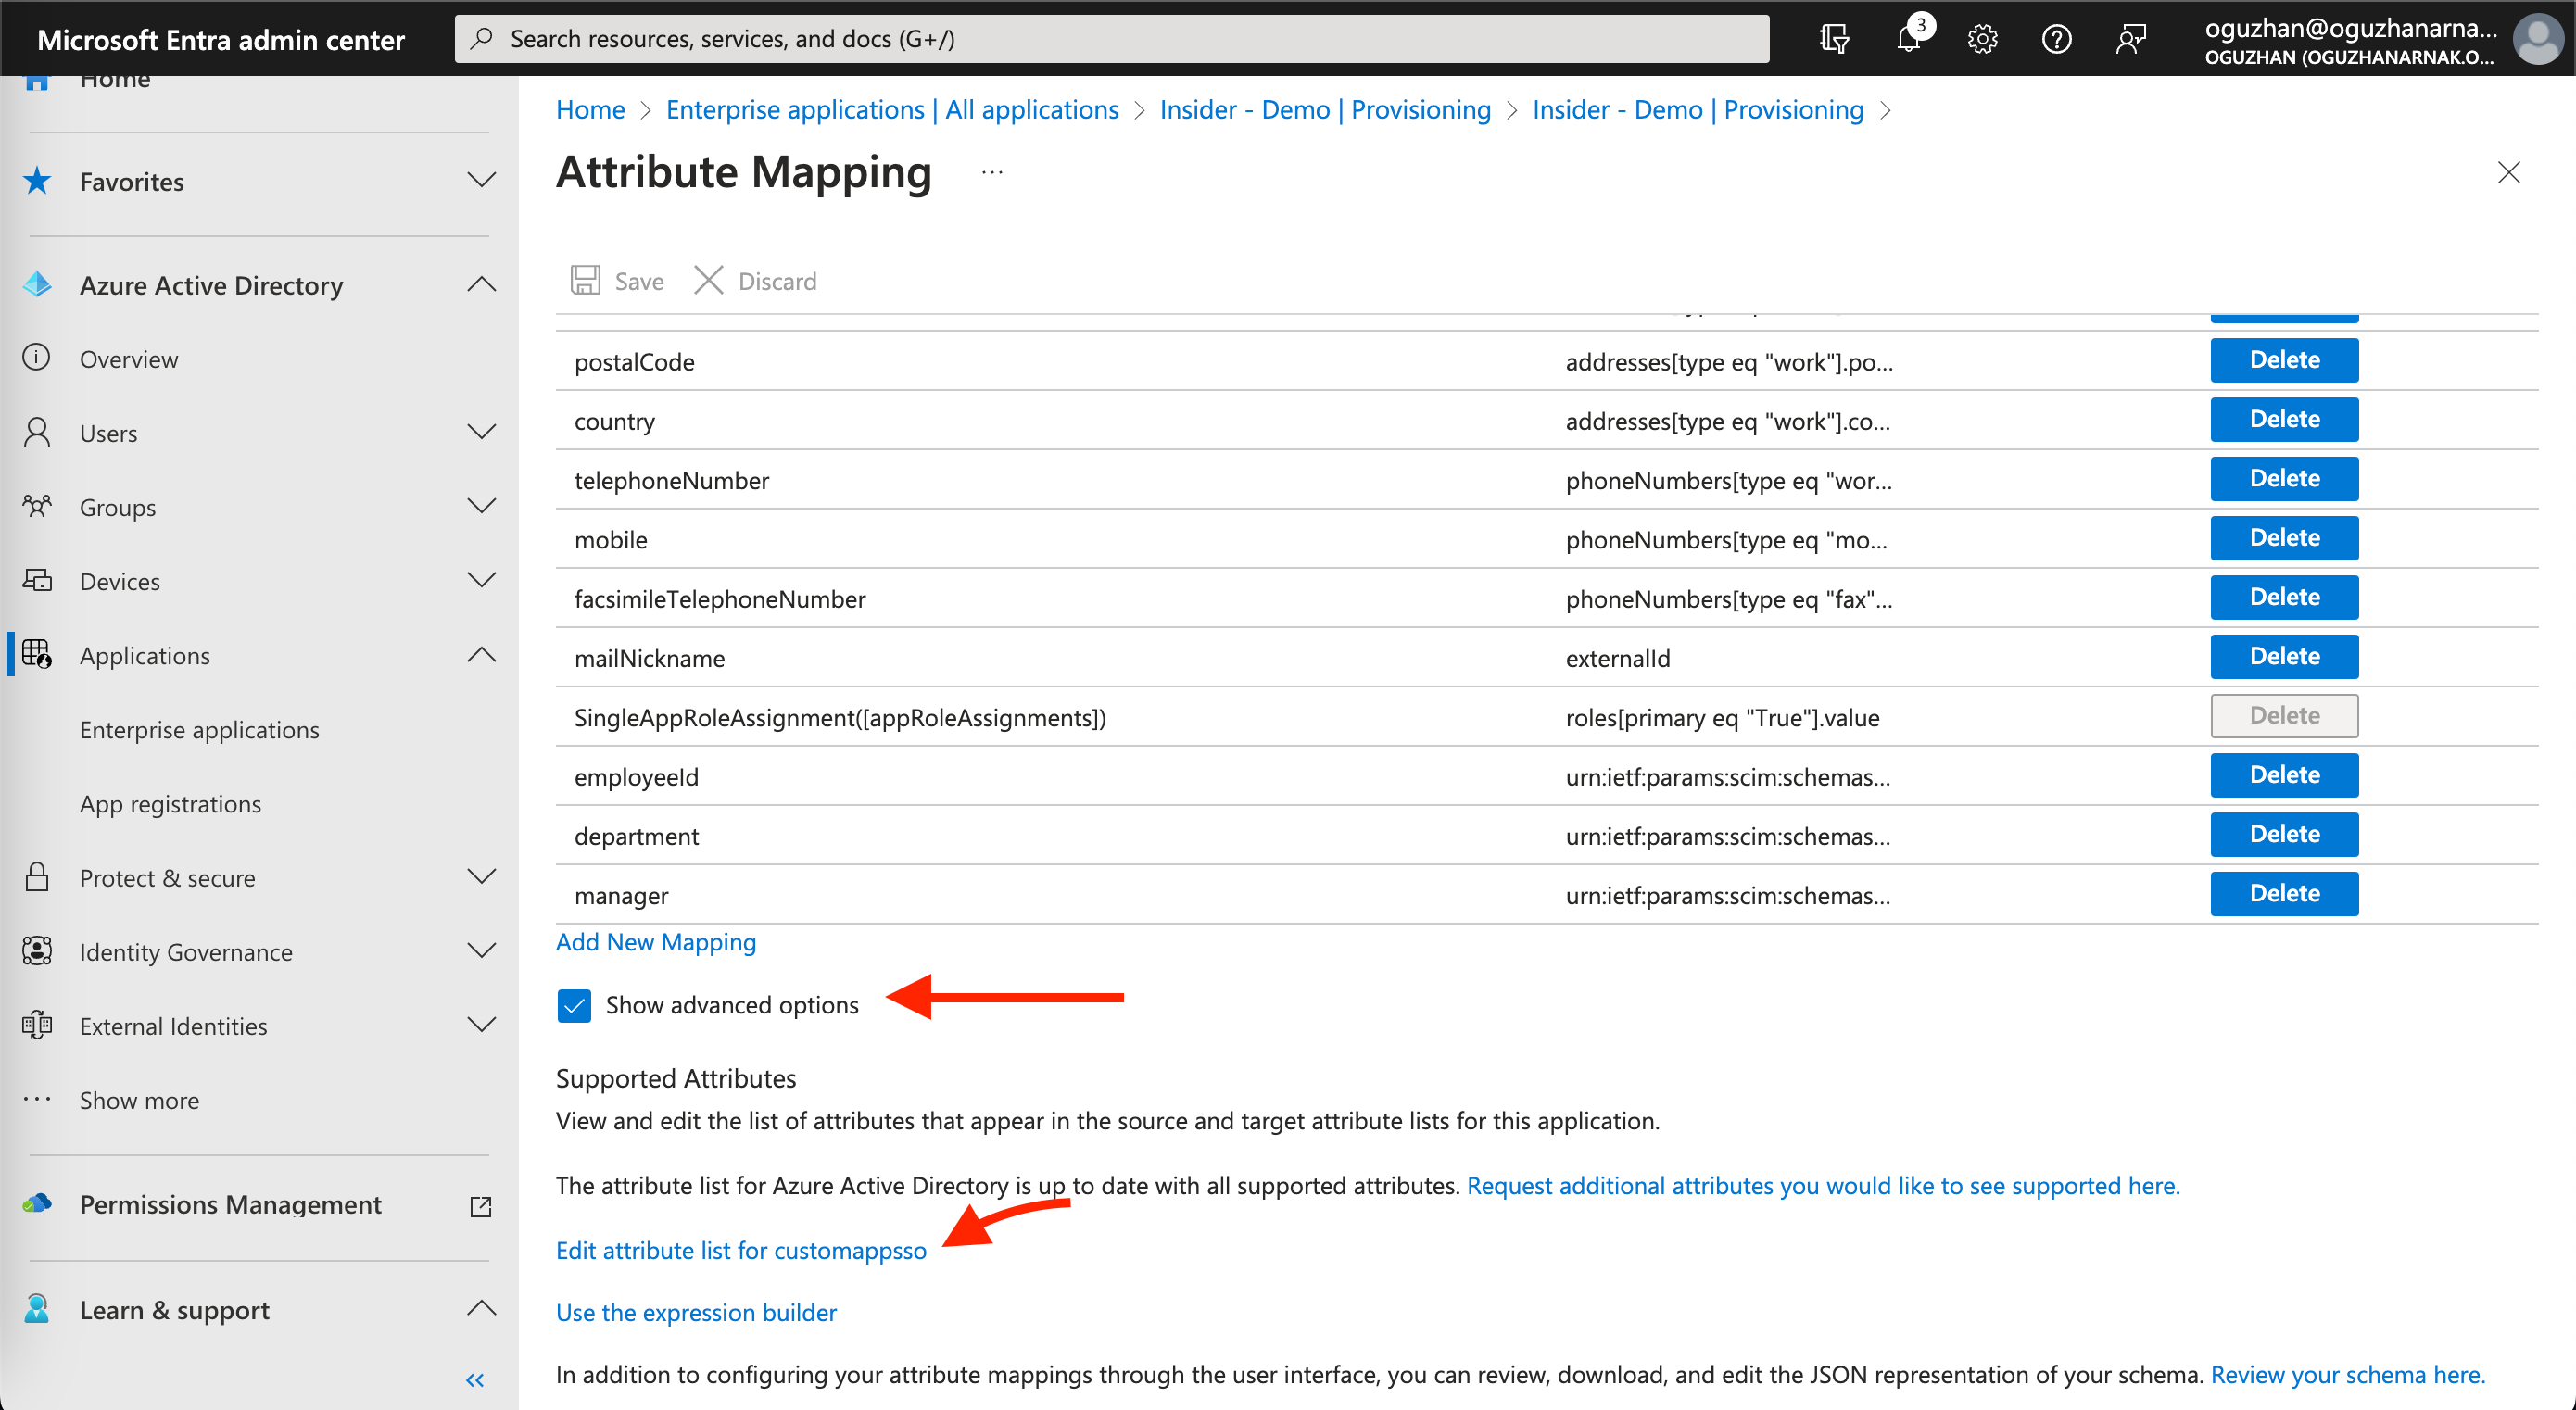
3. On the following page, make sure to check the required checkboxes for attributes that start with roles[primary eq ”True”. After selecting the respective attributes, click the Save button. Now you will be redirected back to the previous page.
4. Click the Add New Mapping button to add the required mapping to the Insider application.
5. On the following page, you need to add role mapping to your application to make sure you sync user roles between your Active Directory and Insider’s databases. Fill out the necessary input fields as displayed below.
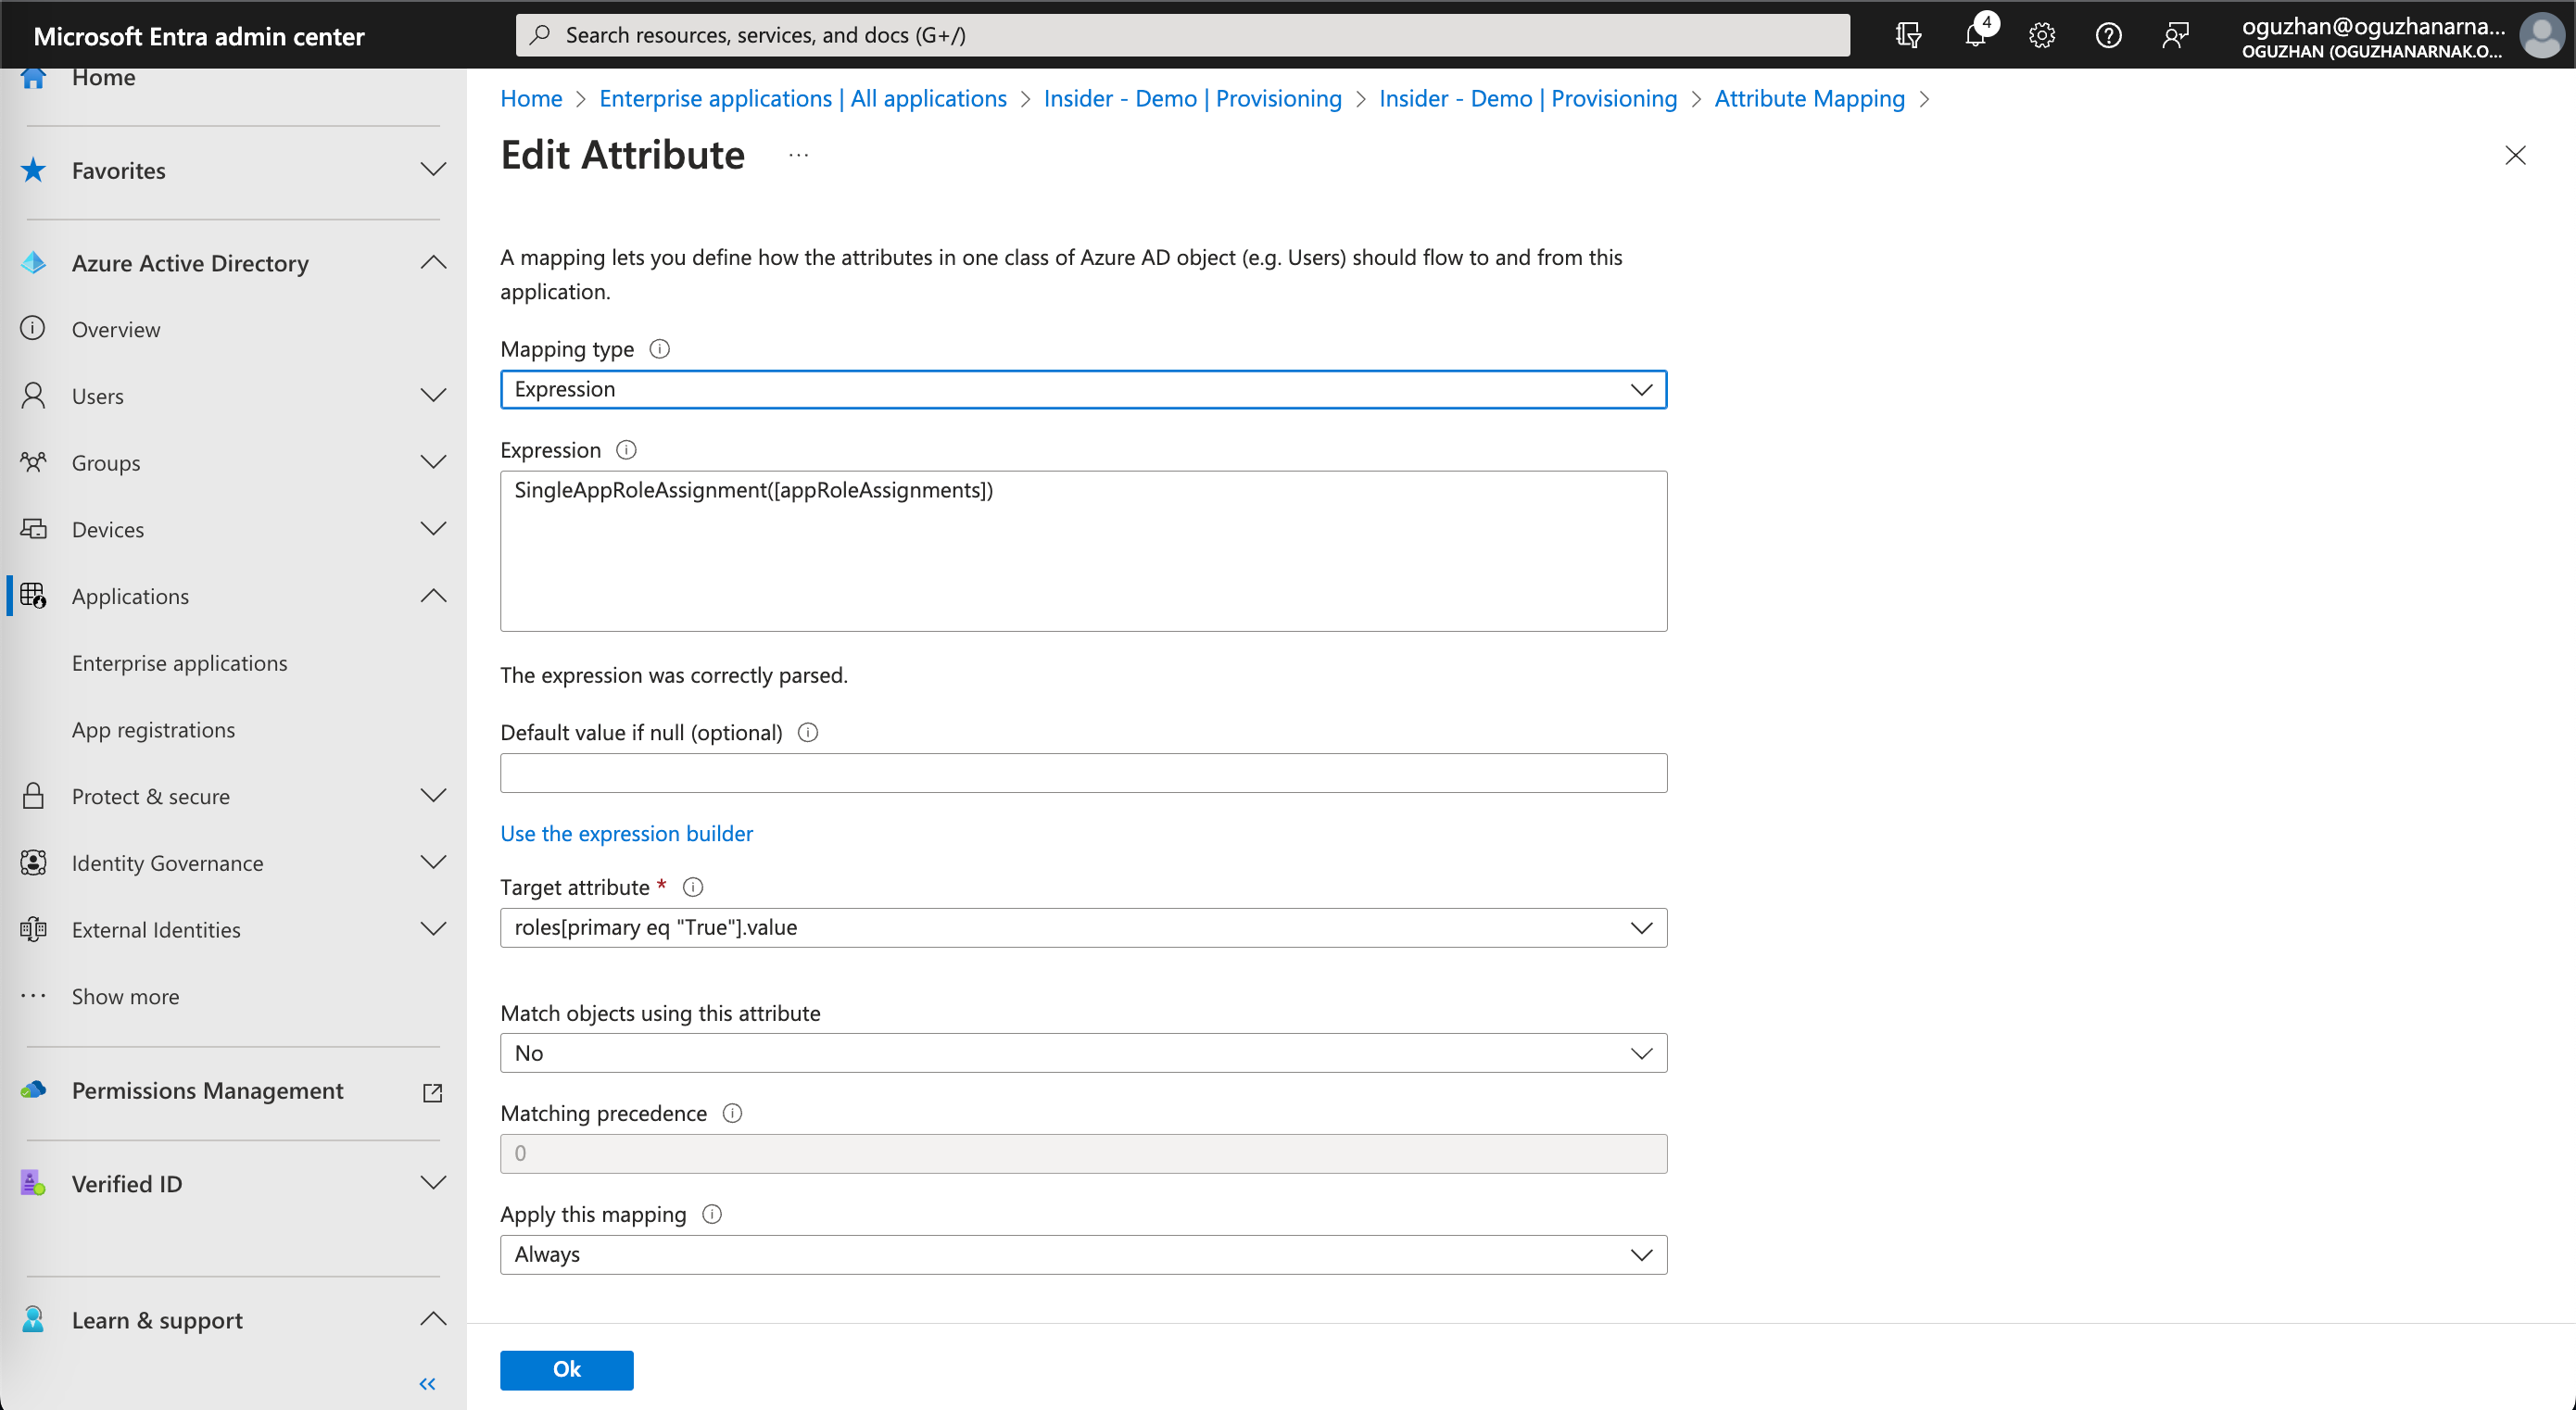
| Field | Value |
|---|---|
| Mapping type | Expression |
| Expression | SingleAppRoleAssignment([appRoleAssignments]) |
| Default value if null (optional) | Leave it empty |
| Target attribute | roles[primary eq “True“].value |
| Match objects using this attribute | No |
| Apply this mapping | Always |
Click the Ok button to save your changes.
Adding more users to the Application
You can add more users to your application, and assign them the roles that you have set up above.
1. Go to Users > All users to click the + New user button.
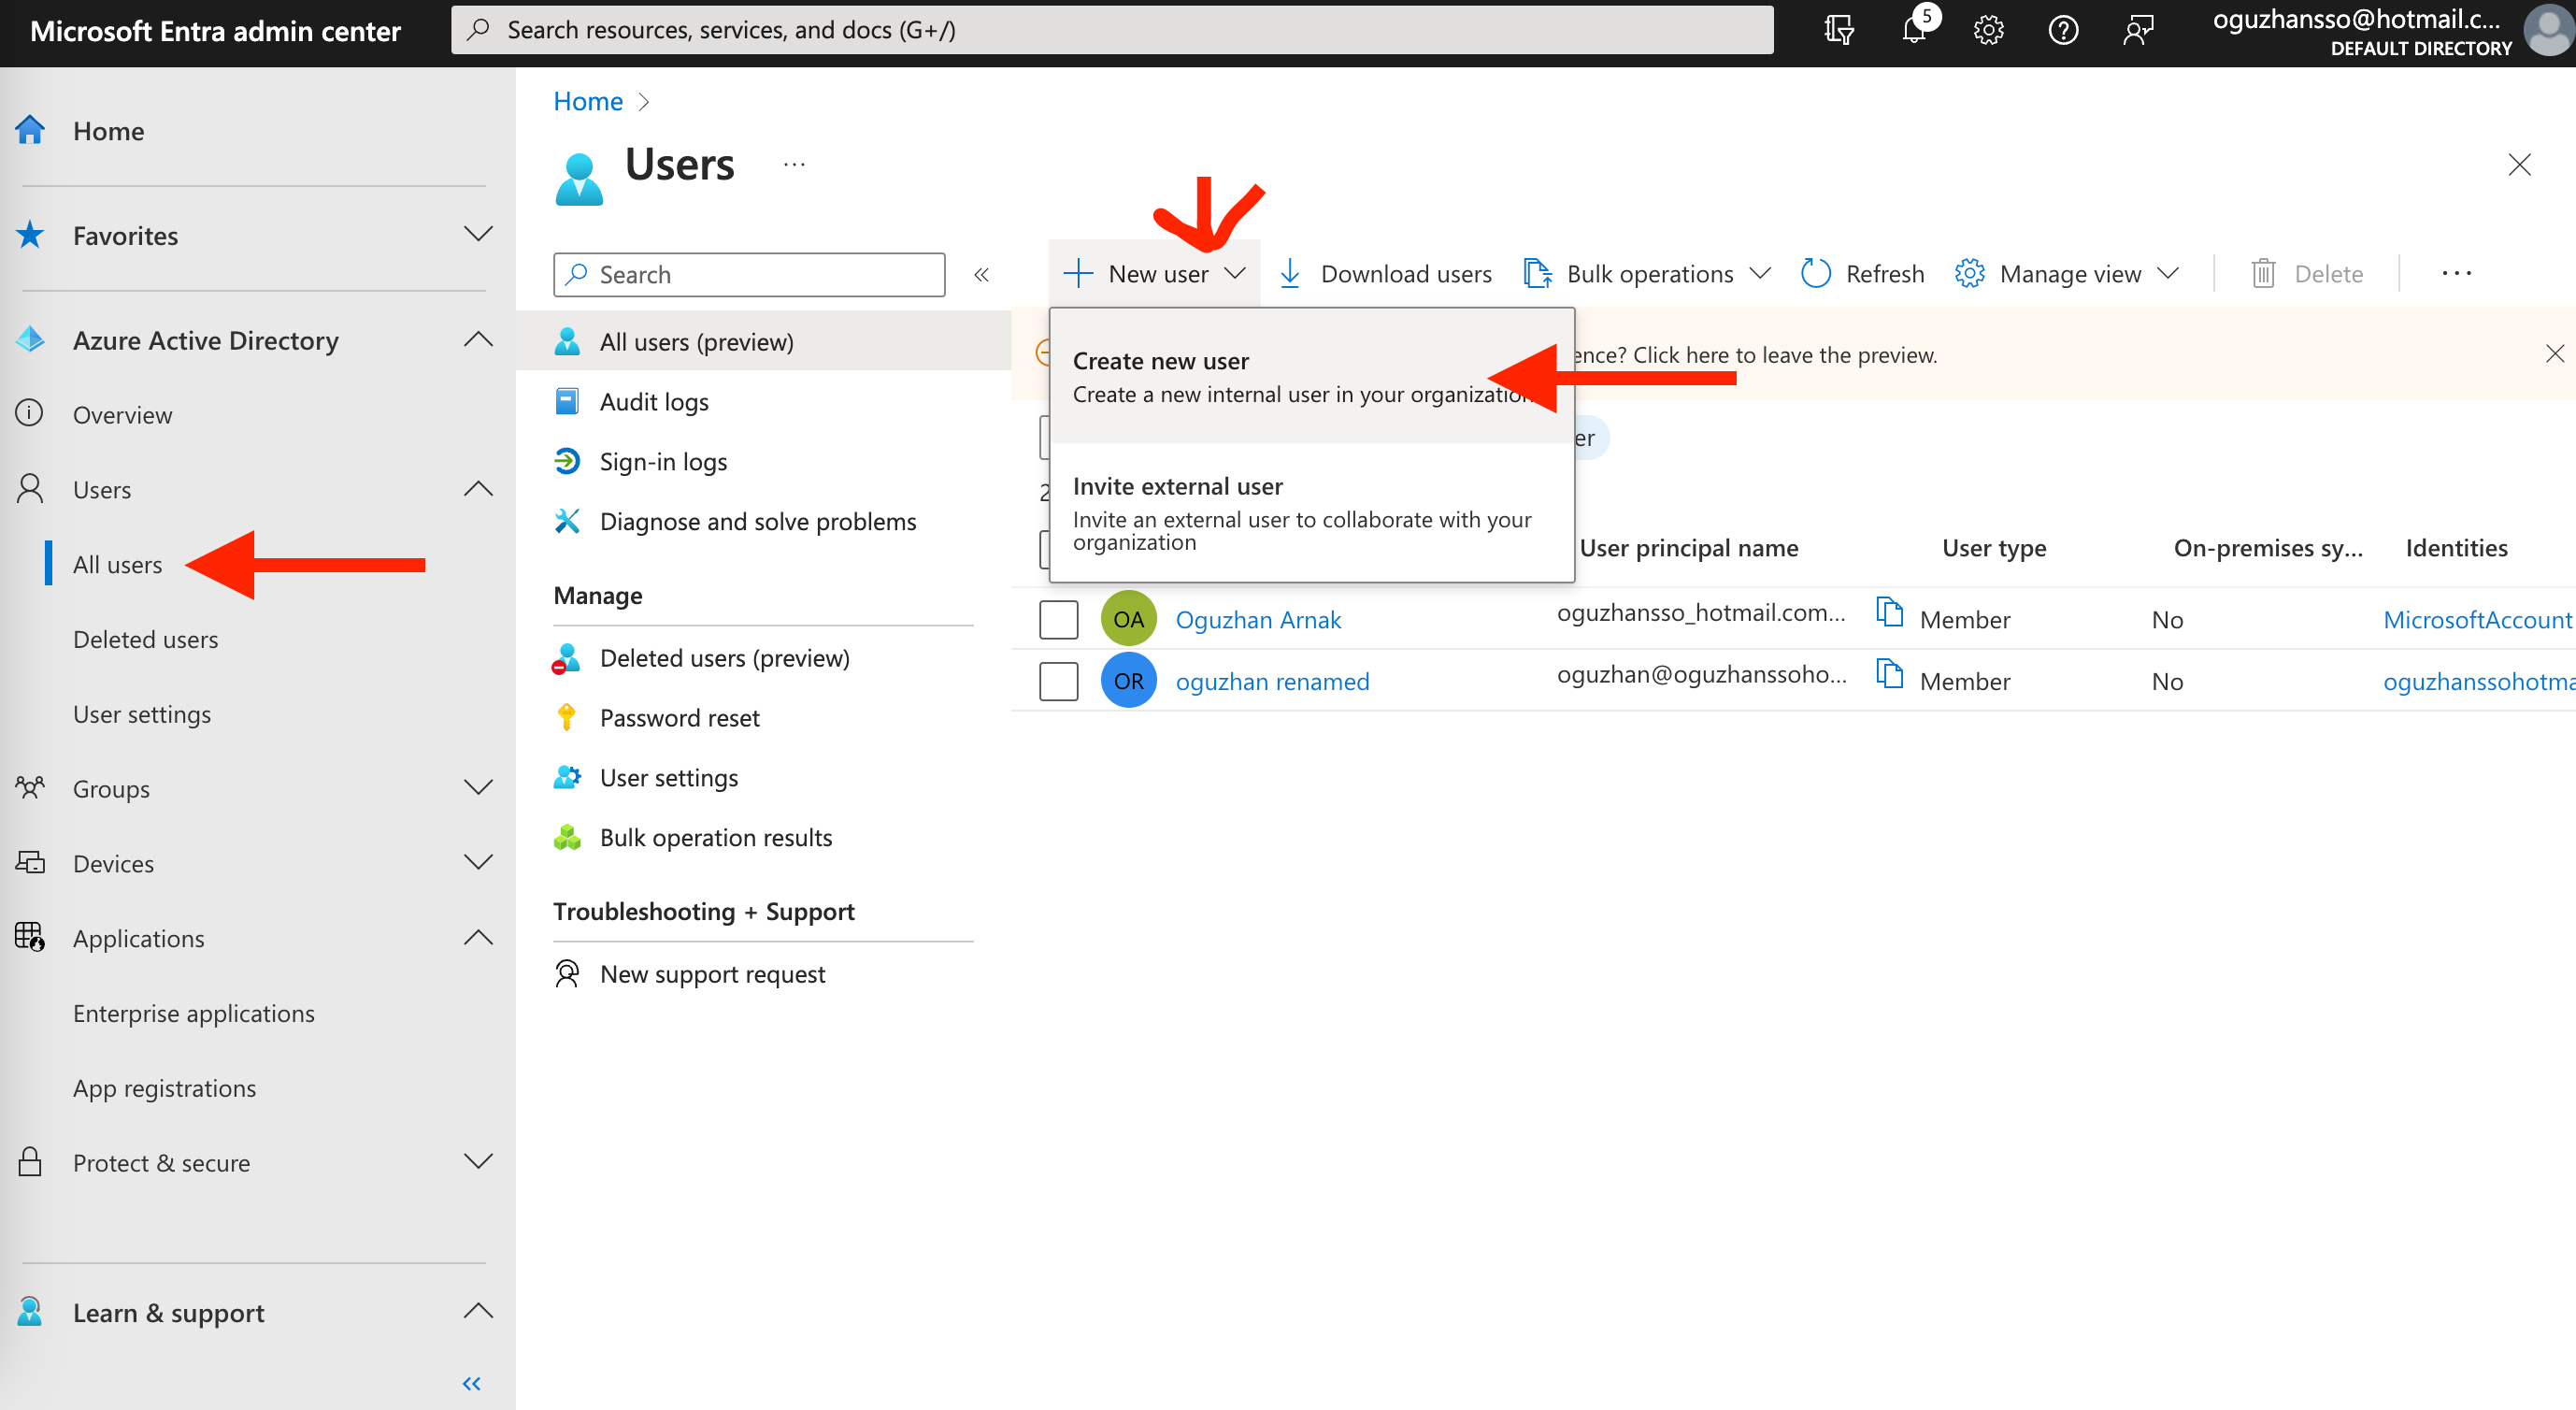
2. Fill in the user name, name, first name, and last name fields on the following page, and click the Review + Create button.
(6).png)
3. Go back to Applications > Enterprise applications to select Insider from the list. Navigate to Manage > Users and groups, and click the + Add user/group button to add the new user to the Insider application so that the new user can also log in to the Insider panel.
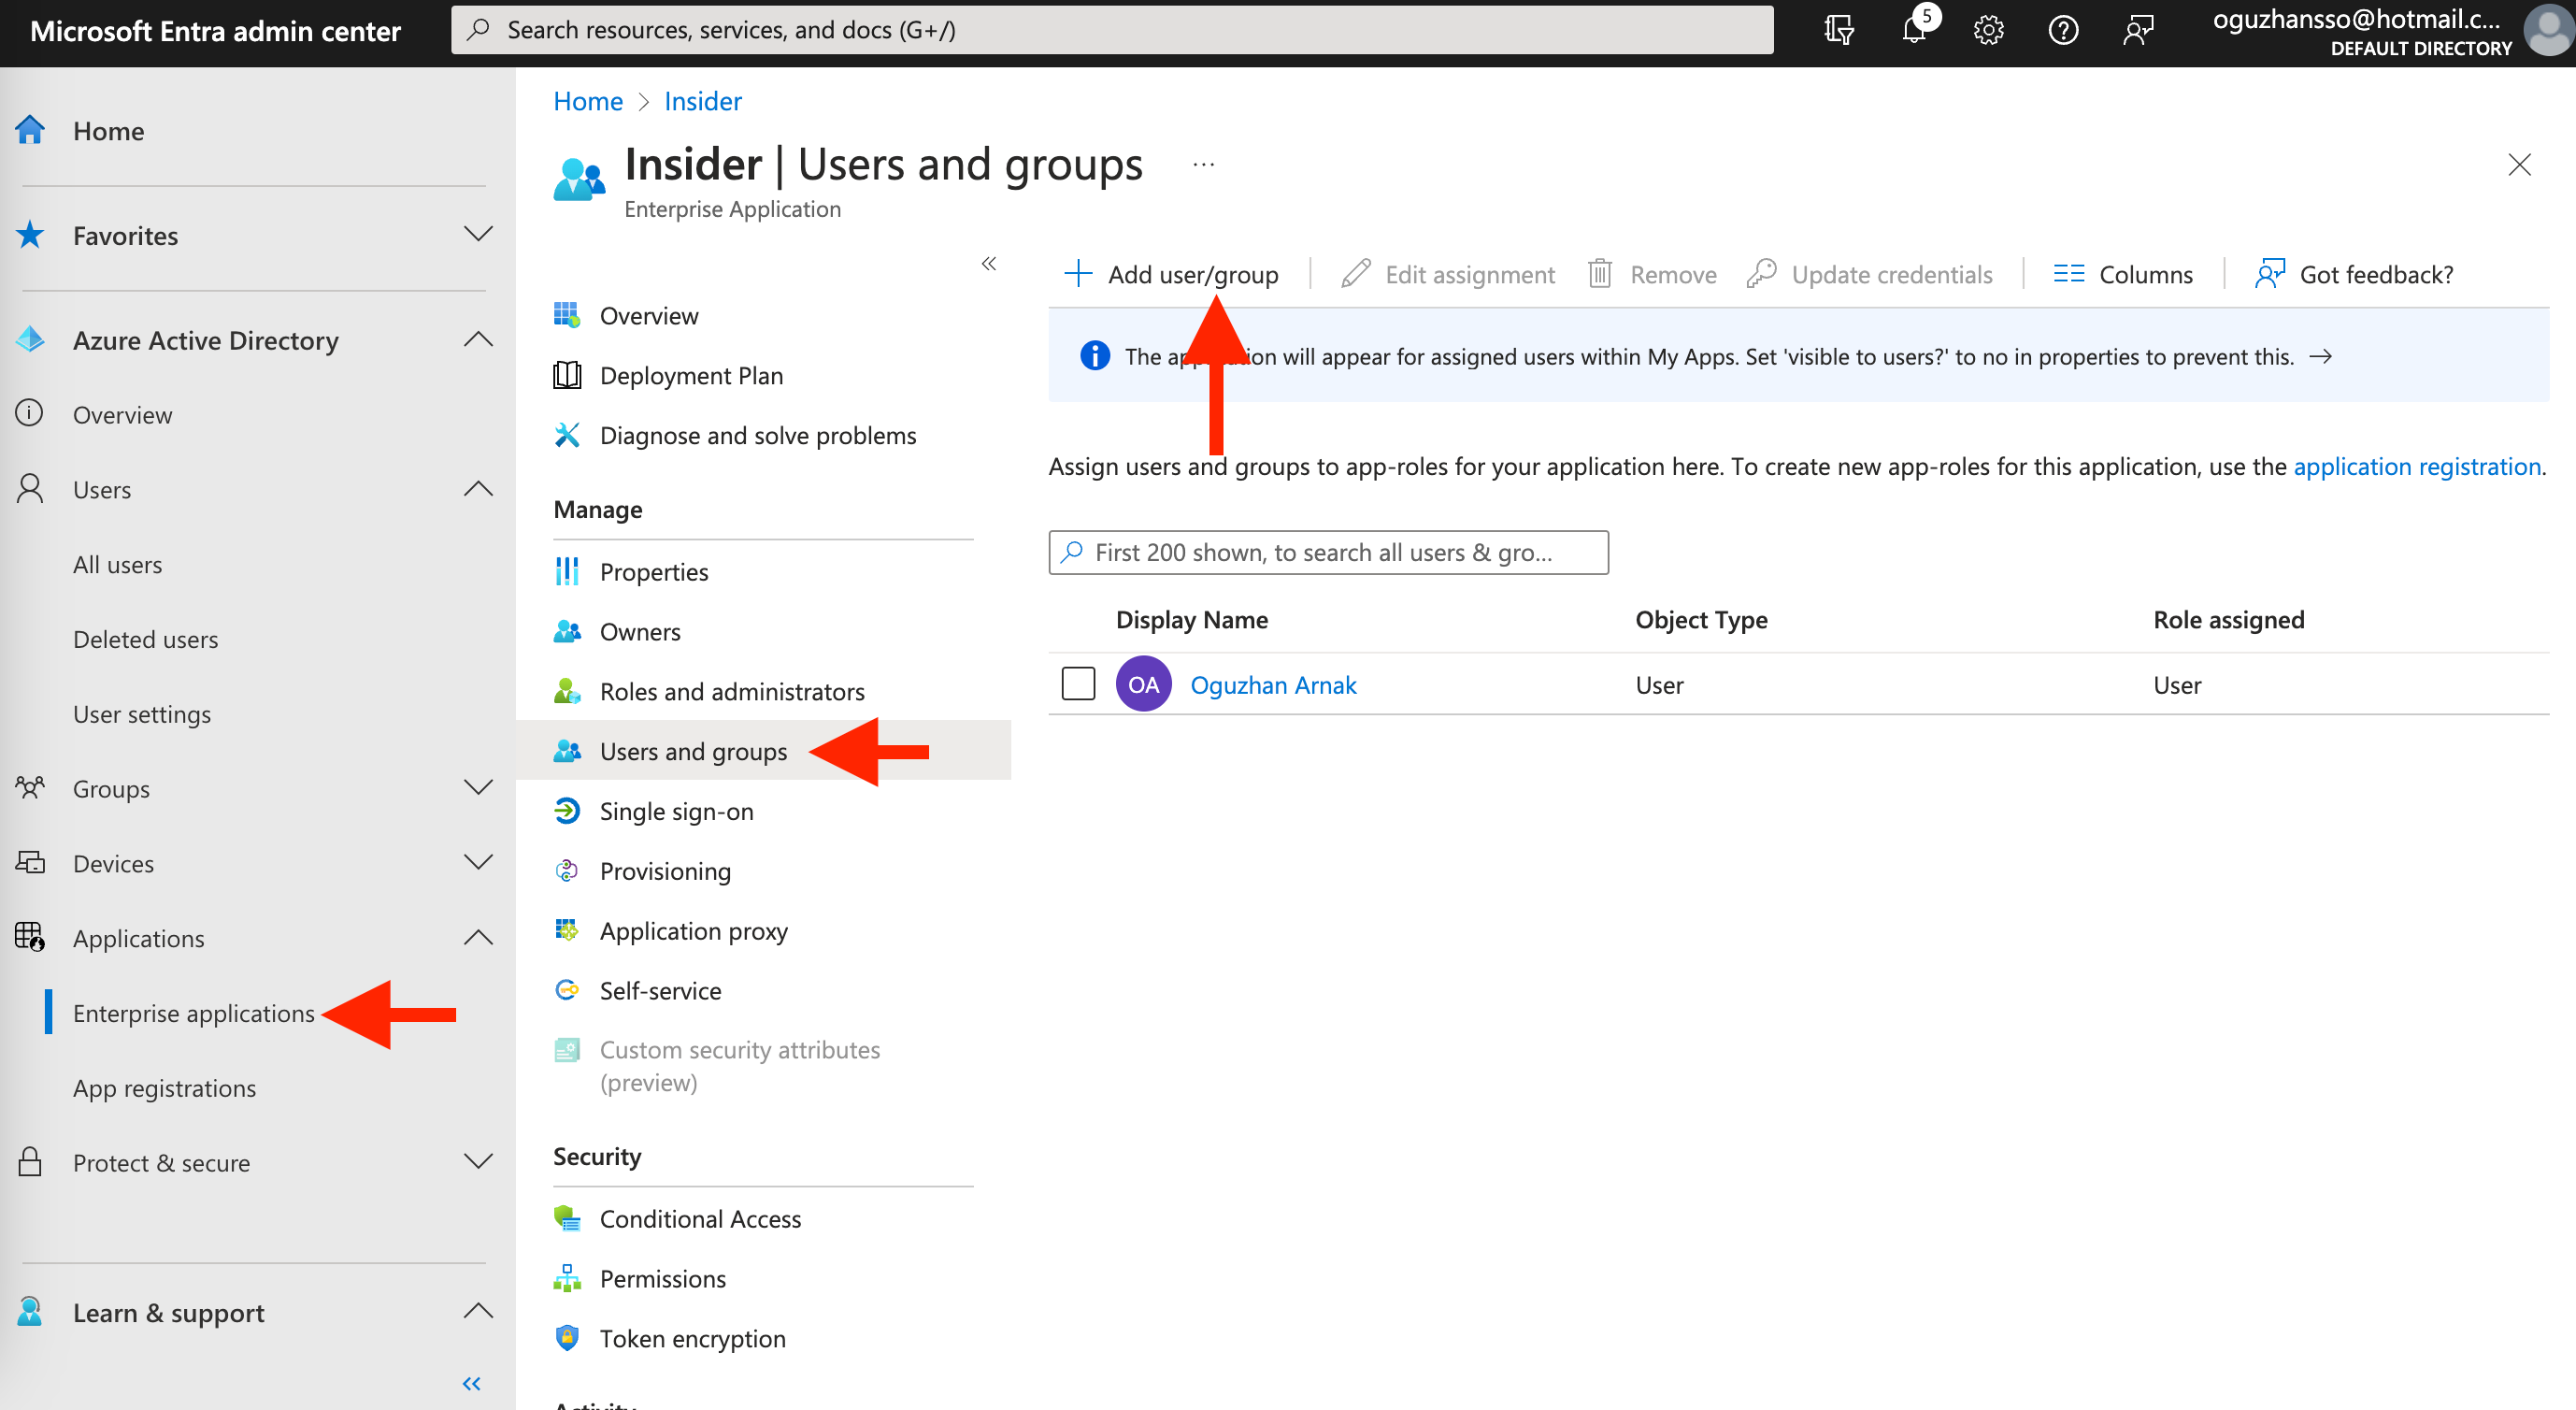
4. Make sure to assign correct roles while adding users or groups to the application.