This feature is released in beta. If you want to get an early access, you need to create a support ticket.
Insider One provides a set of APIs to support various business use cases. You can use one or more of these APIs depending on your integration needs.
In addition to API key authentication, Insider One supports OAuth 2.0 as a new authentication method. It provides a more secure and scalable authentication mechanism, enabling token-based access, fine-grained permission control, and easier credential rotation. For these reasons, OAuth 2.0 is the recommended authentication method for new integrations.
Once OAuth 2.0 is enabled and used for a specific API, API key authentication will no longer be available for that same API. In this case, generating a new API key for the same API will be restricted, and all requests must be authenticated using OAuth 2.0.
Only users with Administrator permission can generate tokens. If your account is not allowed to complete this operation, you can consult the Insider One team.
You can use the Oauth2.0 Credentials section to generate credentials for the following APIs:
To generate an OAuth2.0 Credentials,
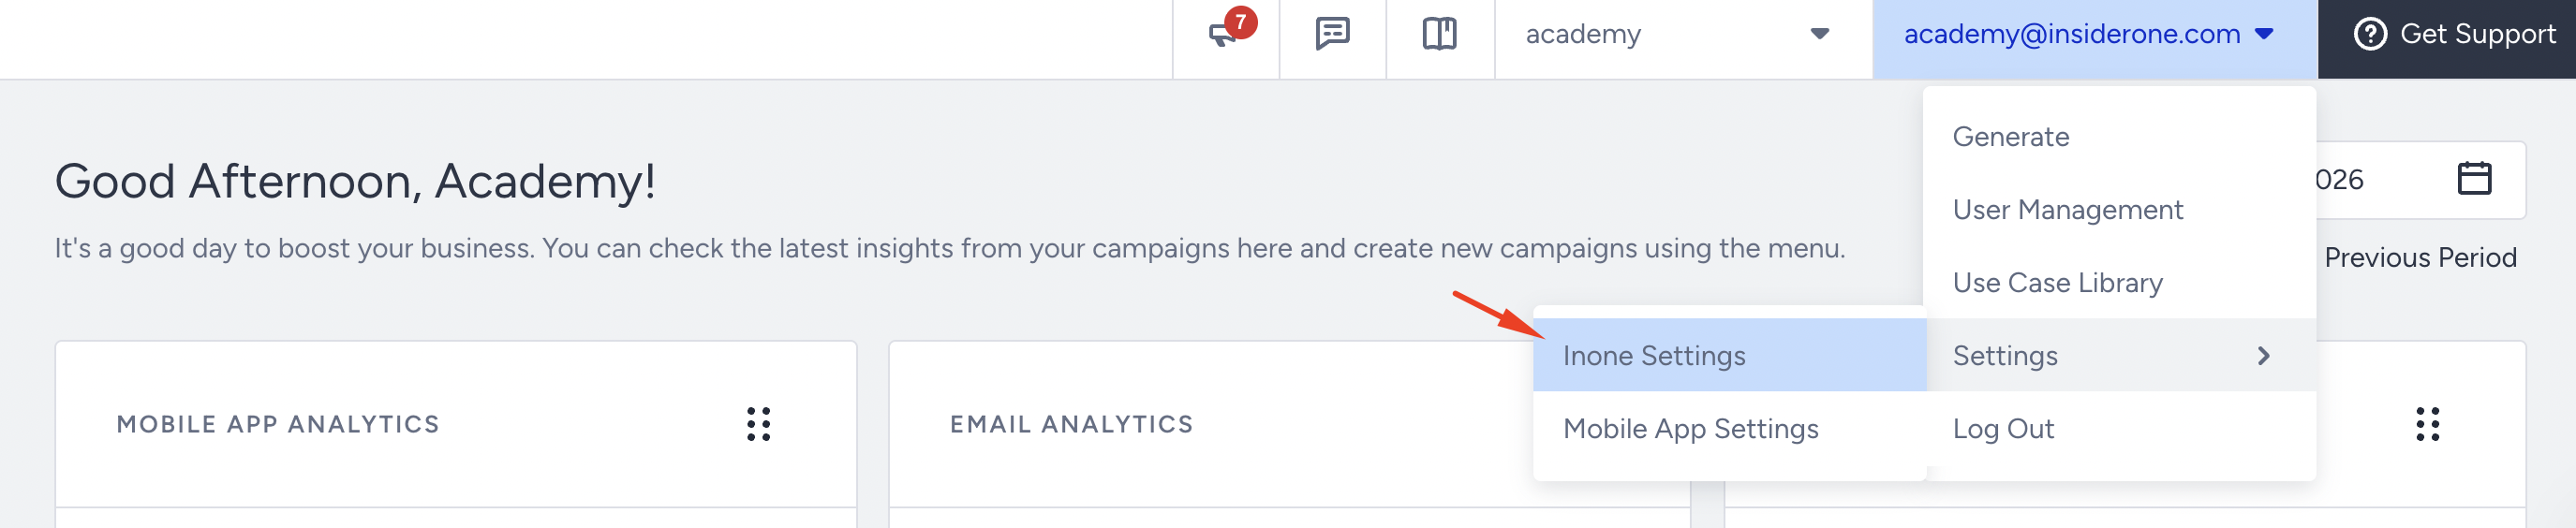
Navigate to your username > Settings > Inone Settings > Integration Settings.
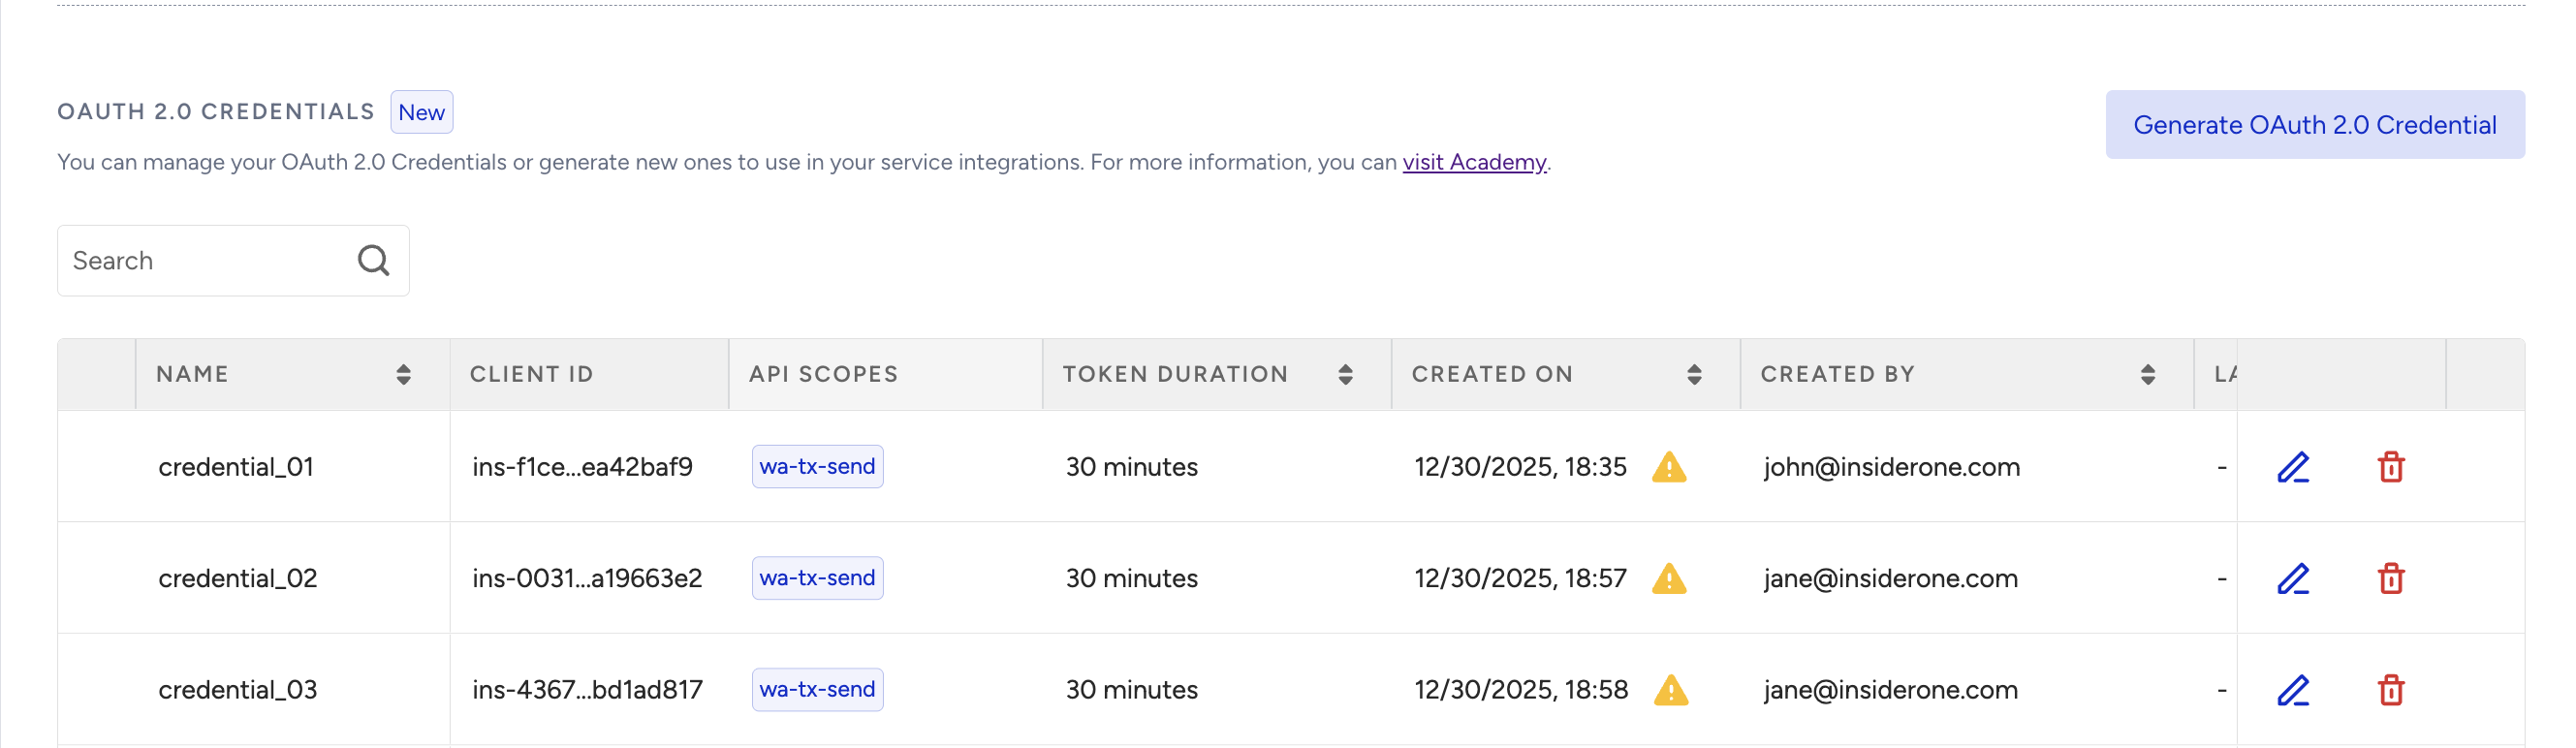
Scroll to the OAuth 2.0 Credentials section to click the Generate OAuth2.0 Credential button.
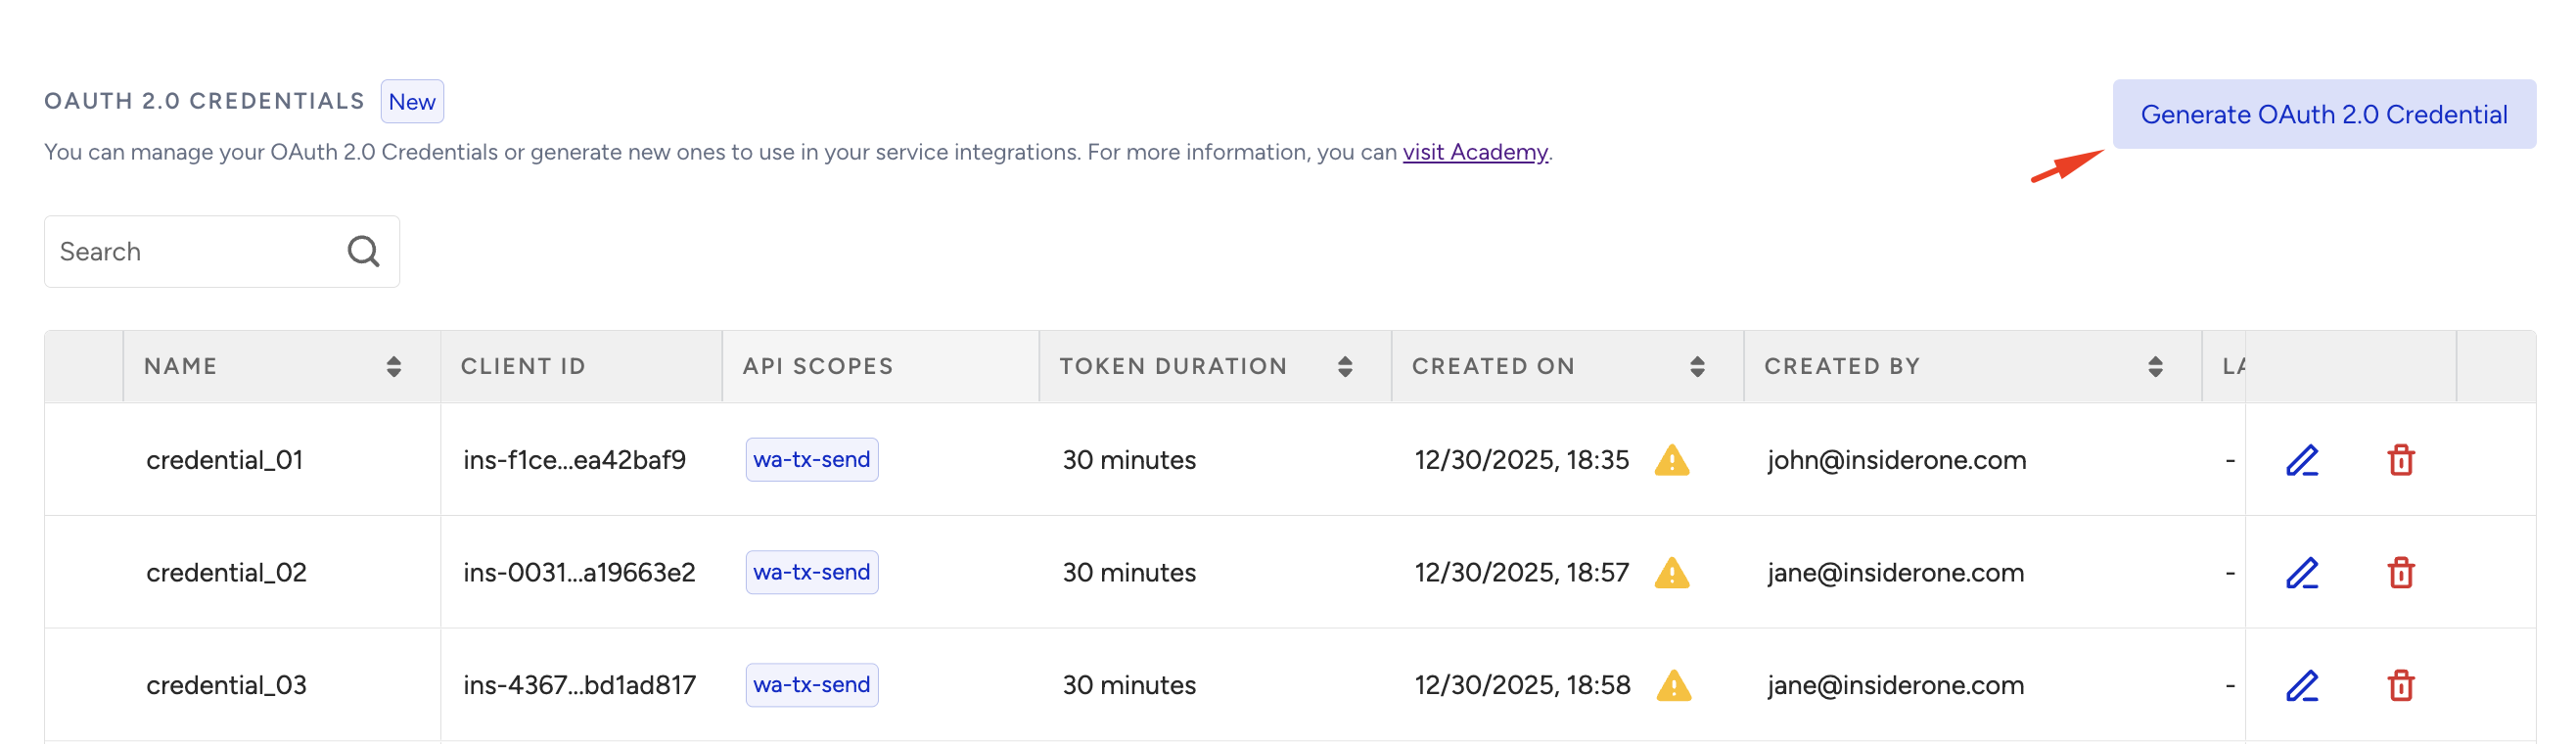
If you have previously created any OAuth2.0 credentials, they will be listed in this section.
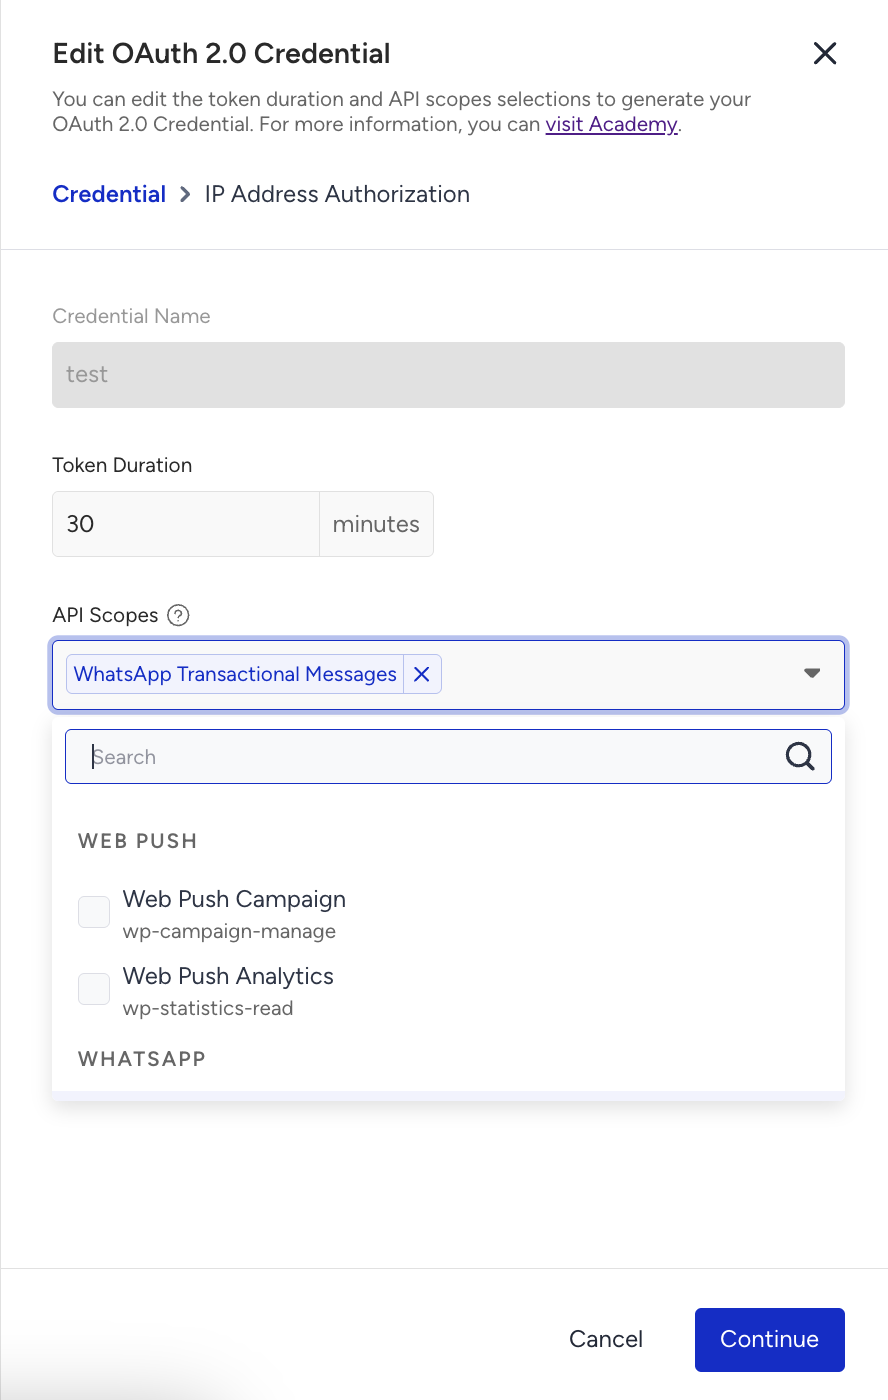
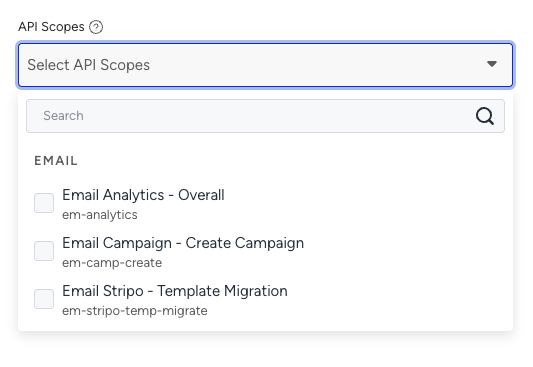
Select the API scope from the dropdown to create an OAuth2.0 credential, enter a credential name, and a token duration.
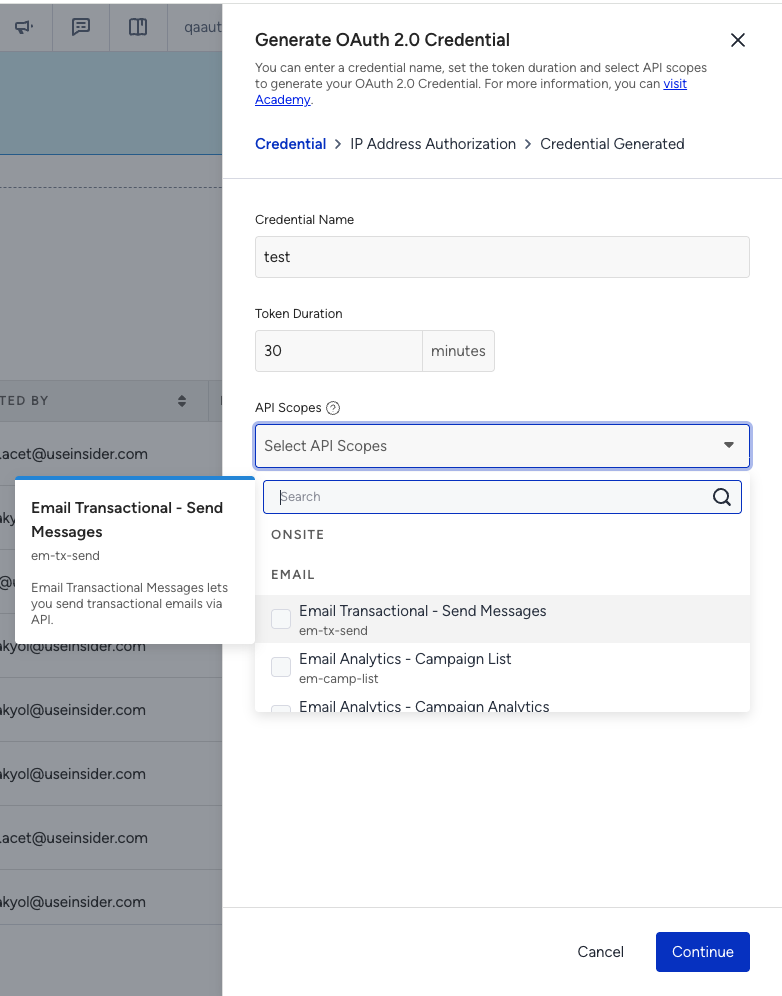
Each user can generate up to 10 tokens per minute. Requests exceeding this limit will be blocked and return an error response.
Click the Continue button.
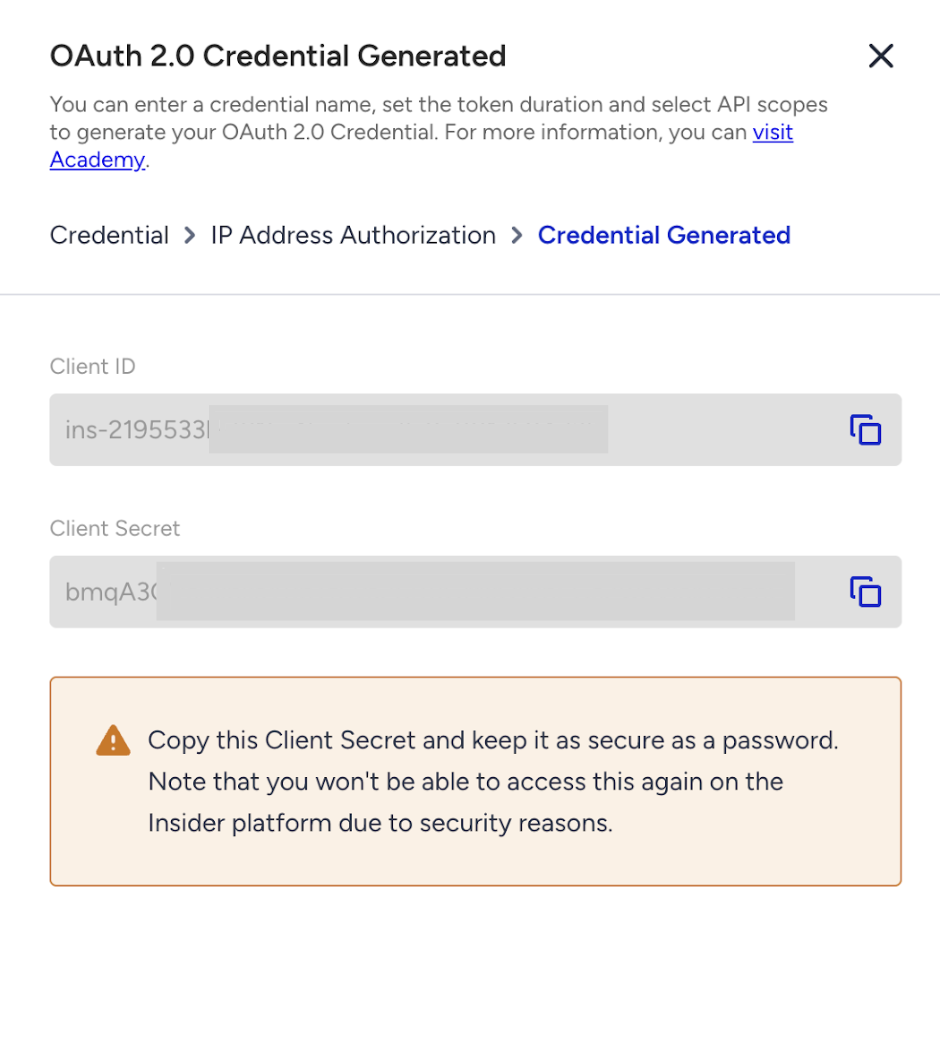
Authorize the trusted IP addresses to apply IP restriction, and click the Authorize and Generate button.
(2).png)
Click the Copy button to copy the Client ID and Client Secret before closing the prompt.
7. Use the Insider Gateway Auth endpoint to generate a Bearer token for your resource requests.
curl -X POST --location 'https://gw.useinsider.com/auth/token' \
--header 'Content-Type: application/json' \
--data '{
    "client_id": "{your_client_id}",
    "client_secret": "{your_client_secret}",
    "scopes": ["{resource_scope_you_want_to_access}"]
}'
8. Use the Bearer token you obtained in Step 7 to access the resource by providing a scope. Repeat the process before expiry.
Your request should match the method described in the documentation for each resource (e.g., GET, POST, PUT, etc.)
curl --location 'https://gw.useinsider.com/api' \
--header 'Authorization: Bearer {your_bearer_token_from_step_7}'
9. Now you can handle authentication and authorization responses. Once you generate a Bearer token and start sending requests to Insider Gateway APIs, your integration should properly handle both successful and unsuccessful responses.
Errors might occur on two main layers:
Authentication layer (token generation): Errors that happen while retrieving the OAuth2 token.
Gateway authorization layer (resource access): Errors that happen while accessing APIs using the Bearer token.
The following section outlines the possible response codes and their meanings.
Authentication API (Token retrieval)
Response | Meaning |
|---|---|
Rate Limited | Code: “R3” HTTP Code: 429 Message: “Rate Limited” |
Forbidden | Code: “R4” HTTP Code: 403 Message: “IP Restricted” |
Unauthorized | Invalid Credentials Code: “R1” HTTP Code: 401 Message: “Invalid key or secret” Invalid Authorization Scope Code: “R2” HTTP Code: 401 Message: “Invalid key or secret” |
Gateway API Responses
Response | Meaning |
|---|---|
Rate Limited | Per Minute Code: “R3” HTTP Code: 429 Message: “Rate Limited” Per Second Code: “R7” HTTP Code: 429 Message: “Rate Limited” |
Forbidden | Code: “R4” HTTP Code: 403 Message: “IP Restricted” |
Unauthorized | Invalid Token Code: “R1” HTTP Code: 401 Message: “Invalid Token” Expired Token Code: “R5” HTTP Code: 401 Message: “Invalid Token” Invalid Scope Code: “R6” HTTP Code: 401 Message: “Unauthorized Request” |
Response format
{
	"code": "",
	"message": ""
}
Custom response code mapping
R1 => Invalid Crendentials
R2 => Invalid Authentication Scope (while generating token)
R3 => Rate Limited
R4 => IP Restricted
R5 => Token Expired
R6 => Invalid Authorization Scope (while sending request)
R7 => Burst Limited
10. To delete the previously created OAuth2.0 credentials, click the Delete button against the key you want to delete.
(2).png)
11. To edit the previously created OAuth2.0 credentials, click the Edit button against the key you want to edit. You can change only the API scope and IP Address Authorization.