The launch is the last step before your campaign goes live. However, before launching your campaign, you need to:
Configure the campaign settings
In the Launch step, you can configure the following settings for your campaign: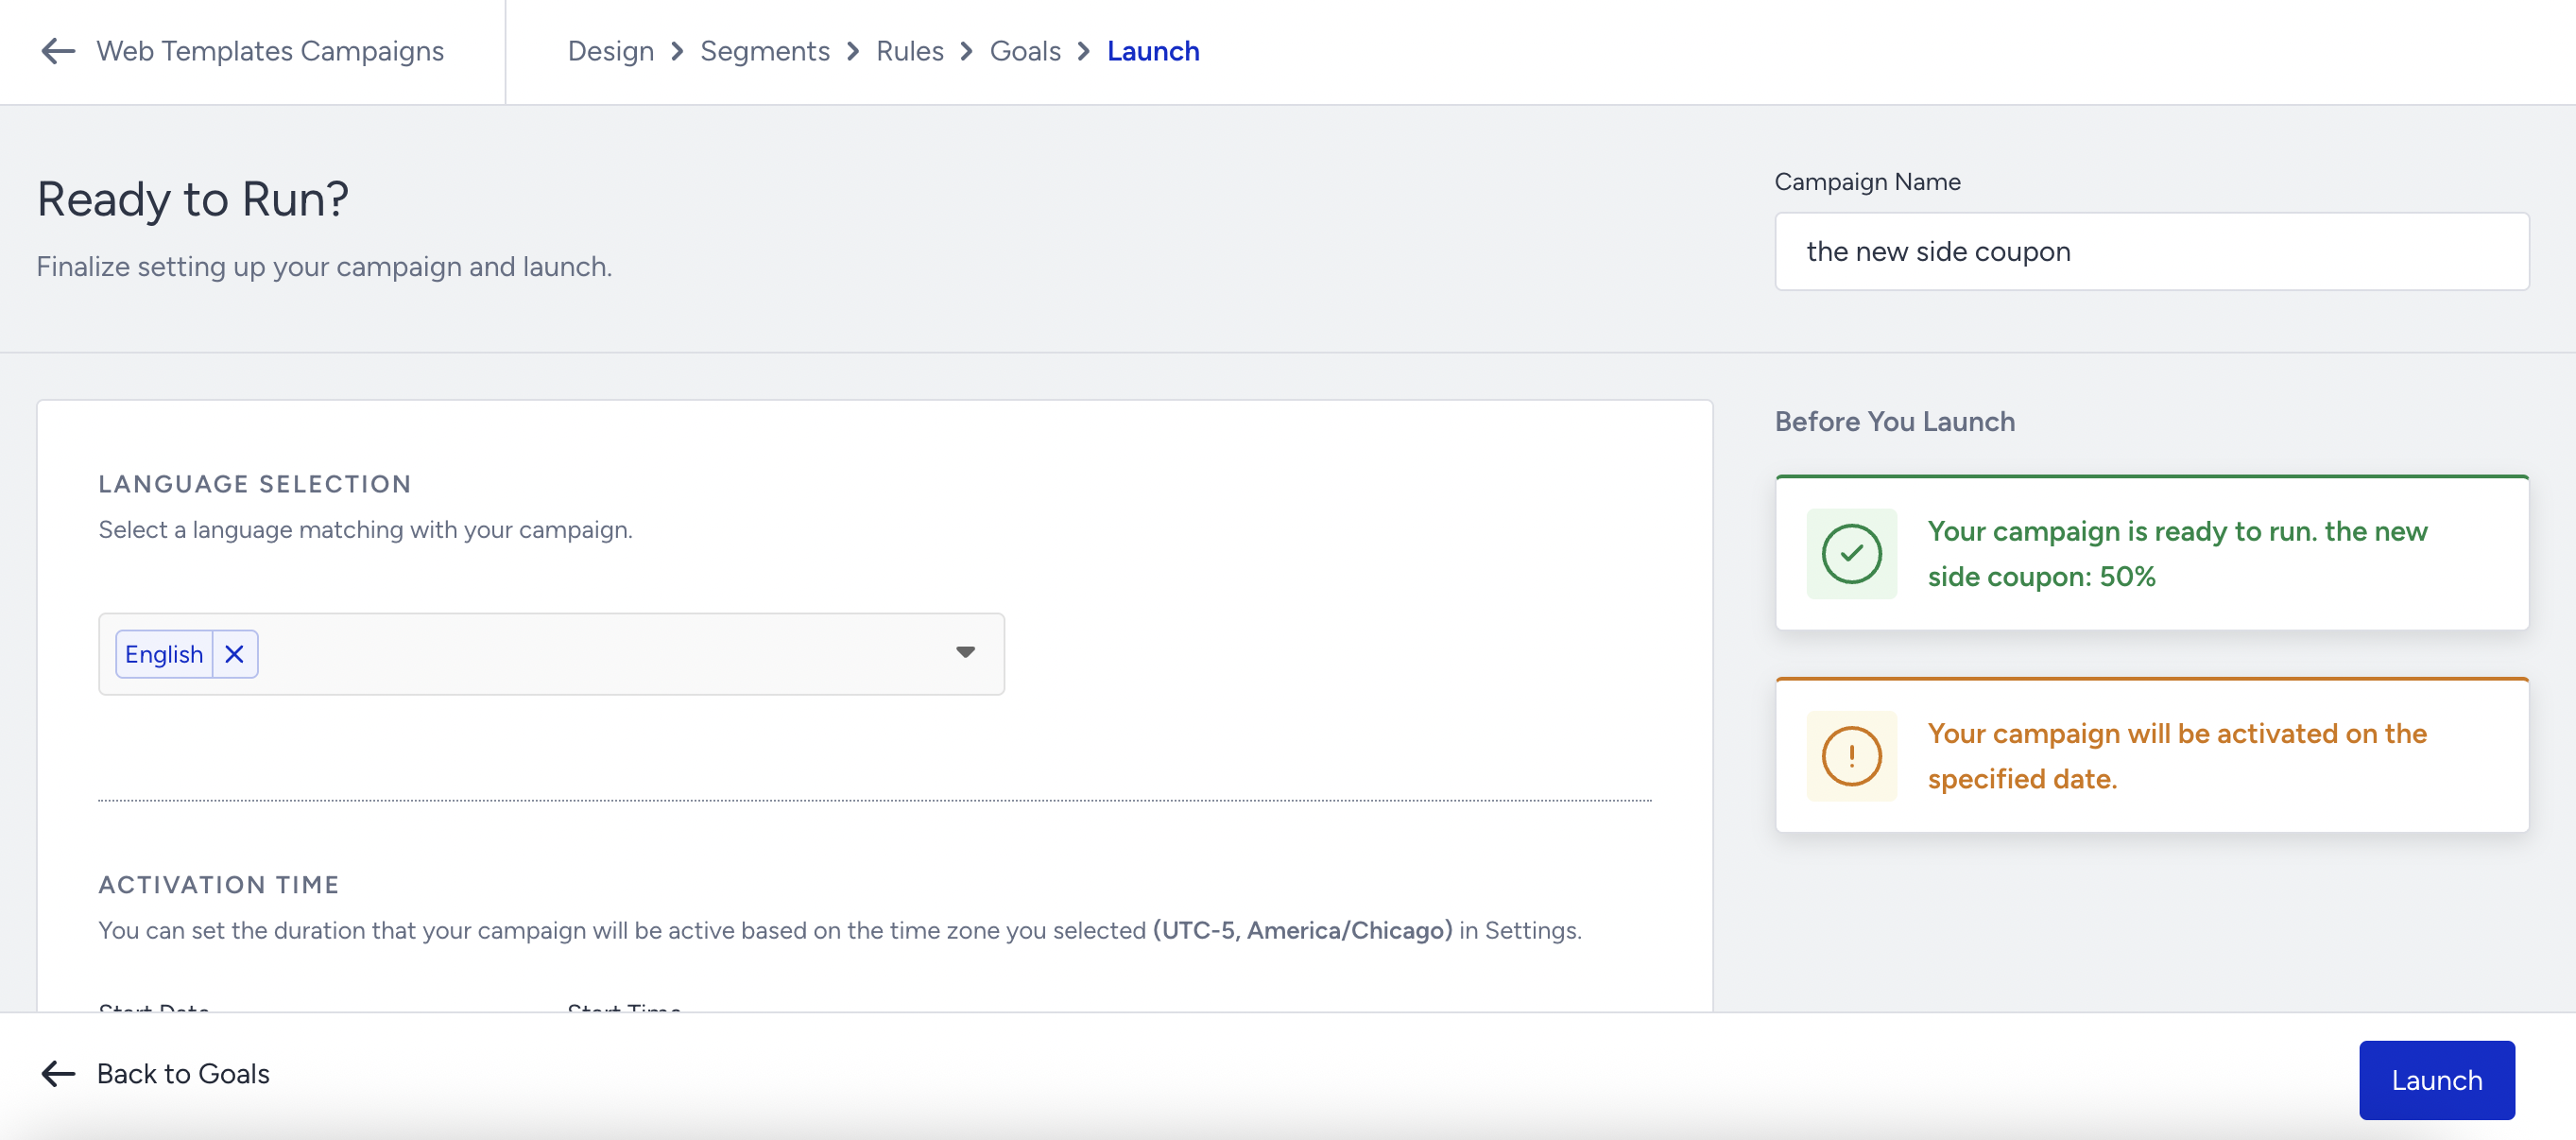
Language Selection
You must select the correct language to display your campaign on your website. The language should be the one defined in the system rules.
If your campaign is a language-independent design and you want to release it for multiple languages, you can select All Languages.
Countdown elements have time labels such as Day, Hour, Min, and Seconds. The text of these labels is dynamically translated based on the selected language in the Launch step. For instance, if you choose English, the campaign displays x hours, y minutes, or z seconds to users on your website.
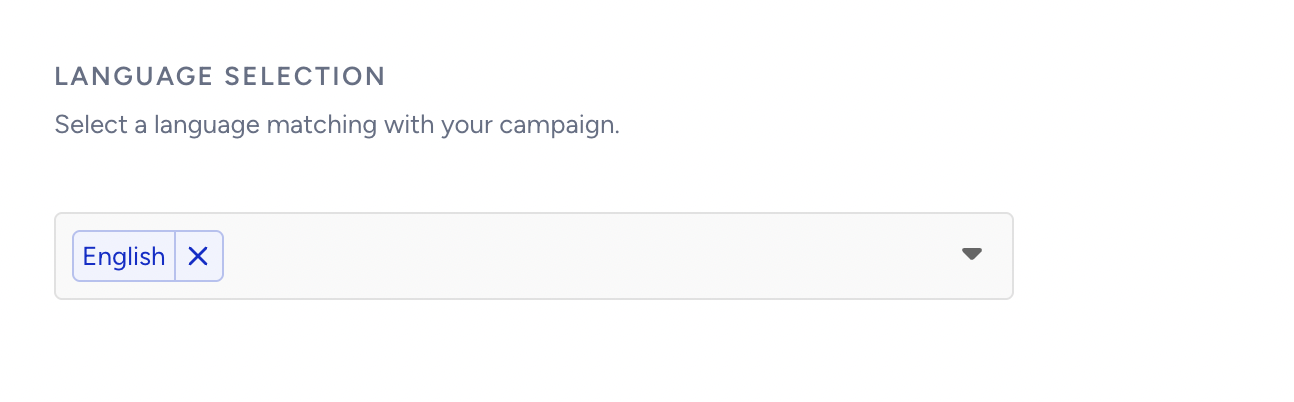
Activation Day and Time
Set the activation day and time in your respective time zone while launching your campaign.
If you see a different time zone on the Activation Time, please select the correct time zone under Account Settings.
To schedule your campaign for a future date, select the desired date and save it in Active status. In this case, you will see the campaign status as Scheduled on the listing page.
To test the campaign, the start day and time should not be earlier than today's date or time. If they are, no change will be applied.
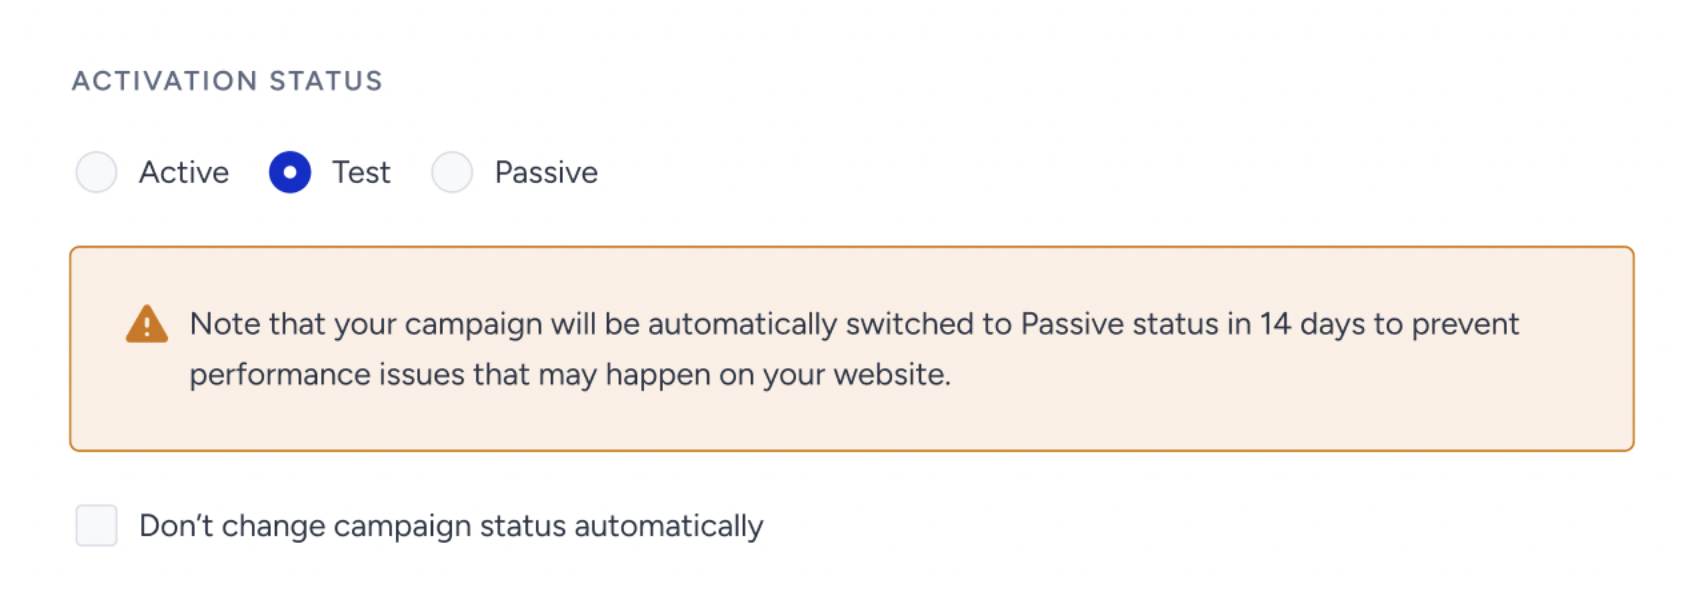
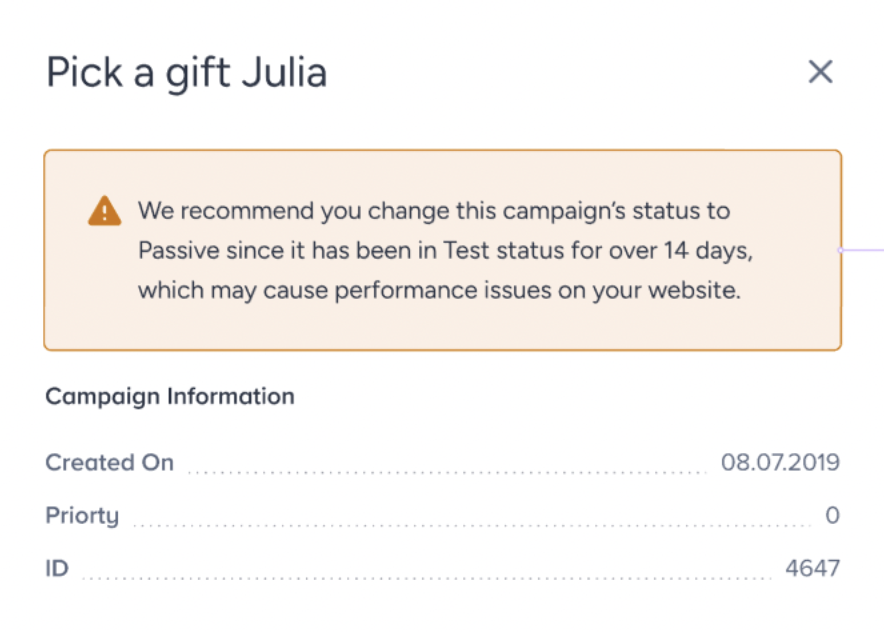
As of February 19th, 2025, Test campaigns will be automatically deactivated after 14 days if their status is not updated. To prevent this, you can select the appropriate option in the Launch step.
This change applies only to newly created Web Templates; existing campaigns will not be affected.
When selecting the Test status in the Launch step, a warning message will indicate that the campaign will be deactivated in 14 days.
To disable automatic deactivation, simply check the box below the warning.
For campaigns that remain in Test status beyond 14 days, an informational message will appear in the Details Modal on the listing page.
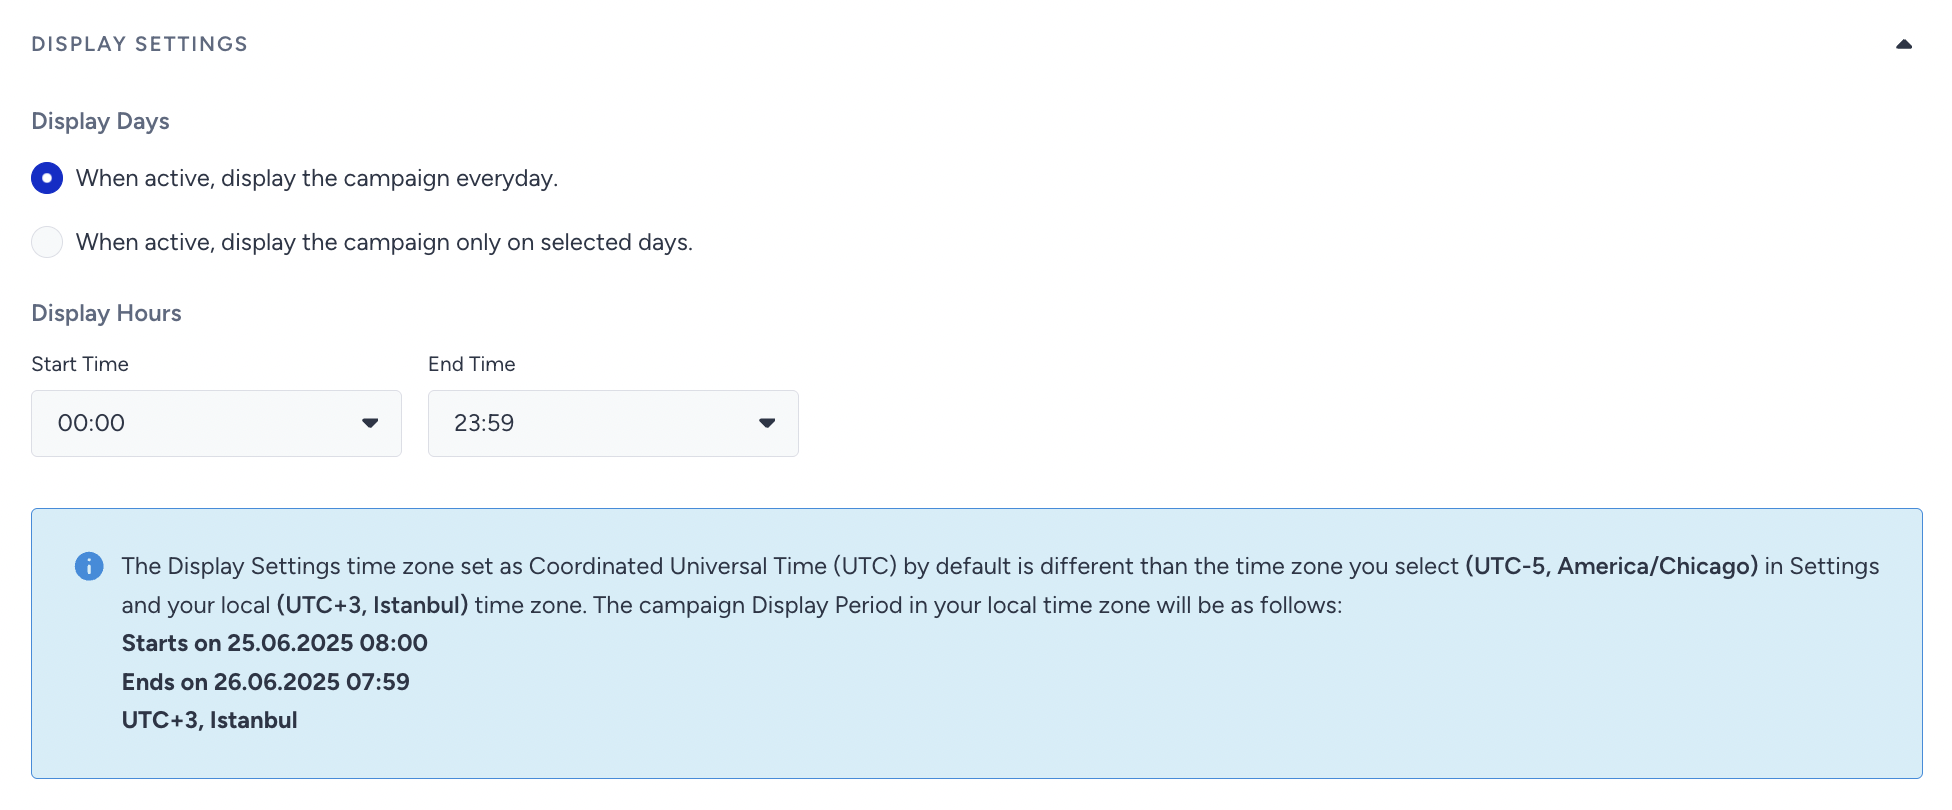
Display Settings
You can set your campaign to display every day, on specific days, all day, or at certain times. The day and time should be configured for your respective time zone.
Advanced Settings
Under Advanced Settings, depending on your campaign type, you can configure settings for your collected data and your campaign priority.
Send campaign results
You can periodically send the campaign results (collected leads, survey replies, etc.) to an email address. For example, you can use this option if you have a Feedback or a Lead Collection campaign. You can use the Email settings for any campaign that exports results or user data, including replies. You can send results periodically and/or when new data is added.
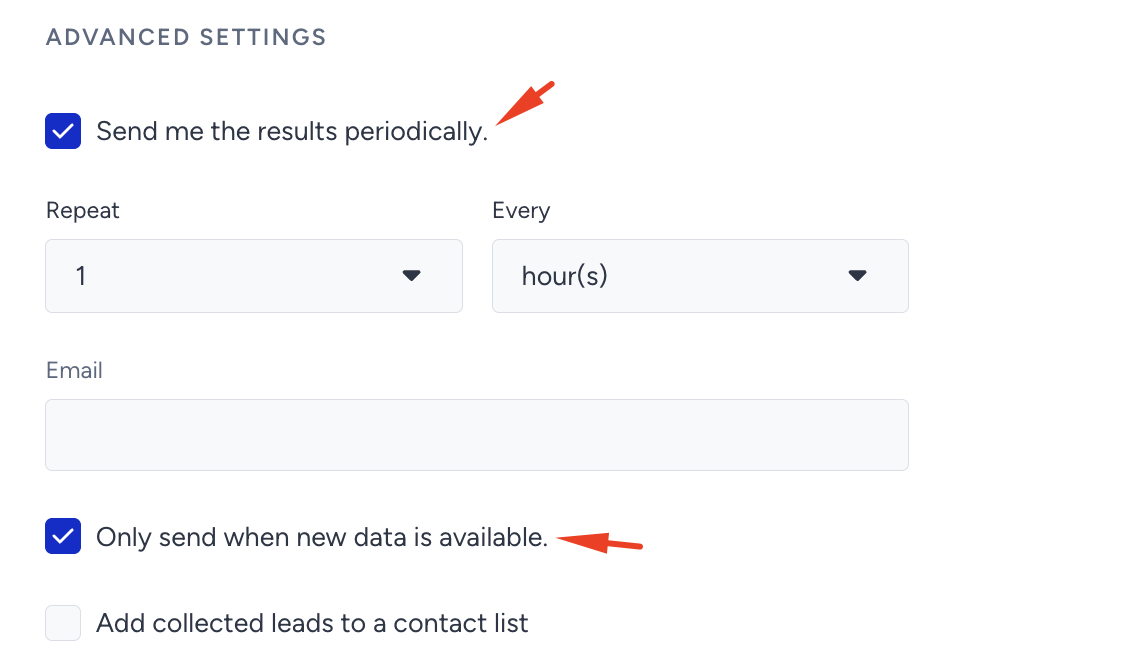
If you want to send leads from campaigns to Insiders' contact lists, enable the "Add collected leads to a contact list" checkbox and select the list from the dropdown.
Set priority
Priority enables multiple campaigns that can be displayed on the same page in a priority order. For example, if you have 10 campaigns and want 3 of them to be in priority order, you must set priority for all your active campaigns.
The Priority feature is available only for on-page templates on Web Suite.

Setting priority works on ranking. The lower the number you enter, the higher the campaign's priority. For example, you have two visible campaigns. Users will see Campaign A first if you set 1 for Campaign A and 10 for Campaign B. If their priority is 0 or lower, users will see the campaign with the earlier creation date.
Activation Status
You can launch your campaign with four different activation options. Active, Test, and Passive are visible in the Launch step, while Scheduled is visible on the listing page.

Active
The active status means your campaign is active on your website and can be displayed to eligible users. It must be set to Active if you schedule your campaign for a future day or time. For example, if you prepare the campaign but don’t want to make it active now, you can schedule it for later.
Test
The test status means that your campaign is in test mode and cannot be displayed to any user unless they have a test link. We suggest you always keep your campaigns in test mode until you are sure their functions are appropriately set and ready to go live.
We strongly suggest you keep your campaign status as Test while configuring and reviewing it to ensure it's set correctly. Once you test your campaign and it is ready to go live, you can change the status to Active to launch it.
A campaign on the Test status is still a part of your campaign base, which means it is not passive but only masked. An increasing number of campaigns on the Test and Active status might also affect the loading speed of the Insider script. That’s why we highly suggest you change the campaign status to Passive instead of Test if you want to pause it.
Passive
The passive status means your campaign is deactivated and is not displayed to any user. You cannot get any test link for your campaign when it is passive.
Scheduled
The scheduled status means your campaign will be activated on the specified day and time.
User actions like clicks and closes are recorded in local storage. Even if a campaign is deactivated, this information remains in local storage until expiration. If the campaign is reactivated within this period, it will resume where it left off.
Generate the InOne panel
Before testing or launching your campaign, you need to generate your panel. To do so, follow the instructions for Generating InOne.
If you do not generate your panel, the latest changes might not be applied to your campaigns.
Test your campaign
Before launching your campaign, we suggest you test your variant(s) using the Test a Web Template as a guide.
Launch your campaign
Now that you understand how to launch a Web Template, you can start building and launching unique user experiences that boost engagement, drive conversions, and increase brand loyalty.