CraftGate is an application that serves as a bridge between companies and banks, enabling seamless management of payment transactions across various POS systems and methods through a unified panel. Currently, MindBehind utilizes its 'Payment by Link' solution.
Refer to Craftgate for further information.
This guide aims to explain how to integrate CraftGate. You can start with the MindBehind setup and then proceed to the CraftGate setup.
Set up MindBehind
- After registering in CraftGate or if you have already registered, go to MindBehind and select your company from the “Companies” tab.

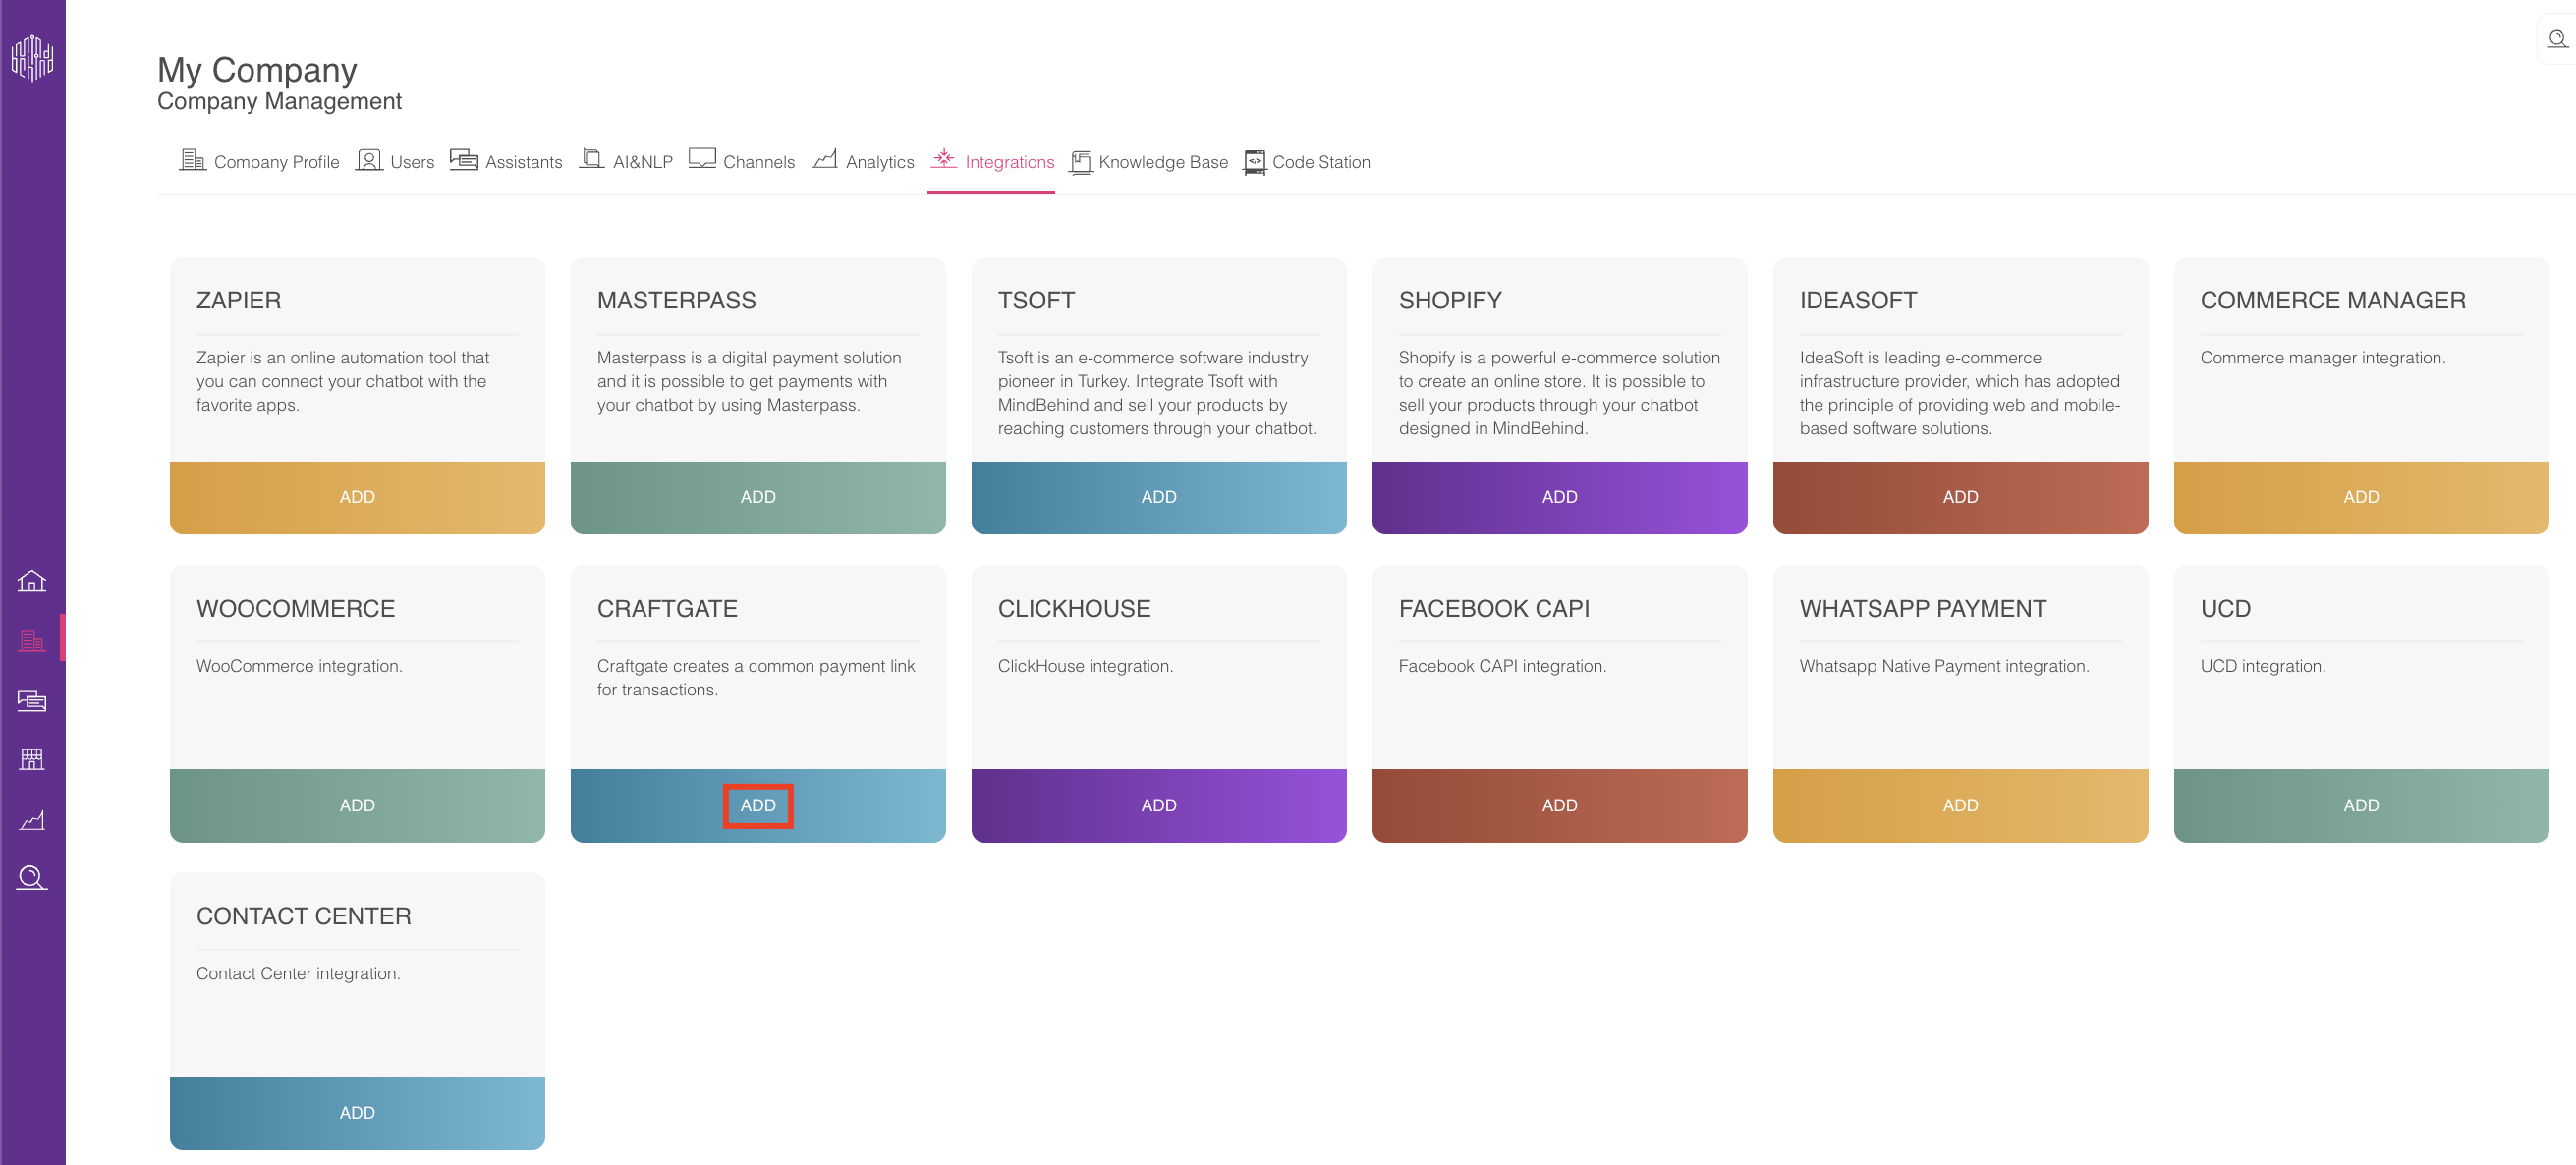
- Click the Integrations tab and click the Add button for the CraftGate integration.
- Fill in the related fields in the CraftGate Integration pop-up.
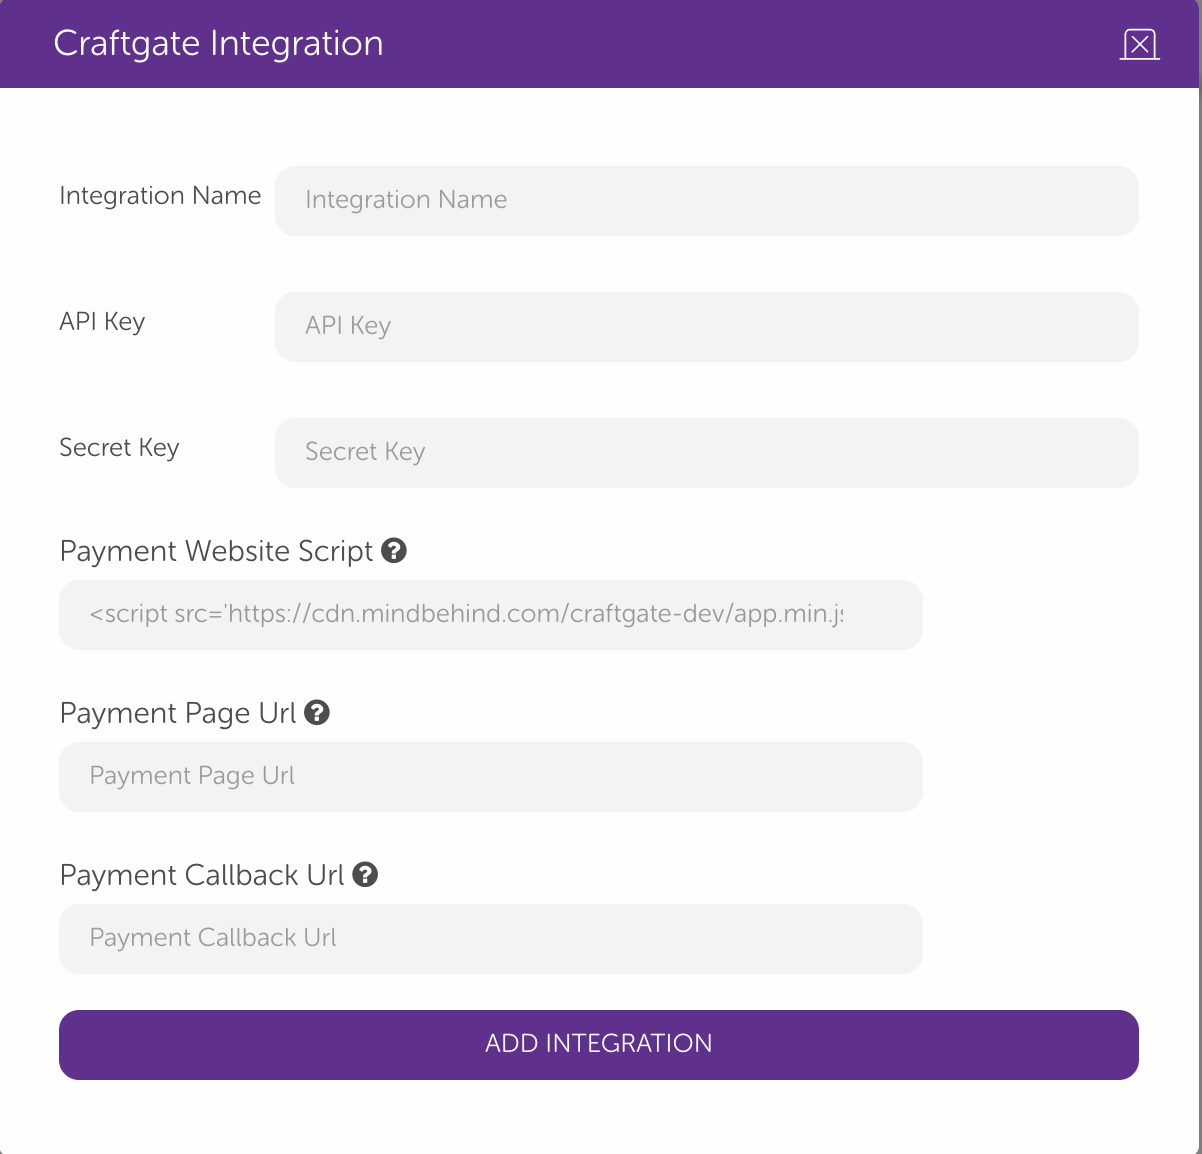
- You can choose anything you want for the Integration Name. You should take the API Key and Secret Key from Craftgate. You should also check the Crafgate Setup section below to continue.
- If you want to get payment from your website, you need to copy the script under the Payment Website Script to your website.
- The Payment Page URL is your website where you want to get paid and must contain the Payment Website Script. If it does not contain the script, you get an error when submitting the Add Integration button. When payment is completed, the client is redirected to the Payment Callback URL. If you do not want to copy the script to your website, you do not need to write anything in the Payment Page URL section. It will work in "mindbehind.com".
- Now, you can use CraftGate integration on your bot with the Payments module. Click on the Payments module you see below.

- Select the integration and fill in the other fields: Total Amount, Currency, and Expiration.
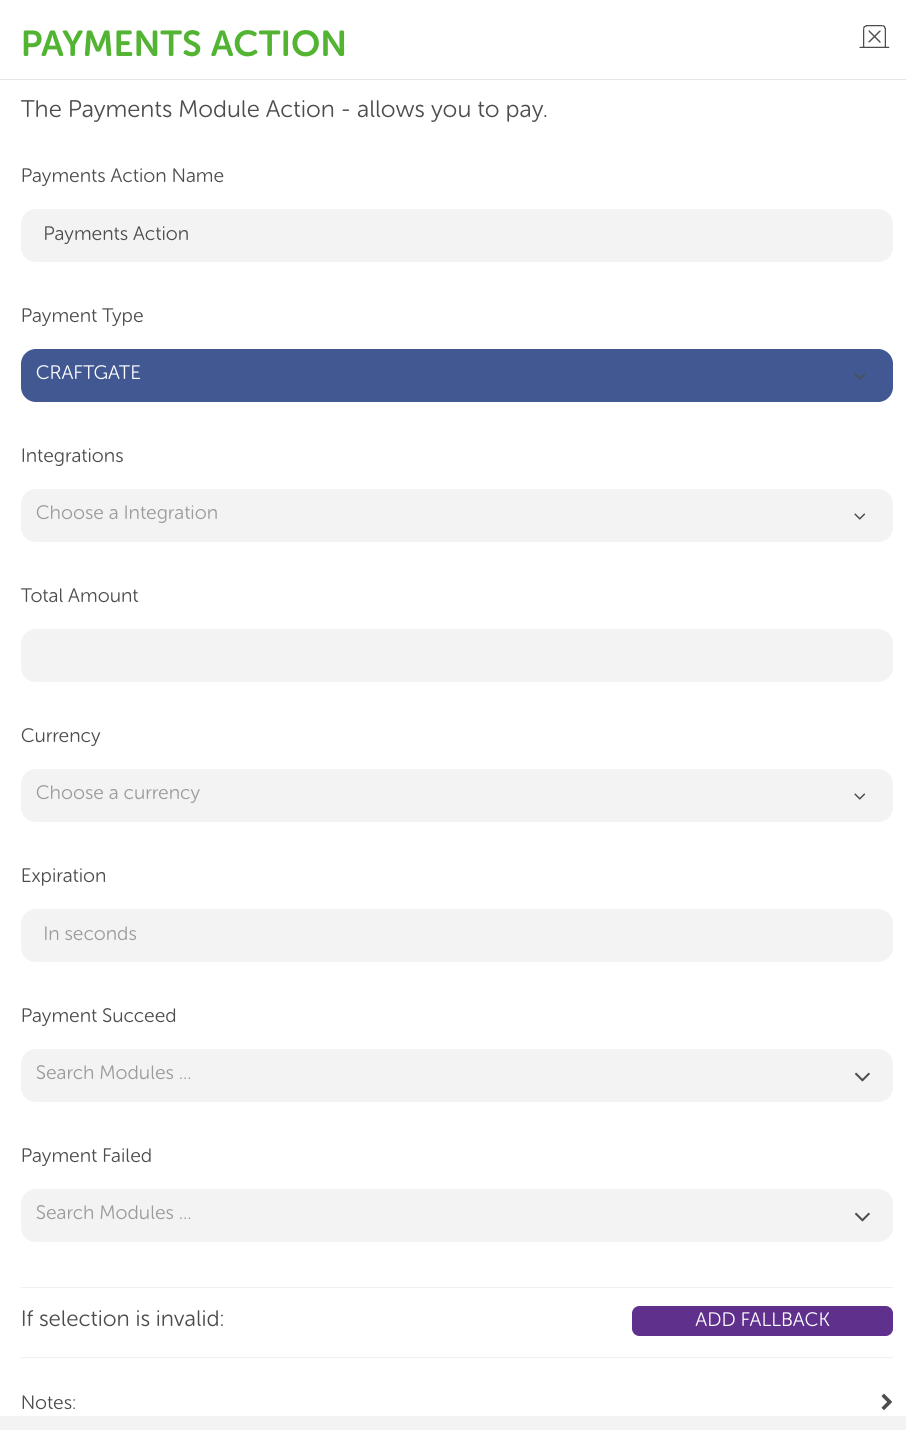 Expiration can not be less than 300s in your Payments action.
 - You can select a node for "Payment Succeed" and "Payment Failed". If the payment is successful, the chatbot continues to node "Payment Succeed". Otherwise, it continues to the node of "Payment Failed".
At the end, the common payment page will look as follows: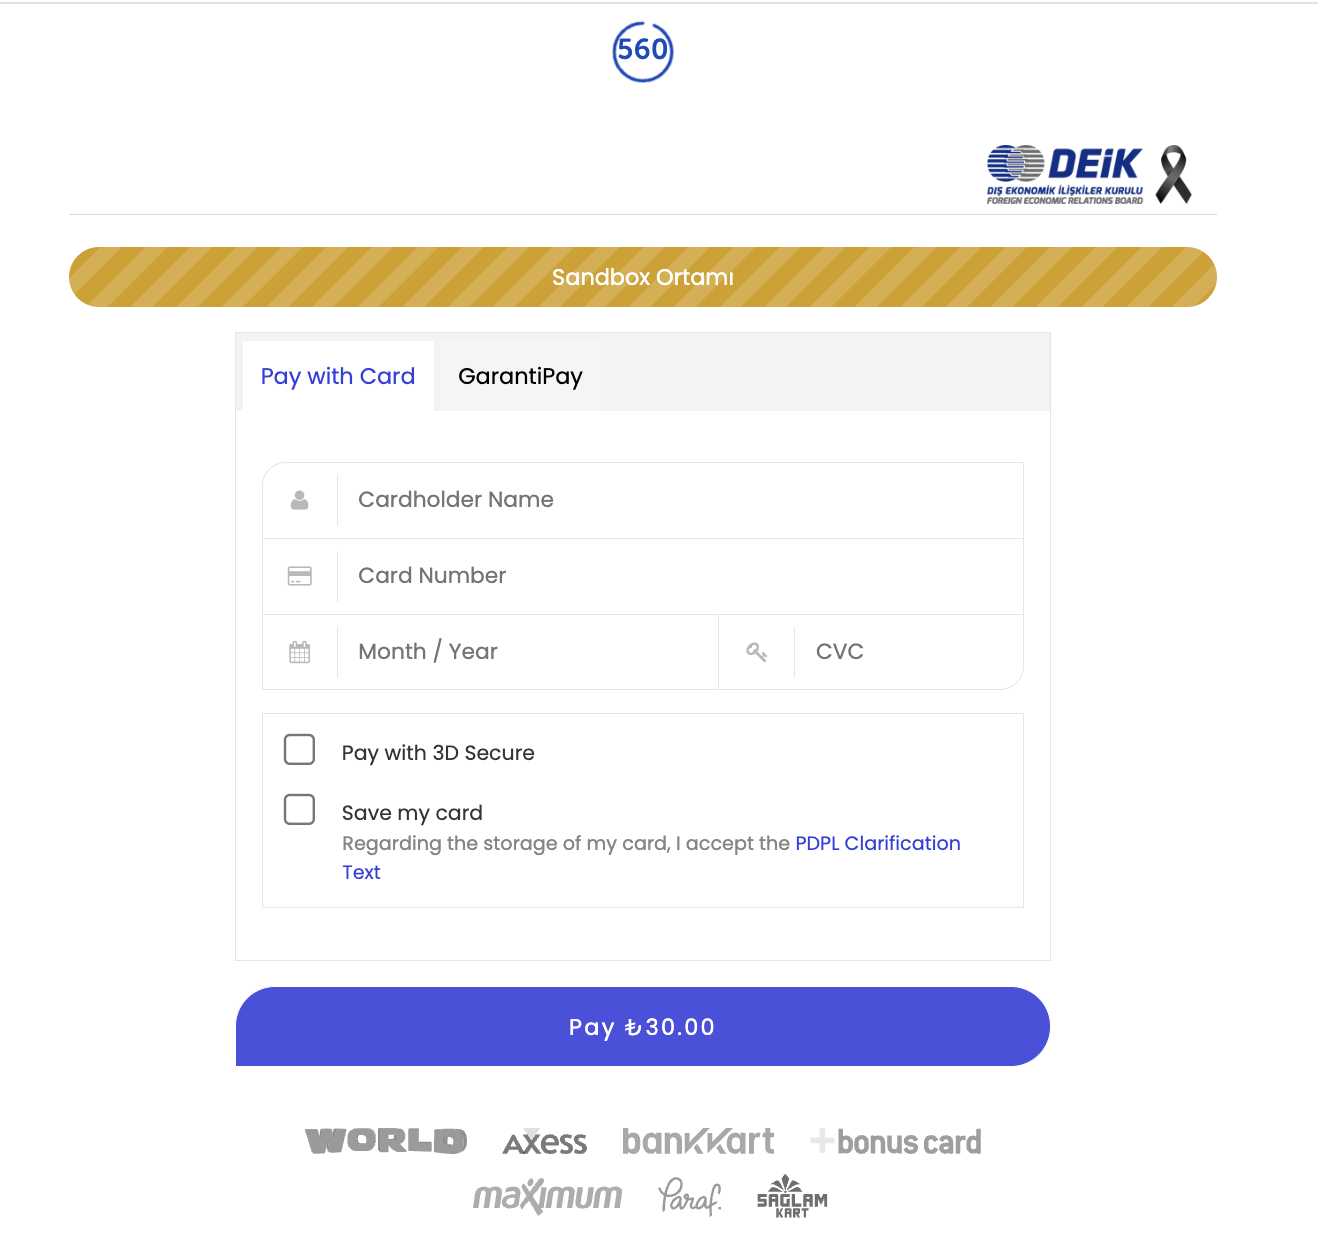
- When the payment is made, you will be redirected to the callback URL you defined in the integration.
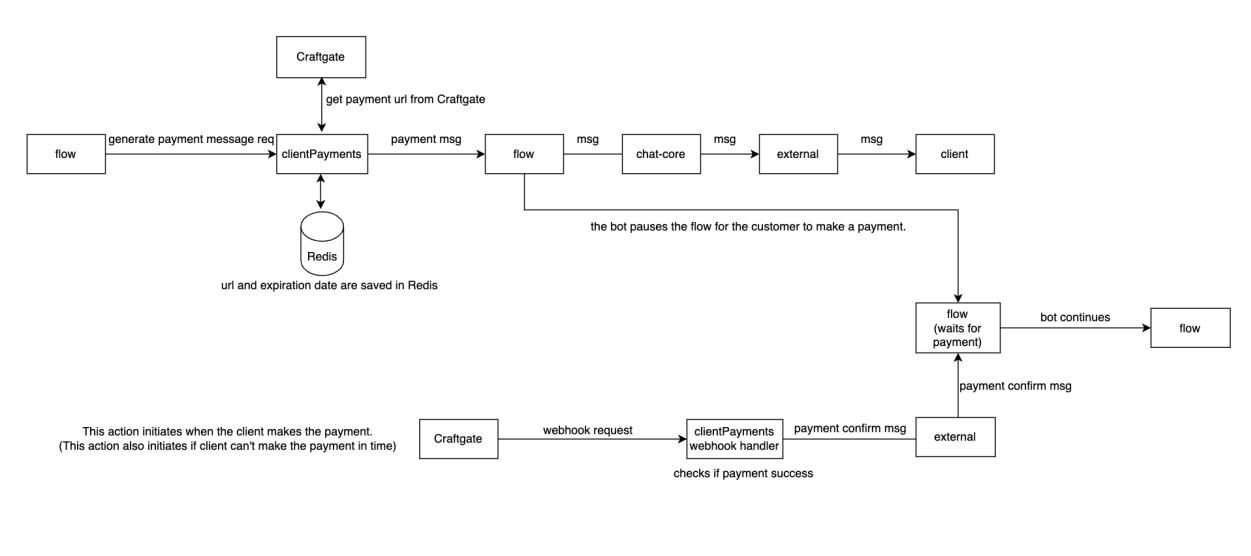
To see the flow, you can also check the diagram below:
Set up Craftgate
- To fill in the "API Key" and the "Secret Key" fields, go to the CraftGate panel. Click the “API Authorization Management” option under the Management.

- If there is no previously created API authorization on this page, you can click the Create API Authorization button to create a new one.

- In the pop-up that opens, you should enter a name and give the necessary permissions.
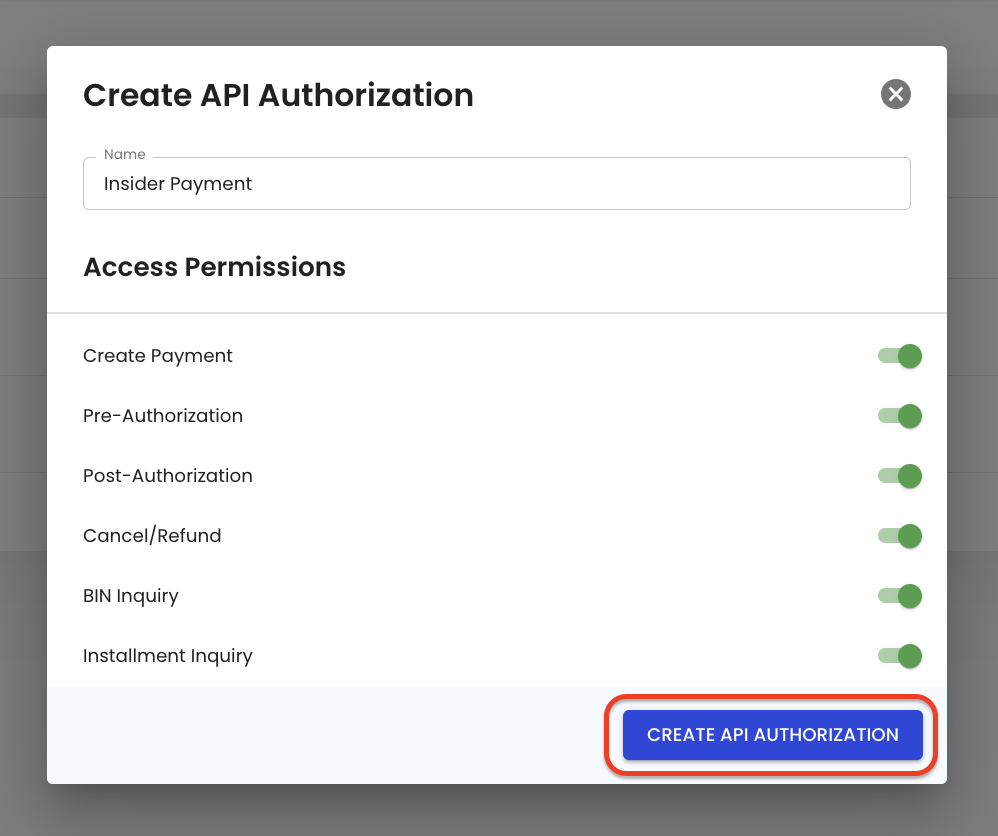
- When you click the Create API Authorization button, you should see the "API Authorization" section as shown below.
(1).png)
- Paste the API key and Secret Key information of the created API authority to the relevant places on the Integration page.
- Click the Add Integration button. After this process, you can see your newly created integration under the Integrations tab.
