Dynamic segments are audience groups that update automatically in real time, based on the rules you define with events and attributes. Once created, they continuously refresh to include users who meet the criteria and remove those who no longer match, ensuring your campaigns always target the most relevant audience without manual updates
This article covers the answers to the questions below:
Use cases
Dynamic segments help ensure your campaigns and automations remain timely, relevant, and aligned with each user’s current activity:
Send targeted campaigns
Build precise audience subgroups to deliver more relevant messages instead of contacting your entire list. For example, target newsletter subscribers who opened an email in the last 30 days.
Trigger automated flows
Use a segment as the trigger for automated campaigns across channels such as Email, Web Push, WhatsApp, or SMS. For example, launch a welcome flow when a user makes their first purchase.
Analyze audience trends
Monitor changes in segment size in real time to understand engagement and behavior patterns.
Dynamic Segments listing page
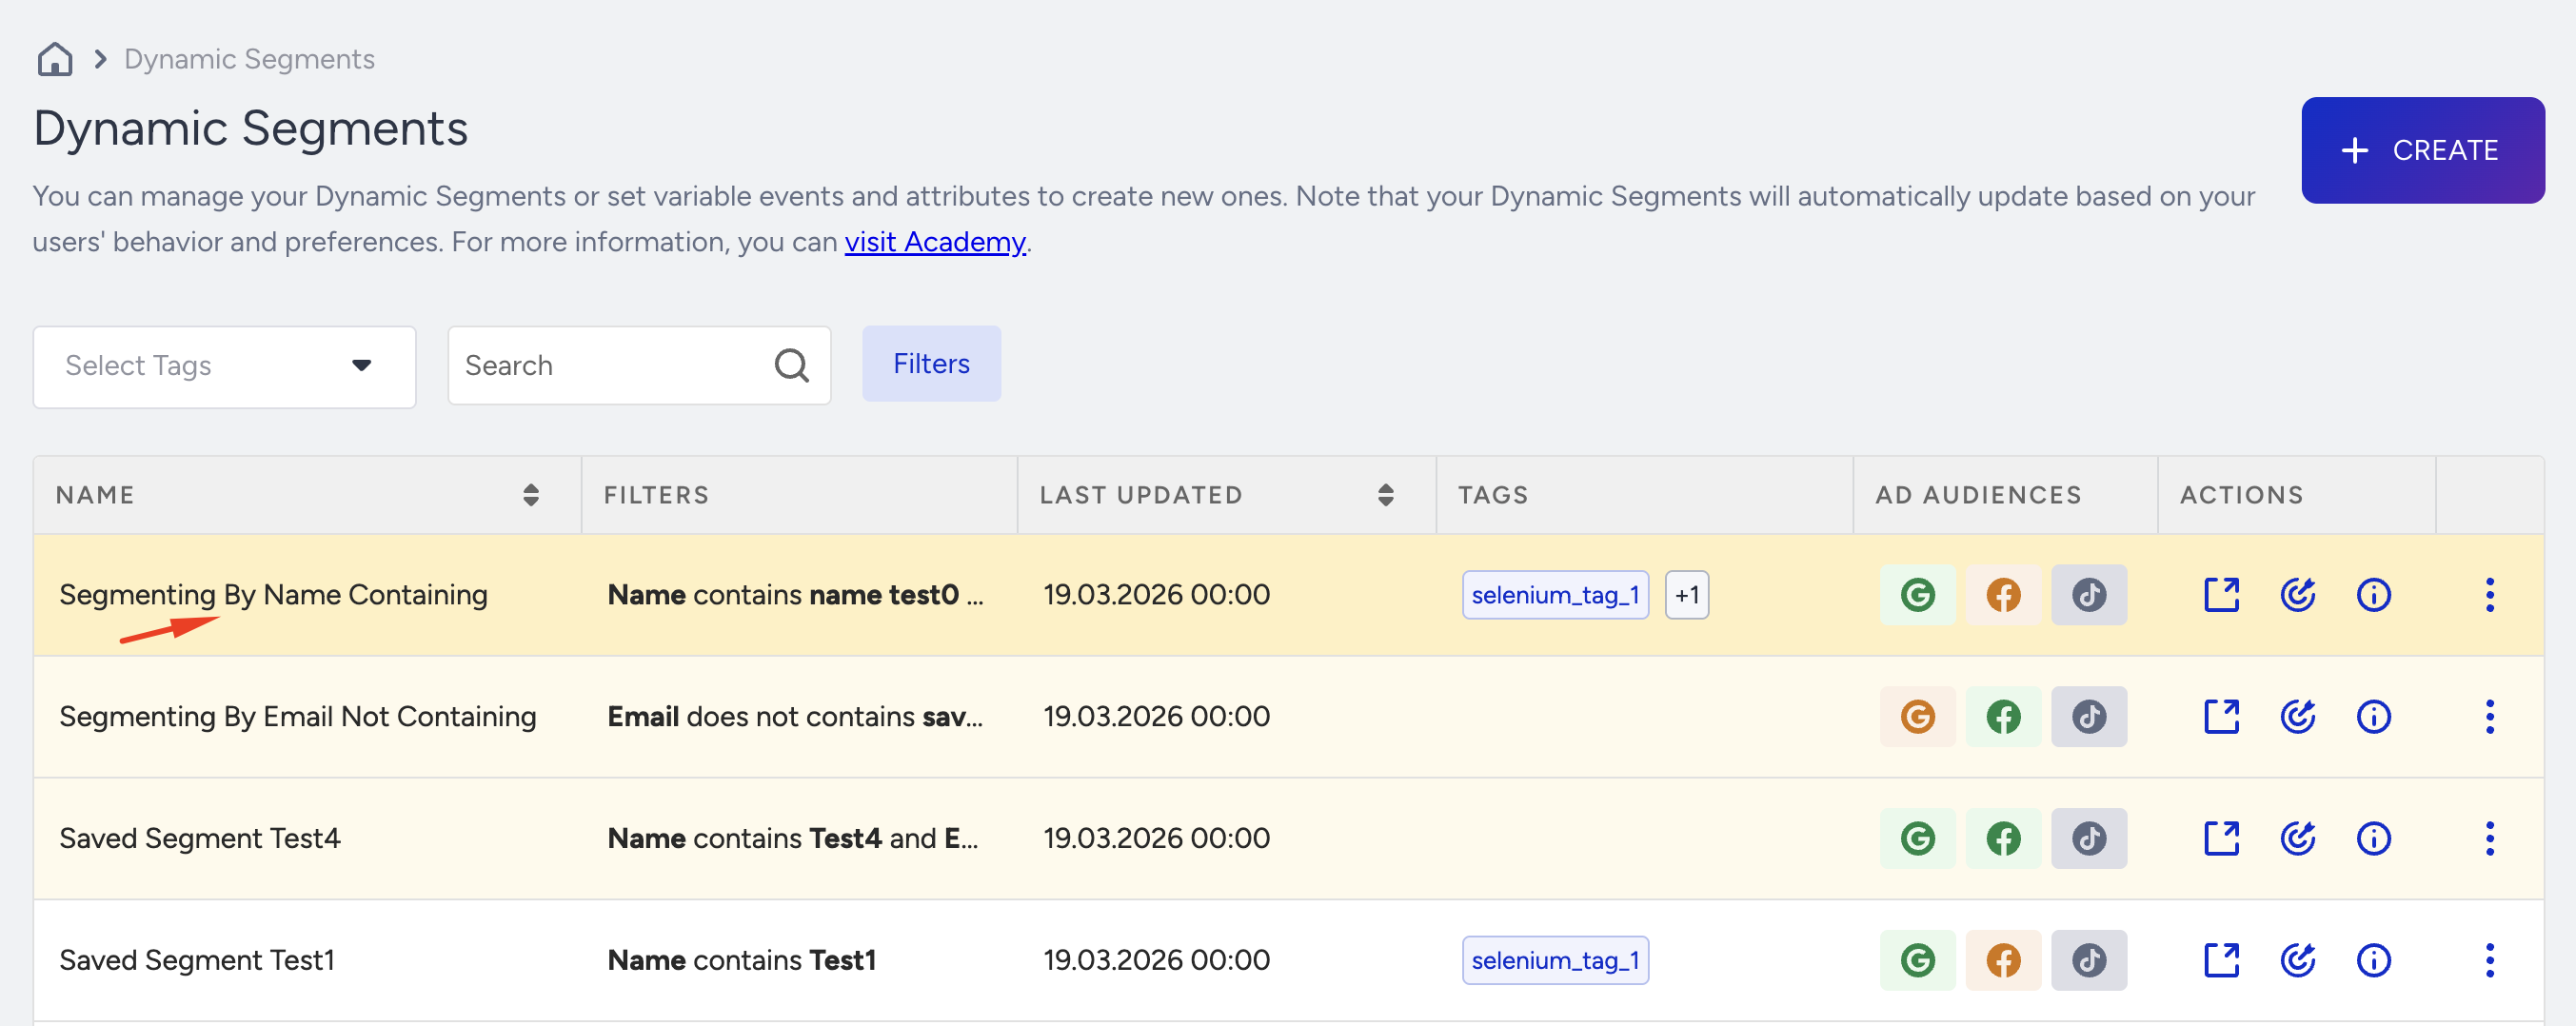
To view the Dynamic Segments listing page, navigate to Audience > Segments > Dynamic Segments. You can find the following details of your dynamic segments on this page:

Select Tags: Displays the segments based on the tags.
Search: Describes the search criteria. You can search for a segment by email, name, uuid, or phone number.
Name: Specifies the name of the segment you assign while creating segments. When you click on a segment, you can view the details of the summary and users.
Filters: Specifies the applied filters to a particular segment, if any.
Last Updated On: Displays the last date the segment was updated.
Tags: Displays the tags that you have assigned.
Remarketing: Displays the remarketing channels to which you send your dynamic segments. It turns blue when it is integrated.
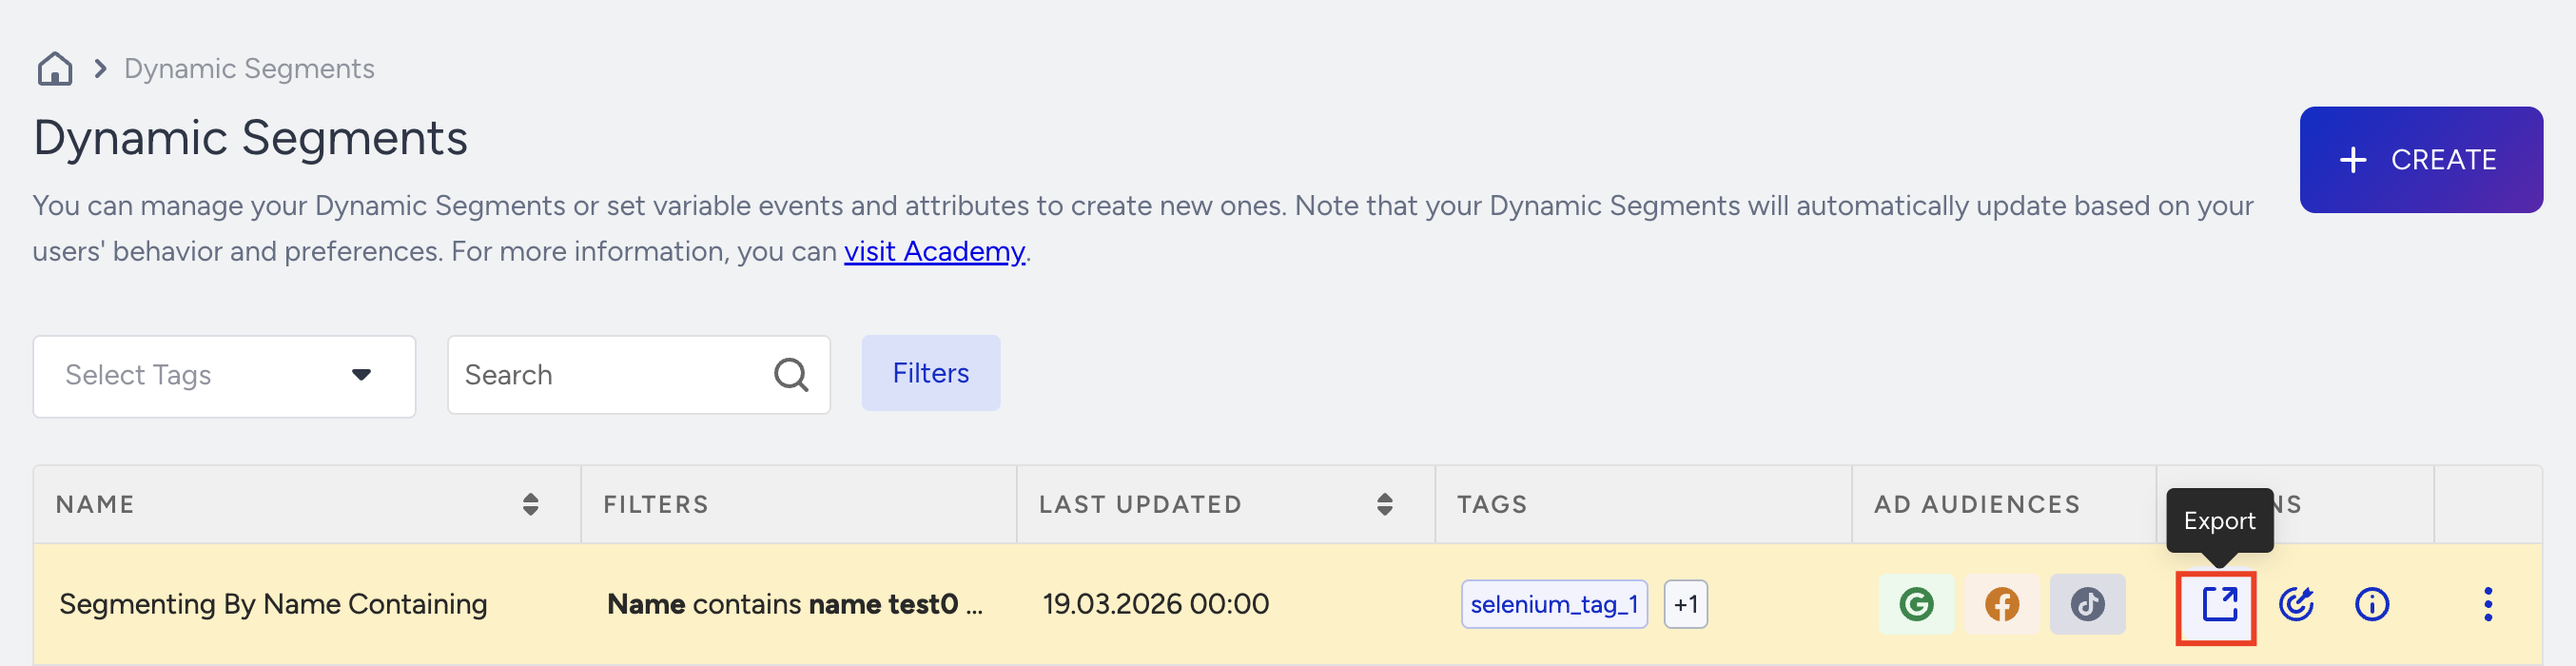
Actions: Exports the details of the dynamic segment to a CSV file.
Menu (three-dots): If you click the menu against a segment, you can see the following options:
Pin to Top: Use it to pin the selected dynamic segment at the top. If the dynamic segment is already pinned, this becomes Unpin.
Edit Tags: Use it to edit the tags assigned to the segment.
Edit: Use it to edit the segment you created previously.
Duplicate: Use it to clone a segment to run some experiments. You can change the name by clicking the segment name and editing the input field.
Delete: Use it to remove a segment permanently.
The deletion action for the Dynamic Segments indicates that the user will only be removed from the list, not deleted entirely from the Unified Customer Database (UCD)
Dynamic Segments summary page
To access the Dynamic Segment summary page, click on the segment name from the listing page.
You can find the following details of your Dynamic Segments on the Summary tab:
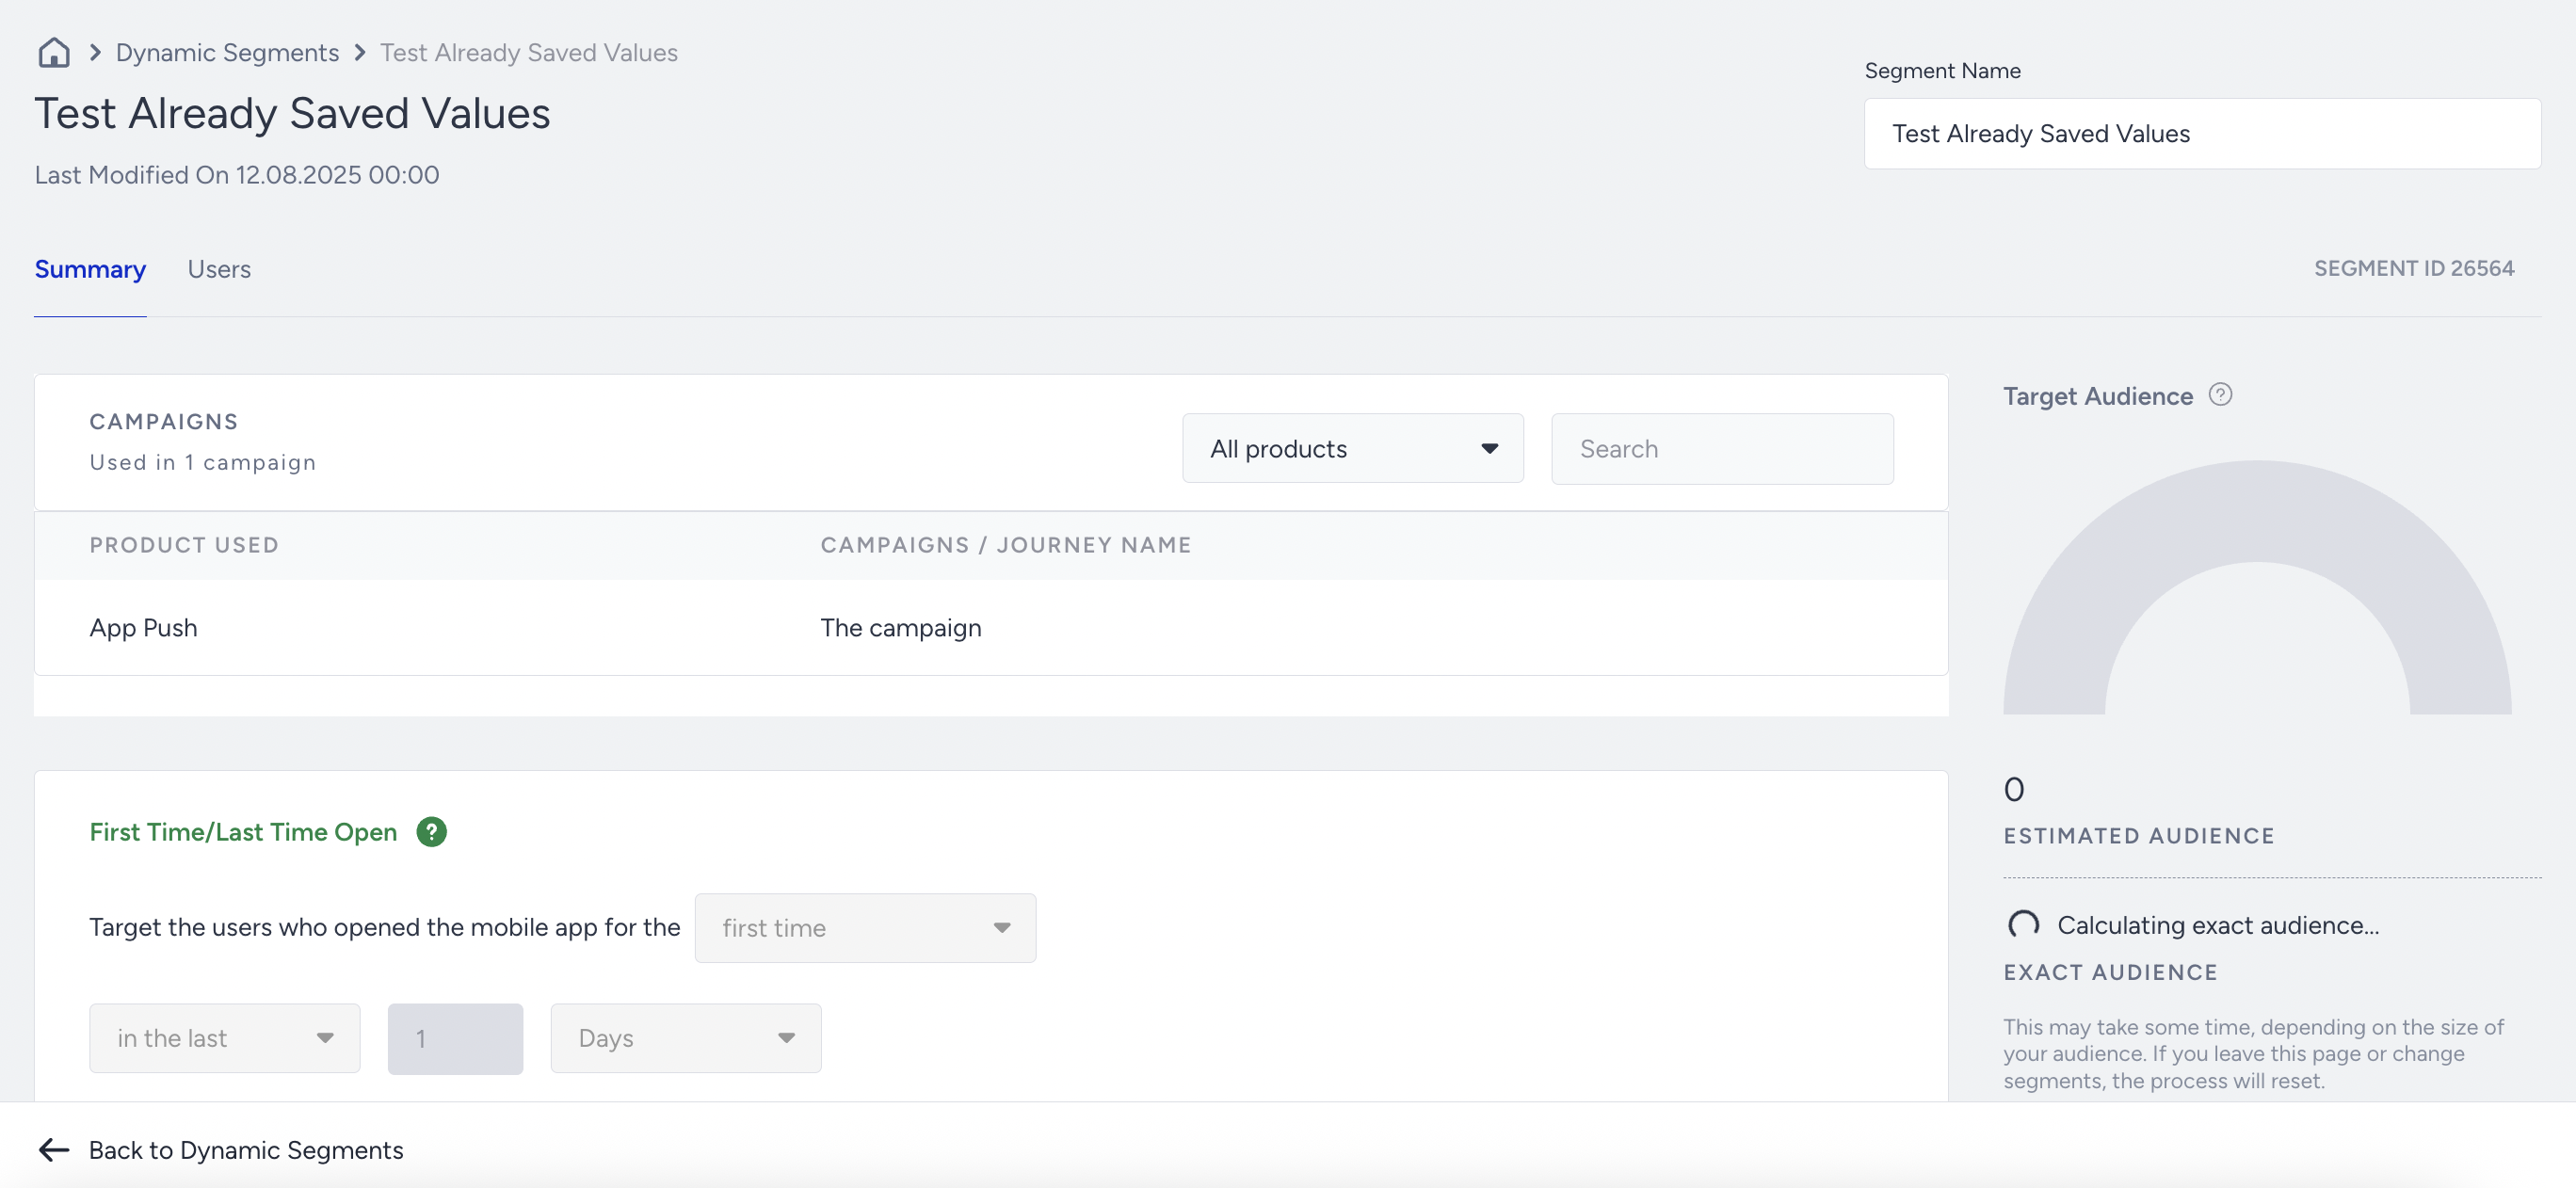
Segment ID: Located under the Segment Name field, it displays a unique ID to differentiate the segments.
Segment Name: Specifies the name of the segment you assign while creating segments.
Campaigns: Displays the number of campaigns in which the segment is used.
Search: Displays the list of segments by Insider One product. You can select All products, Email, Architect, SMS, WhatsApp, or Web Push. You can also enter a name to display search results.
Product Used: Displays the Insider One product to which the segment belongs.
Campaigns / Journey Name: Displays a segment's campaign or journey name.
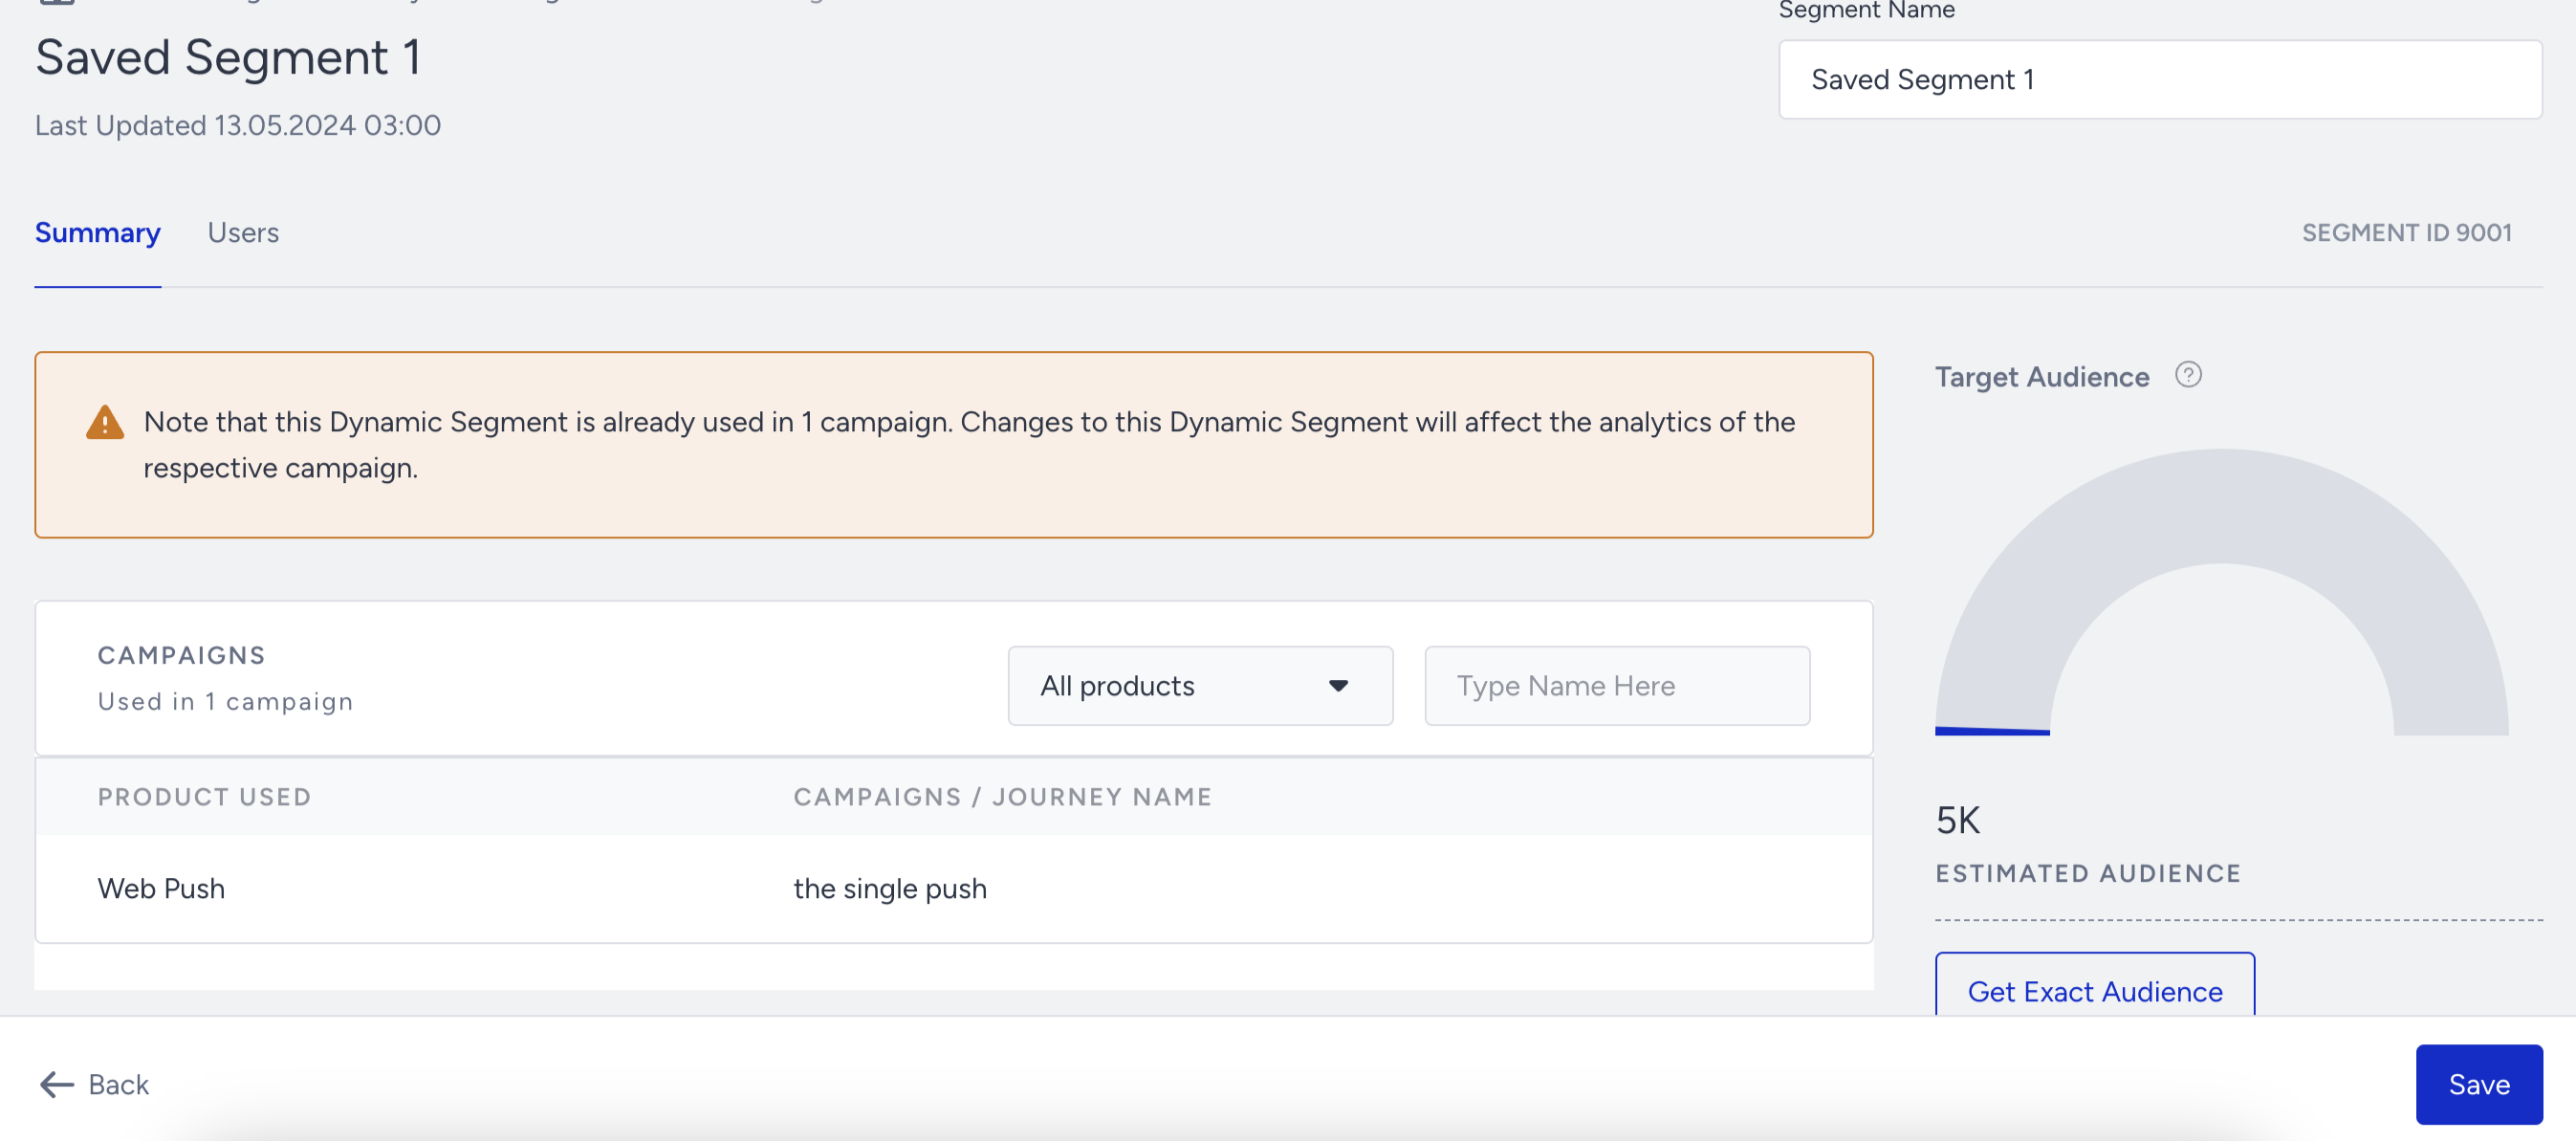
Target Audience: Displays the number of users that your message could reach.
Estimated Audience: Displays the approximate number of users based on your current segmentation settings.
Get Exact Audience: Displays the actual count of users based on your current segmentation settings.
Dynamic Segment users page
Switch to the Users tab, and you can find the following details of your Dynamic Segment users on this page:
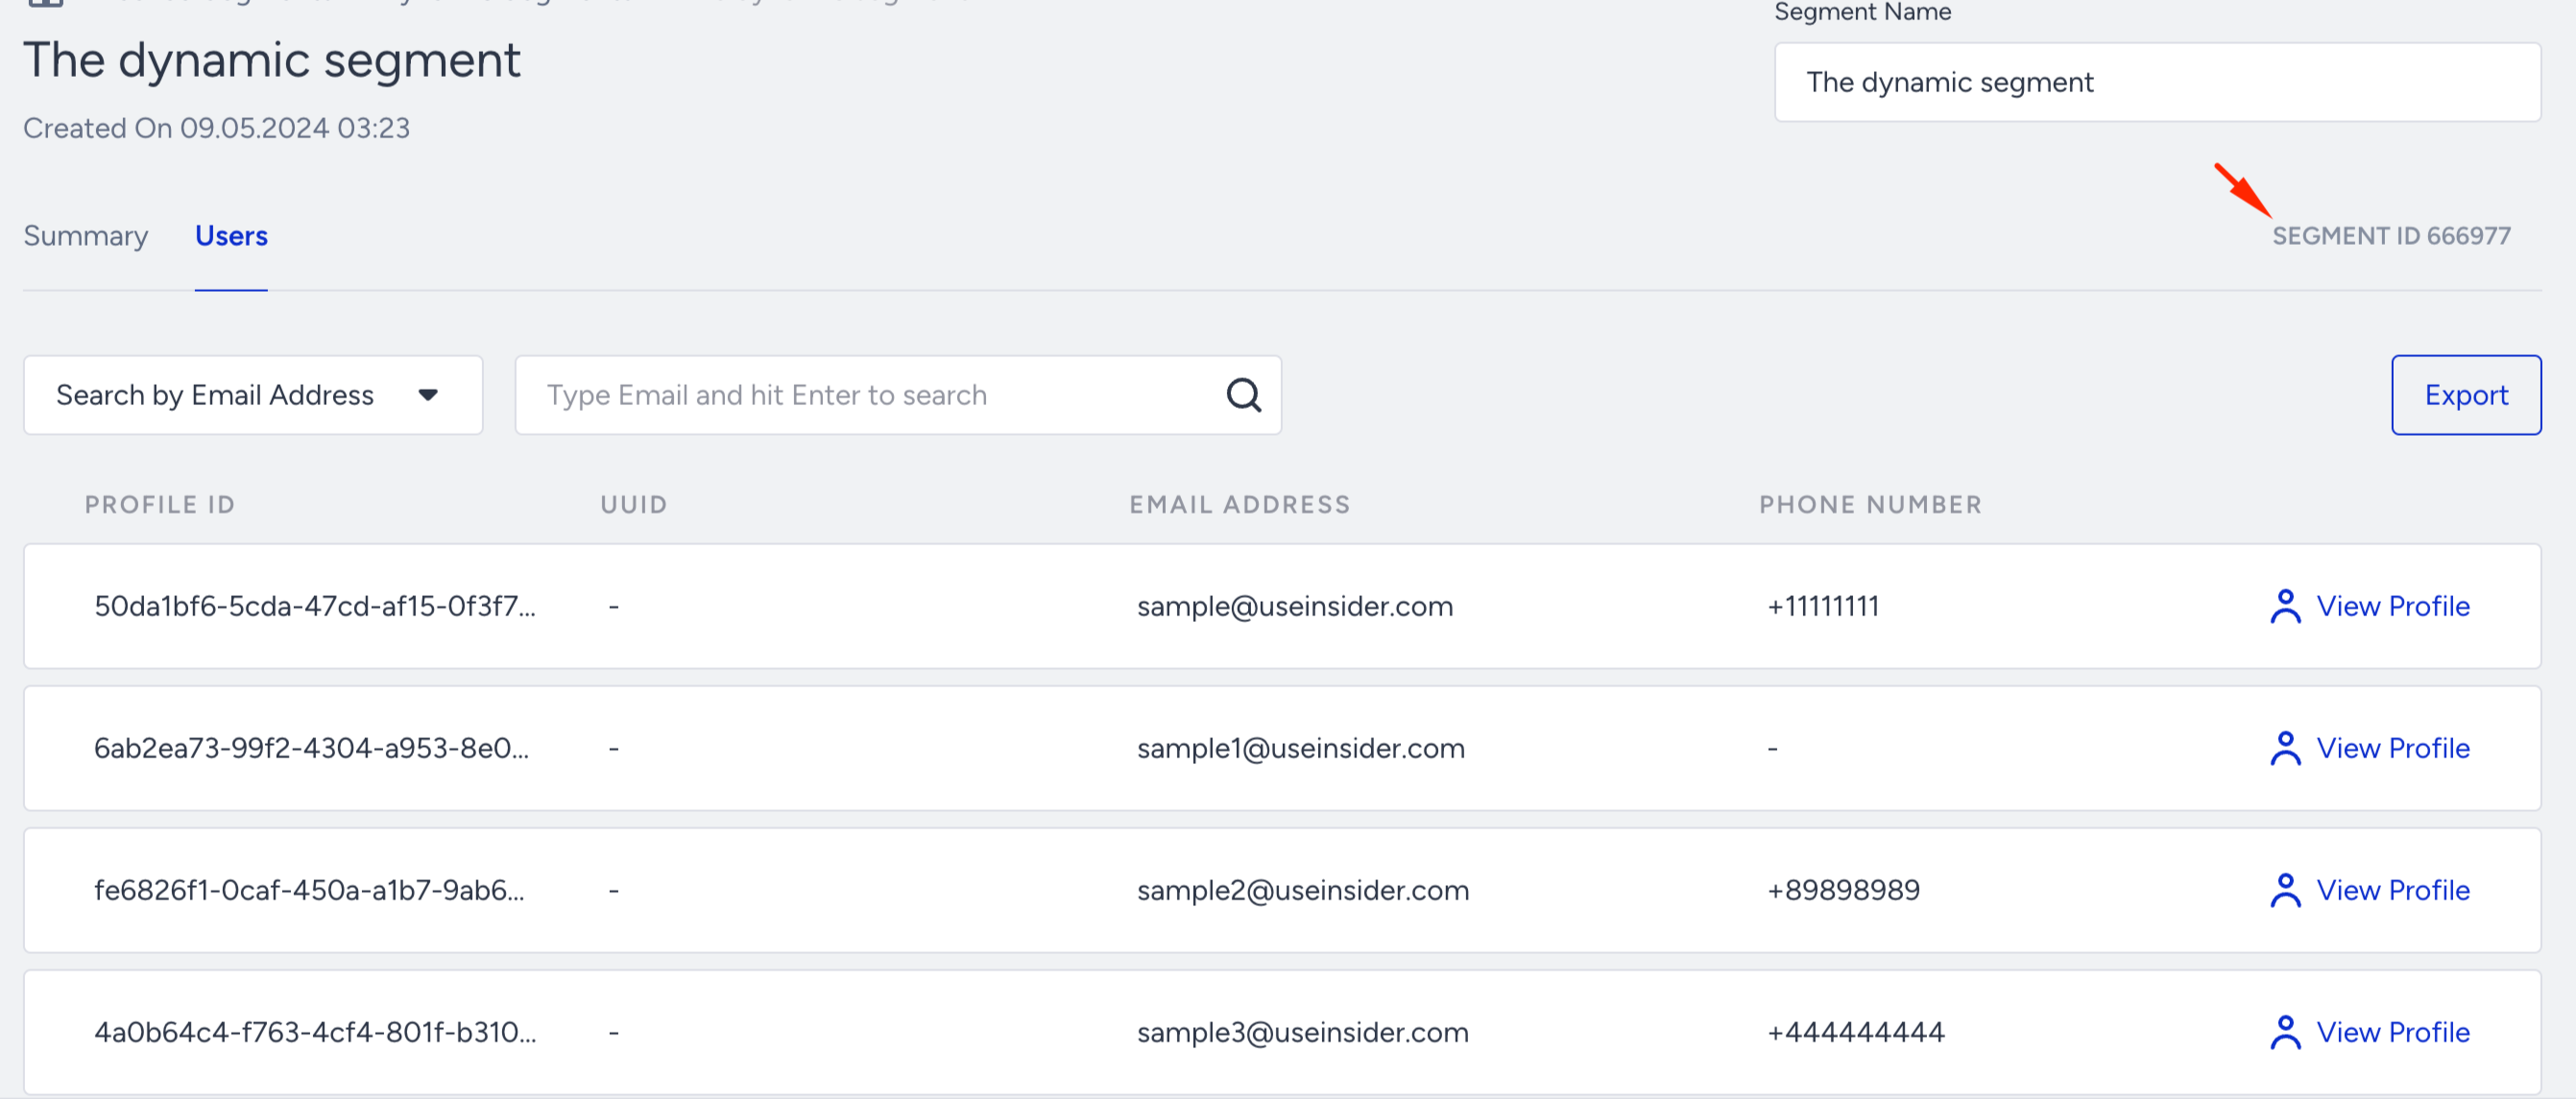
Segment ID: Located under the Segment Name field, it displays a unique ID to differentiate the segments.
Segment Name: Displays the name of the segment that you assigned.
Search: Search for a segment by entering the name, email, phone number, or UUID.
Profile ID: Displays the profile ID of each user.
UUID: Displays the user's unique ID.
Email Address: Displays the user's email address.
Phone Number: Displays the phone number of the user.
View Profile: Displays the user profile.
Only users granted Personally Identifiable Information (PII) permission or the account administrator role can see the user data on this page. Otherwise, the data will be partially masked.
Create a Dynamic Segment
To create a Dynamic Segment to narrow your users:
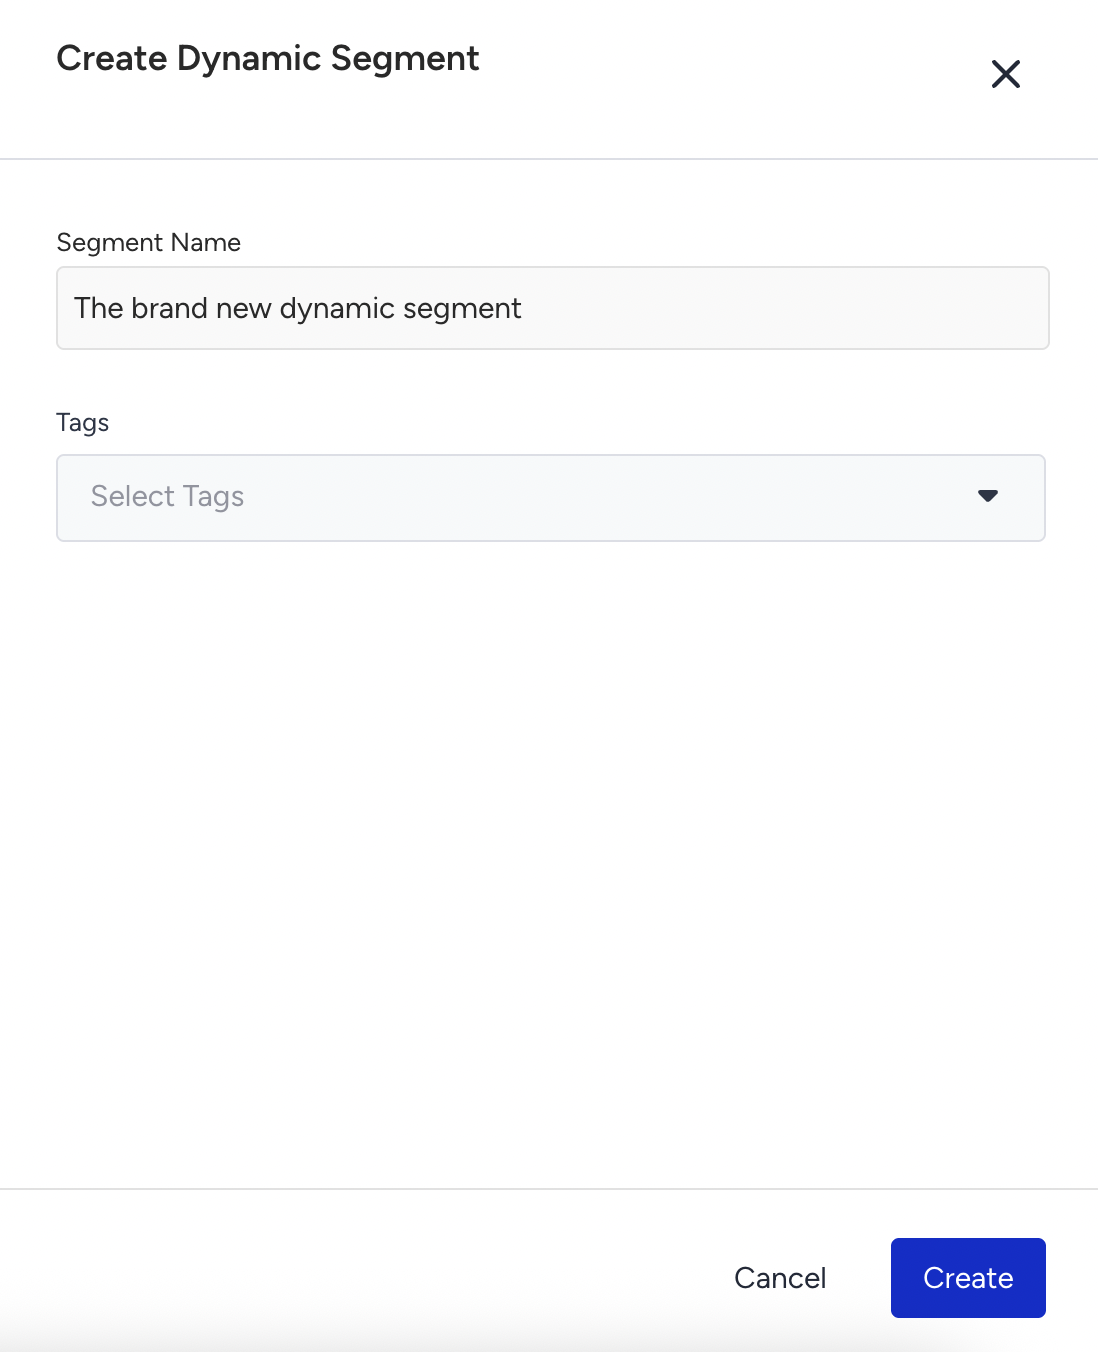
Click the Create button on the Dynamic Segments listing page.

Enter a short, descriptive name and click the Create button. You can also select tags or create new ones to use as a filter later on.
You land on the Segments selection page. By default, no filter is applied. To narrow down your audience, choose a segment to categorize your users.
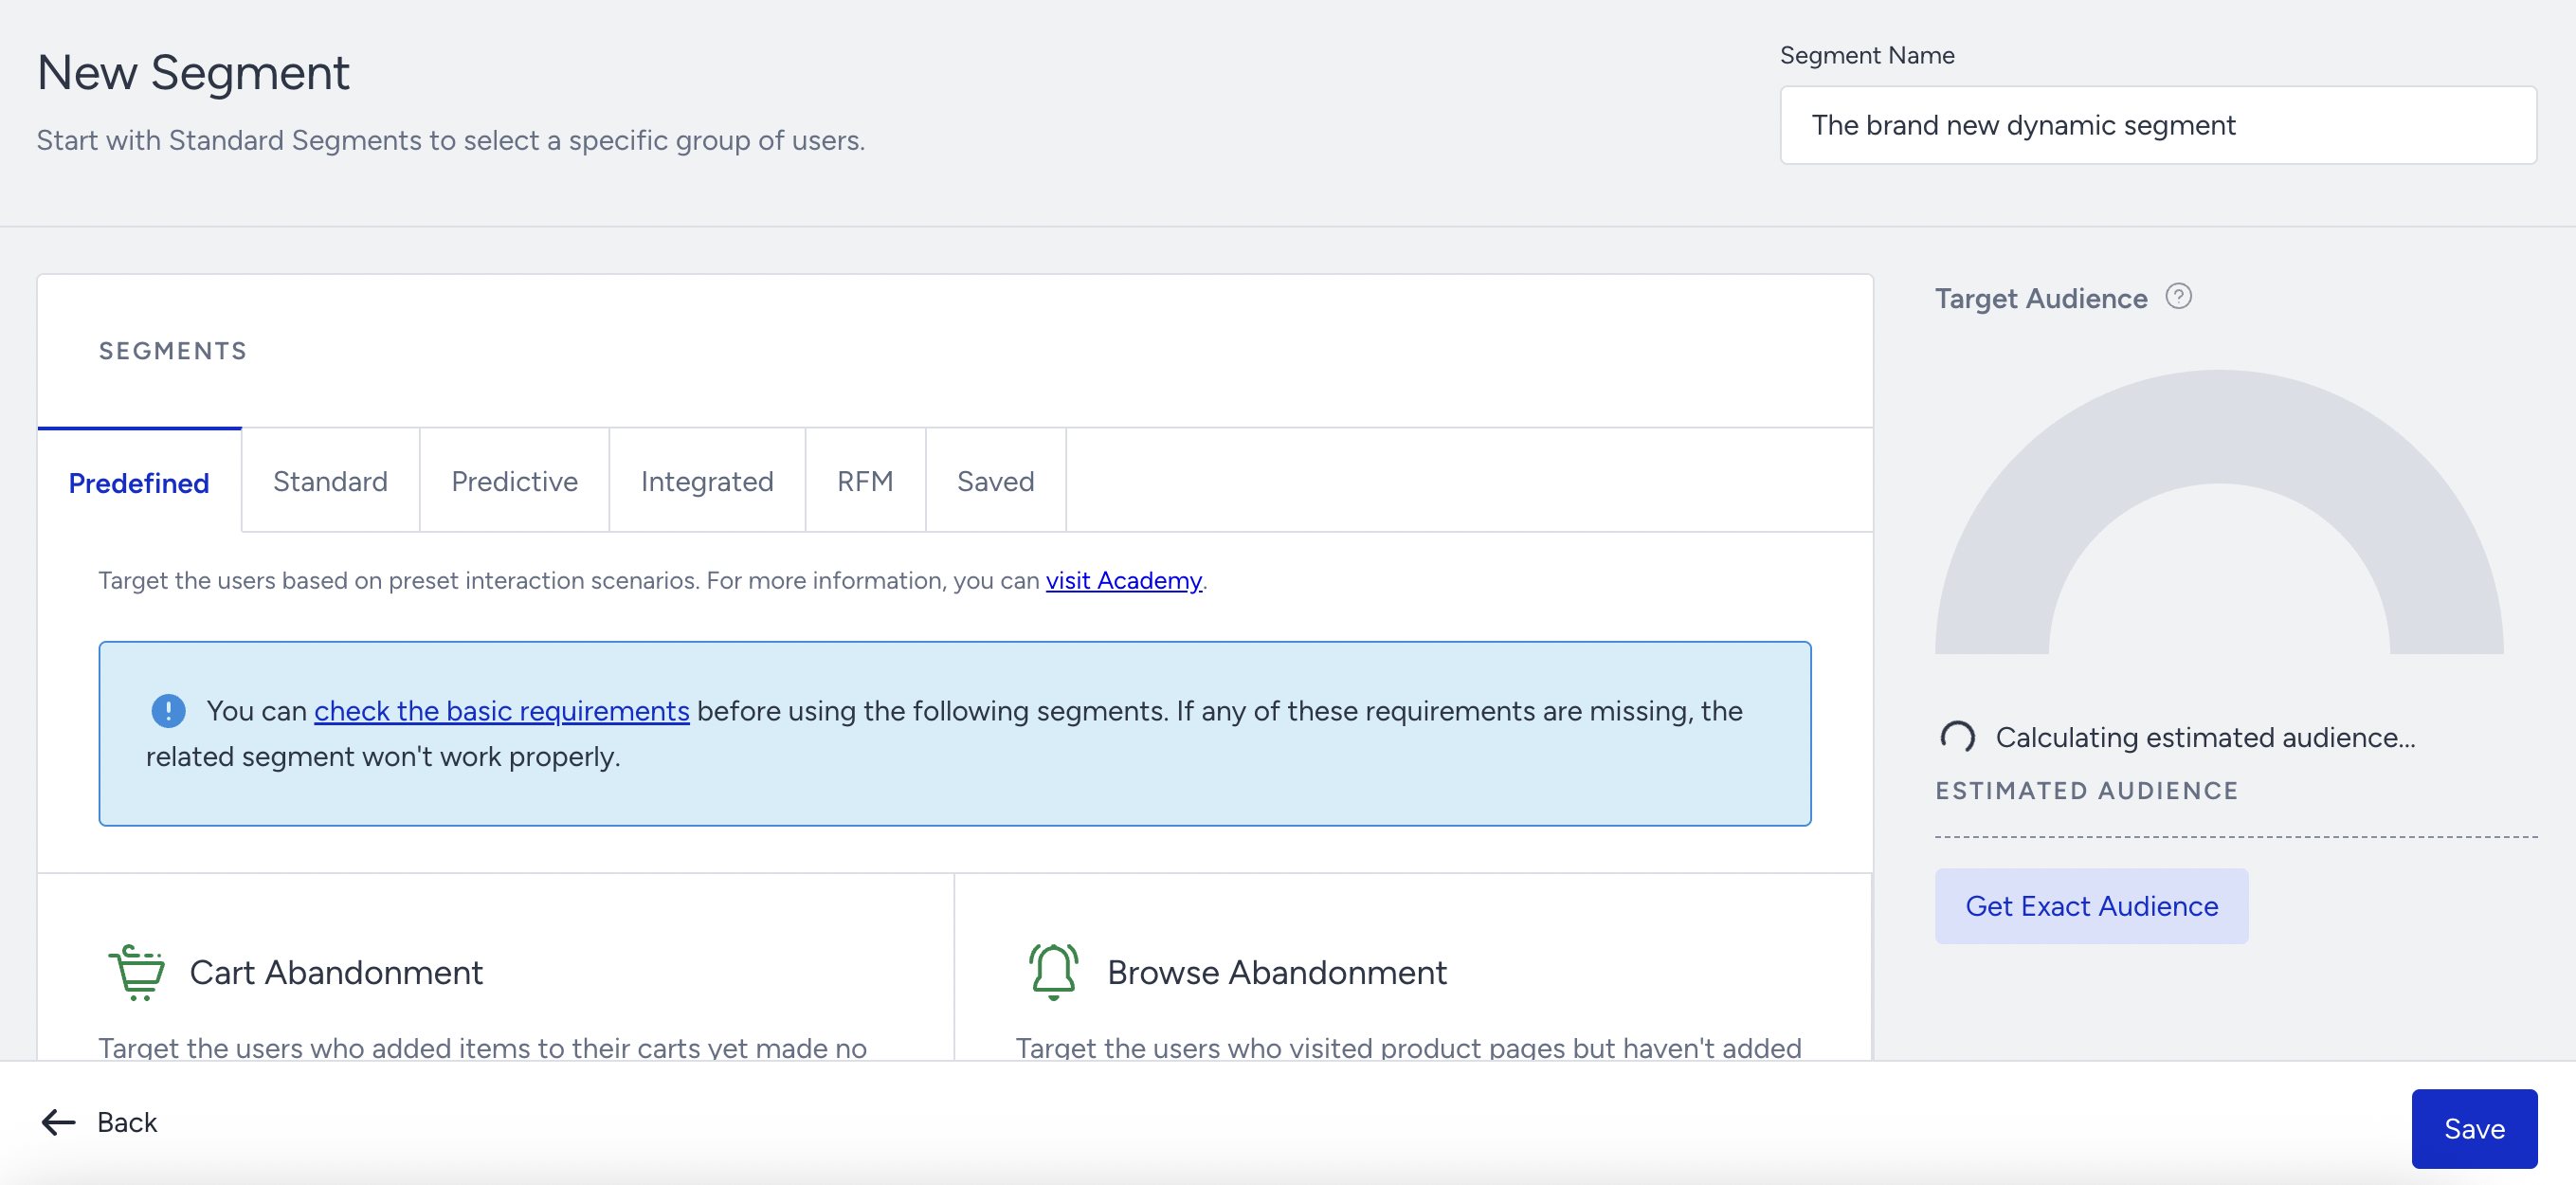
The available segment options are:
Saved Segments
Dynamic Segments
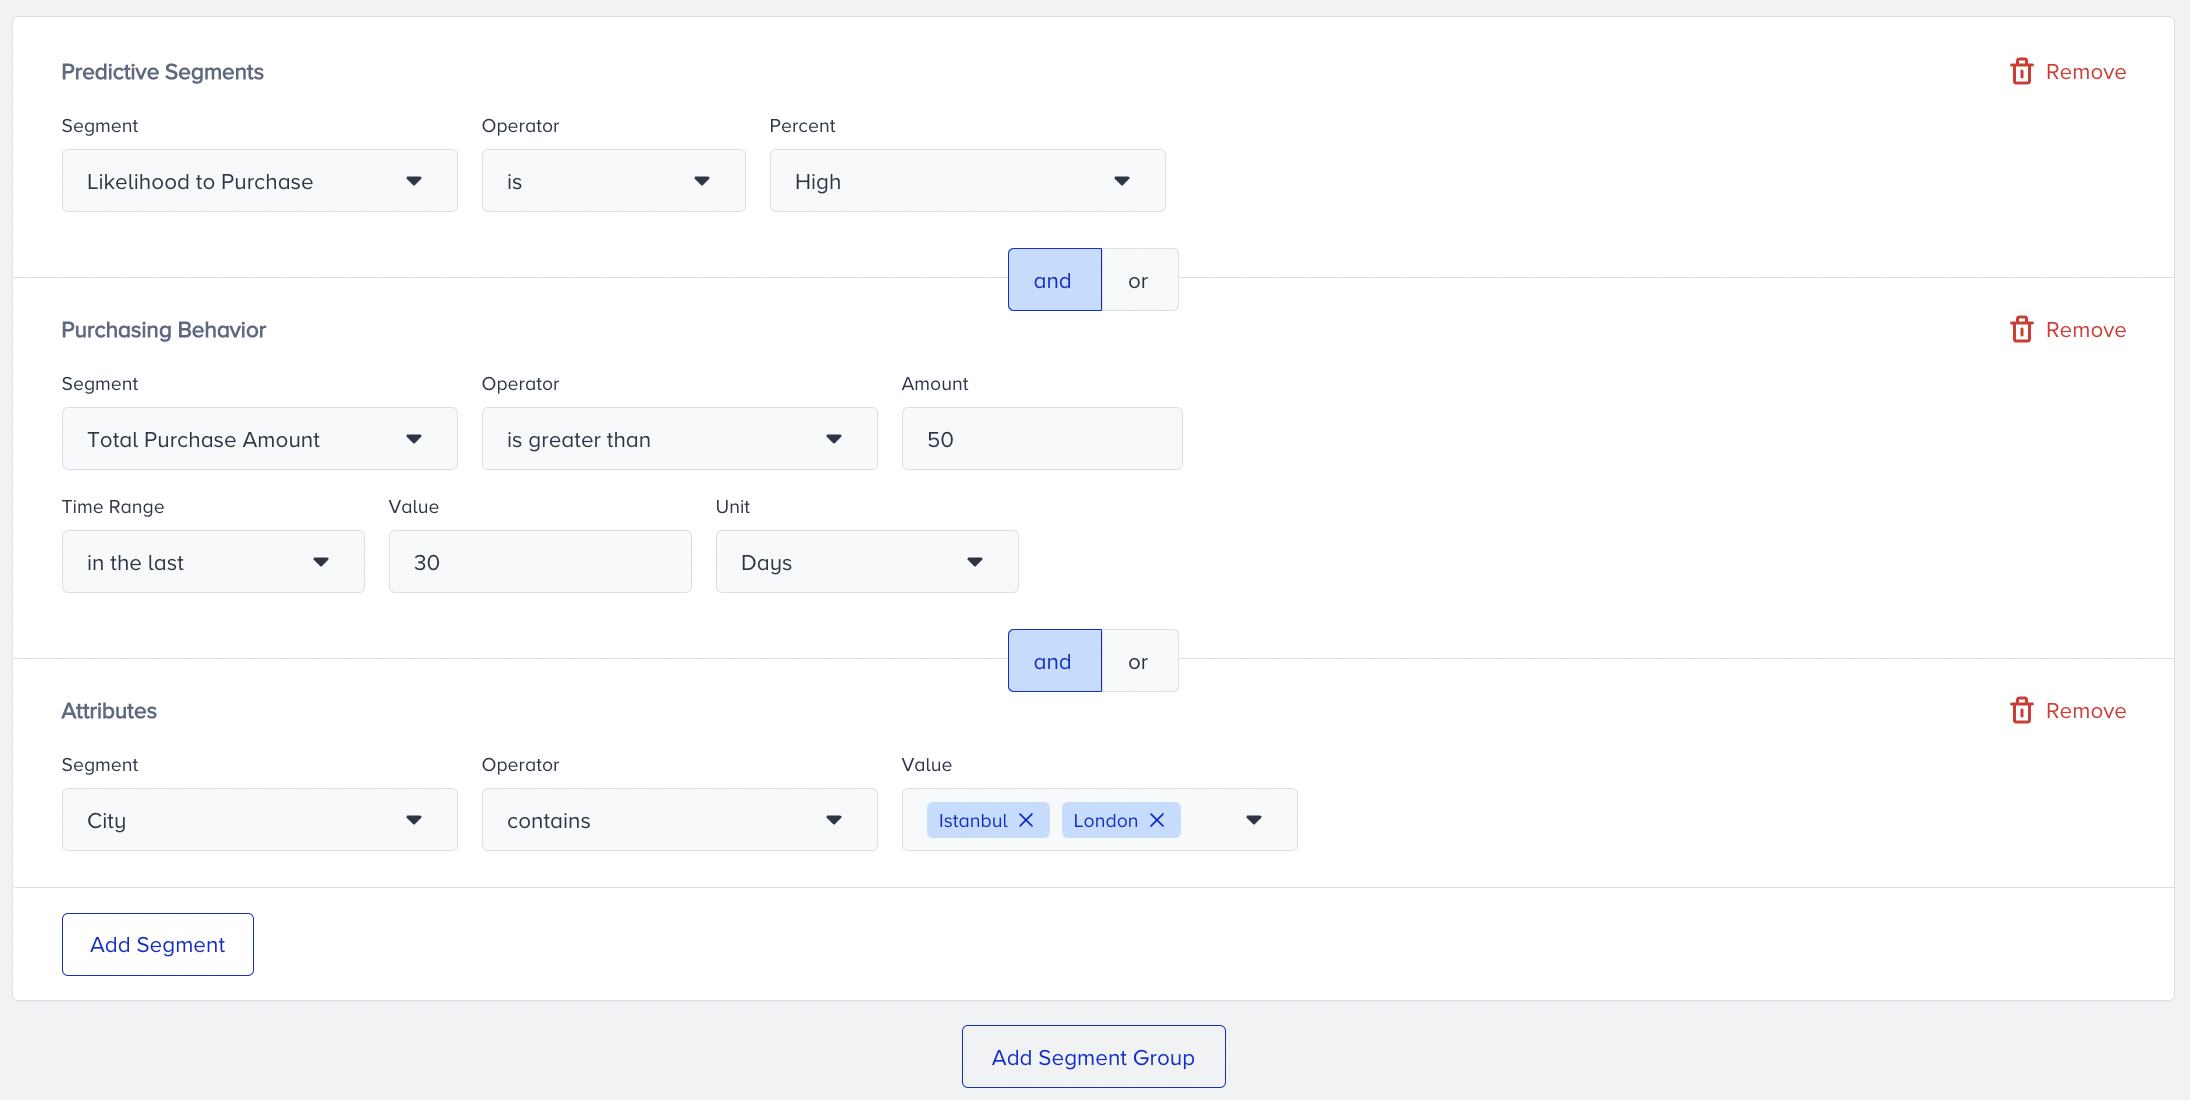
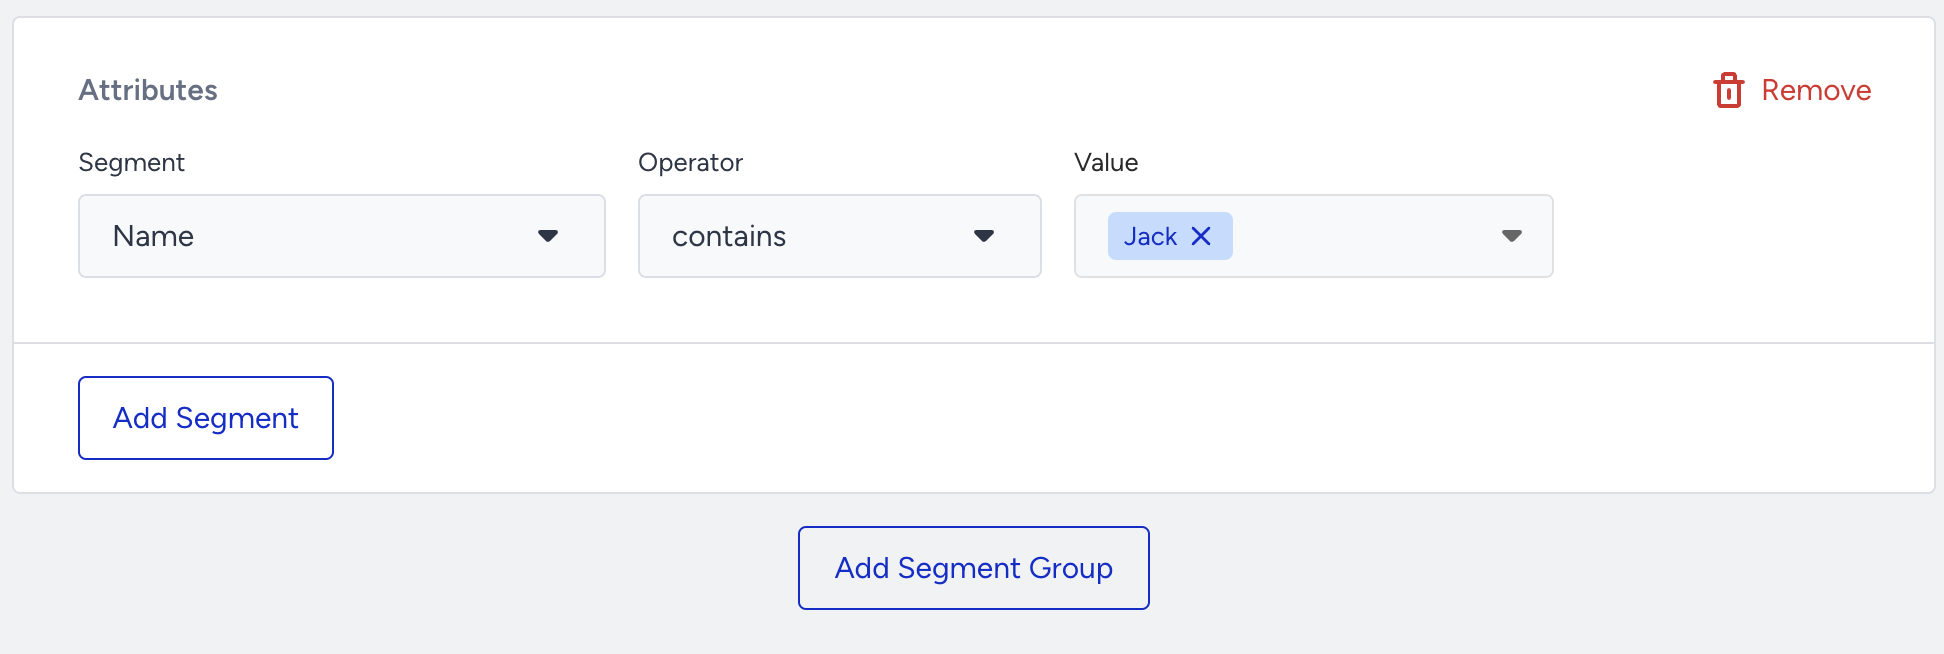
In the segment creation steps, you can add or remove any segment or segment groups and change AND/OR conditions as per your preference. You can also apply filters.
You can select multiple values for an attribute, which enables you to filter users in one box by selecting more than one value. You can easily choose them from the value dropdown menu.
This feature allows you to select data whose type is string or array for attributes. Number, number, and boolean types are not supported.
You can find an example below for a segment that targets users with a high likelihood to purchase value, who have made a total purchase amount of 50 in the last 30 days, AND whose city is either "Istanbul" or "London". When you’re ready to save your filters, click Save.
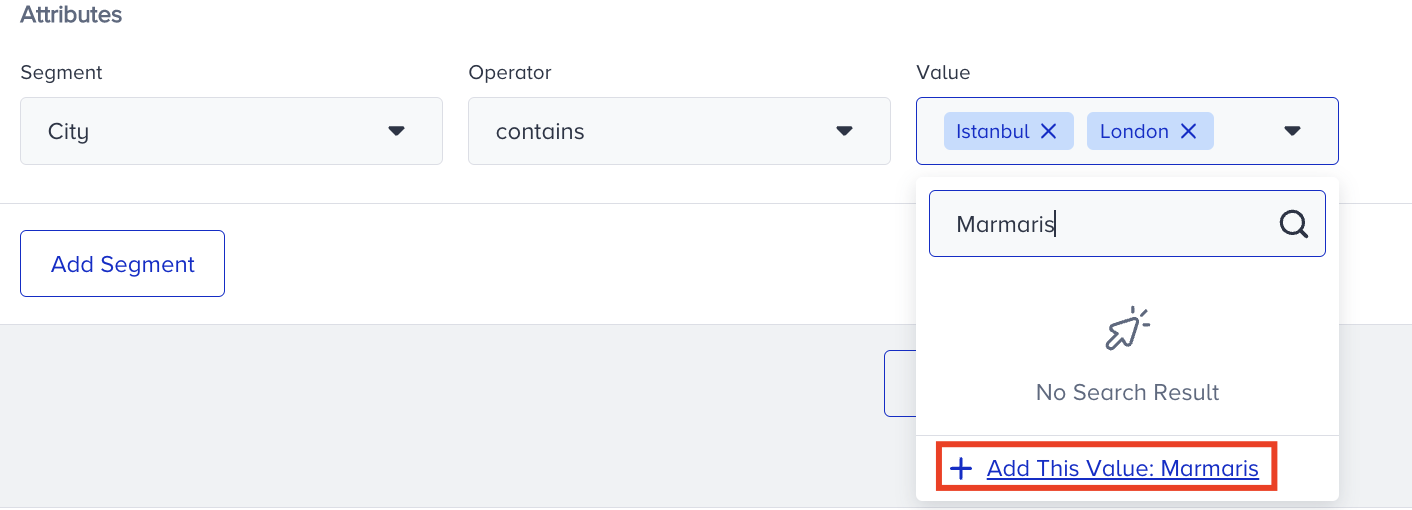
You can also add any new value that doesn't exist for an attribute in the dropdown. When you start to type, the Create option appears.
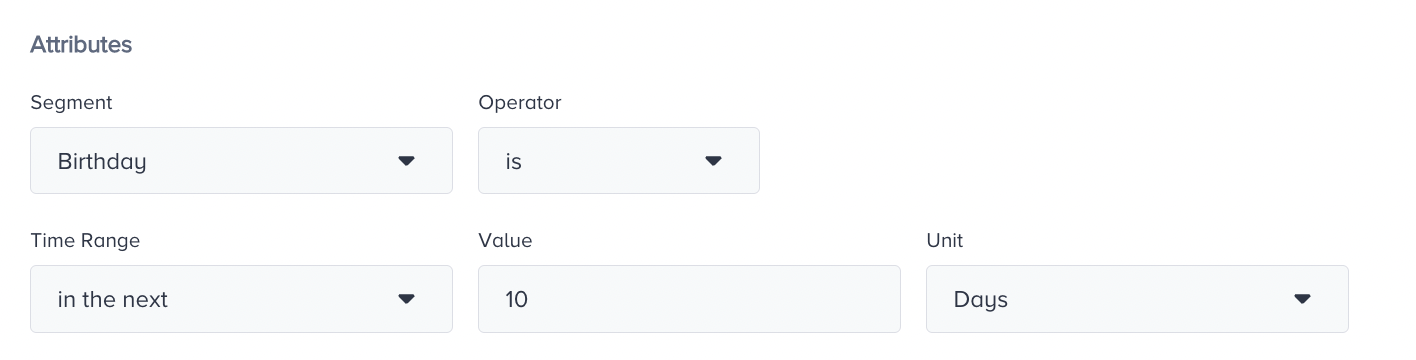
If the attribute is birthday, which has the DateTime data type, you can now have the following operators:
is
is not
is empty
is not empty
As for the time range, you can have the following options:
in last (specify days, weeks, and months)
in the next (specify days, weeks, and months)
on date (date picker)
between (date range)
after (date picker)
before (date picker)
When you click +Add an Event Parameter, you can also apply multiple value selection, which enables you to select more than one value to filter users in one box. You can easily choose them from the value dropdown menu.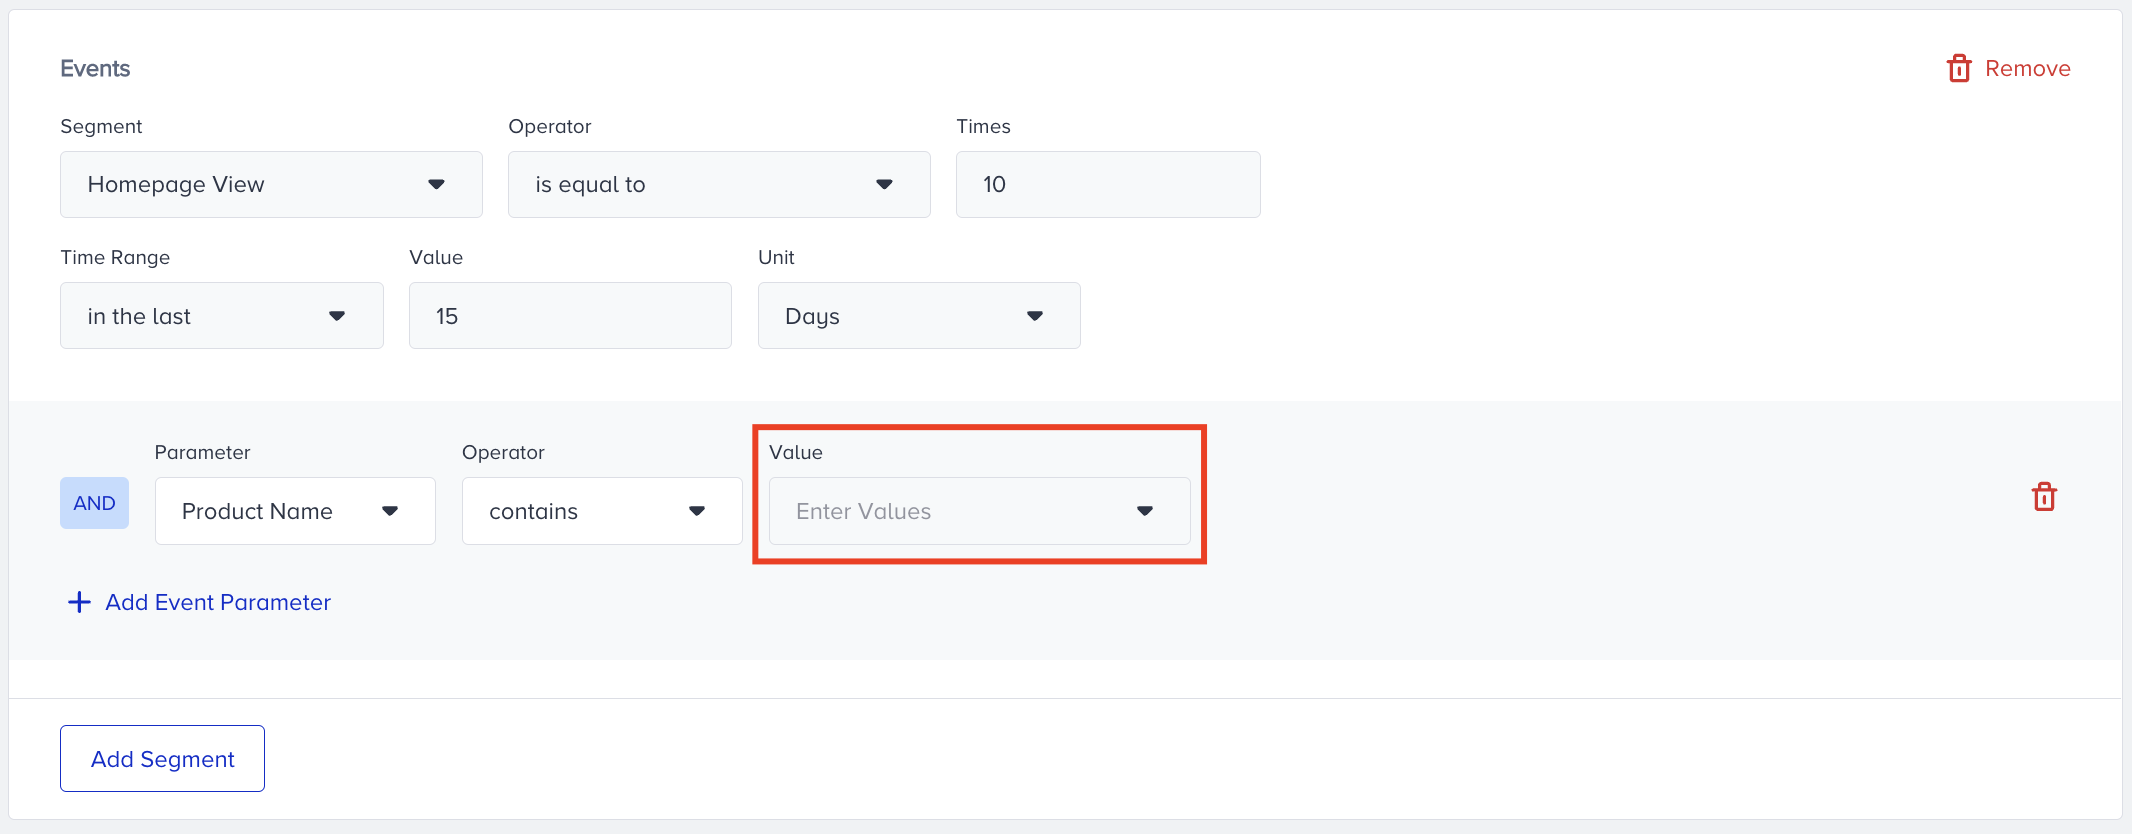
For example, if you want to target a cap and a beanie for the product name, you do not need to add event parameters separately; instead, you can keep them together.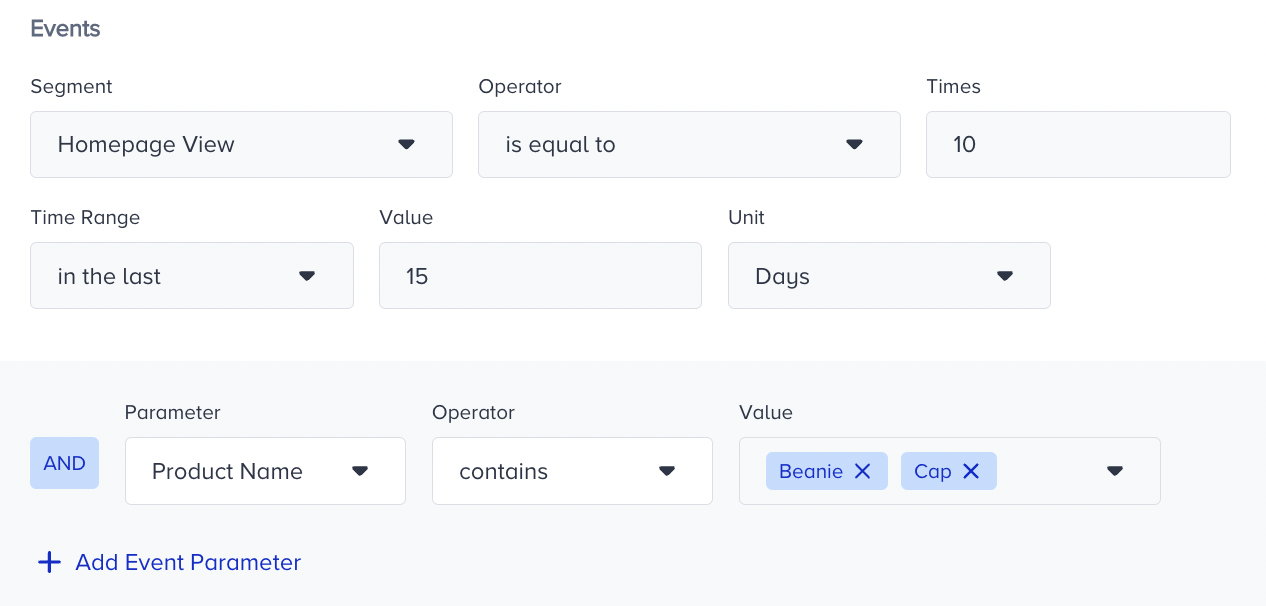
You can use this feature to select all types of data except for date and boolean for event parameters.
Note that when you delete the segment, the campaigns in which your segment is used will not be affected until that campaign is rescheduled.
You can create up to three condition groups and use up to 15 conditions per group.
Edit a Dynamic Segment
If you want to update your Dynamic Segment, you can edit it:
Click the Edit option against the Dynamic Segment you want to change.

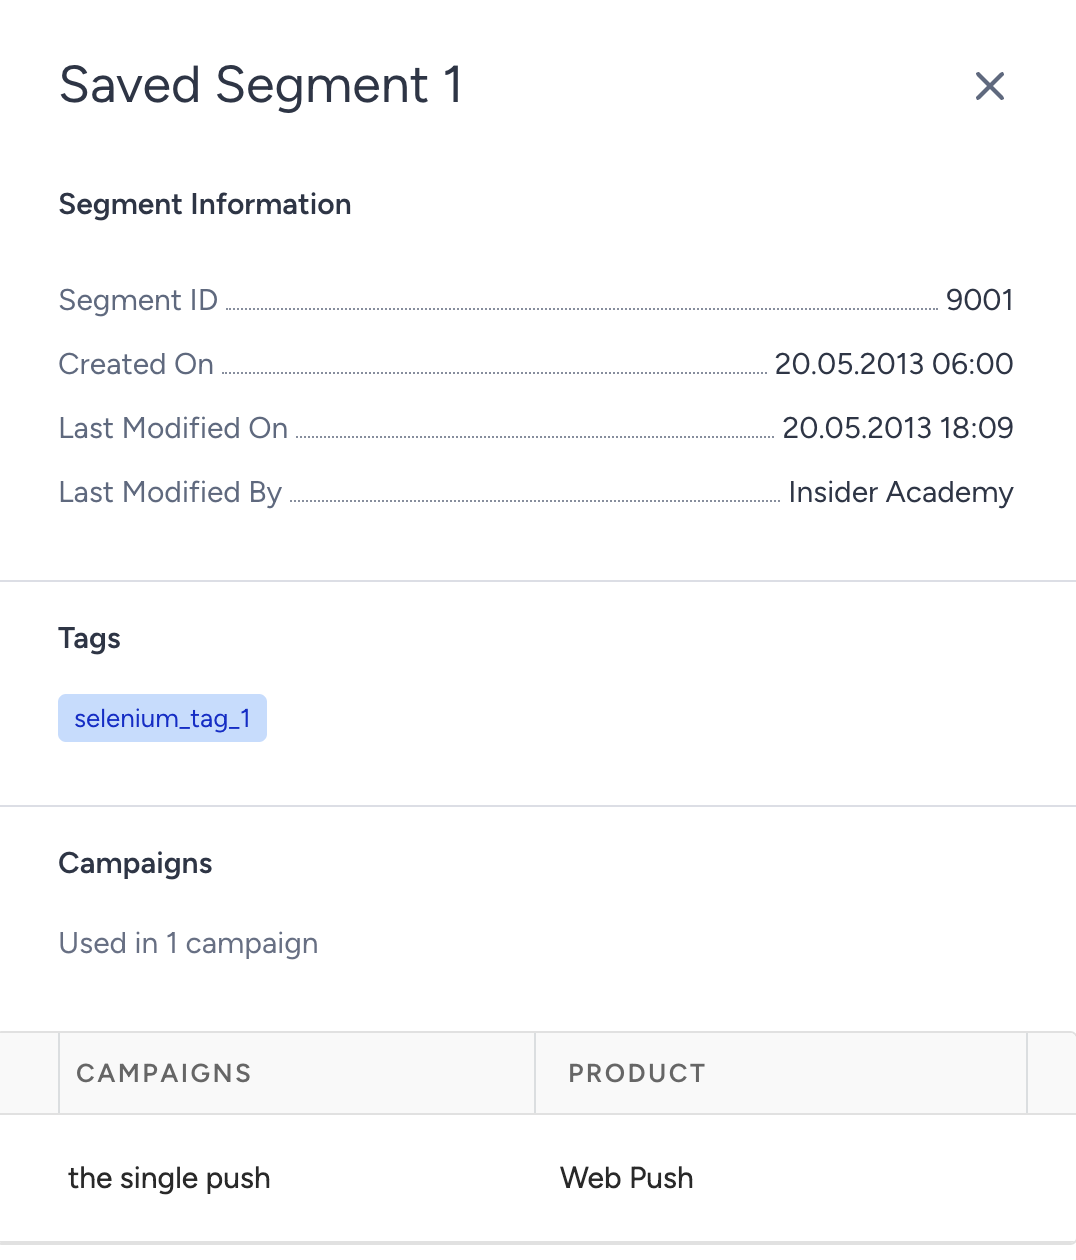
If the Dynamic Segment you want to edit is used in a campaign, you will see information about it under the Summary tab, along with its details.
Click the Add Segment or Add Segment Group to edit your existing segment, and click the Save button.
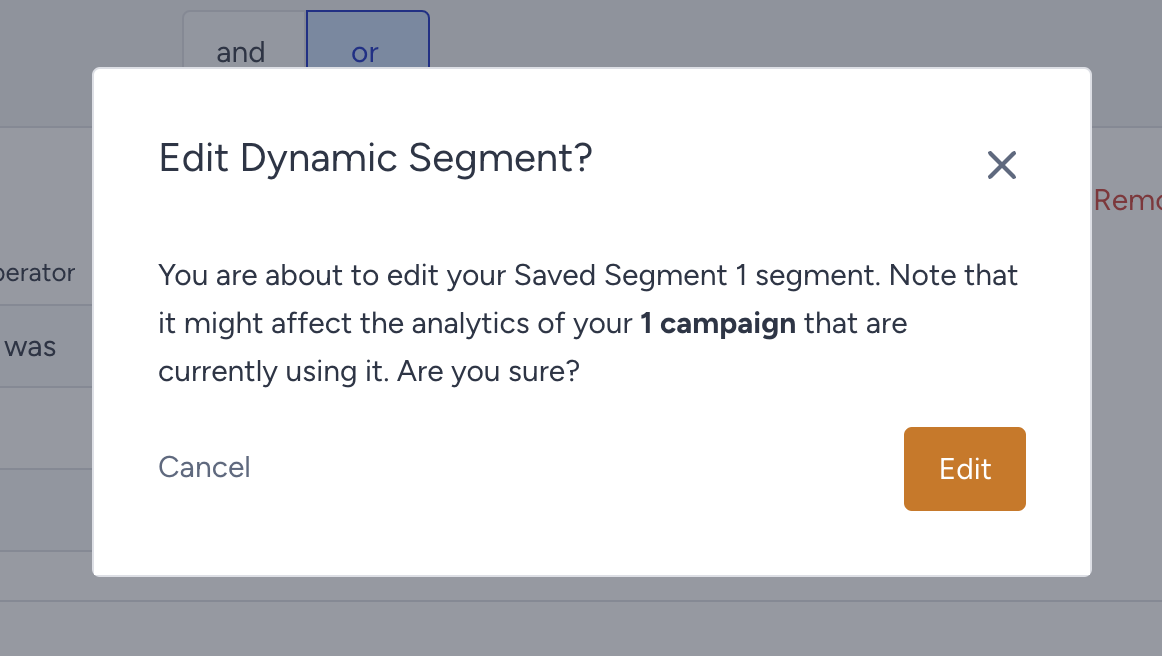
To proceed, you will be prompted with a warning about the campaigns using the respective segment.
When you click the Details button next to the Dynamic Segment, you can see the last modification date and user information.
Export a Dynamic Segment
You can export your saved Dynamic Segments in .csv format.
1. Click the Export button against the Dynamic Segment you want to export on the Dynamic Segments listing page.
You can directly export your dynamic segment without including user attributes. If you choose to do so, you will receive your CSV export with identifiers (Email, phone number, profile ID), respectively.
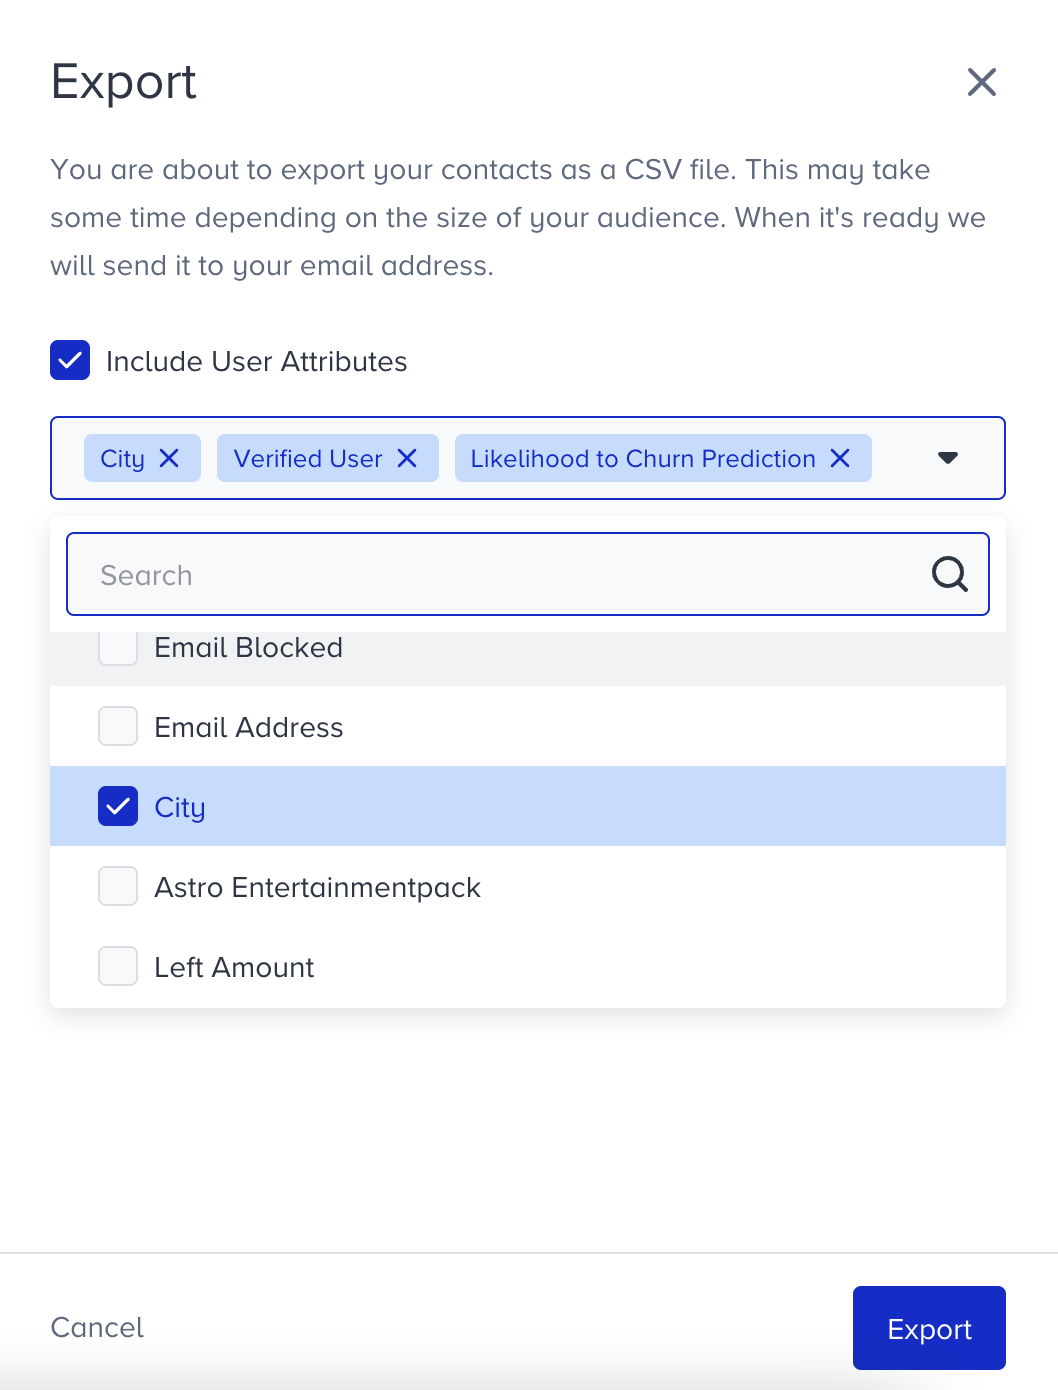
You can also get exports by selecting different user attributes. Once you choose your user attributes from the dropdown list and click the Export button, you will see your chosen user attributes appended to your CSV file.
You can include a maximum of 20 additional attributes in one export file.
Dynamic Segments work independently. If the Dynamic Segment as a Filter feature is not enabled for your account, you cannot combine them with other saved segments or filters.
Send Dynamic Segments to Remarketing Channels
You can send Dynamic Segments to the following ad platforms. Refer to the articles below to see the details:
All remarketing segments undergo an update during the nightly sync job.