Suggested readings: Transactional Journeys, On API Call Starter
The On API Call starter is the entry point for transactional journeys triggered directly via an API request. It allows backend systems to explicitly enter users into a transactional journey and send messages in real time.
This starter is designed for use cases where message delivery must happen immediately after a system action, without relying on behavioral data or segmentation inside Architect.
Each API request is treated as an explicit instruction to start a journey instance.
Step 1: Select the starter on canvas
When creating a transactional journey, the On API Call is selected as the starter on the canvas.
The starter configuration area is used to define and validate the payload structure that will be sent when the journey is triggered.

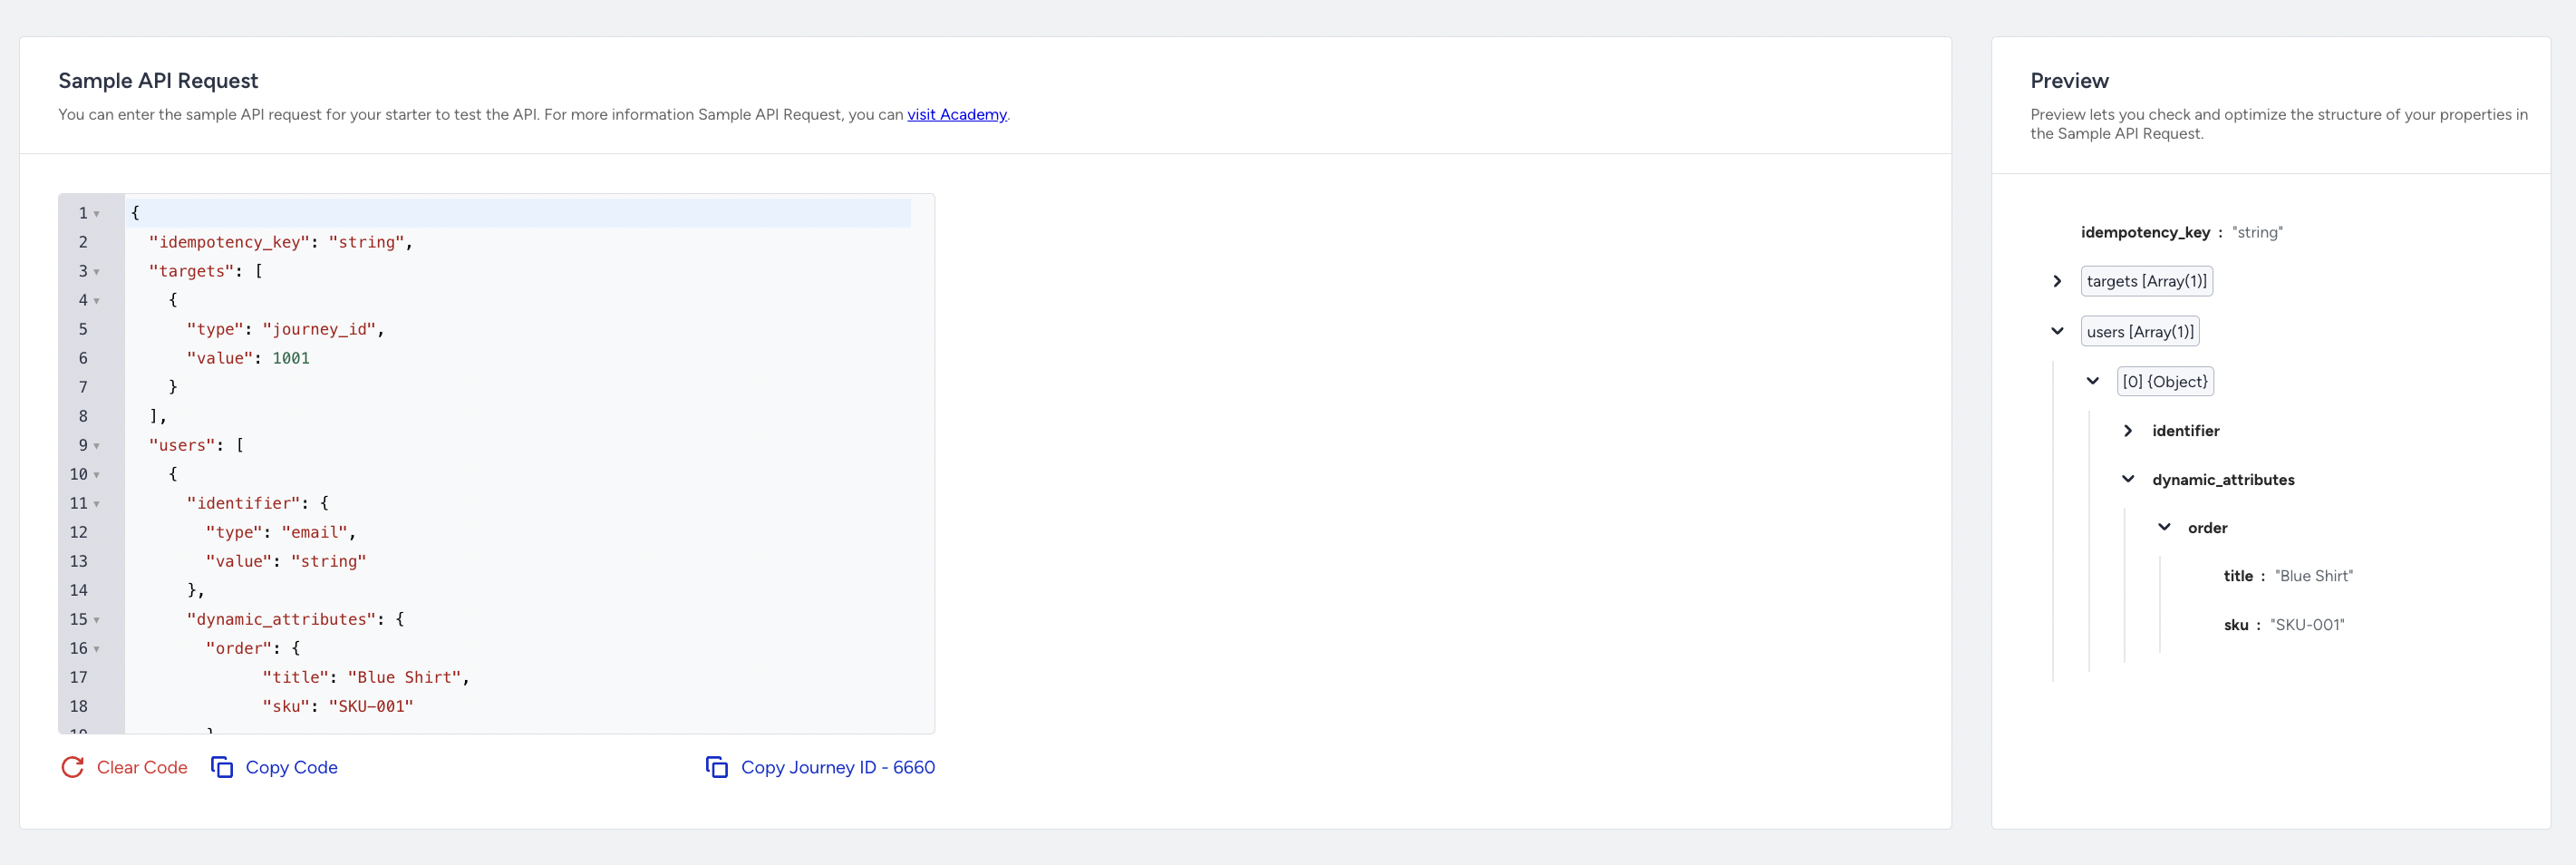
Step 2: Paste your payload
The payload added to the starter acts as a validation schema. It is used to verify that incoming API requests match the expected structure once the journey is active.
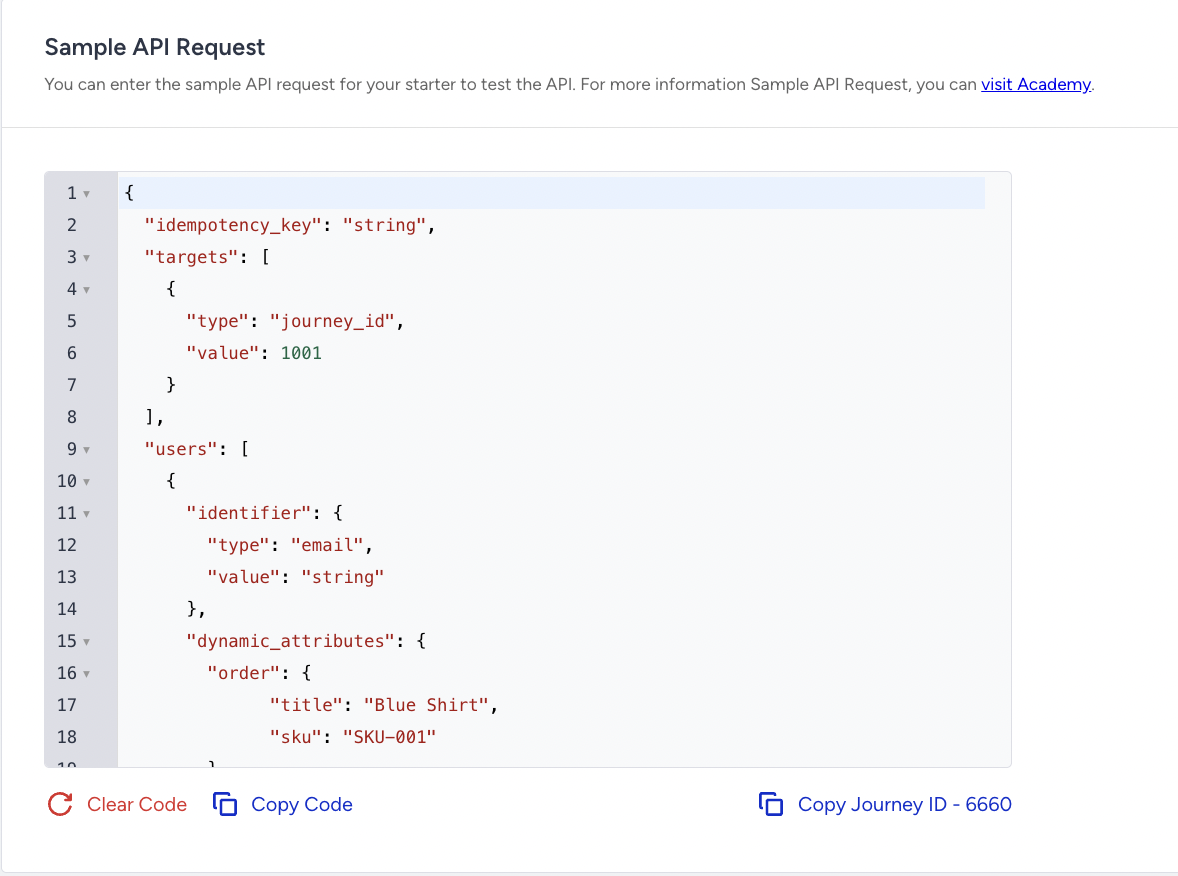
The payload is validated for:
Valid JSON format
Presence of an idempotency key
Target journey definition
Target user structure
Dynamic attributes
If any required part of the payload is missing or invalid, the API request is rejected, and users do not enter the journey.
Dynamic attributes and dynamic content
Dynamic attributes defined in the payload are exposed as Dynamic Content within channel elements.
These attributes are used to personalize transactional messages, such as including order details, user information, or action-specific data.
Dynamic attributes must be explicitly whitelisted on the starter. Only whitelisted attributes can be used inside Email or SMS content. If a dynamic attribute is not whitelisted on the starter, it cannot be referenced in channel elements, even if it is sent in the API request.
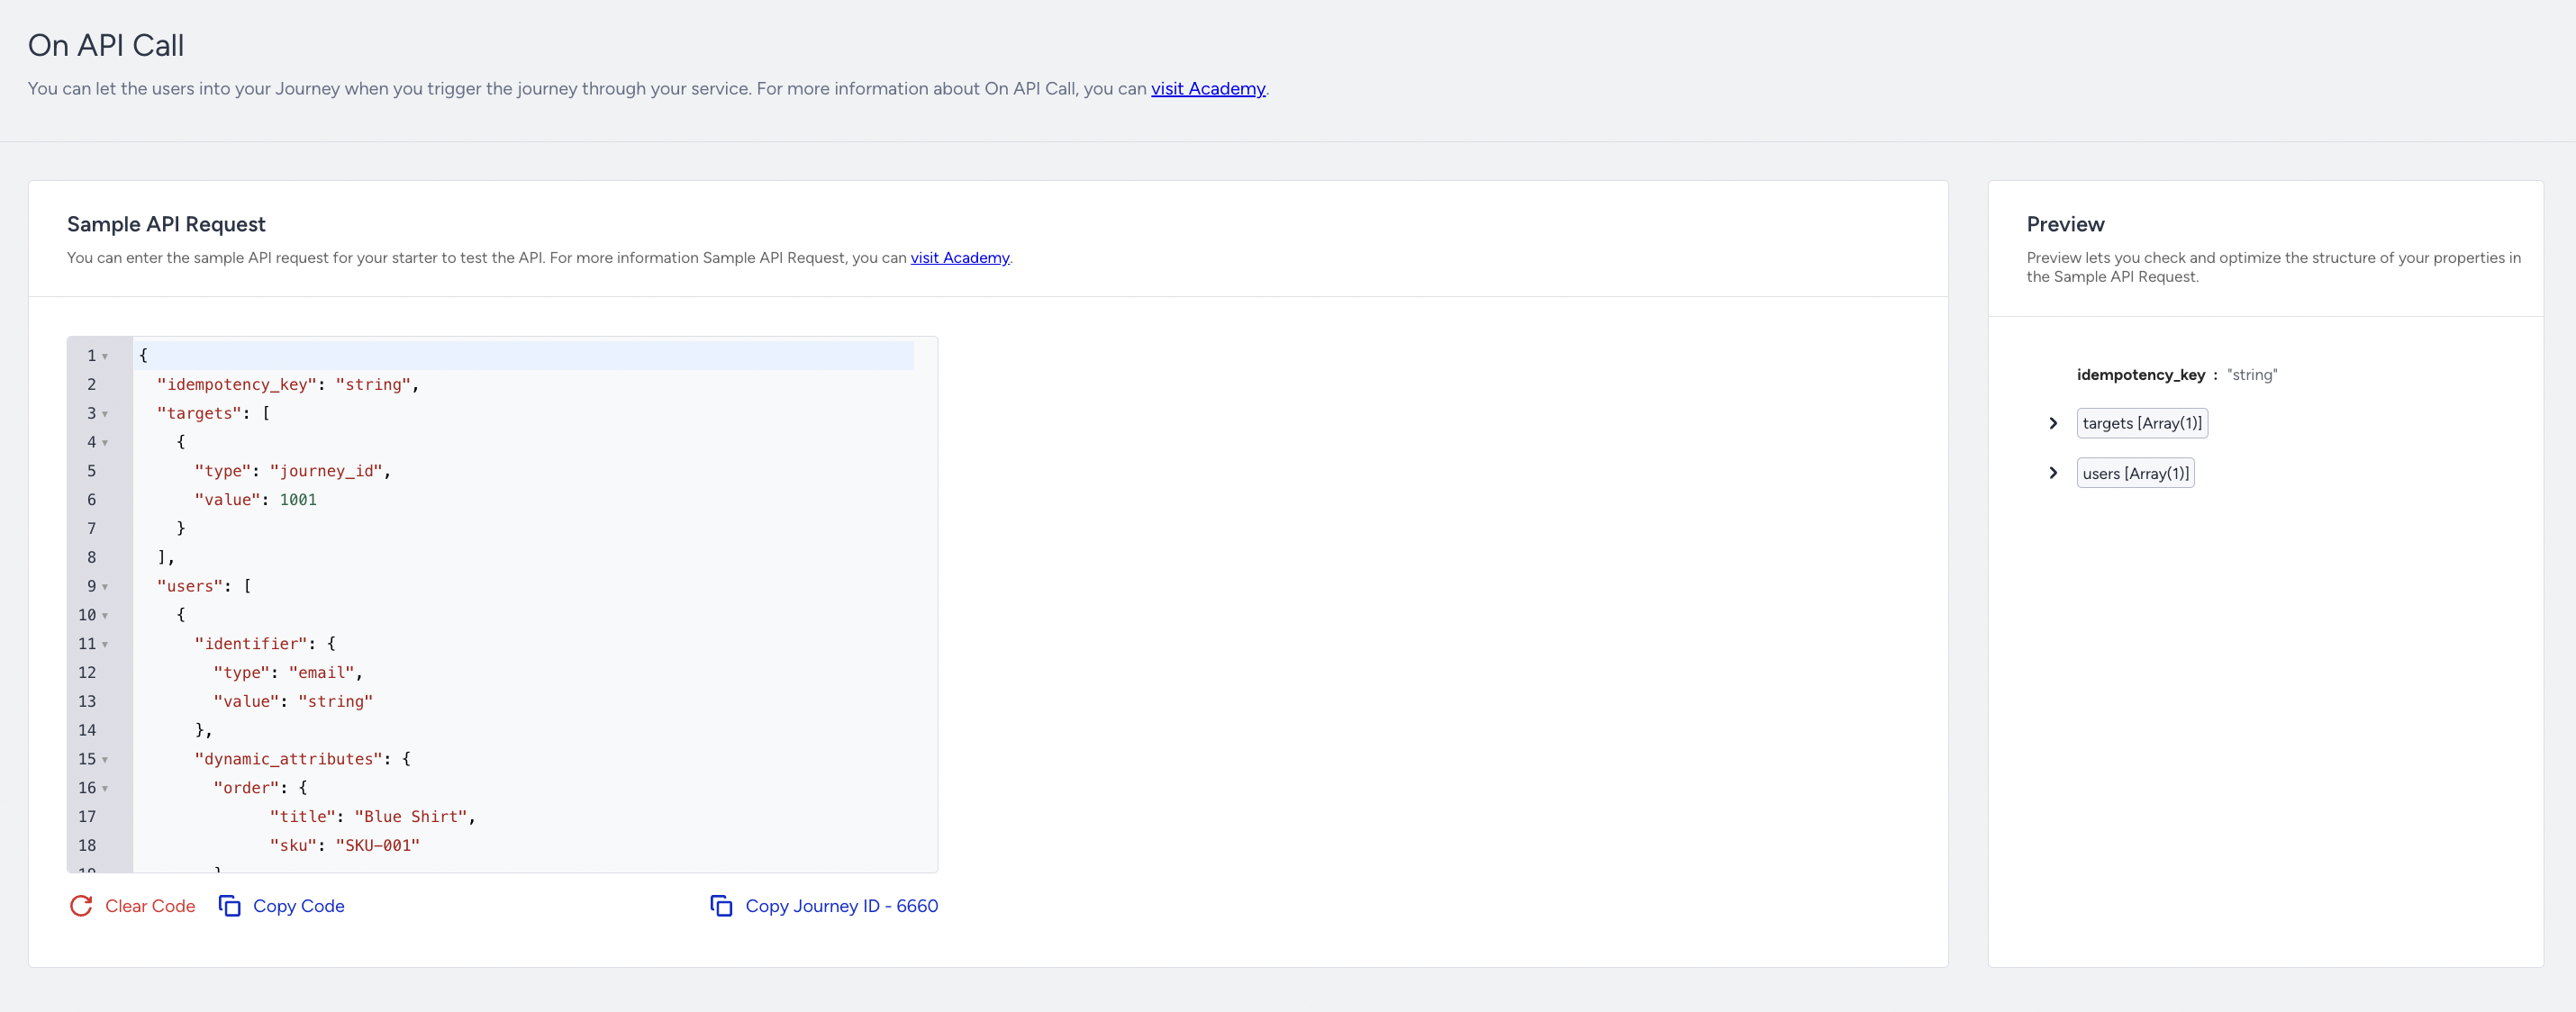
Preview dynamic content
The Preview section lets you see how dynamic content will be rendered within channel elements.
The Preview option helps confirm attribute names, placeholder resolution, and message structure. It does not trigger the journey or send messages.
Step 3: Copy journey ID
Each transactional journey has a unique Journey ID. You must copy this Journey ID and include it in your API requests to target the correct journey.
If a journey is changed, duplicated, or relaunched, a new Journey ID may be generated. In such cases, API requests must be updated with the new Journey ID to use it on your actual API request.
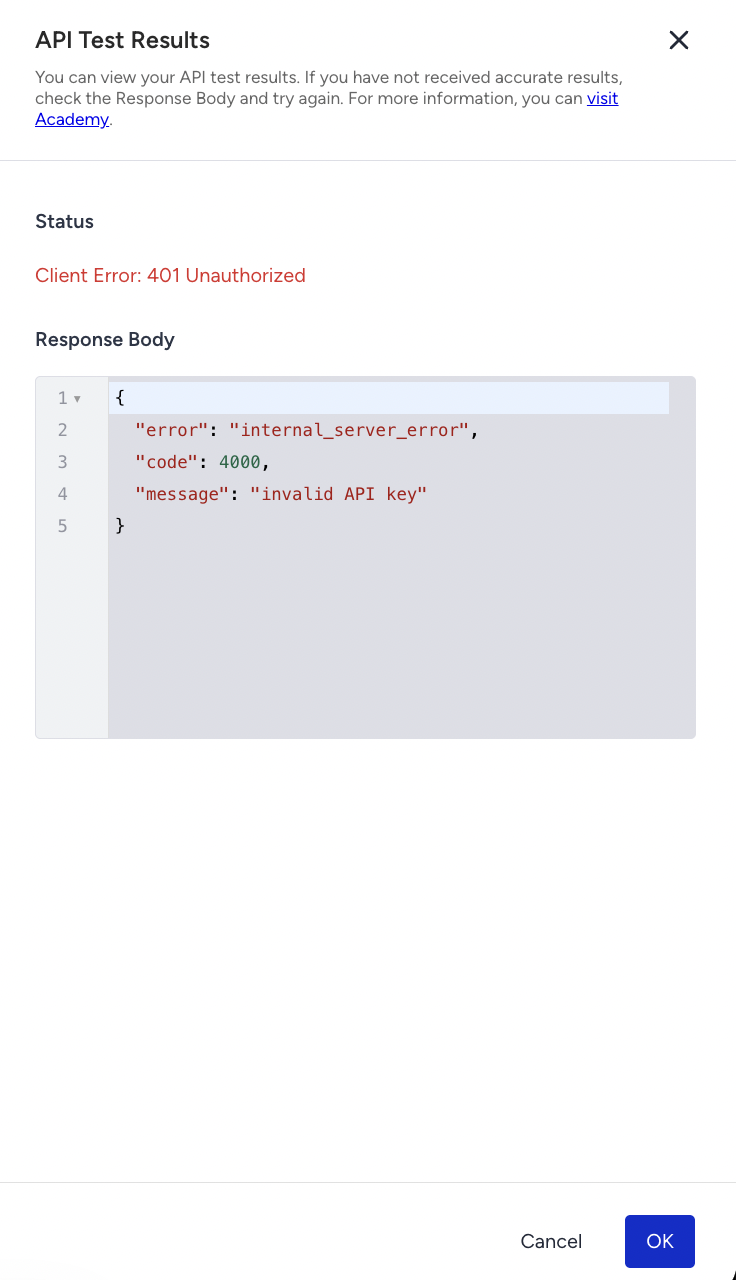
Step 4: Test API
The Test API option allows you to test the payload structure before sending real requests. It does not add users to the journey or send messages to end users.
The Test API:
Validates the request payload.
Returns success or failure responses.
Indicates missing or invalid fields.
Surfaces authorization and validation errors.