Now you can complete this integration on Insider One's new onboarding center. Refer to Insider Onboarding Center for further details.
You cannot make any changes to External Platform Integrations without having either an Administrator or an Editor with PII access in InOne. Refer to User Roles for further information.
Safari 17 introduces a new protection service that blocks known third-party trackers, including Google Tag Manager (GTM). This is a browser-level operation that cannot be resolved on Insider One's side. To allow Google Tag Manager and enable the Insider Tag, click the "Reload with Reduced Protections" button in the browser pop-up to disable protection.
If you integrate the Insider Tag via GTM, Safari’s new service will block the tag from loading initially unless the user reloads the web page with reduced protections. Alternatively, you can directly add the Insider Tag script to the <head></head> tag of your web page without using the Google Tag Manager.
This integration allows you to integrate Insider Tag on your website with ease via Google Tag Manager (GTM).
Following these details will provide you with more details about the integration:
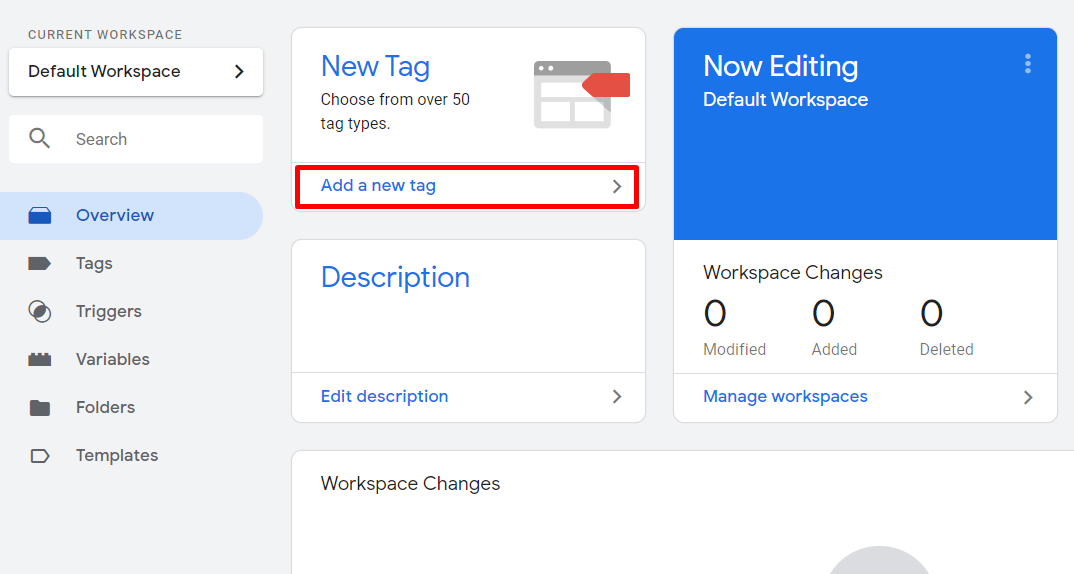
Add a new tag
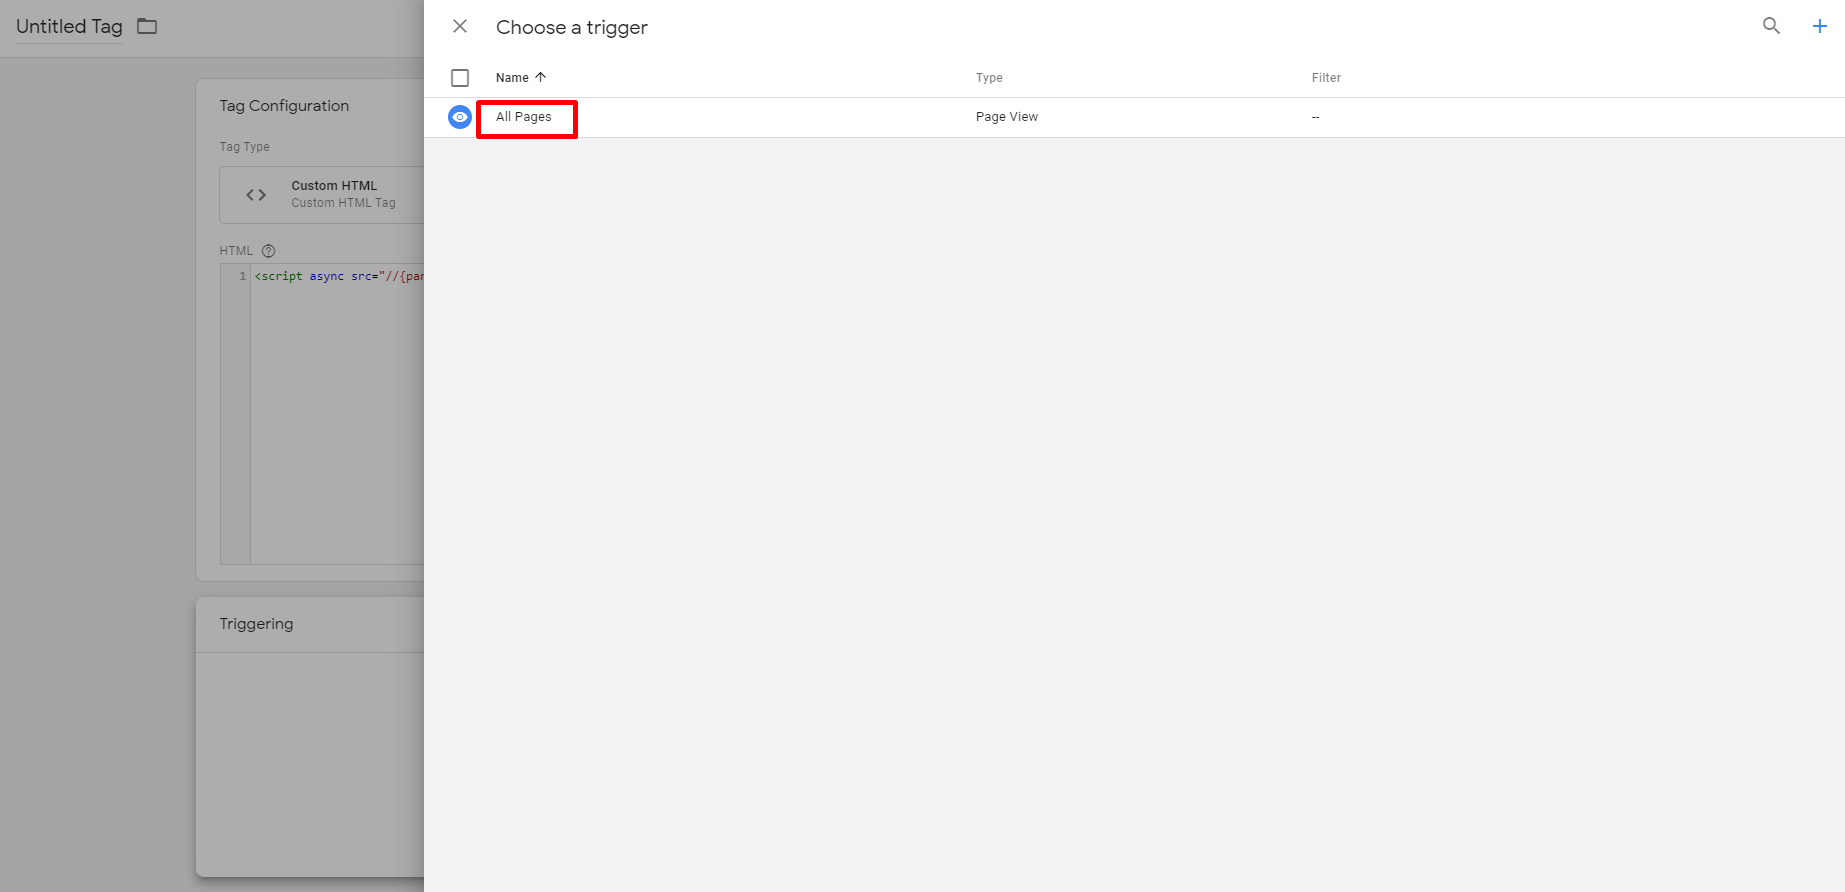
Log in to your Google Tag Manager (GTM) account and click Add a new tag.
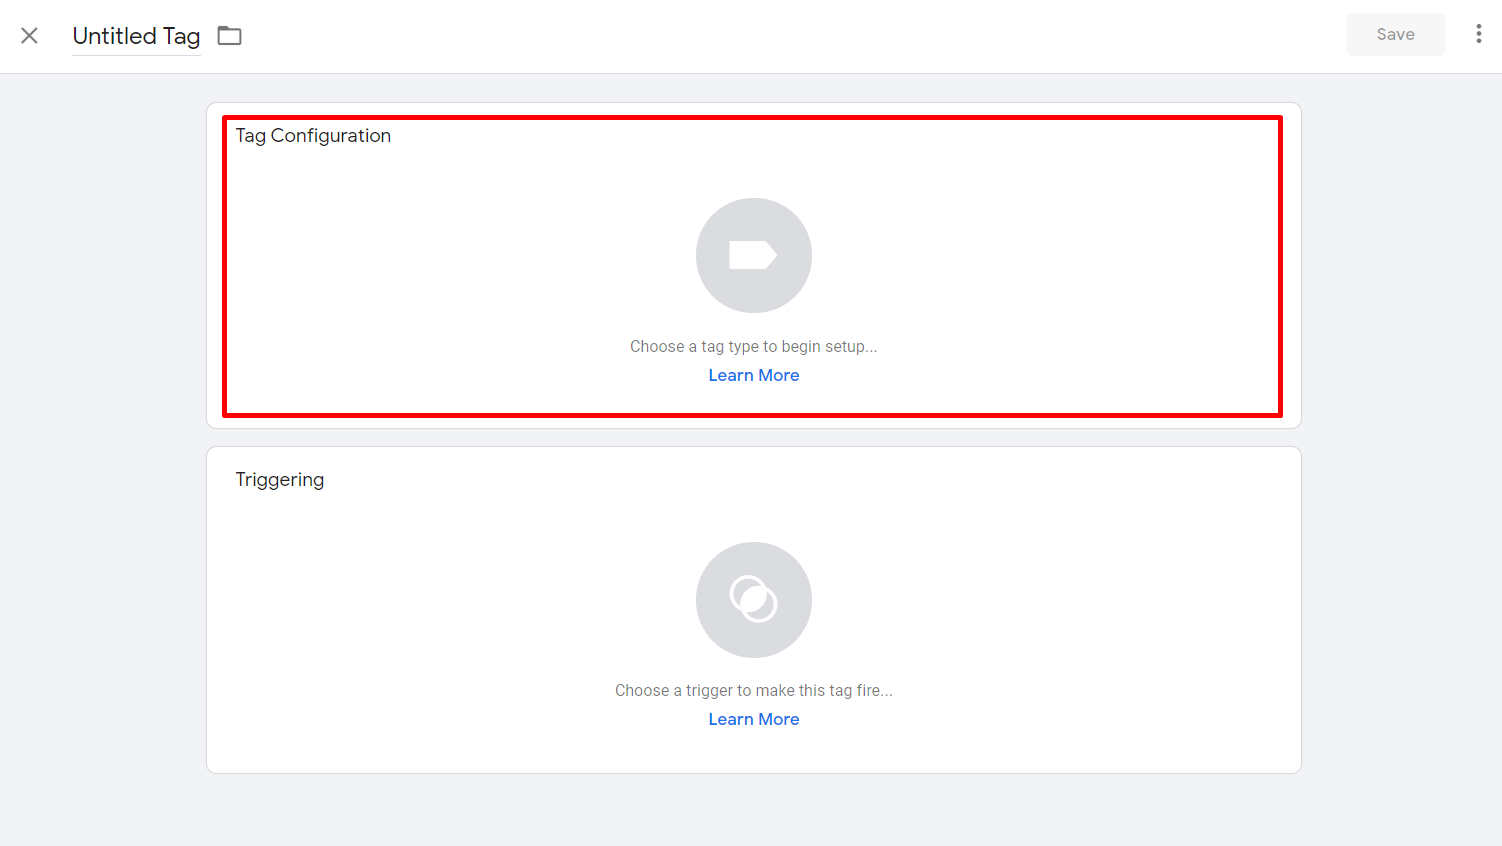
Configure your tag
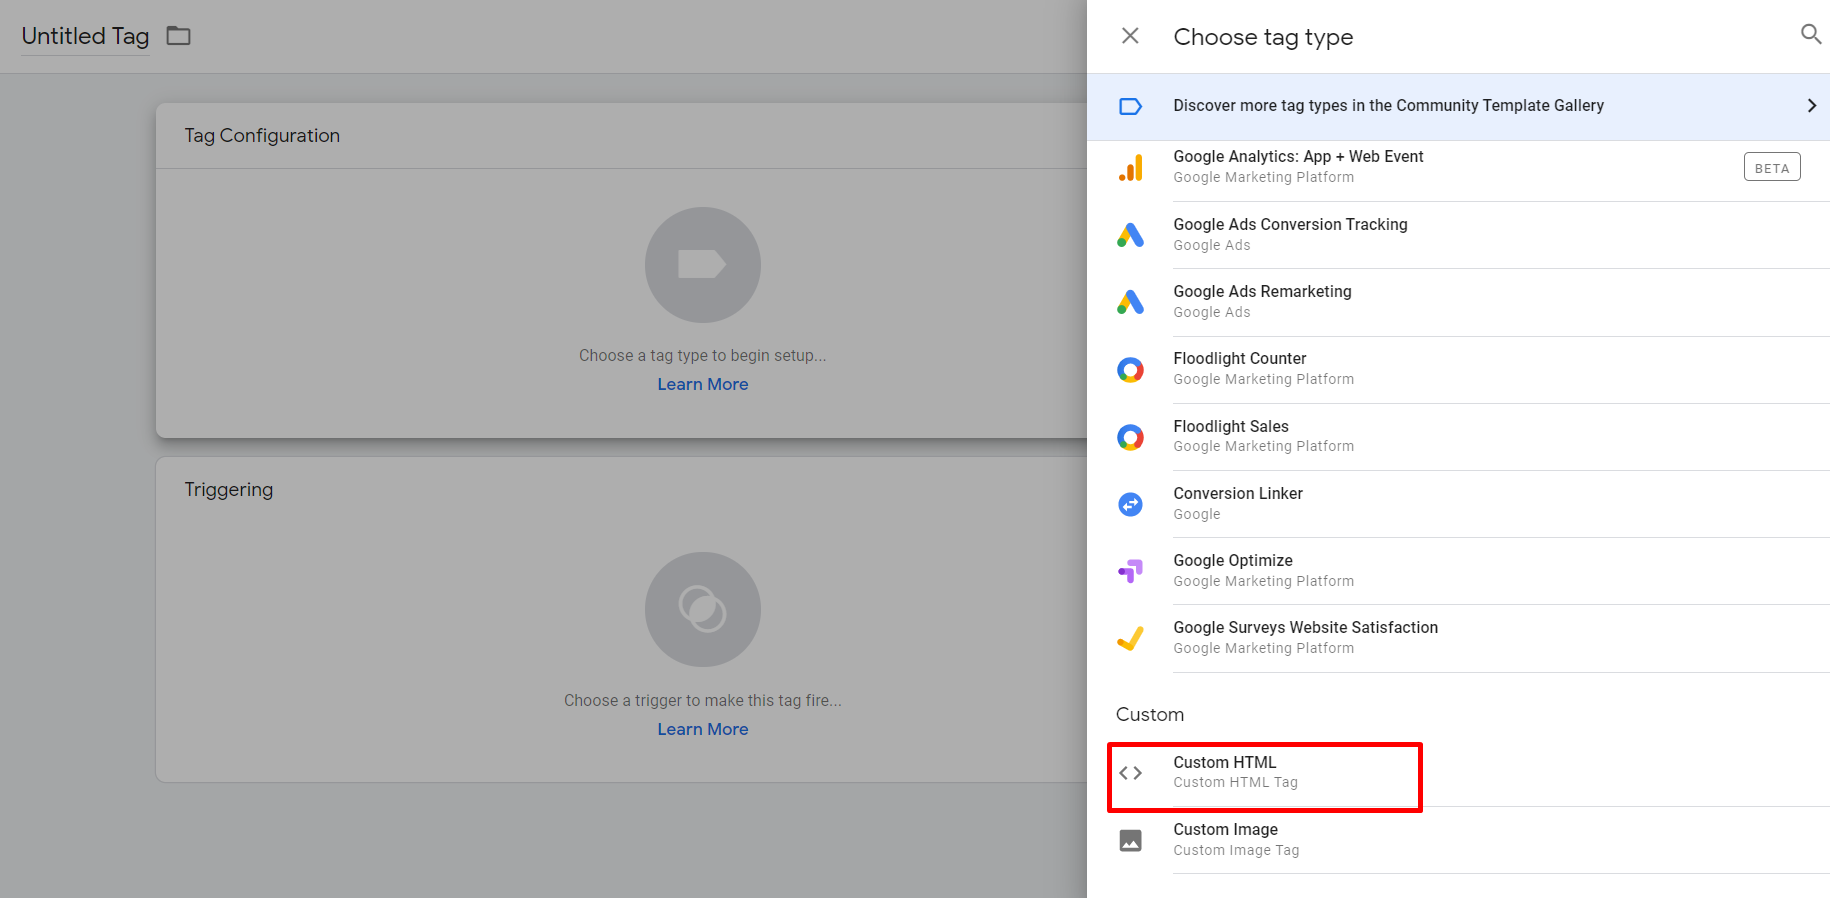
Click Tag Configuration to configure your tag. In the Choose Tag Type window, select Custom HTML.
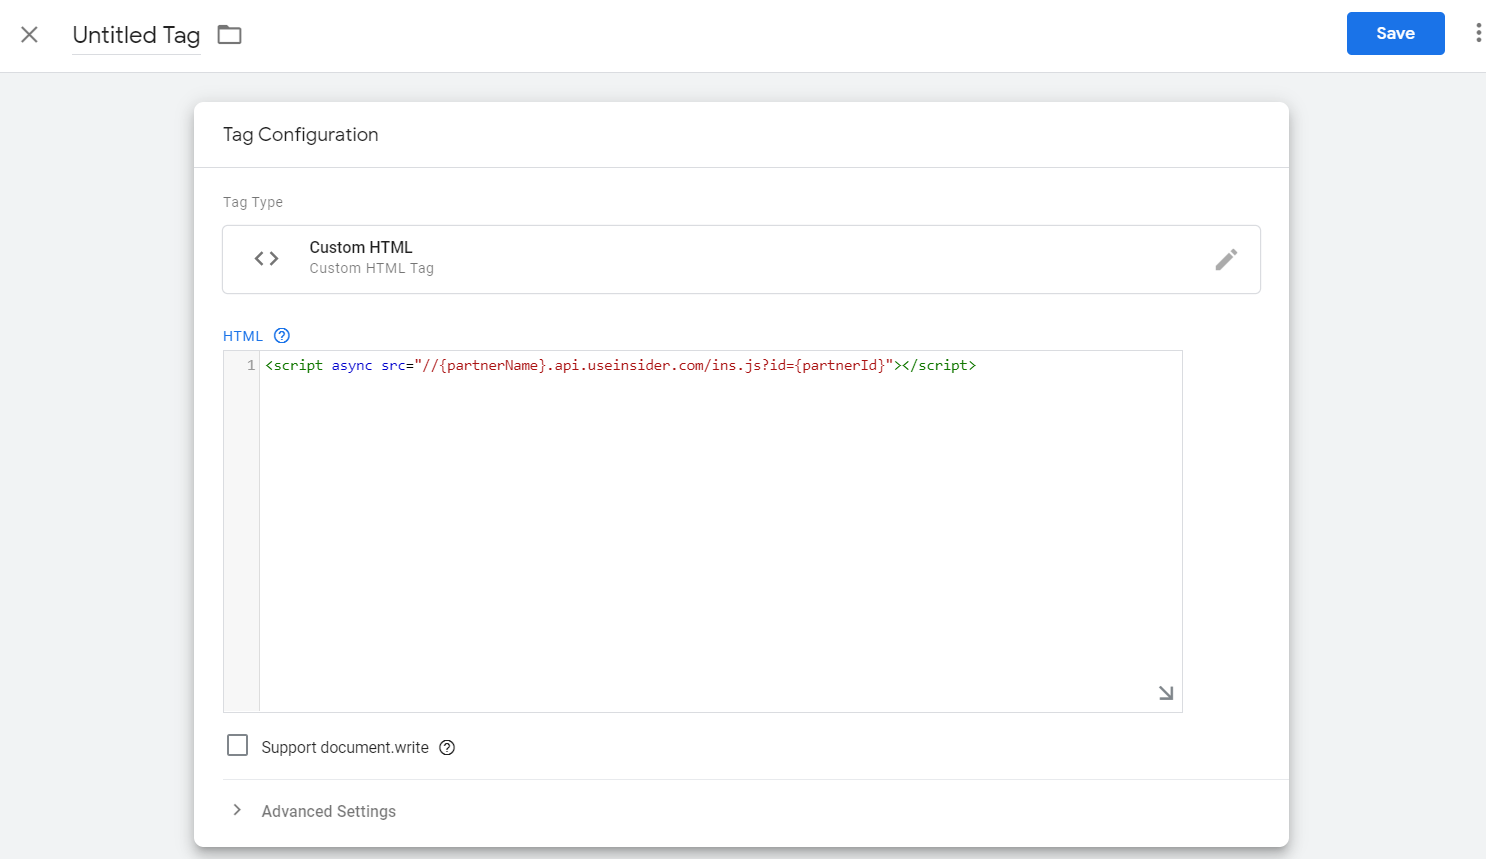
Copy and paste the Insider Tag in the HTML field.
Click Triggering to configure triggers and select All Pages.
NOTE: Avoid adding this script to pages containing sensitive information (e.g., payment pages that contain credit card information). If there is another page where purchased product details can be captured, add this script to that page instead.
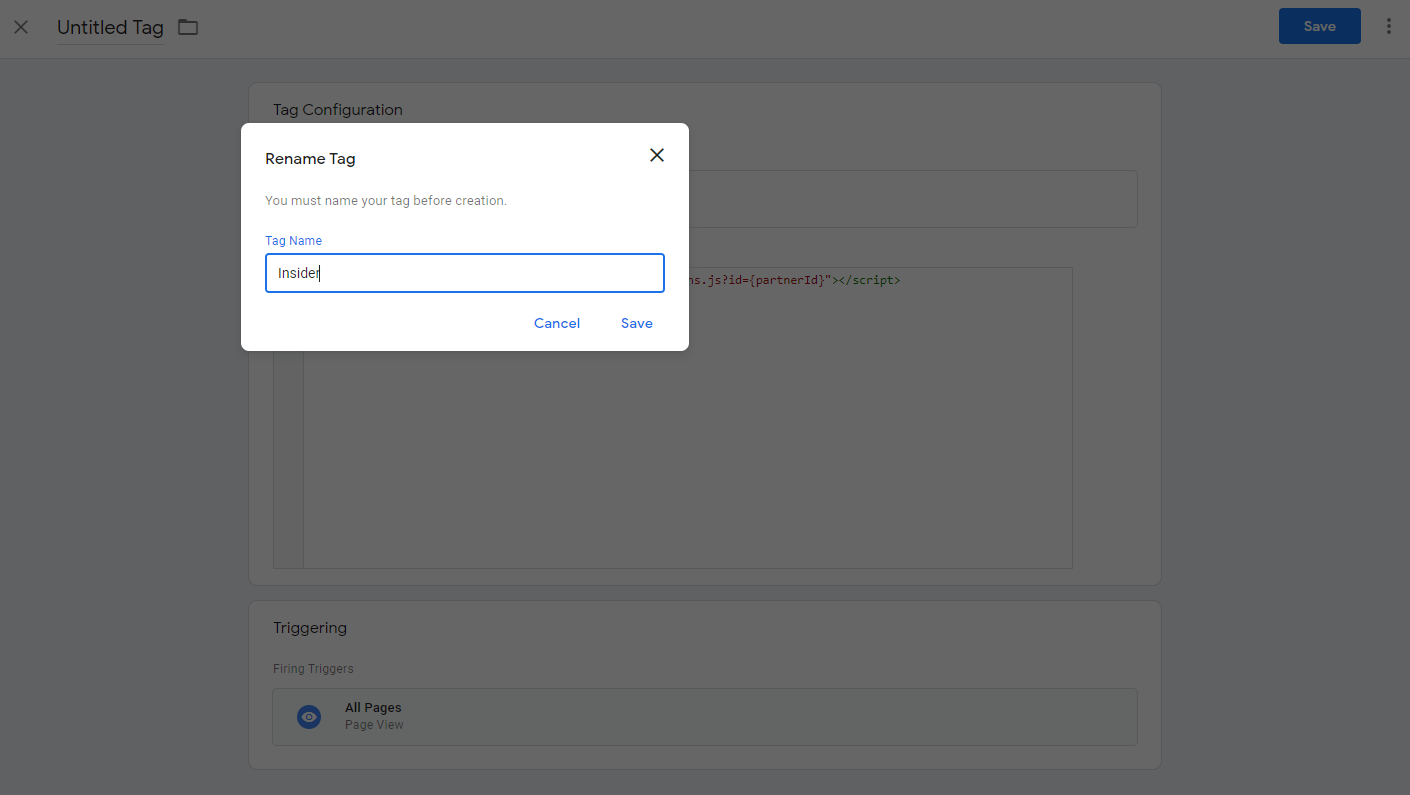
Rename your tag and save it. Save it again on the main screen, then publish the final version on your account.
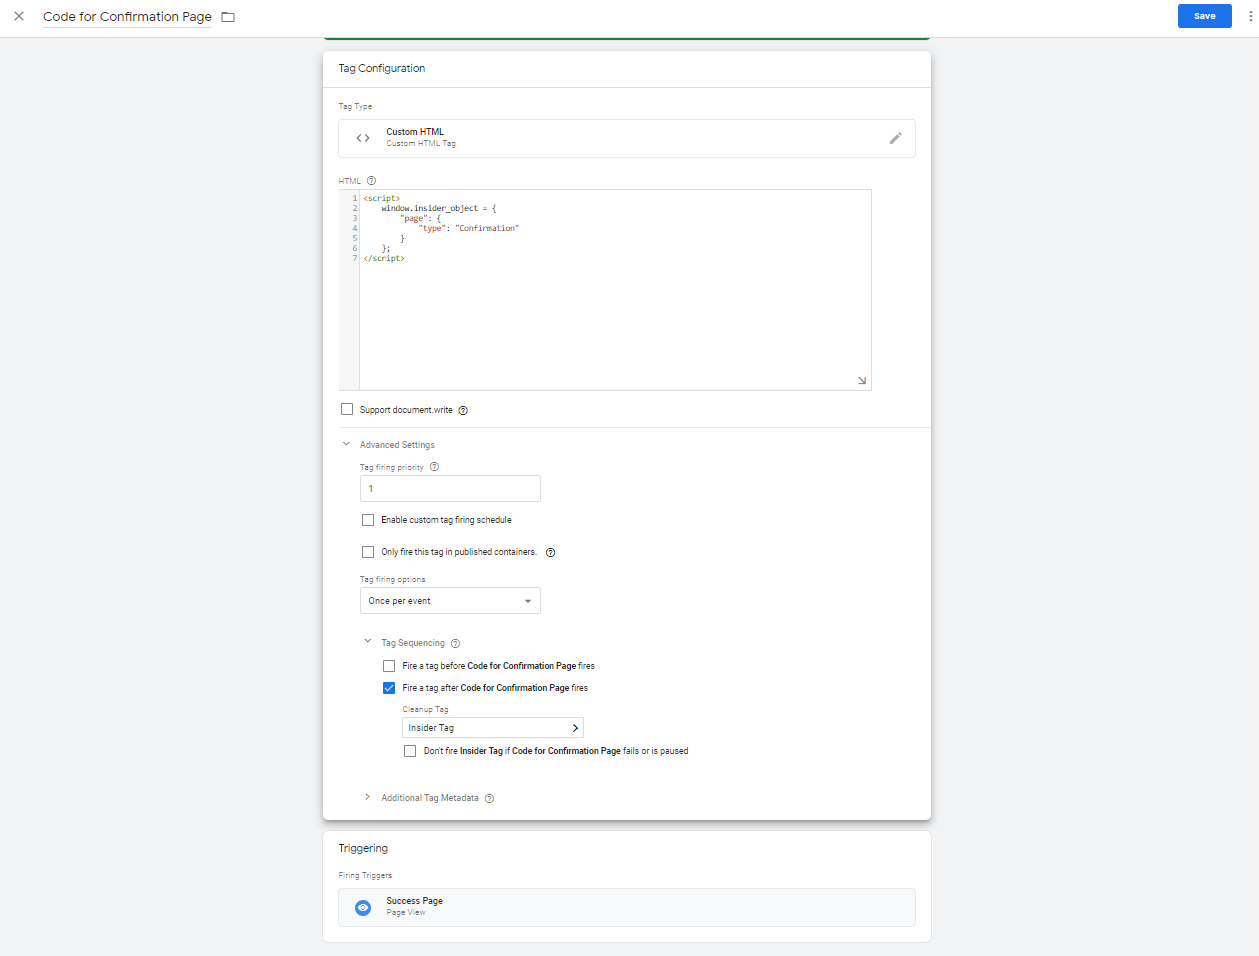
Code for Confirmation Page
After completing a transaction, your customers are directed to a confirmation or success page.
Use the following steps to create a tag for your confirmation page. Add this object, with the stated property, to your confirmation page before the Insider Tag.
1. Add a new tag
From your Google Tag Manager (GTM) account, click on Add a new tag.

2. Configure your tag
Click Tag Configuration to configure your tag. In the Choose tag type window, select Custom HTML.


Copy the code for the confirmation page below and paste it into the HTML field.
<script>
window.insider_object = window.insider_object || {};
window.insider_object.page = {
"type" = "Confirmation";
}
</script>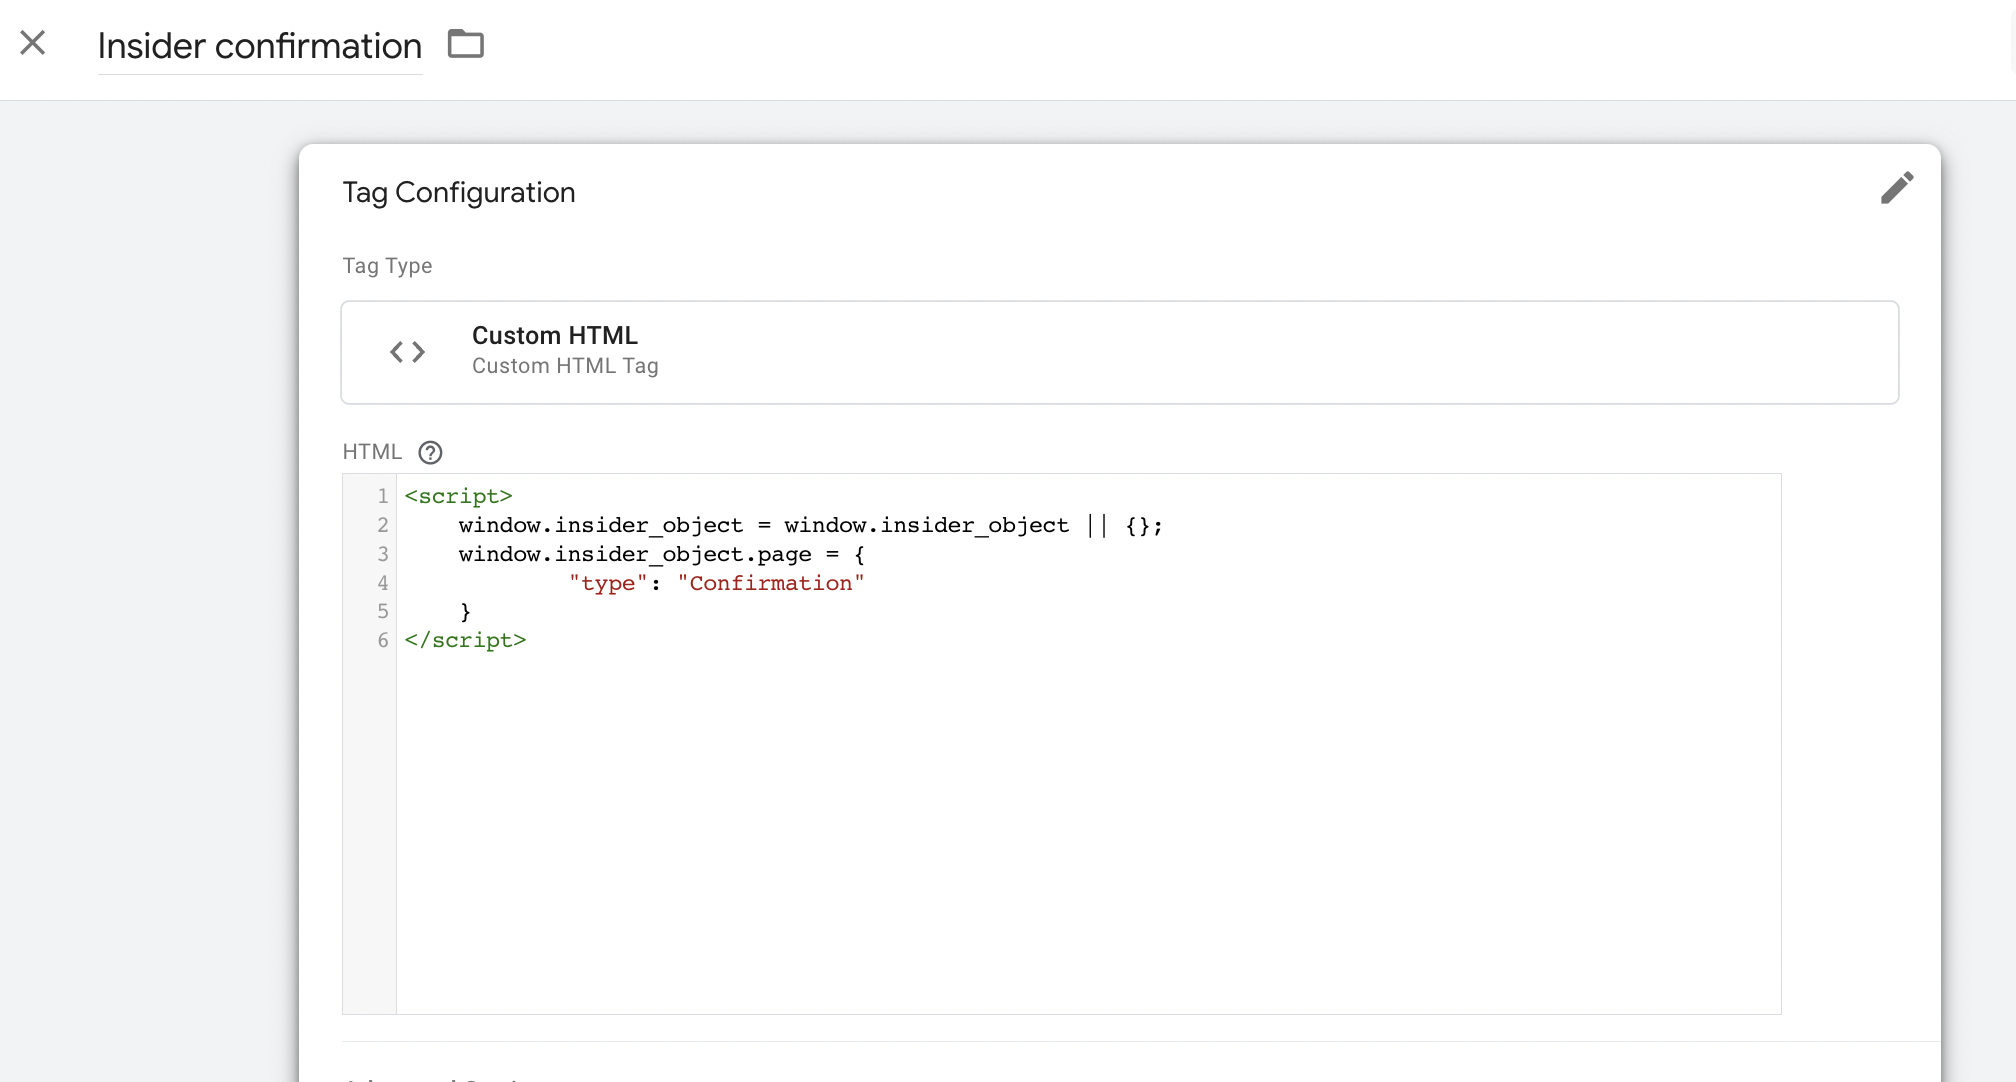
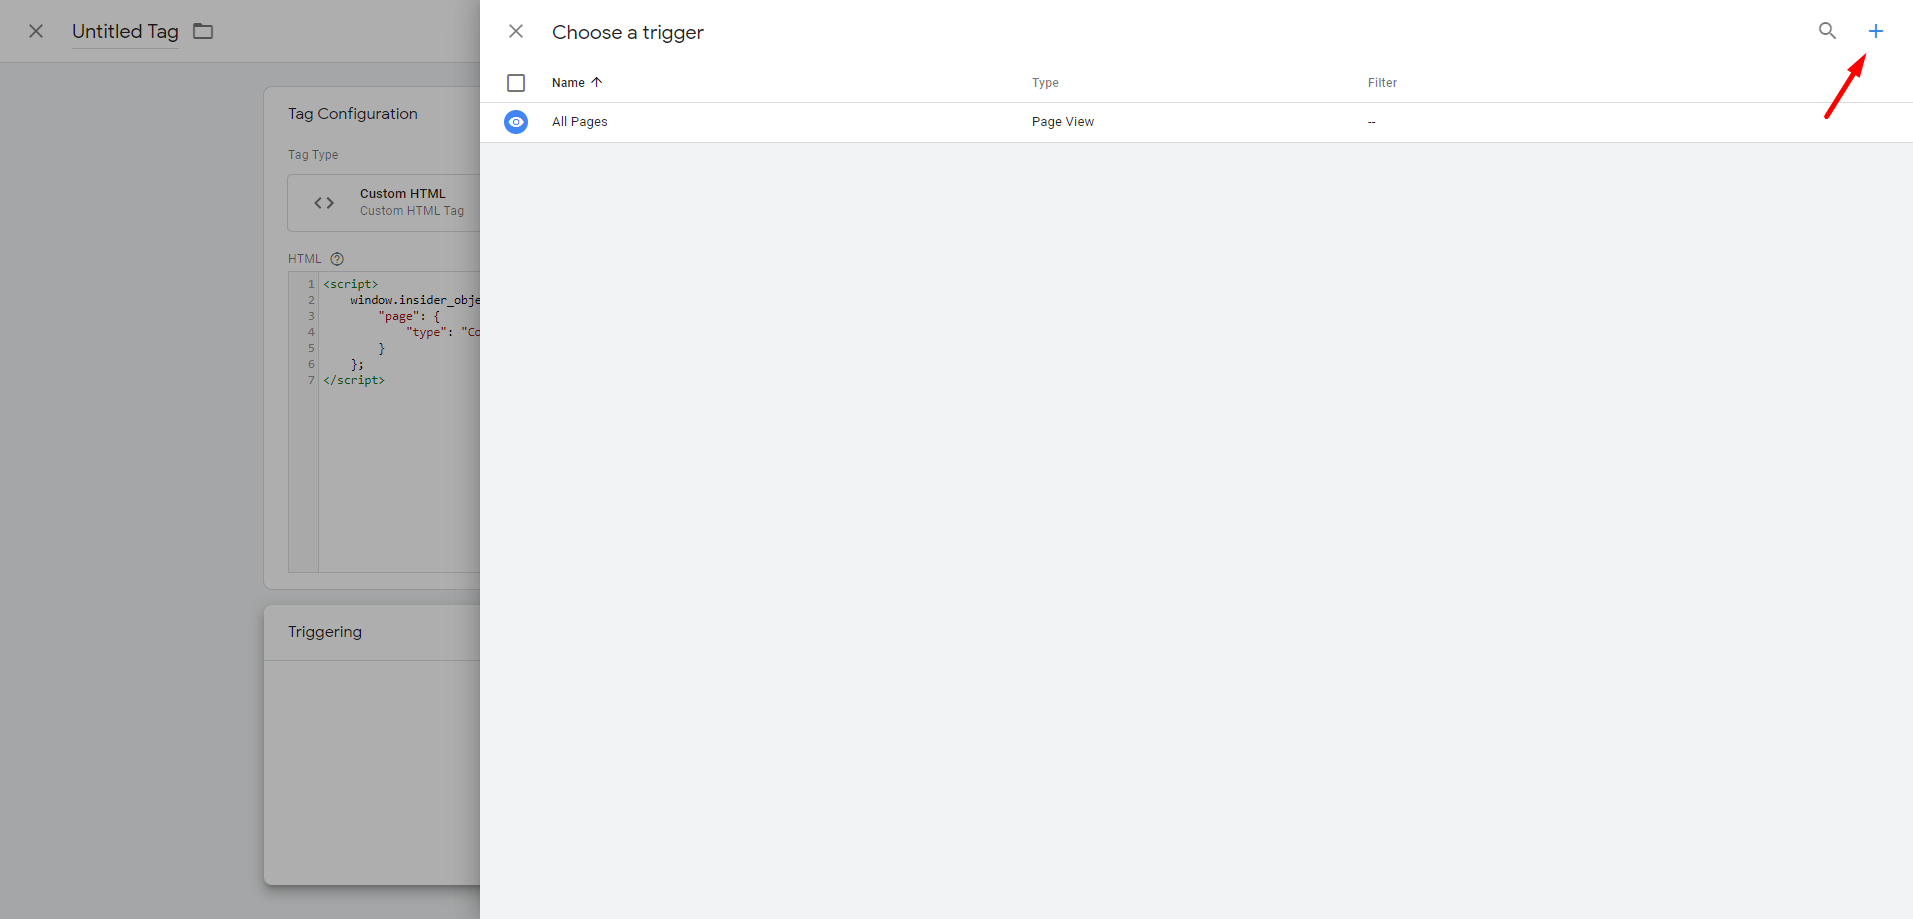
Click Triggering to configure triggers and select Success Page. Rename your tag and save it. Save it again on the main screen, then publish the final version on your account.
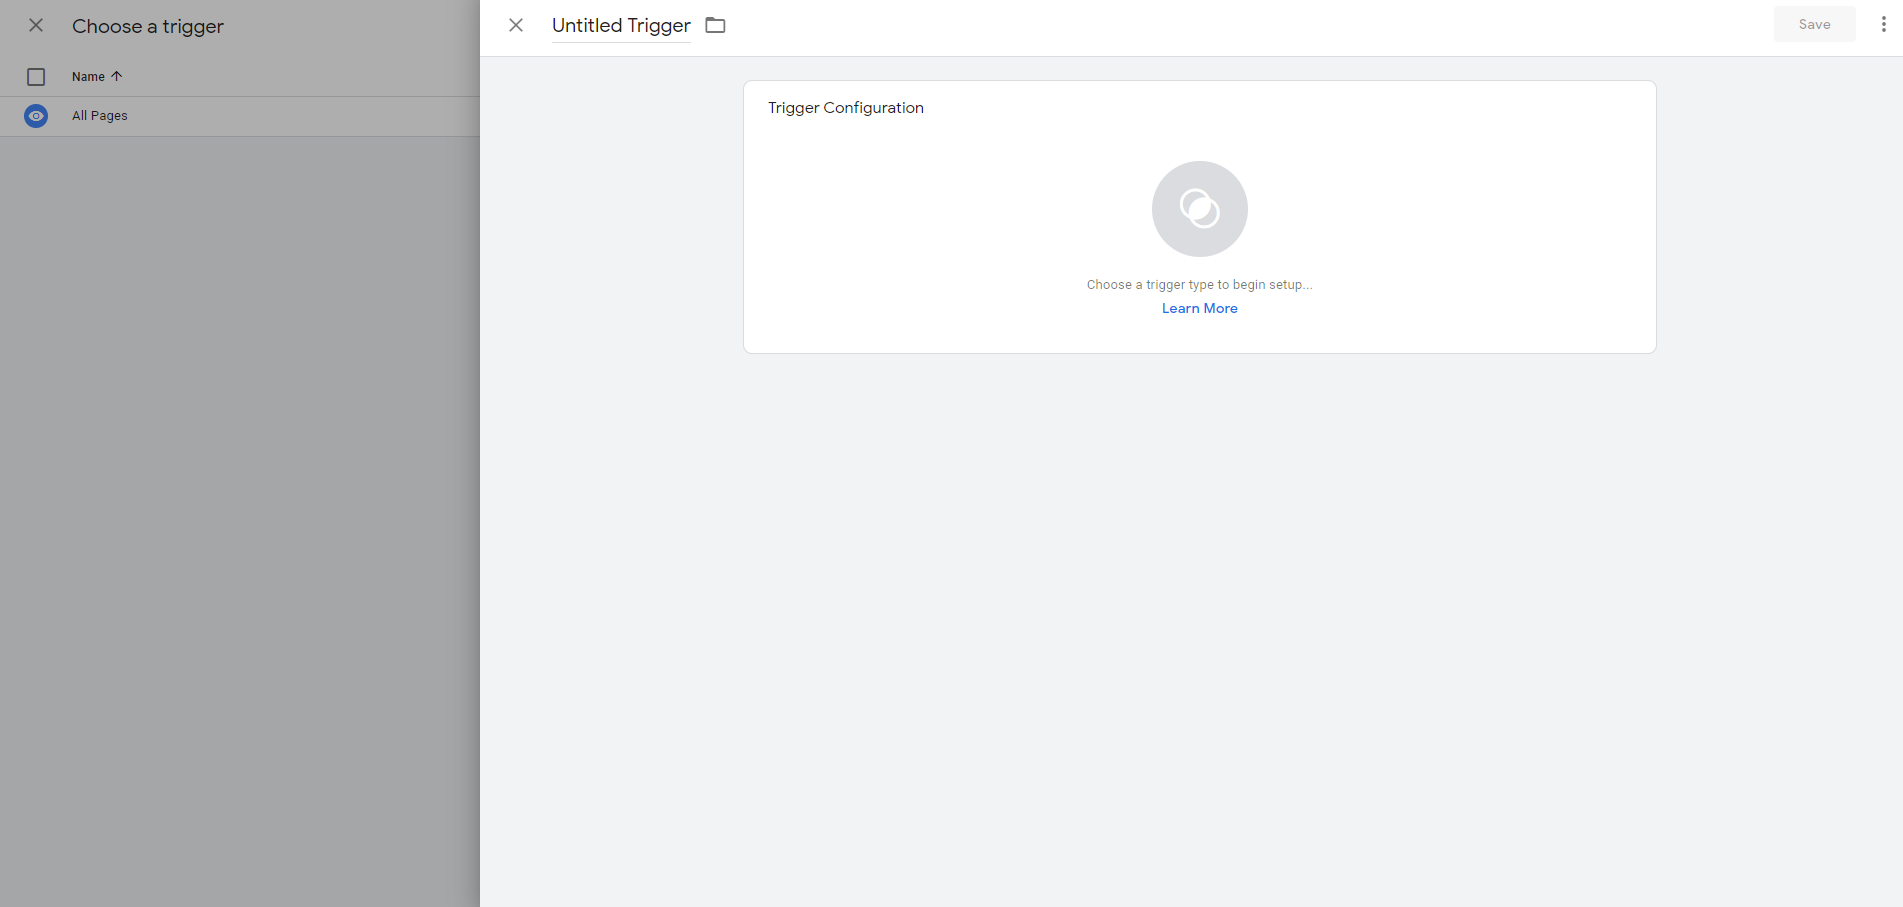
3. Add a new trigger
If you already have a success page, you can skip this step and move on to step 3. If you need to create a success page, follow these steps to create a new trigger.
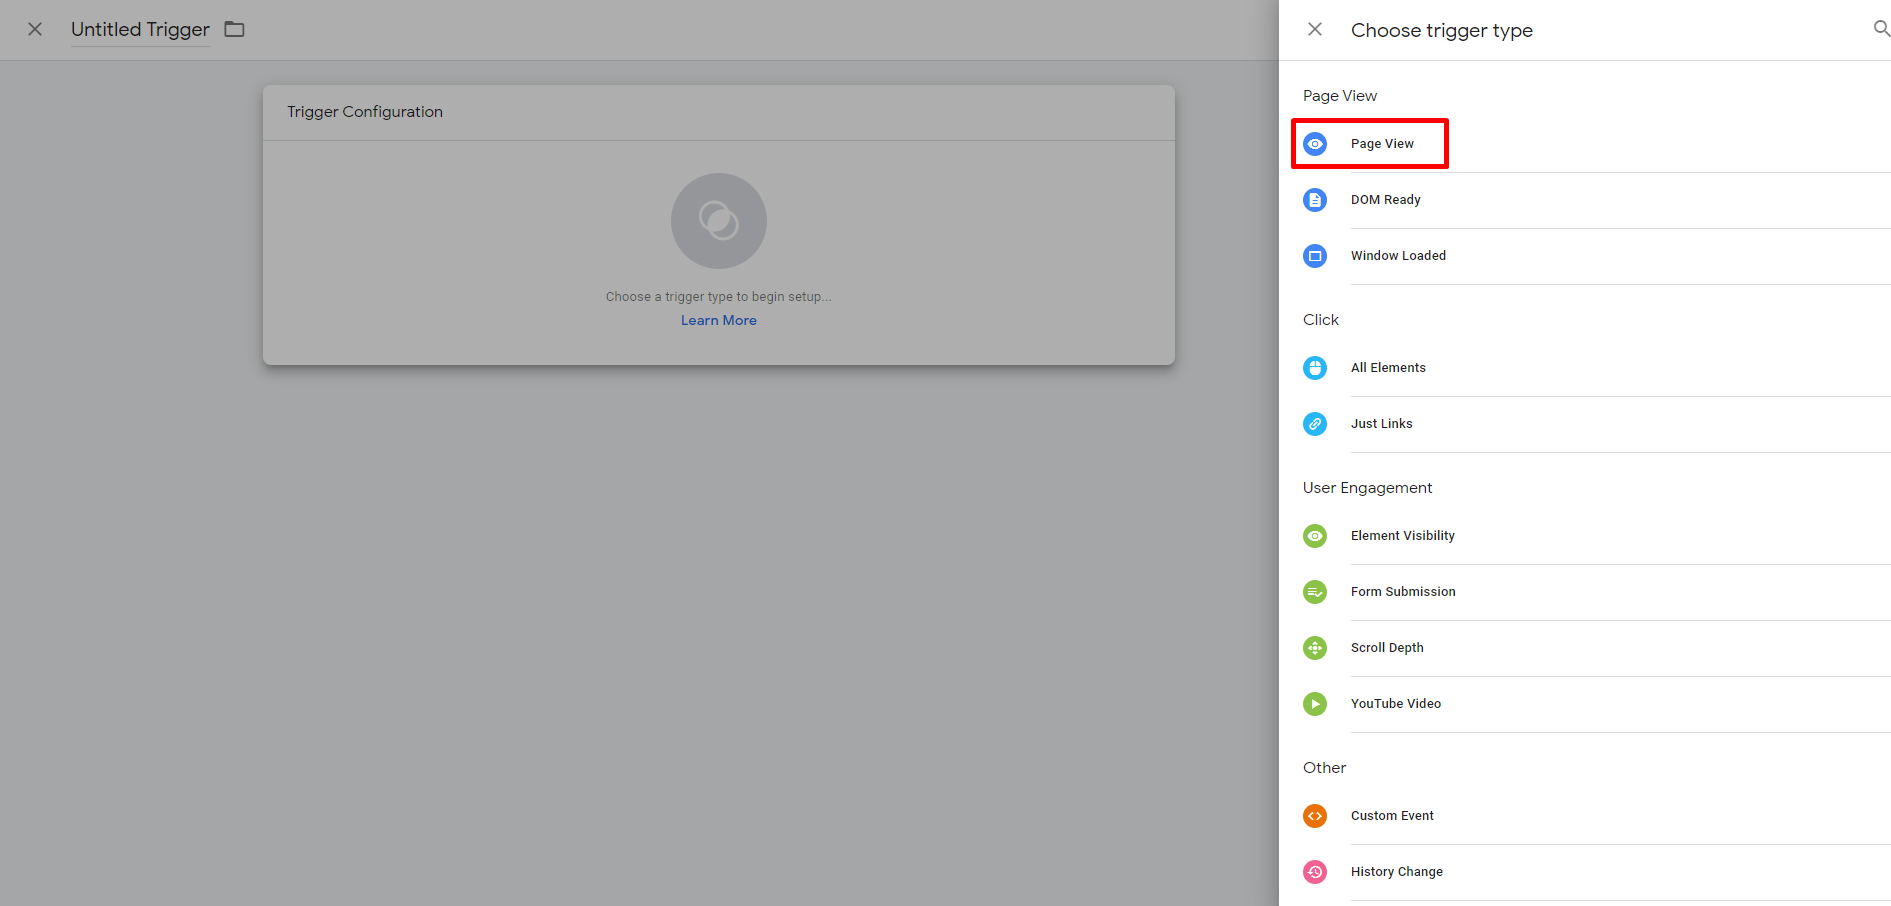
Select Triggering on the new tag page. Click New Trigger, then Trigger Configuration to begin setting it up.
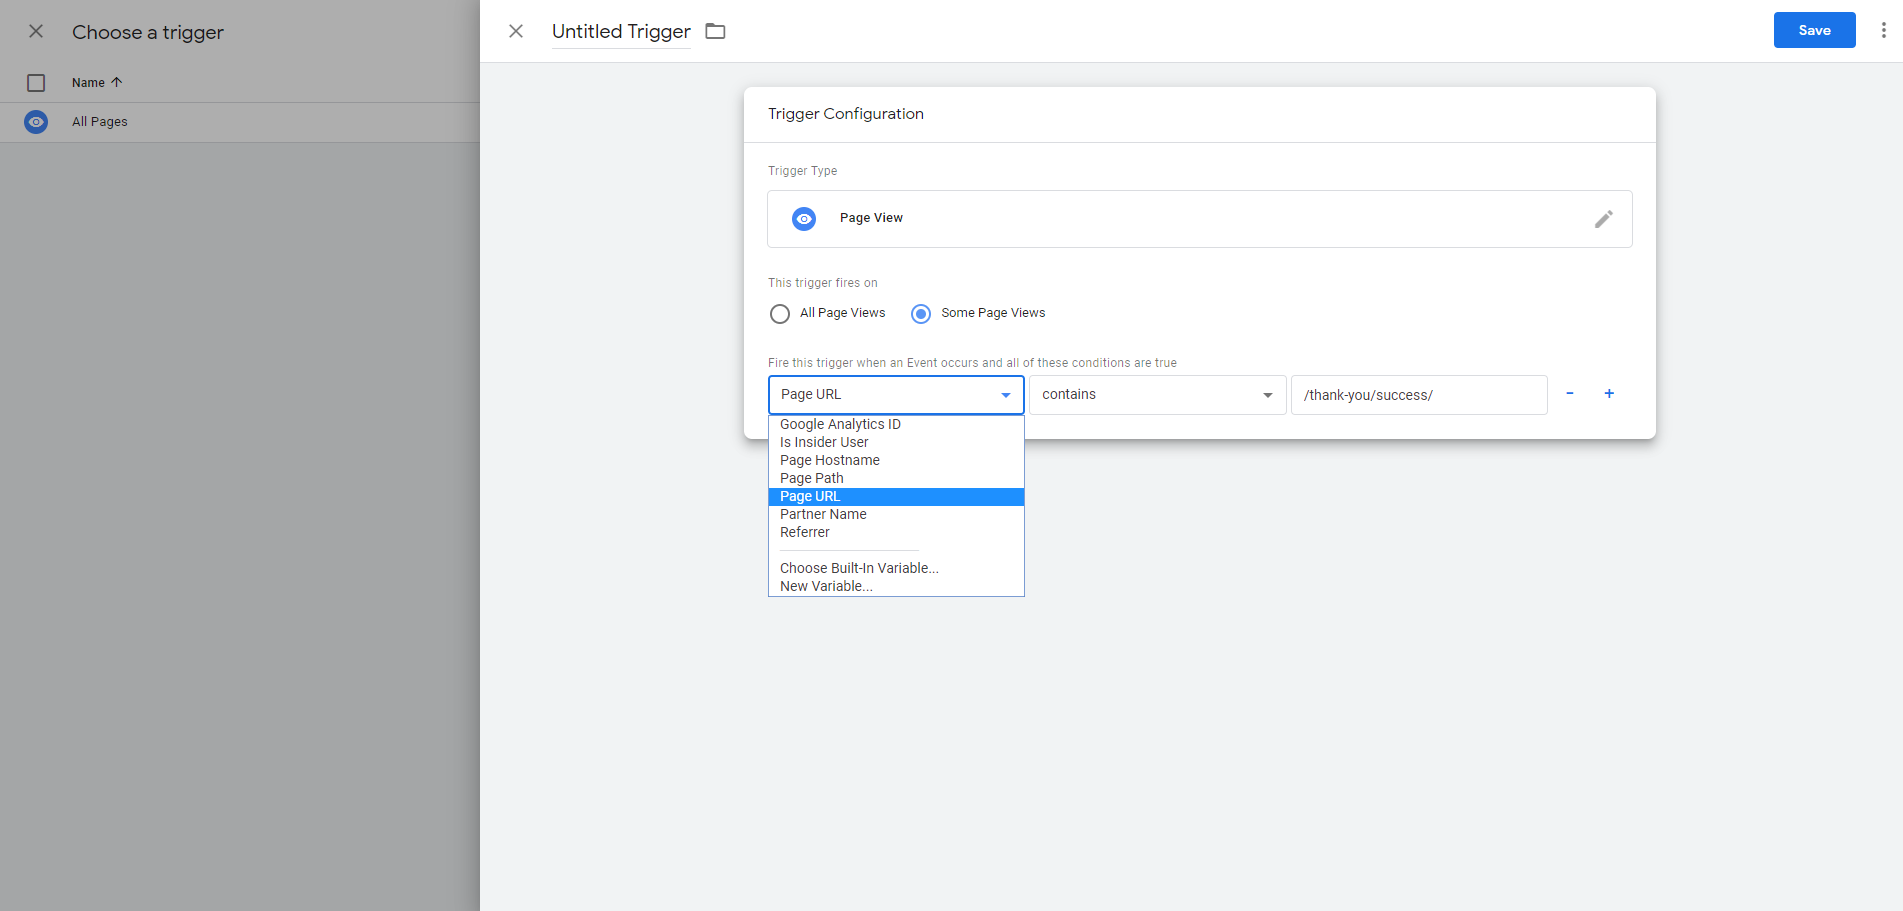
In the Choose trigger type window, select Page View.
Configure your trigger for your Success Page. This step may differ depending on how your success page is tracked.
Name your trigger and save it. The trigger will be automatically selected for your tag.
4. Tag priority
To enable the Code for Confirmation Page to load before the Insider Tag, select Advanced Settings.
The Tag firing priority should be higher than that of the Insider Tag. If none is specified for any tag, the default priority is 0, so the Code for Confirmation Page can be set to 1, as in the example.
After setting the priority, click Tag Sequencing and select Fire a tag after Code for Confirmation Page fires. Then select Insider Tag as the Cleanup Tag.
Rename your tag and save it. Save it again on the main screen, then publish the final version on your account.
Upon adding the Code for Confirmation Page, review to make sure:
It loads before ins.js
The page type is Confirmation for all transactions made with all payment types (payment on delivery, credit card, bank transfer),
If a transaction fails, the type does not show Confirmation.
If it is a single page, ensure the page object includes the correct information. For example, once a user navigates to another page after the Confirmation page, the page object should also state this change and not display the type as Confirmation.
To integrate the Insider Web SDK using Google Tag Manager, refer to Web SDK Integration guide.