This guide aims to explain how to set up a Facebook Catalog for WhatsApp Business API.
Create a Facebook Catalog
To create a Facebook catalog, you can follow the steps below:
1. Log in to Business Manager of Facebook, navigate to Business Account info > Business settings. 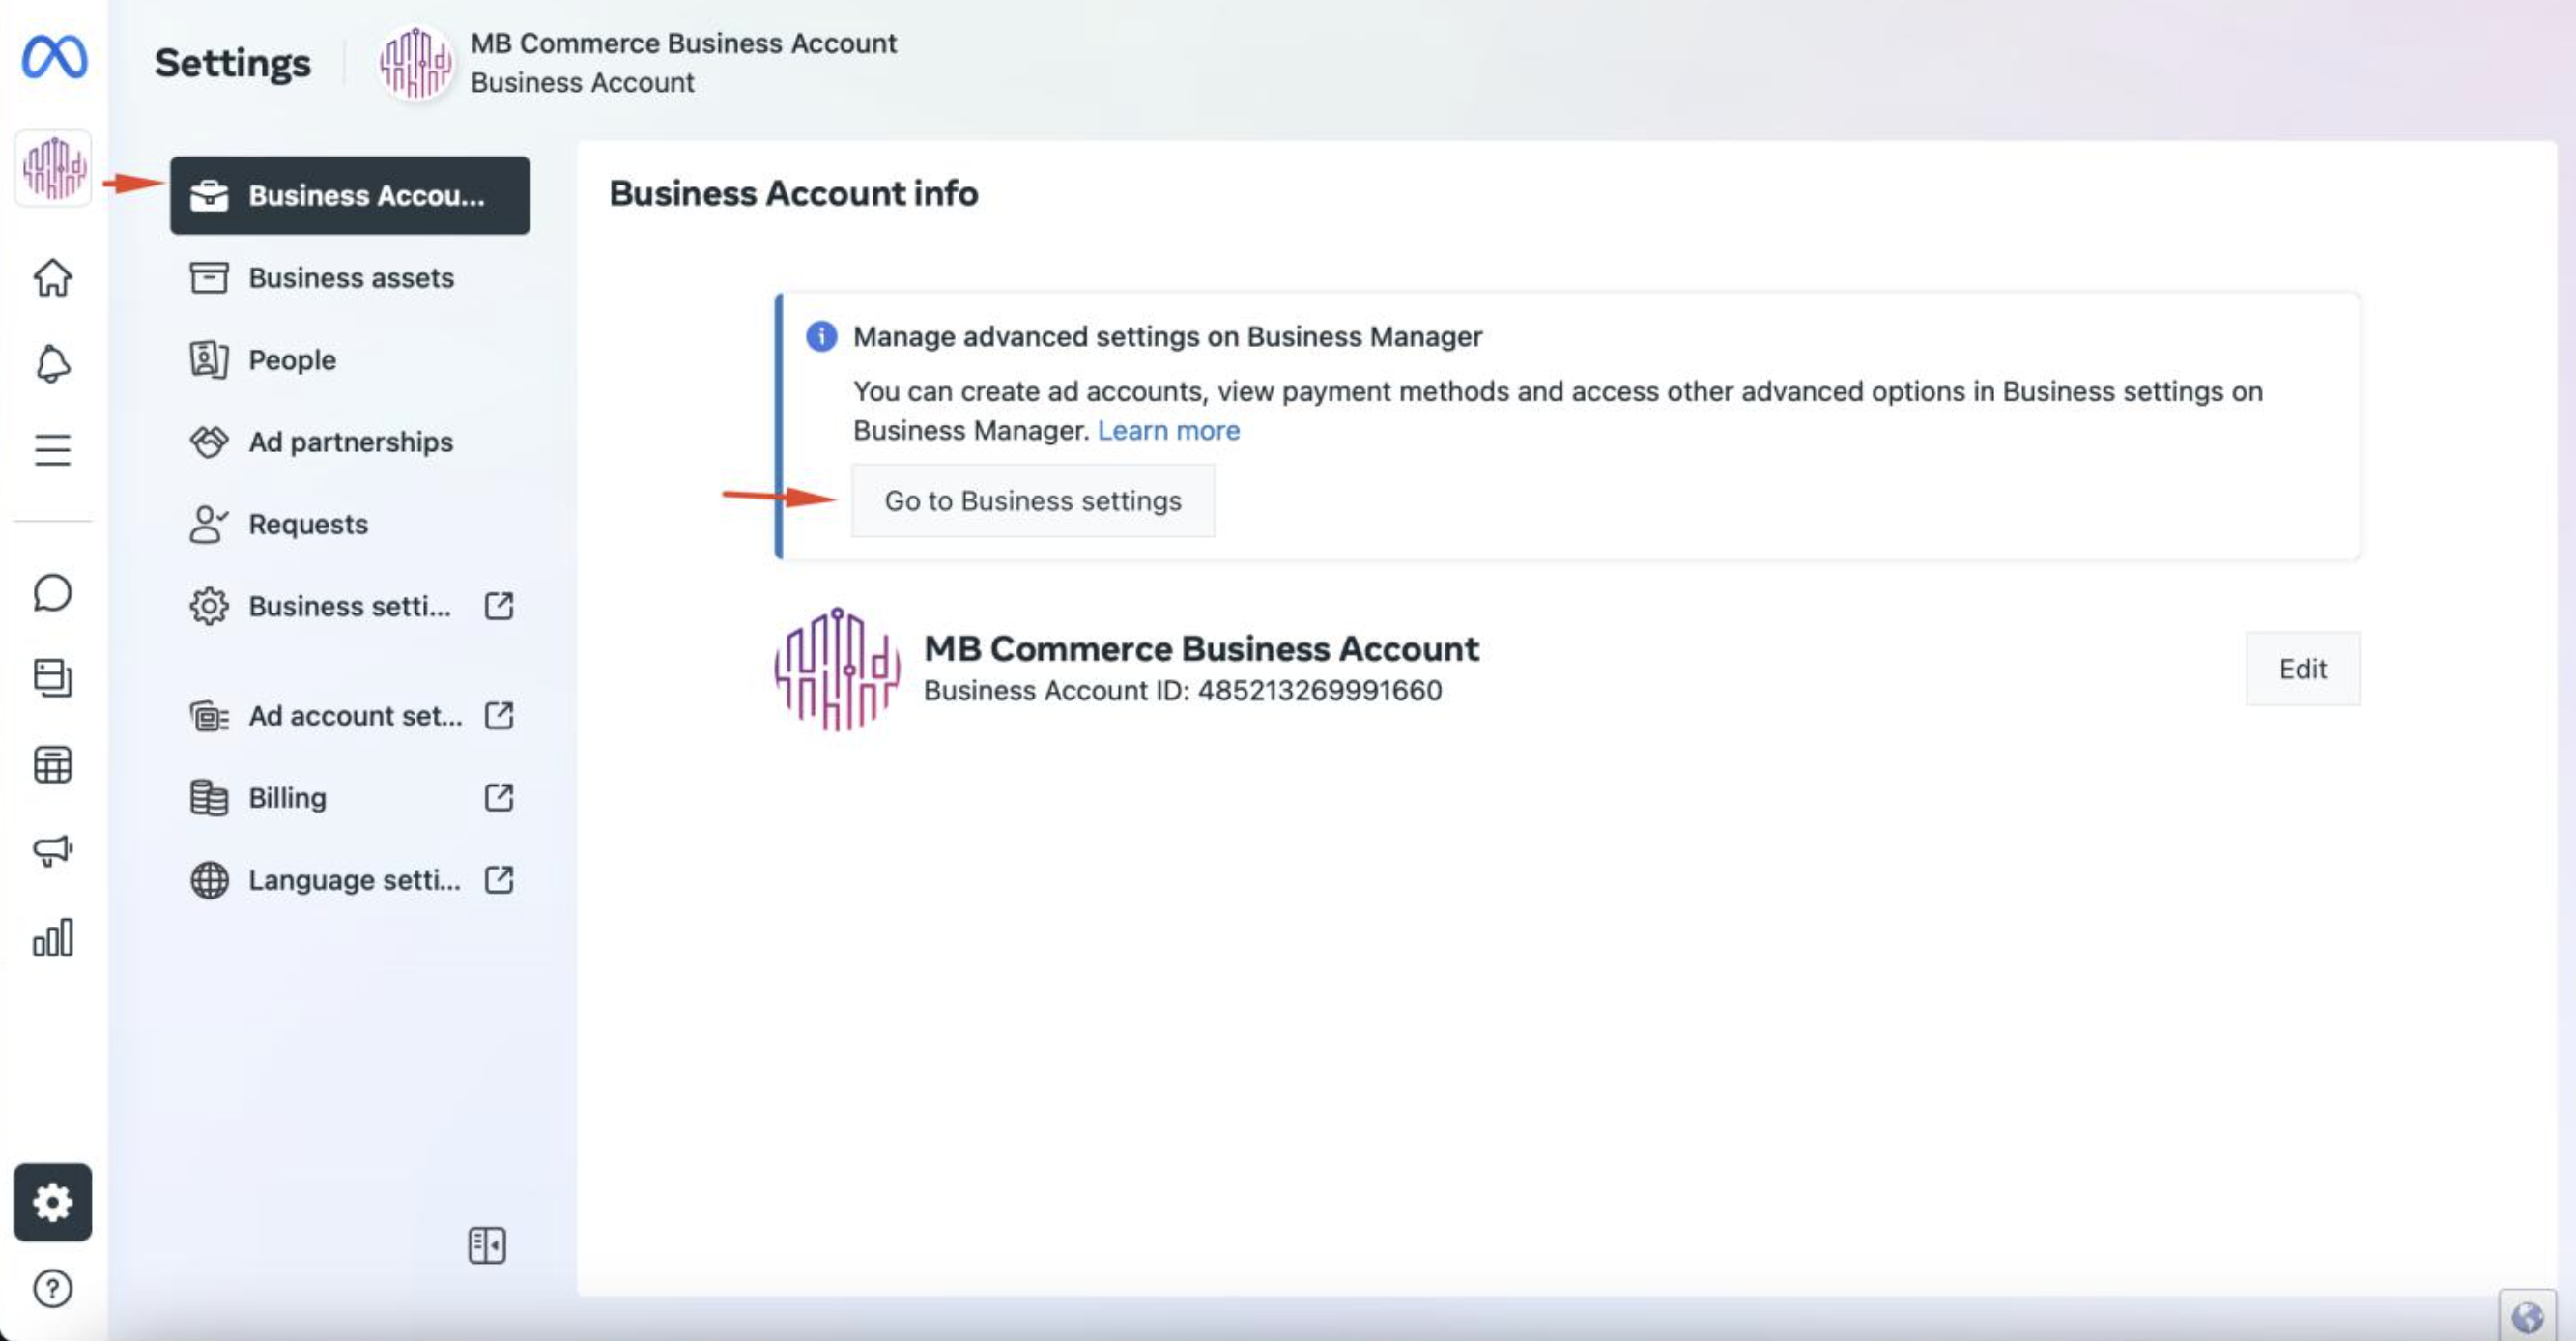 2. On the new page that opens, click the Commerce accounts option and click the Open in Commerce Manager button.
 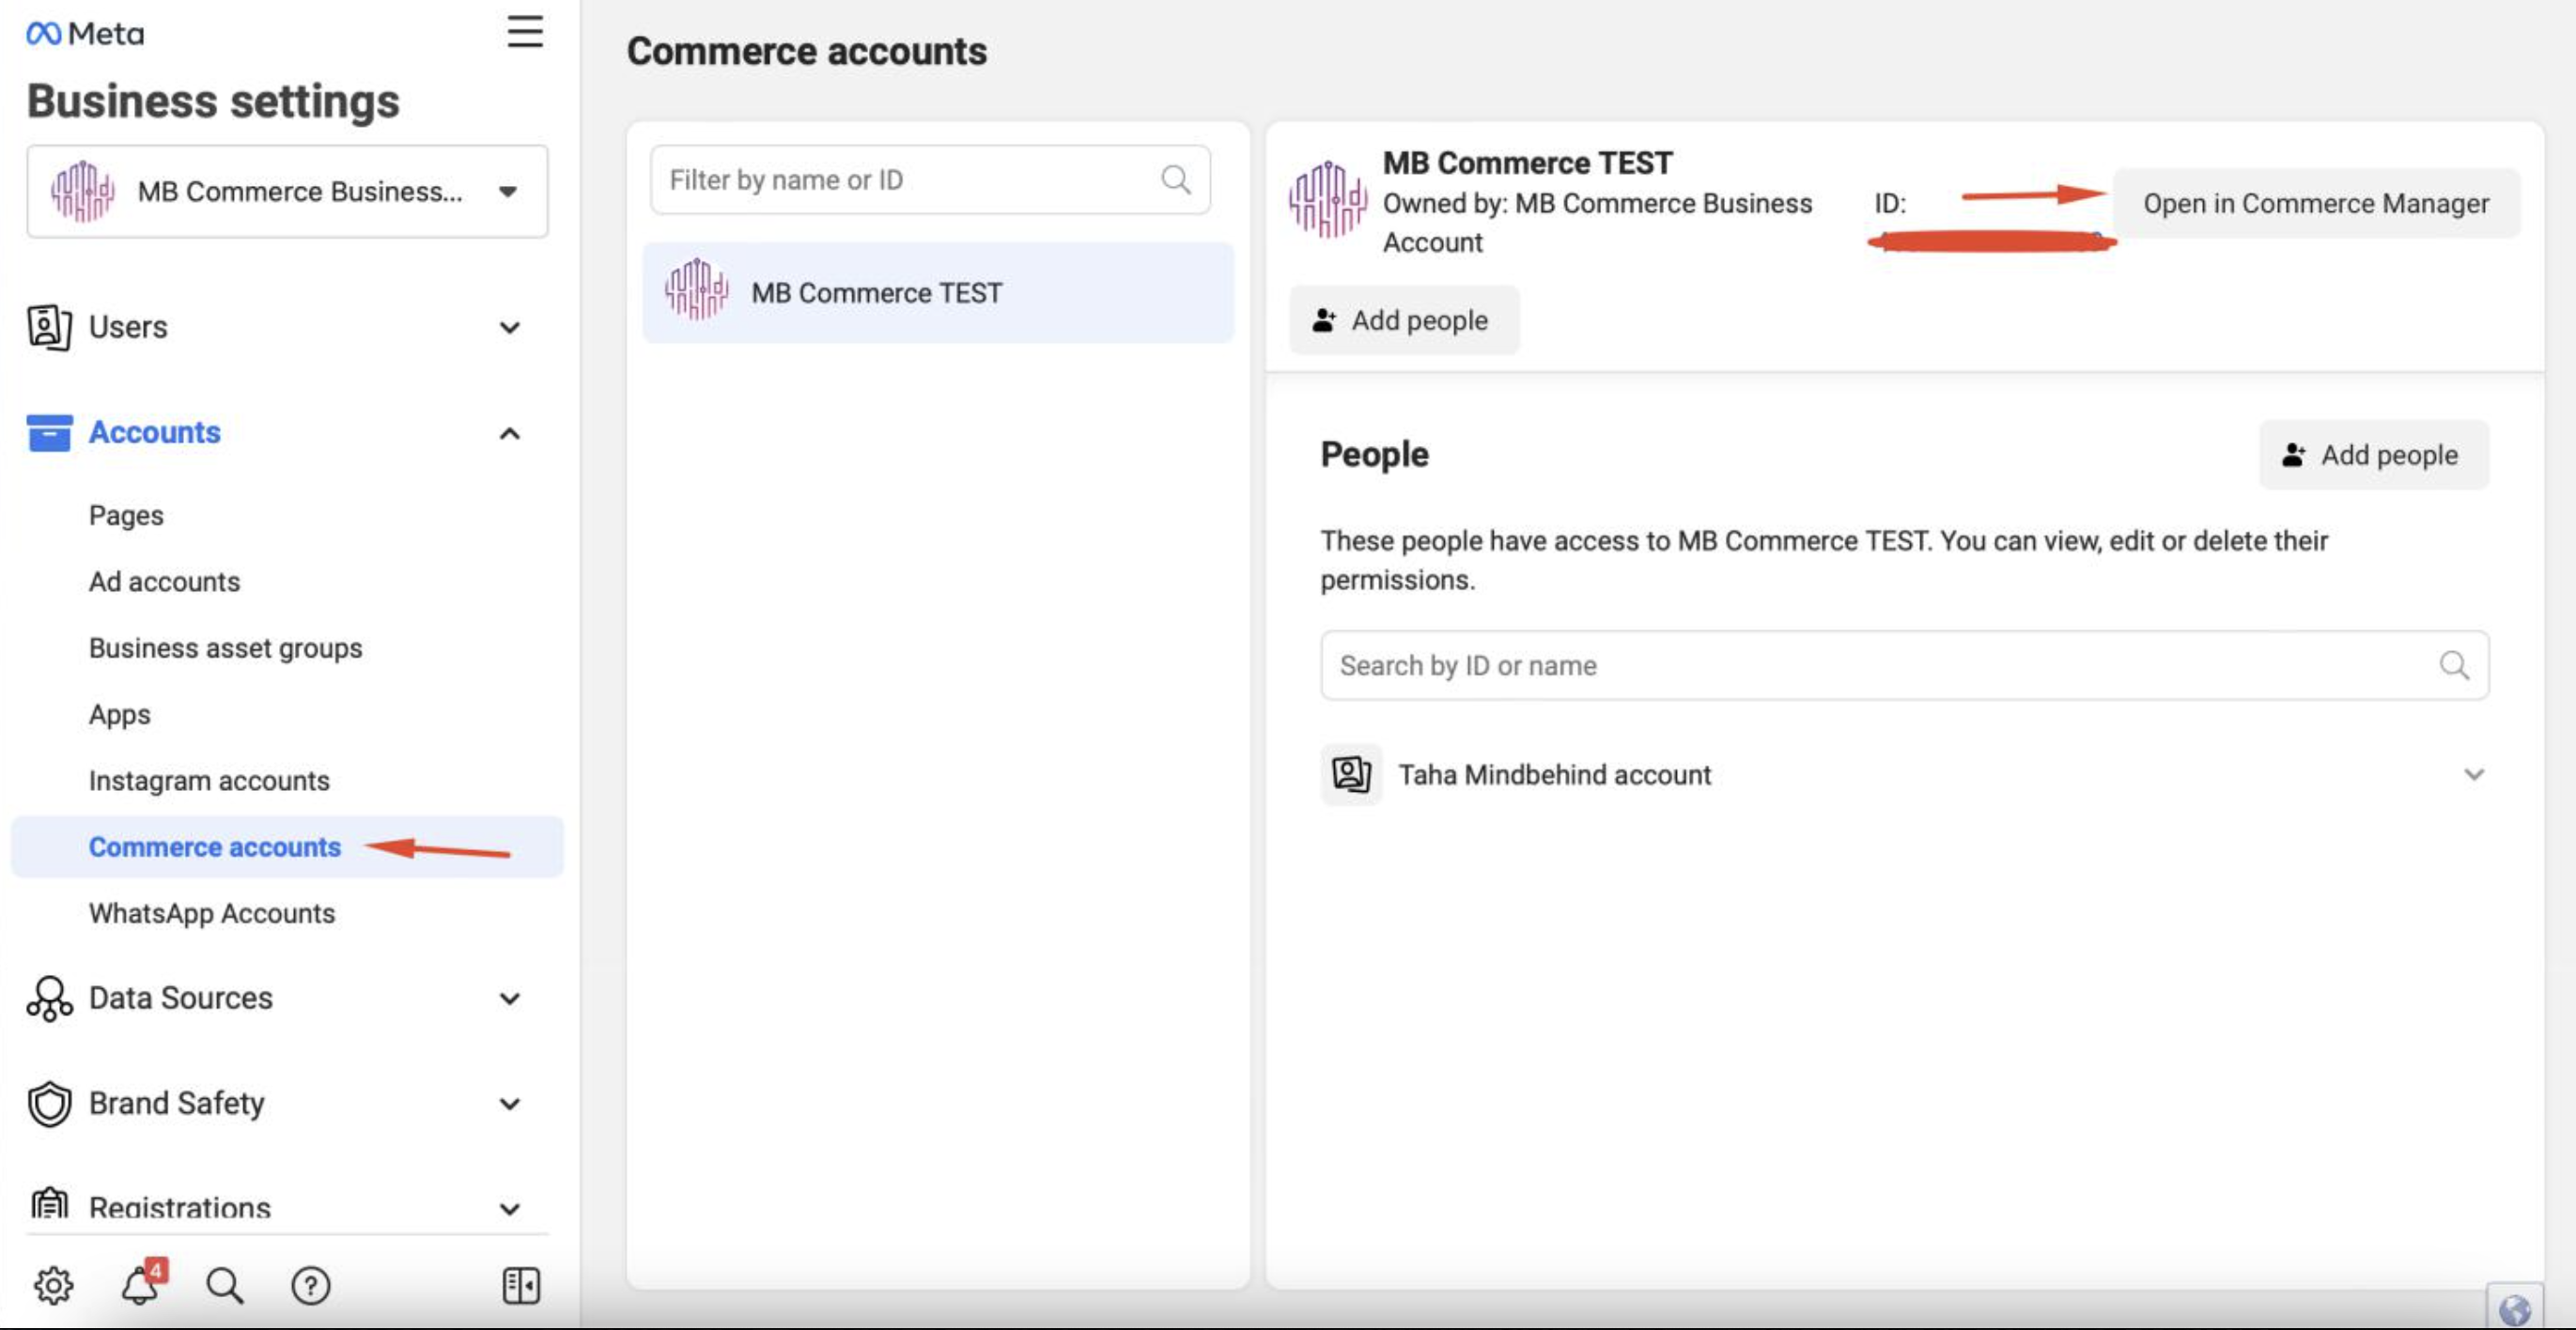 3. On the new page that opens, you will see the catalogs you have created before. Click on your account and click on the View all button from the pop-up that opens.
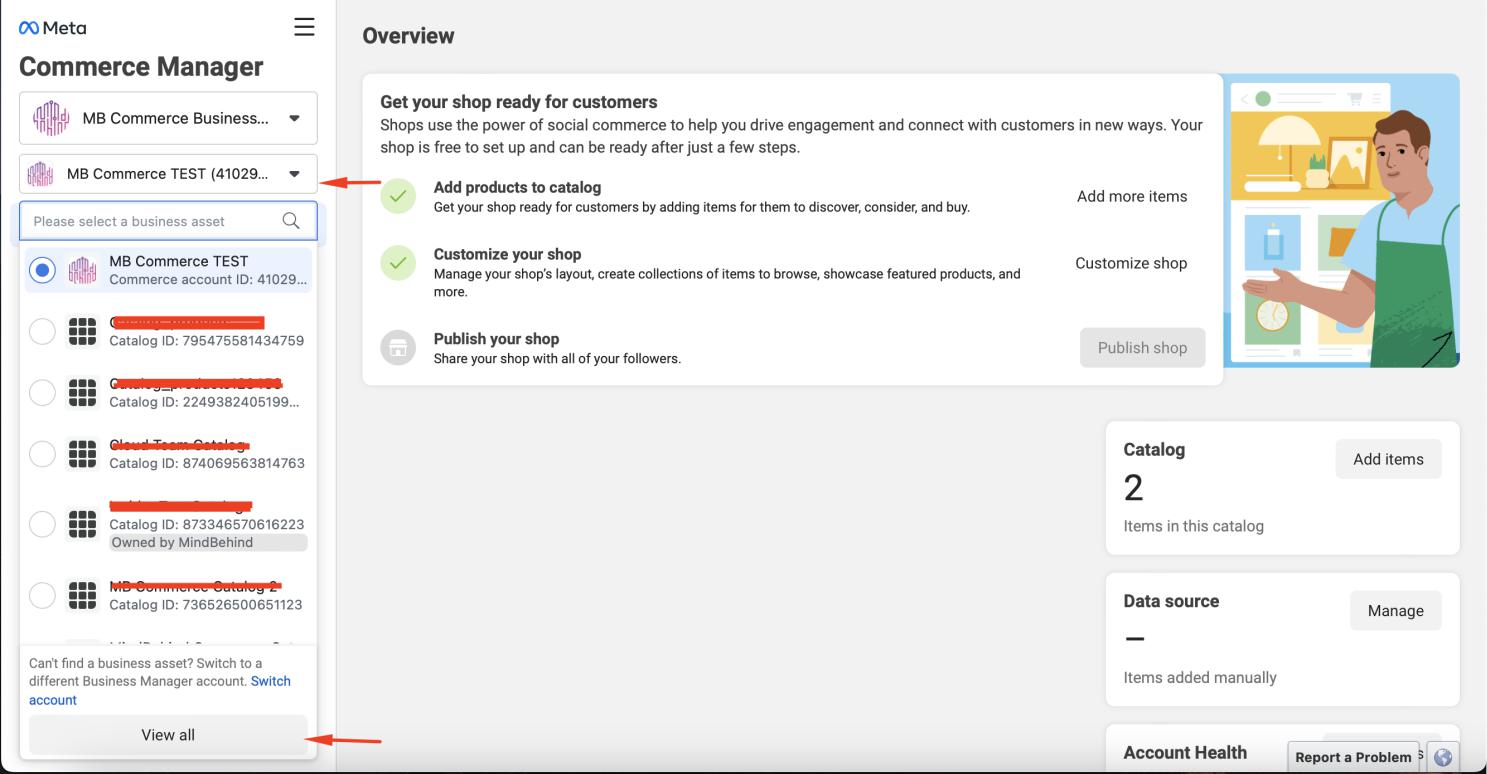 4. You can create a new catalog on the page that opens. Click the "Add catalog" button.
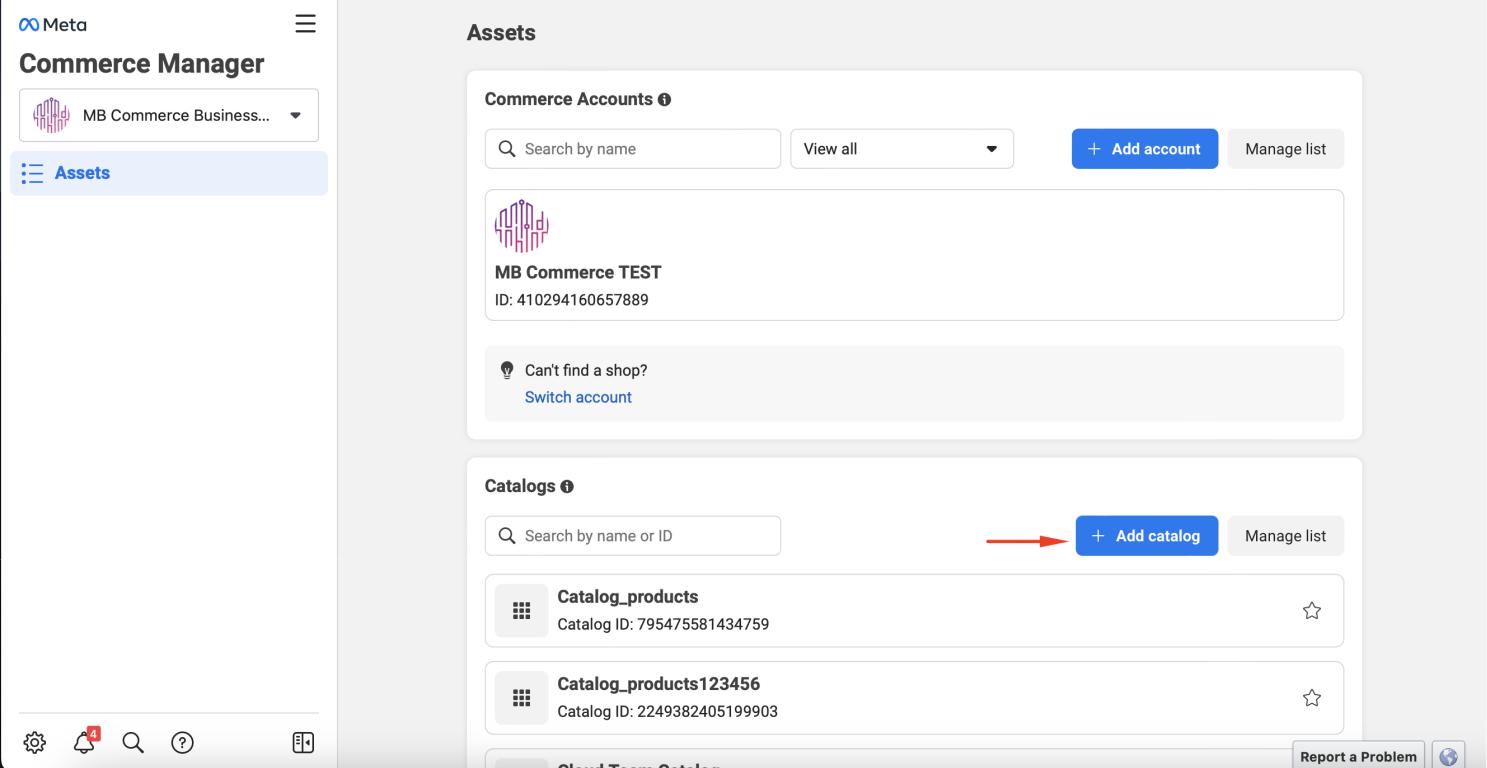 5. Select your catalog type and click the Next button.
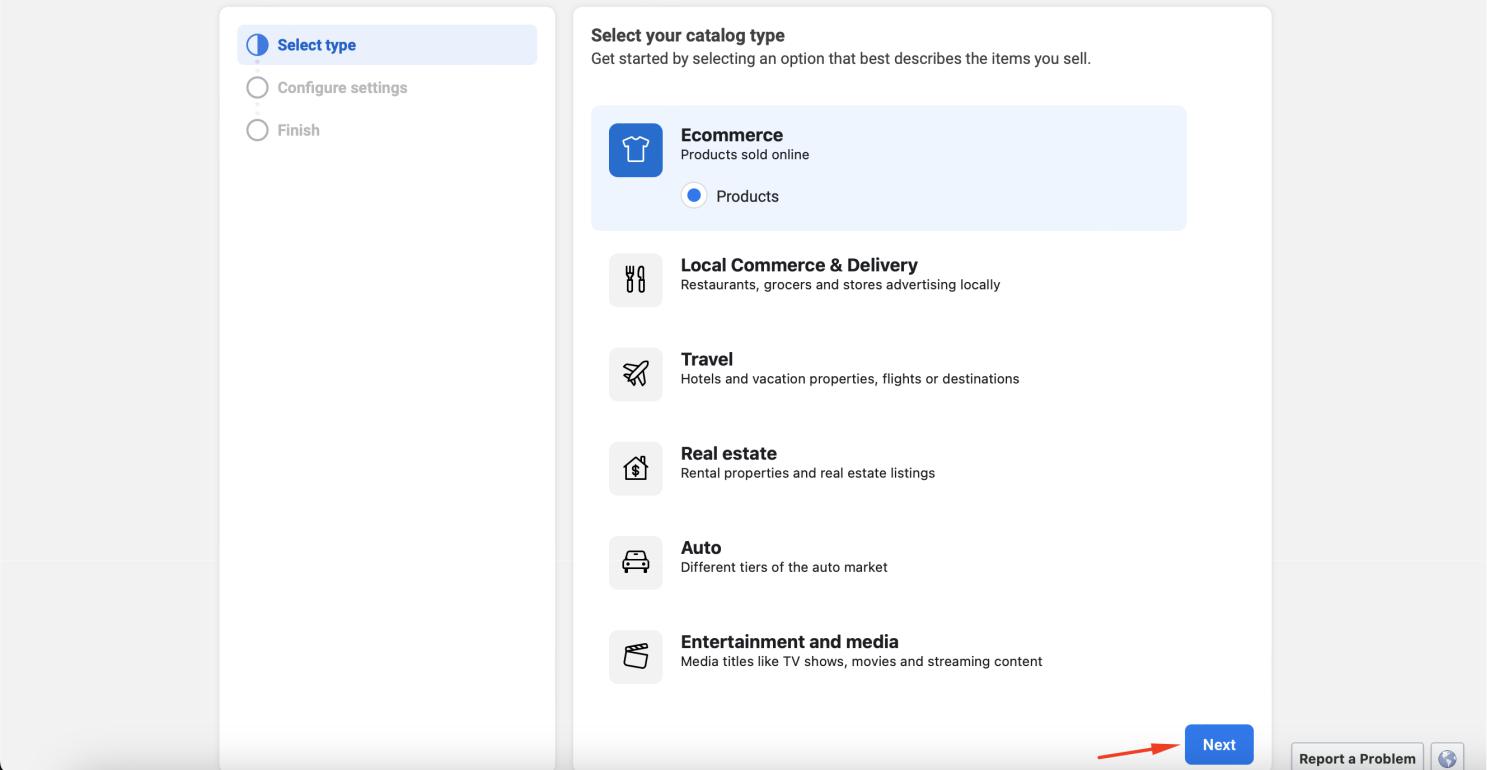 6. Configure your settings, set a name for your catalog, and click the Create button.
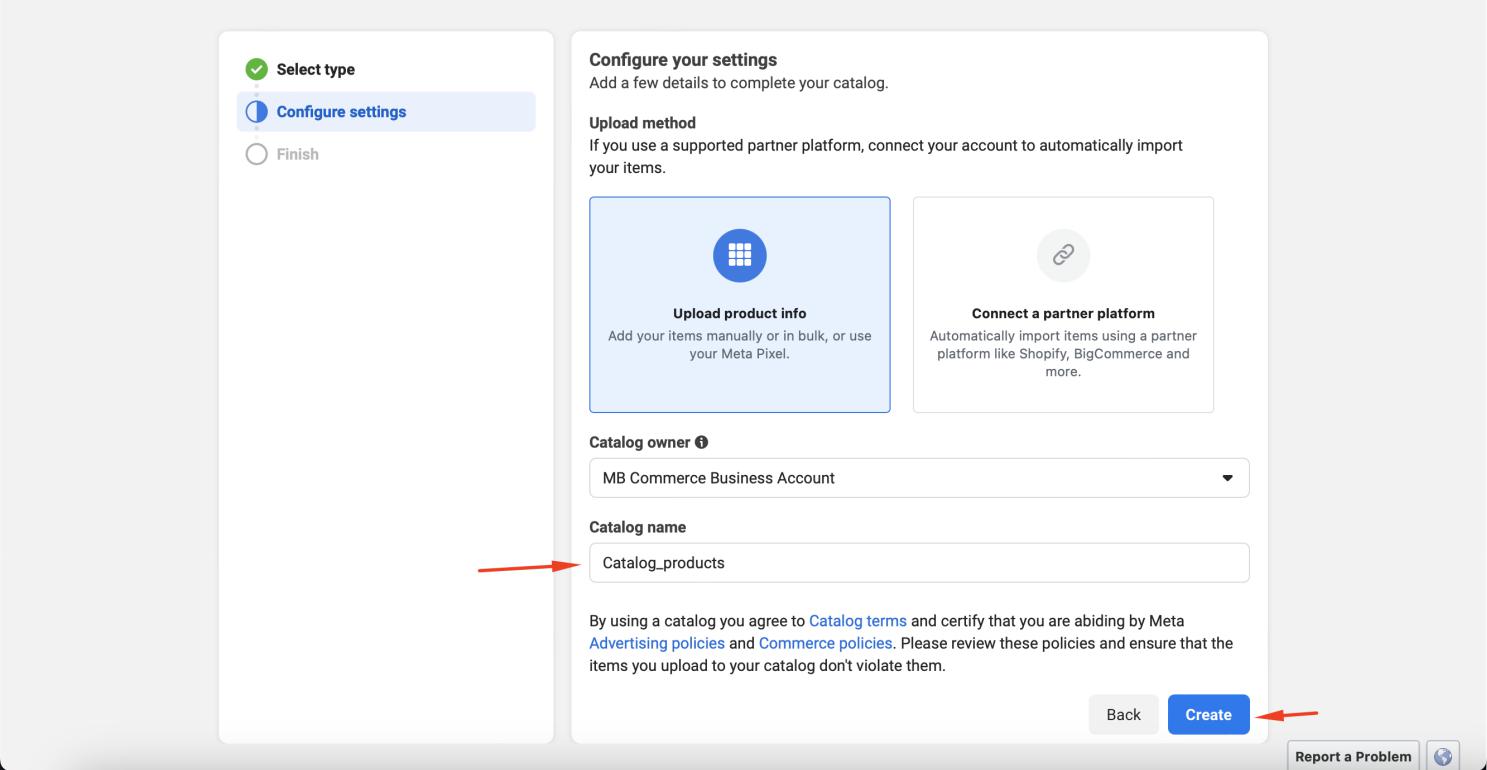 7. After the catalog setup is complete, click the View Catalog button.
 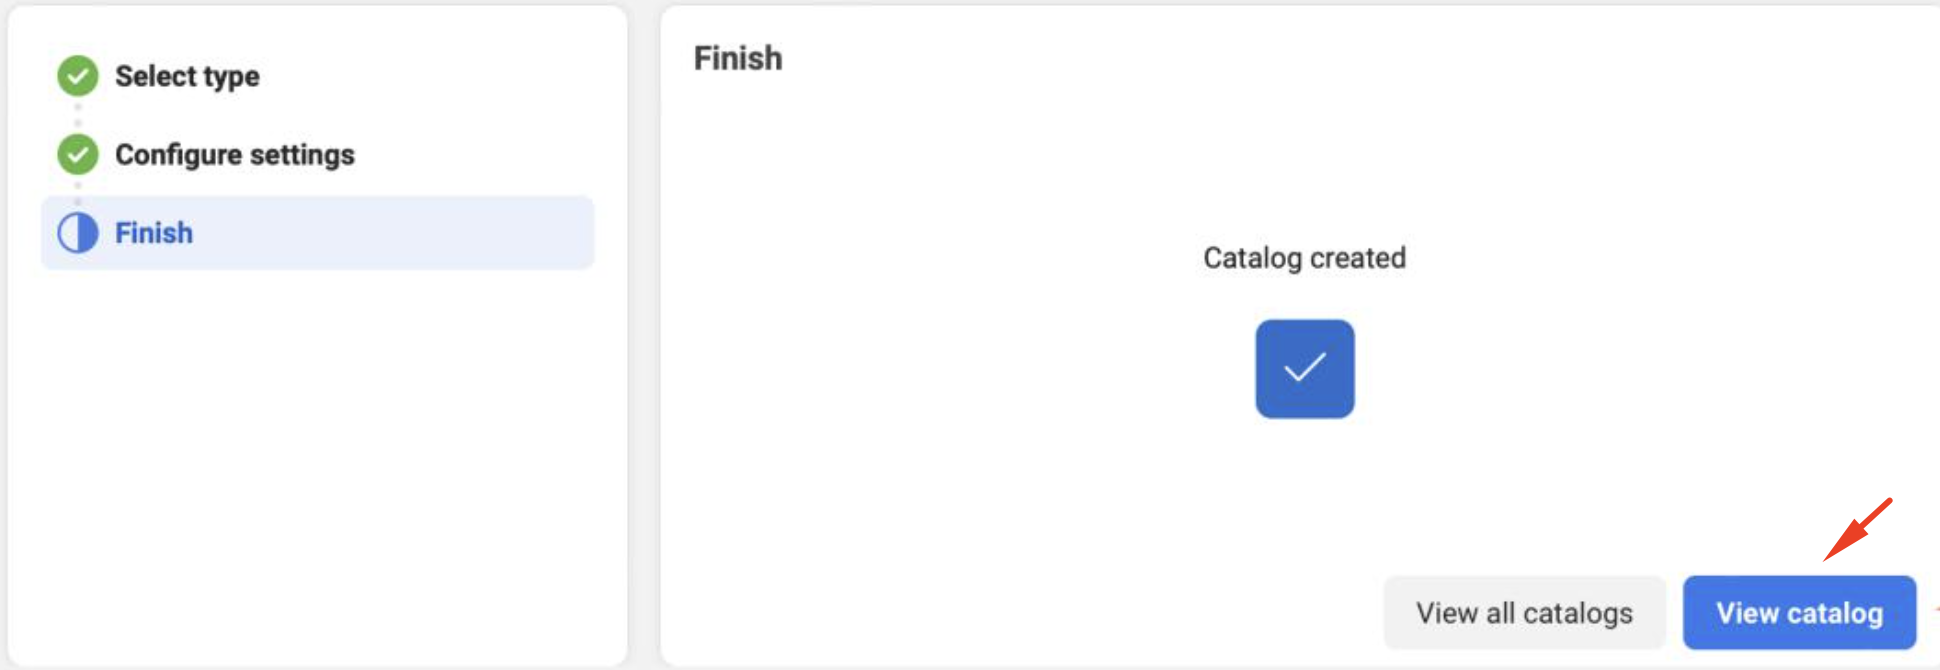 8. It is all done. Your catalog is ready.
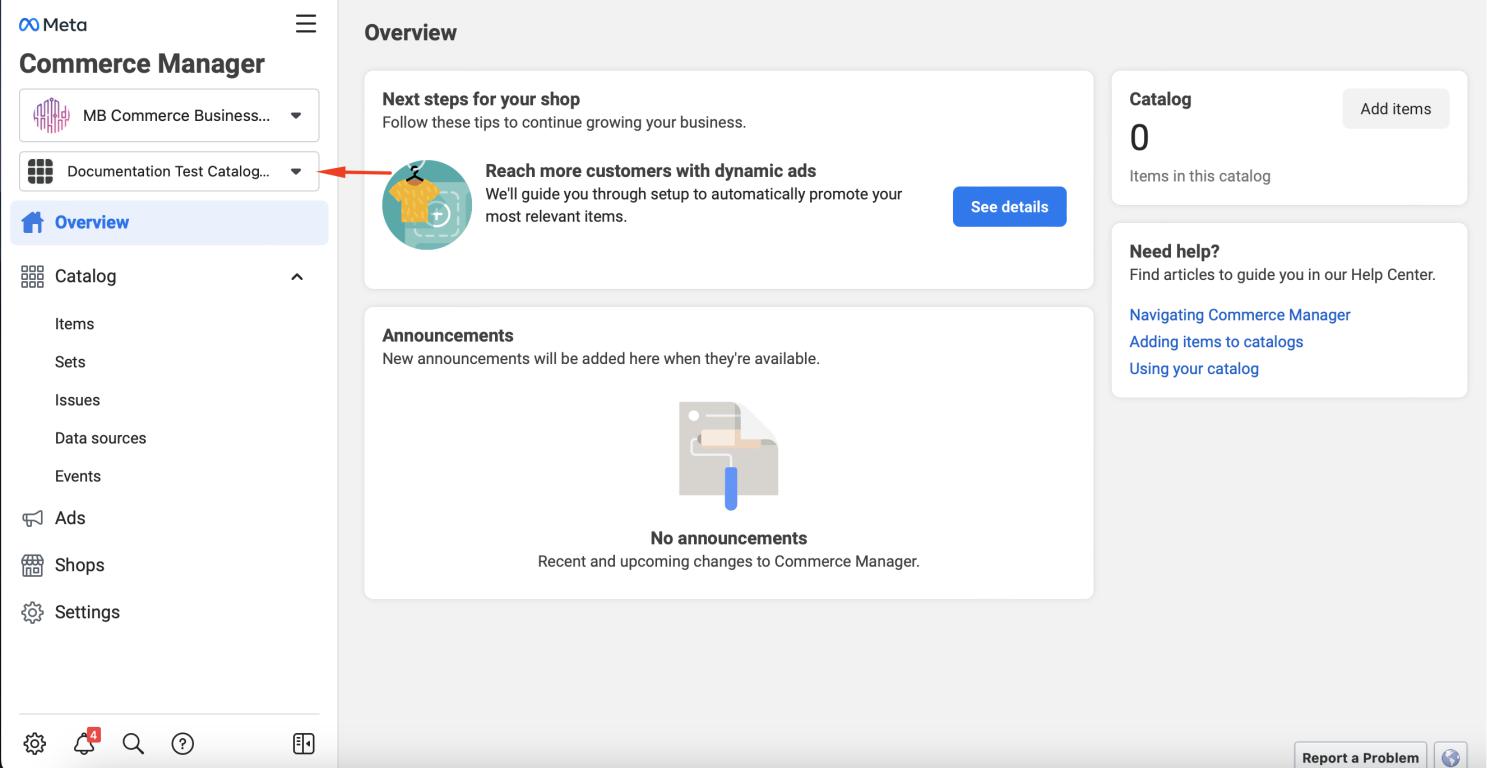
Add products to the catalog
1. Click the Add items button in the upper right corner to add products to your catalog.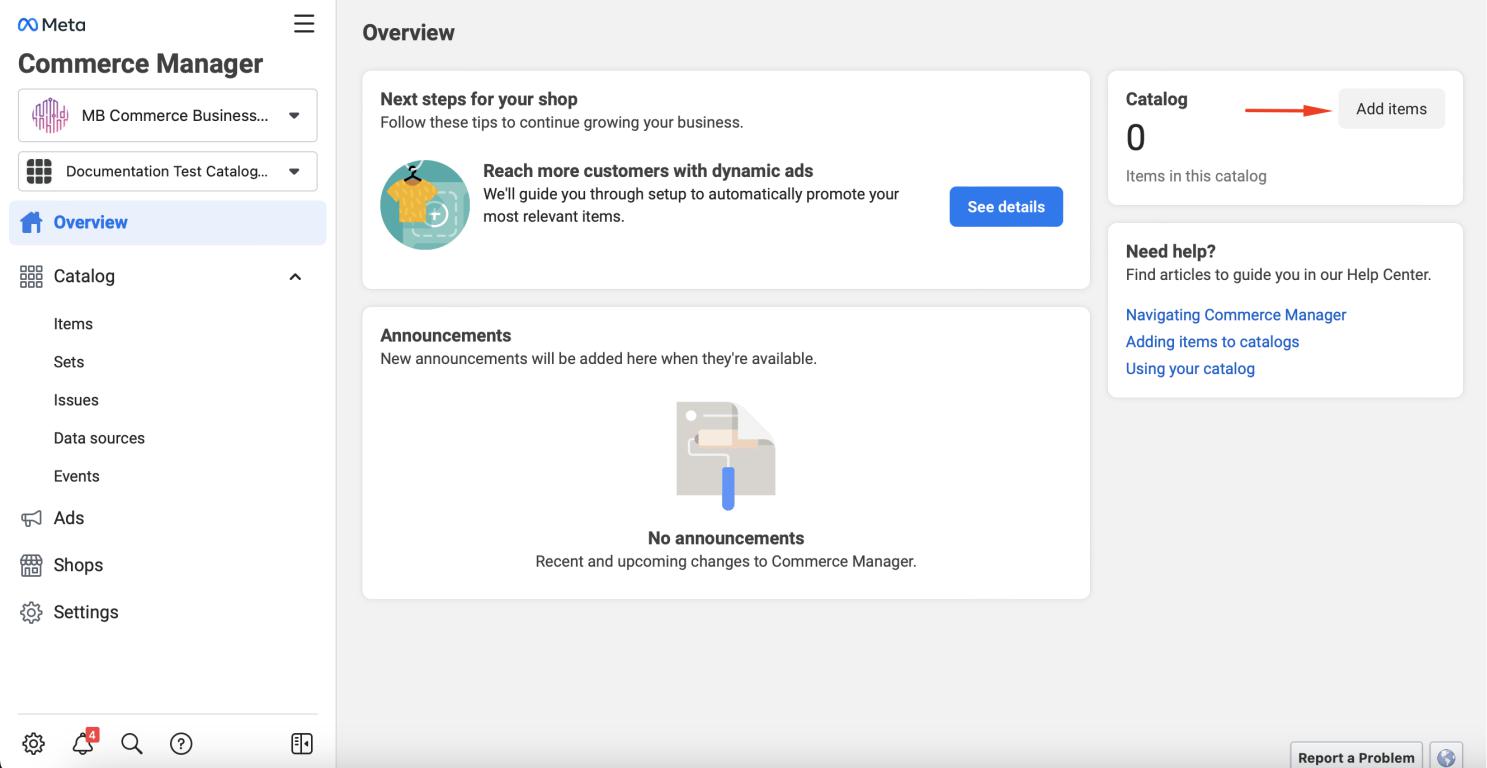 2. Select your product adding method on the screen that opens and click the Next button to continue.
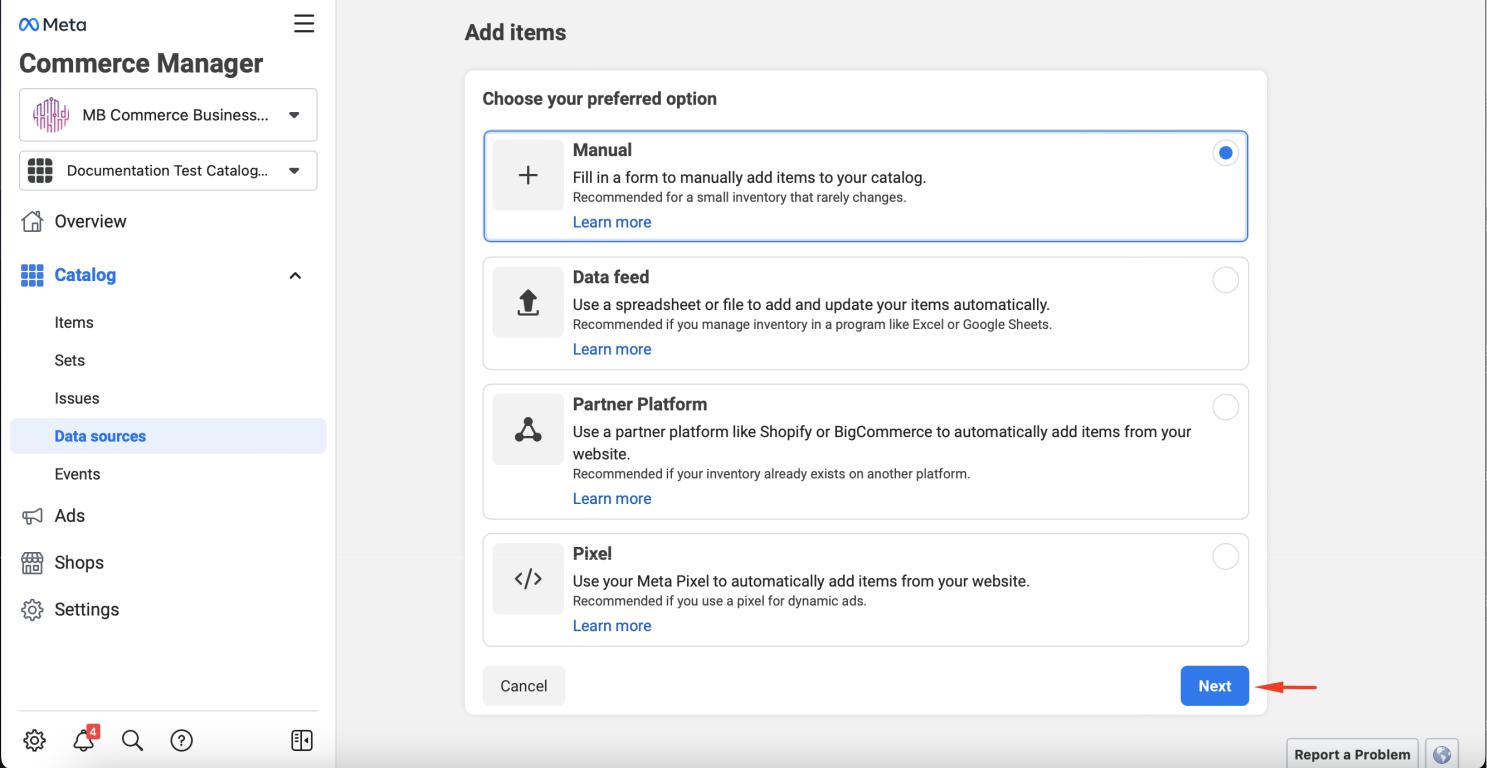
Refer to these materials to learn how to upload items to your catalog with different methods:
3. It is all done. Now you can view your products in the catalog.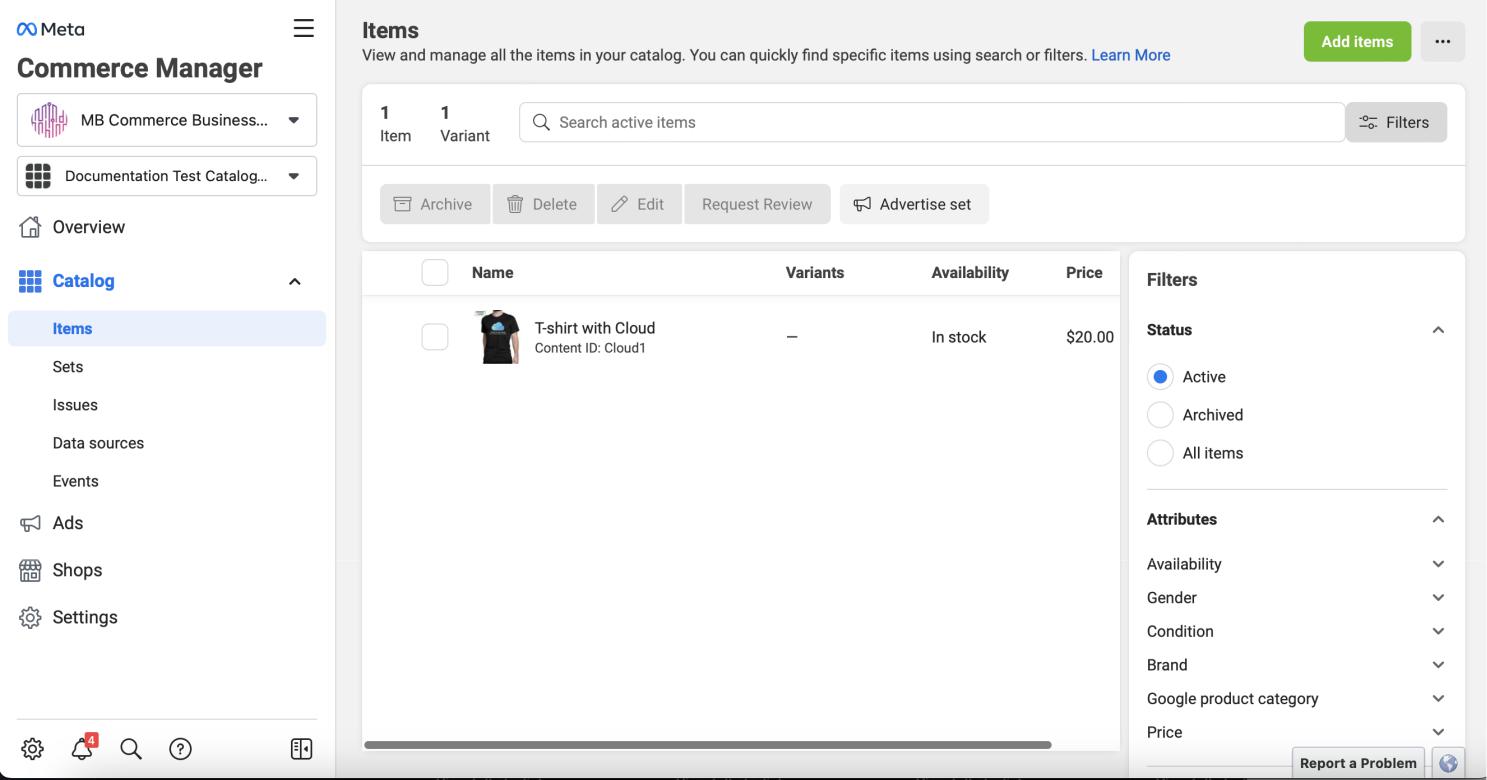
Connect a catalog to your WhatsApp Business account
1. Log in to the Business setting page and click on WhatsApp Accounts. Select your WhatsApp Business Account, click on the Settings tab, then click on “WhatsApp Manager”.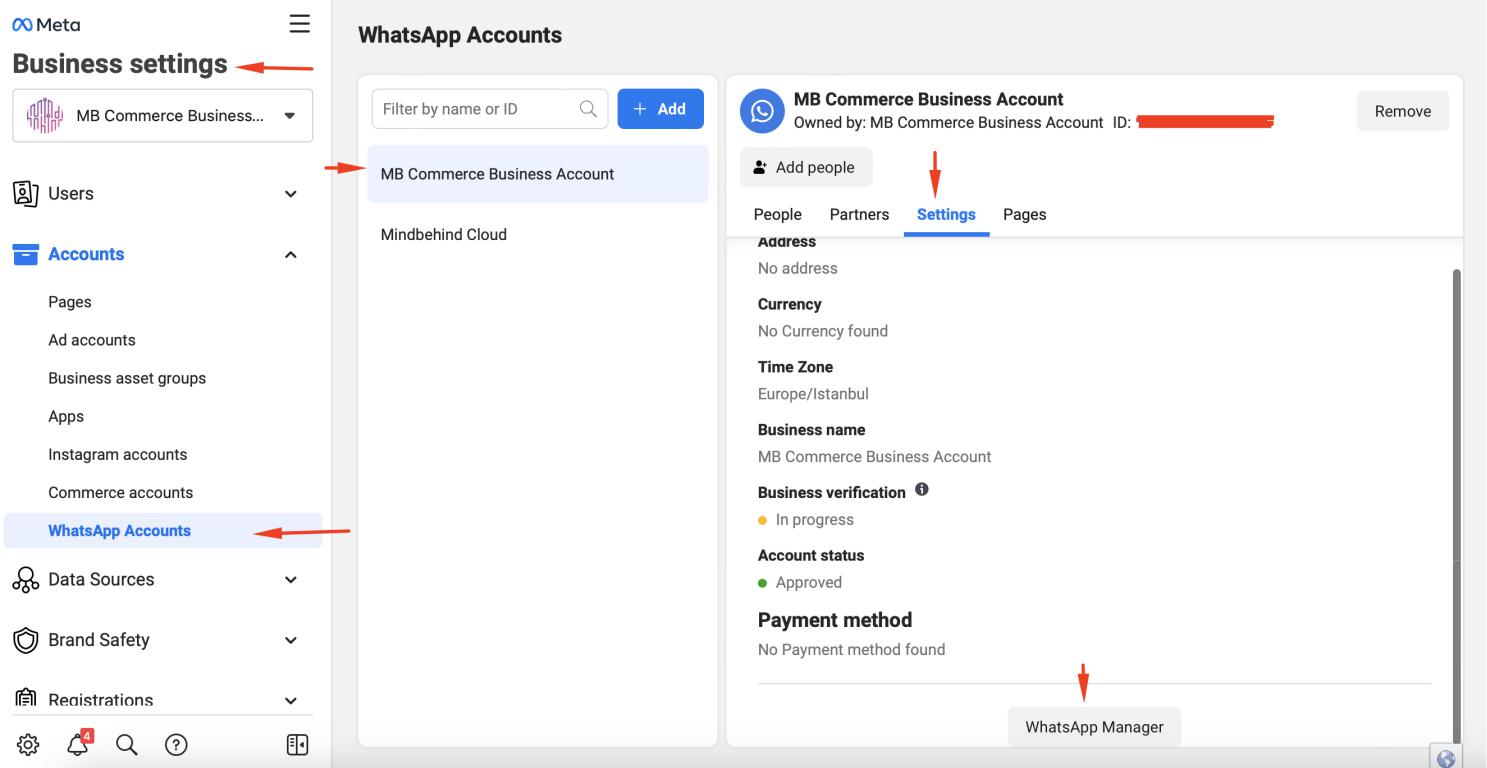 2. Click the Overview menu on the screen that opens and click on the Catalog tab.
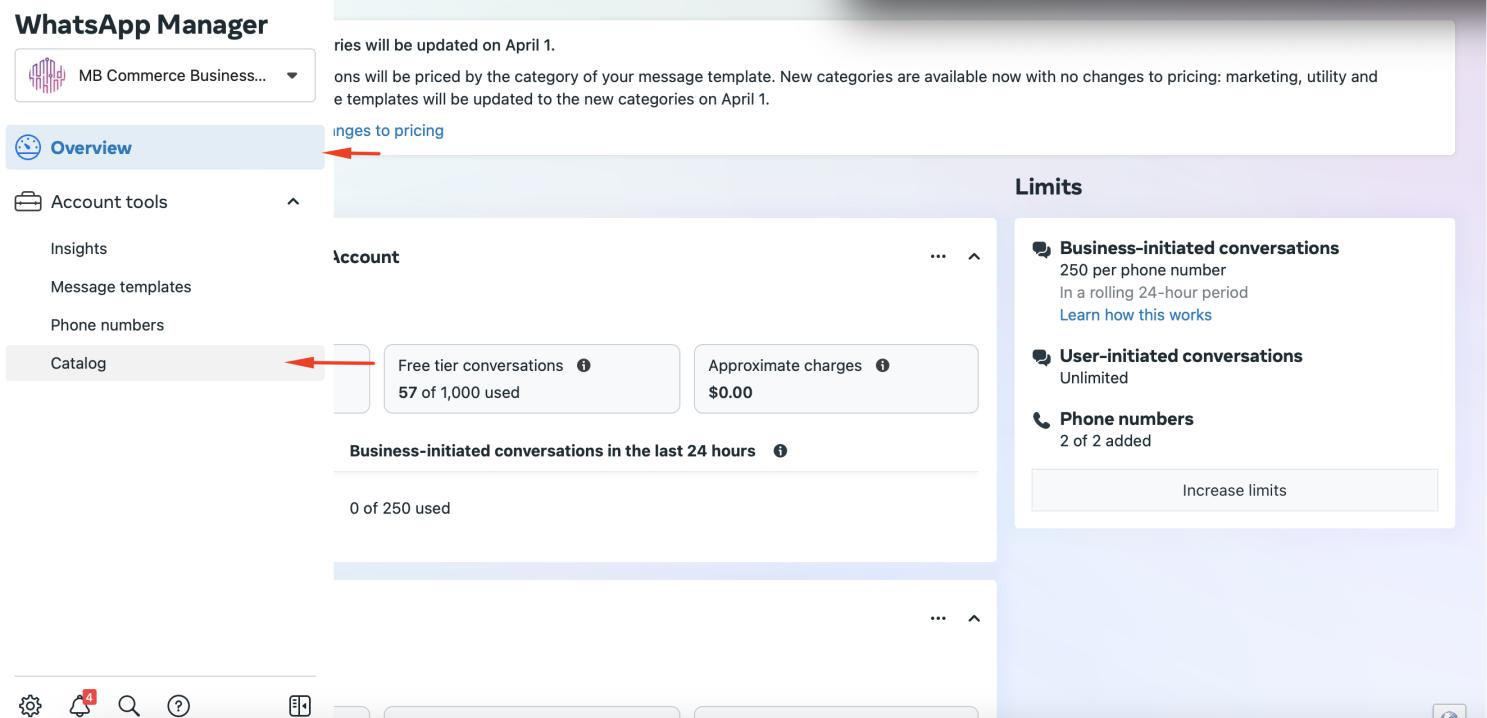 3. Click the Choose a Catalog button on the screen that opens, select the catalog you have prepared, and click the Connect Catalog button.
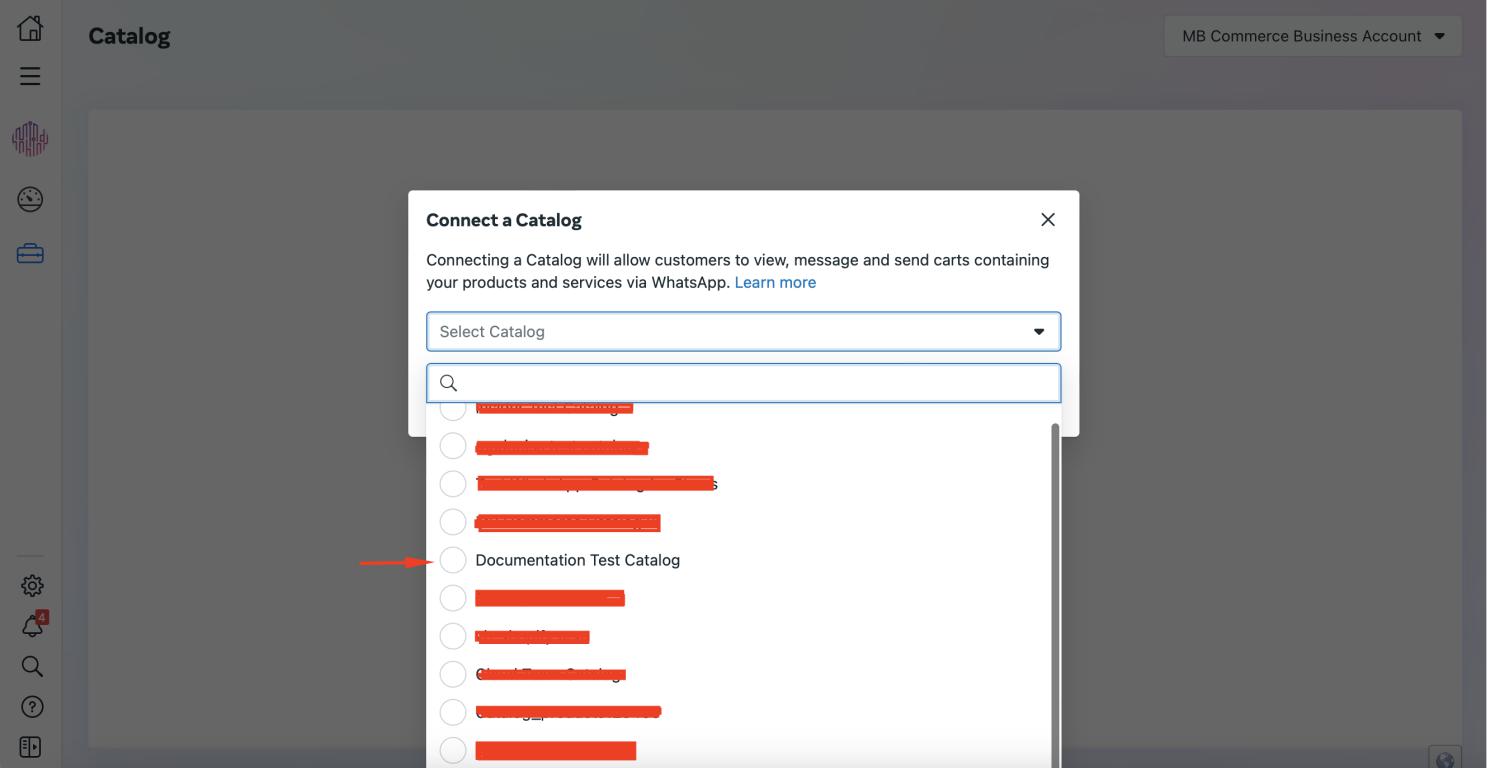 4. Congratulations! Your catalog and your WhatsApp account are matched.
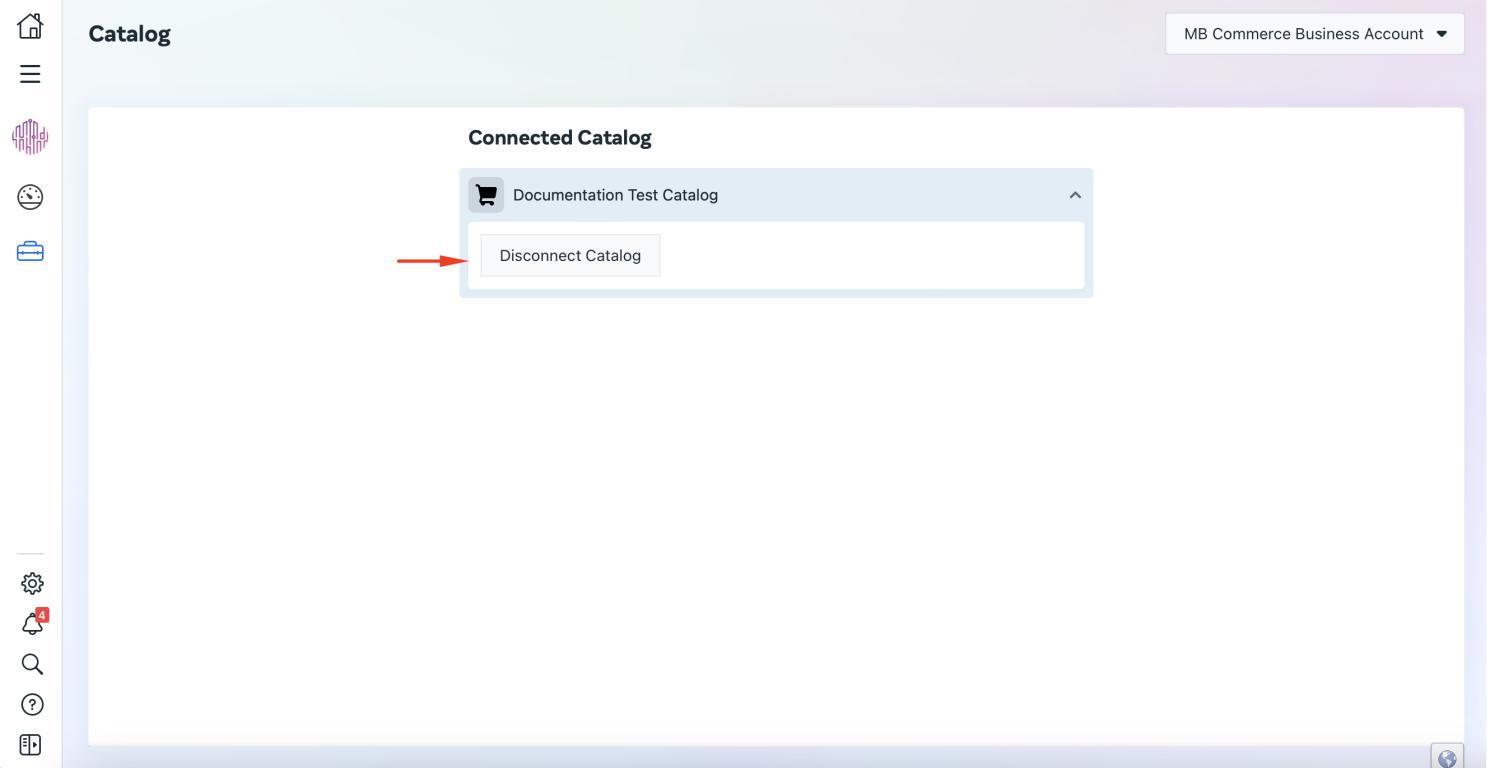
Refer to Facebook's Connect a catalogue to your WhatsApp business account page for further details.