In large organizations, different teams and departments run their own campaigns, track separate KPIs, and pursue unique objectives.
Group Management makes this possible within user role management for team structures. Thanks to it, teams within the same panel can work independently; they only see, edit, and analyze the campaigns that belong to their group. This ensures separation, prevents unwanted visibility, and maintains clean collaboration.
Imagine a retailer with Group A = Loyalty Team and Group B = Performance Marketing Team. Without Group Management, both teams would see each other’s campaigns, leading to confusion and the risk of accidental edits. With Group Management, Loyalty only sees loyalty-related campaigns, while Performance Marketing only sees performance-driven ones, even though both still share the same UCD.
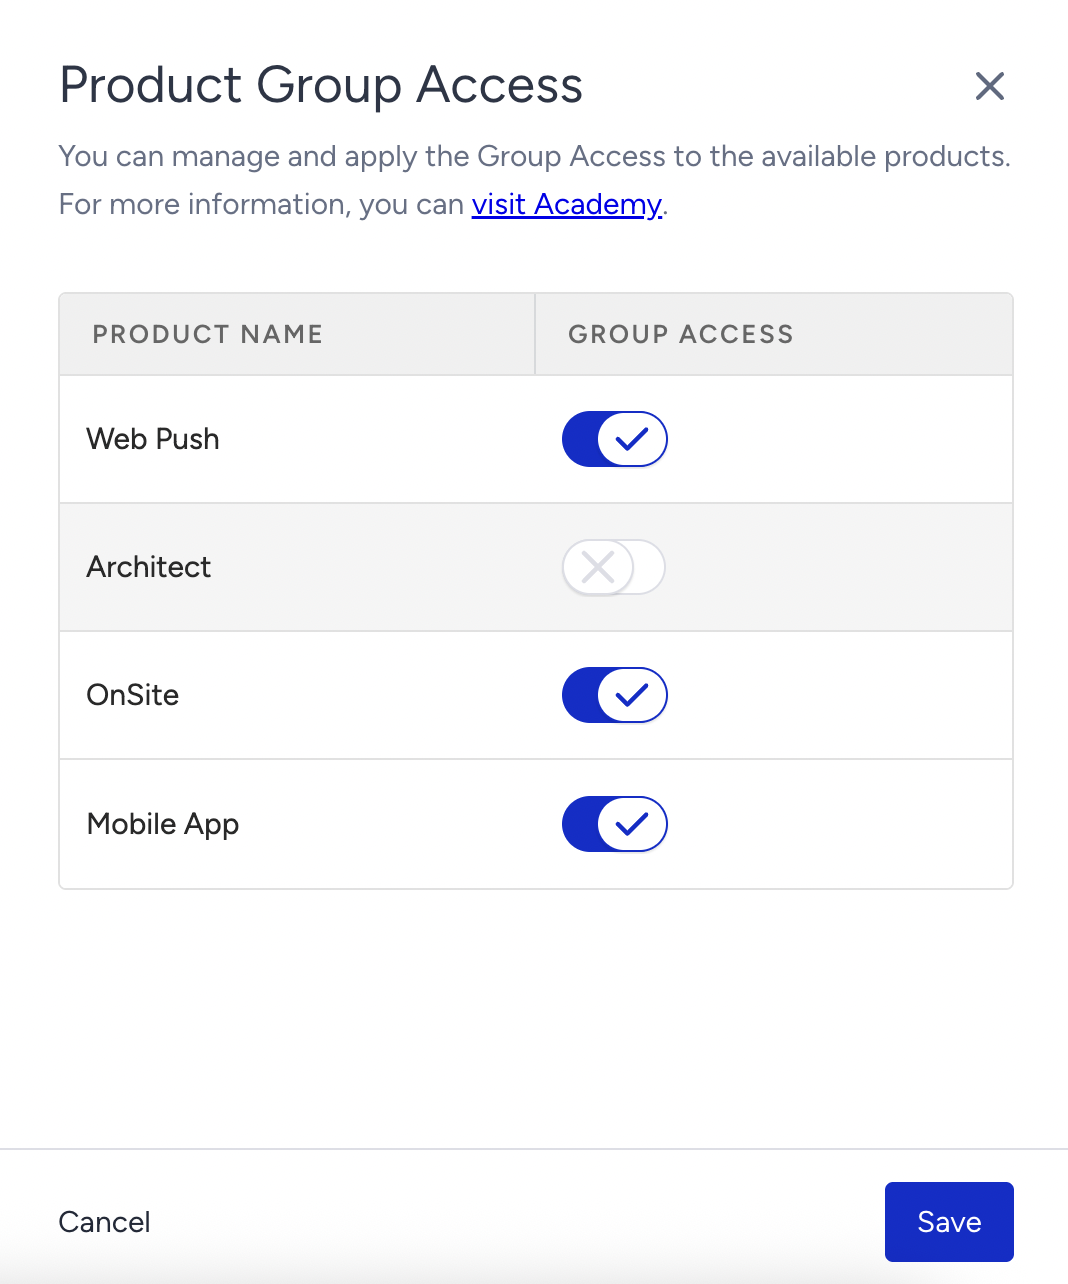
Group Level Access is currently only available for Architect, Web Push, OnSite, SMS, WhatsApp and Mobile App products. Additionally, you can only perform this action for these products if they are defined in your contract.
How Group Management works
Group Management is a part of User Management. Once enabled, Account Admins can create groups and assign users to them. Campaigns and analytics are then tied to those groups. The roles and their capabilities are:
Account Administrators
Create and manage groups
Assign Group Admins
Edit any campaign’s groups
Group Administrators
Manage members inside their own groups
Edit campaigns that belong to their group(s)
Group Members
See and edit only their group’s campaigns
Cannot assign campaigns to groups outside their own
Unassigned Users
Can see campaigns that are not assigned to a group, but cannot edit groups
When you are assigned with a group, you only see the campaigns belonging to that group, not the unassigned ones.
Access Behavior
Role | Edit Group Assignments | Campaign Access | Analytics Access |
|---|---|---|---|
Account Admin | All groups | All campaigns | All analytics |
Group Admin/Member | Only their own group | Only their own group’s | Only their own group’s |
Unassigned | None | All campaigns that are not assigned to a group | All analytics |
How to set groups
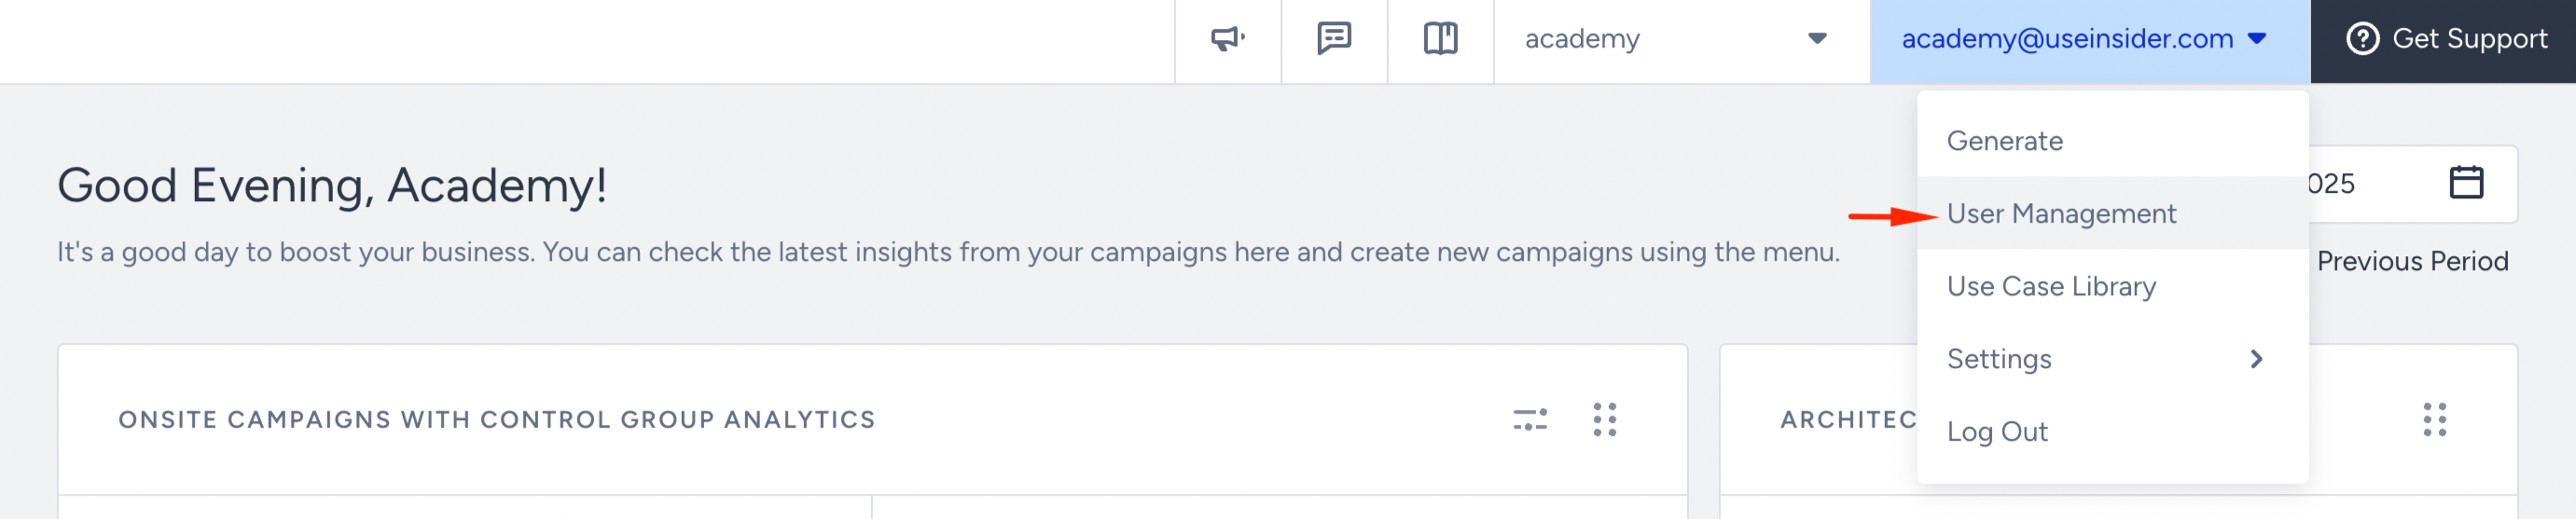
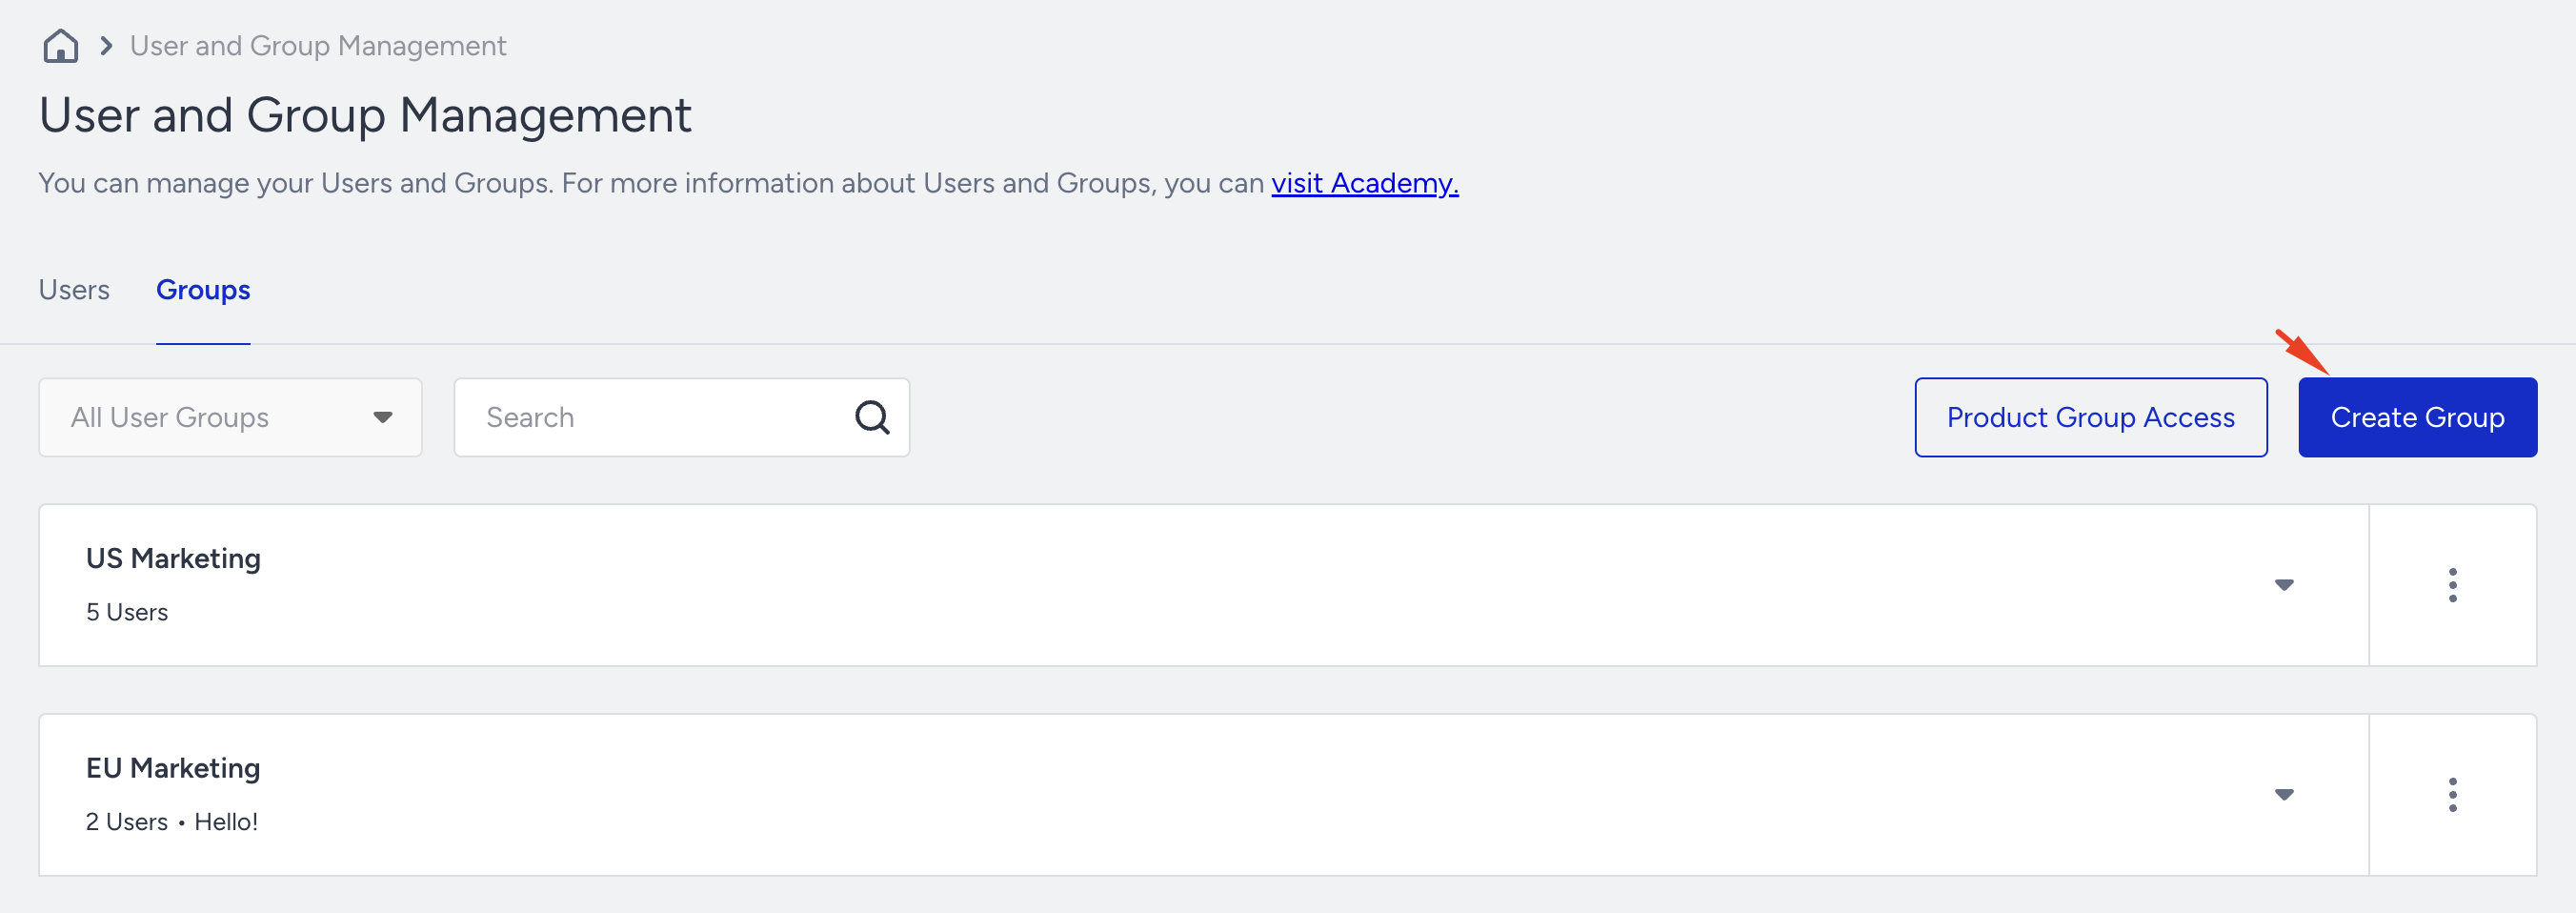
Navigate to User and Group Management through the submenu under your user name in the top right corner.
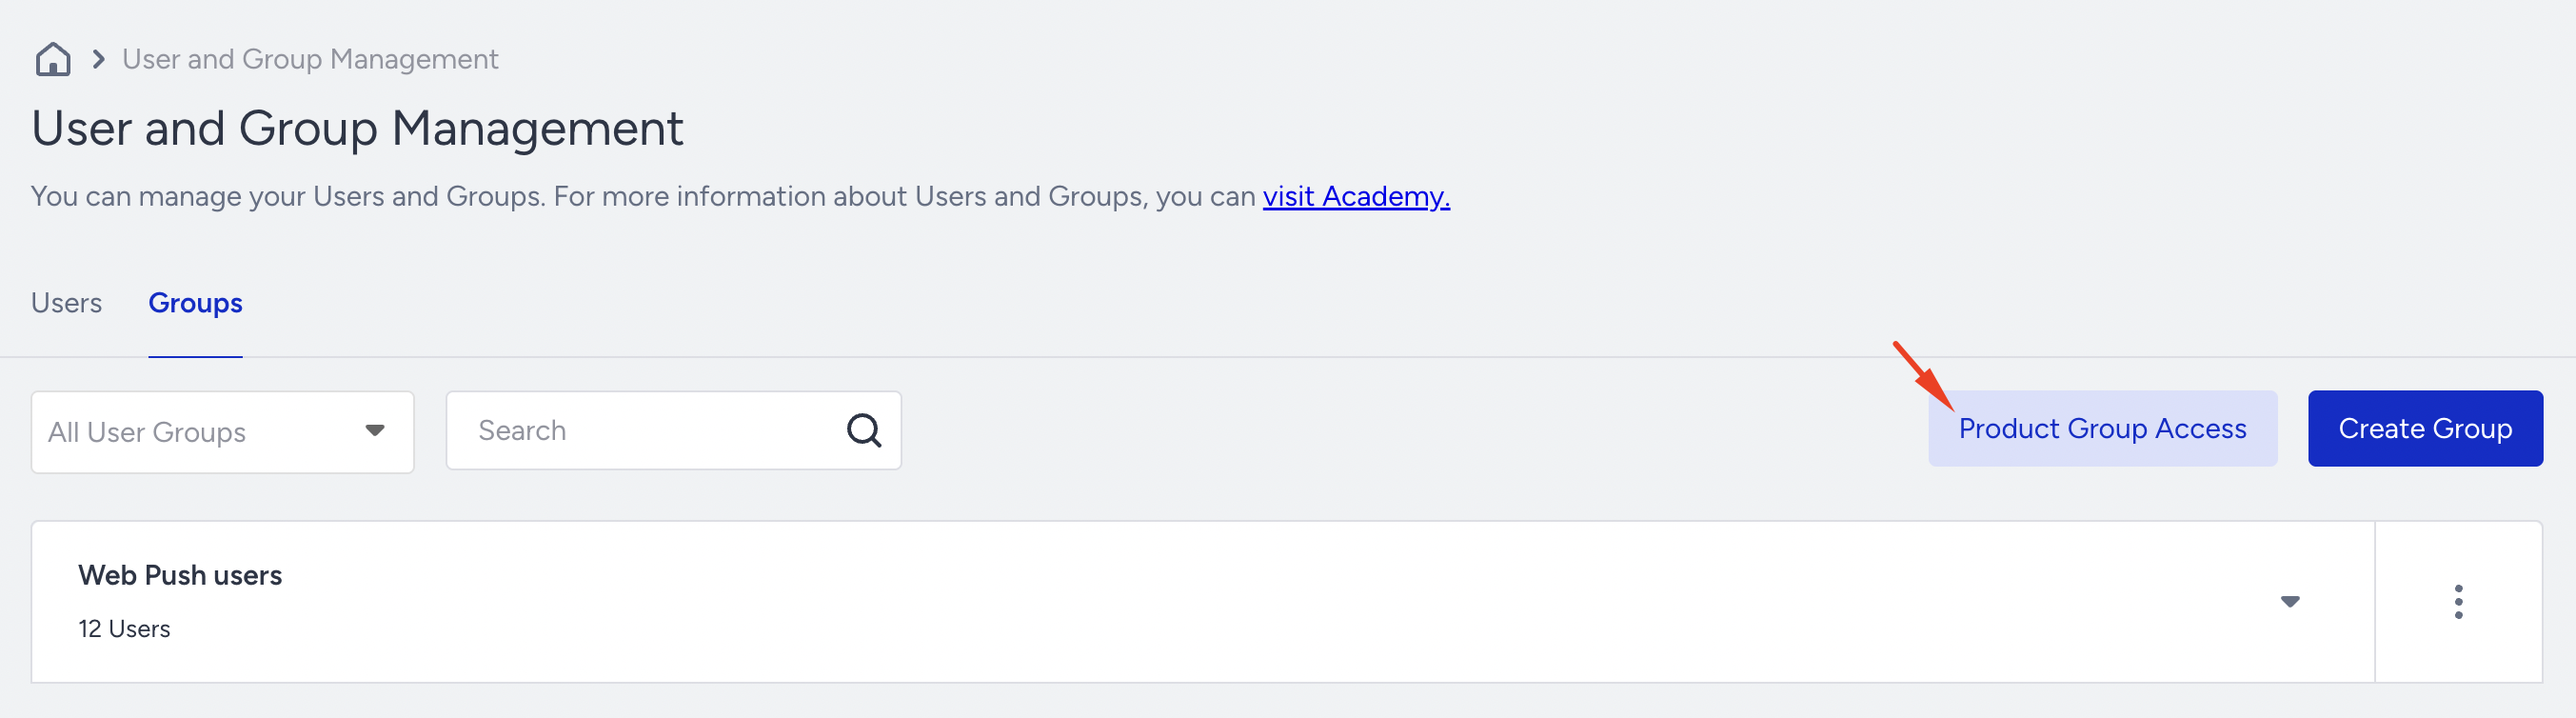
To access the Group Management page, click the Groups tab on the User and Group Management page.
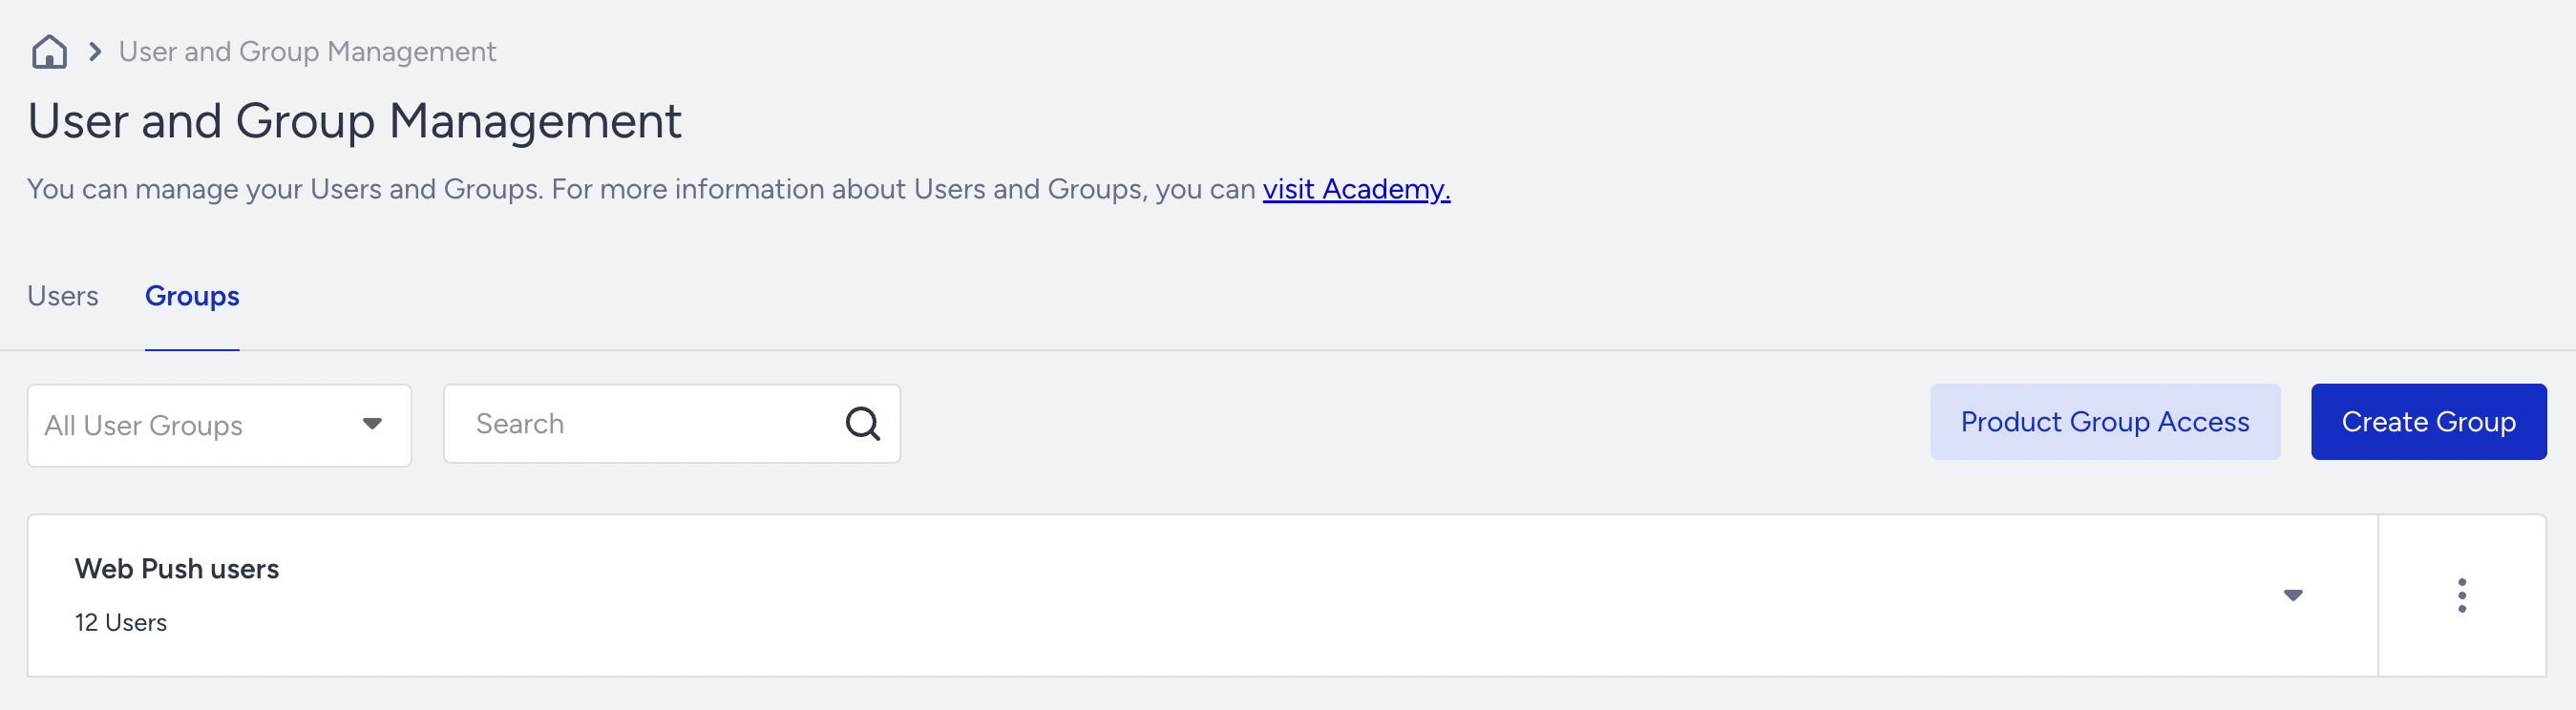
If this feature is not enabled for your account, you will see it locked when you land on the Groups page. Click the Request to Unlock button, and the Insider One team will reach out to you.

In the Groups tab, you can create user groups. Click the Create Group button.

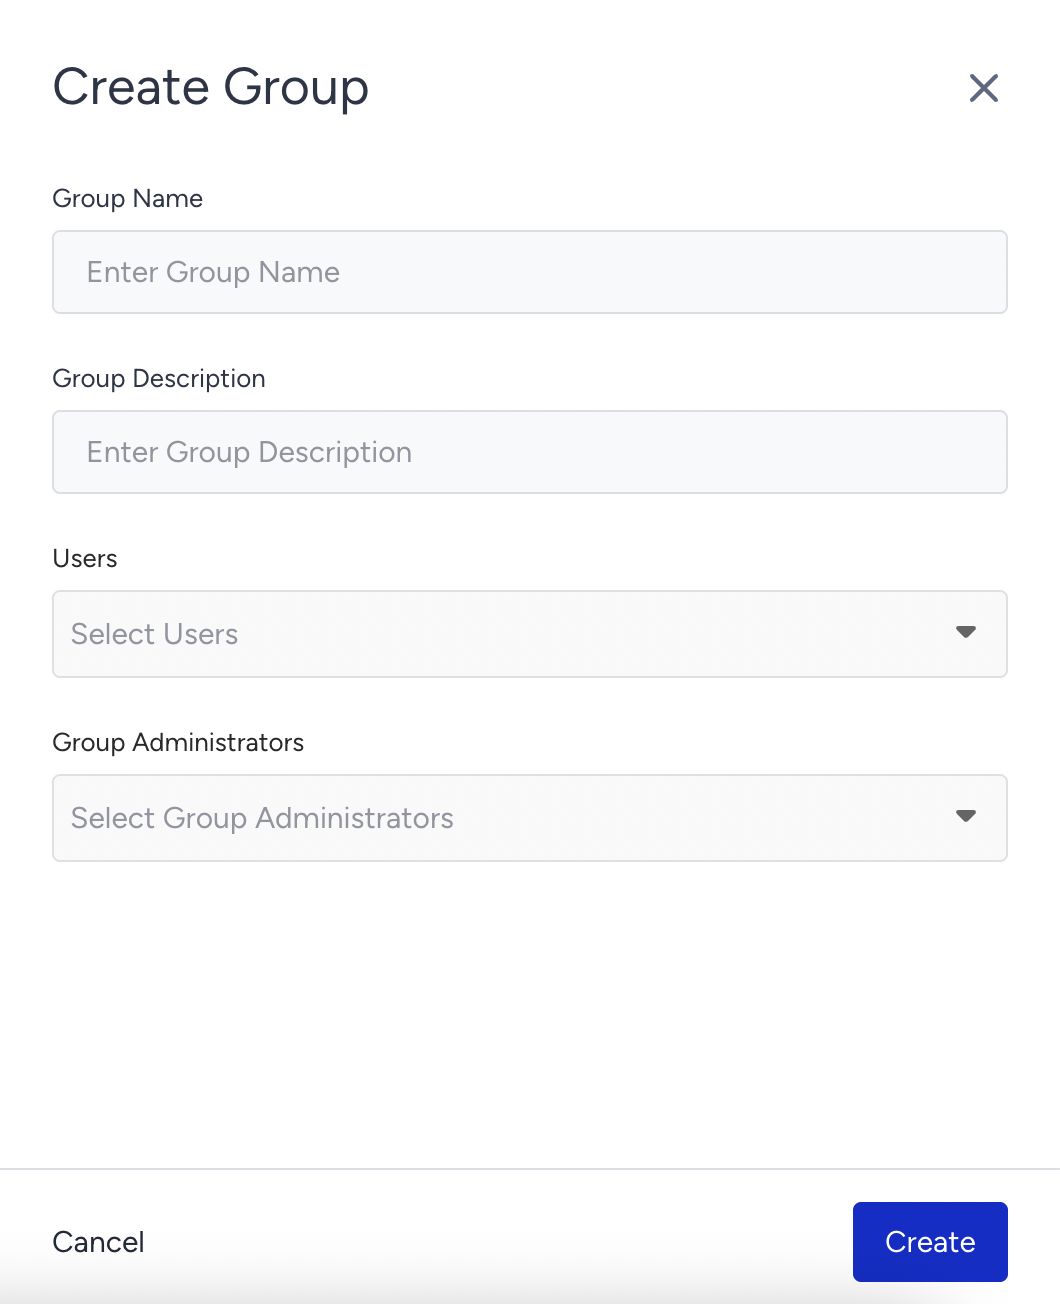
Specify the group name, description, group members, and group administrator, and click the Create button.
Manage product group access
The ability to enable or disable the Group Management feature on a per-product basis is available on the User Management page. To enable or disable specific product-specific features, click the Product Group Access button.
Enable or disable the group access toggle for the product.
Create a user group
Only Account Administrators can create user groups. For other roles, the Create Group button will be disabled.
Click the Create Group button on the Groups page to create a user group.
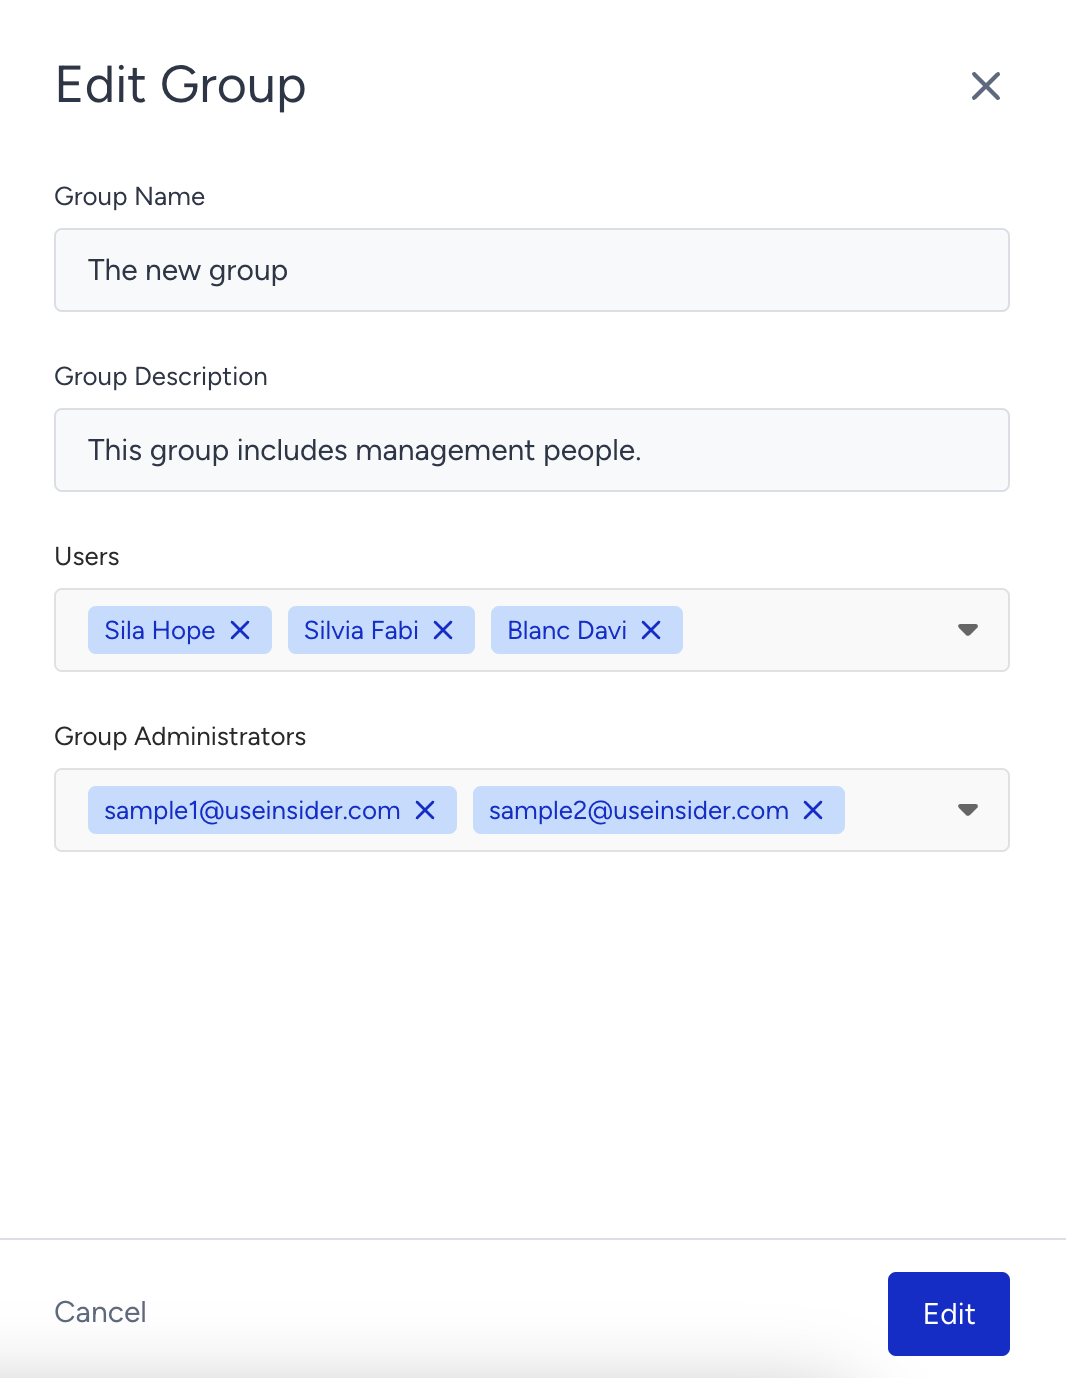
Enter the group name and group description, and select users and group administrators.
In the User dropdown, you can select from all users listed in the InOne panel. However, you will only find users with the Administrator role in the Group Administrator dropdown.
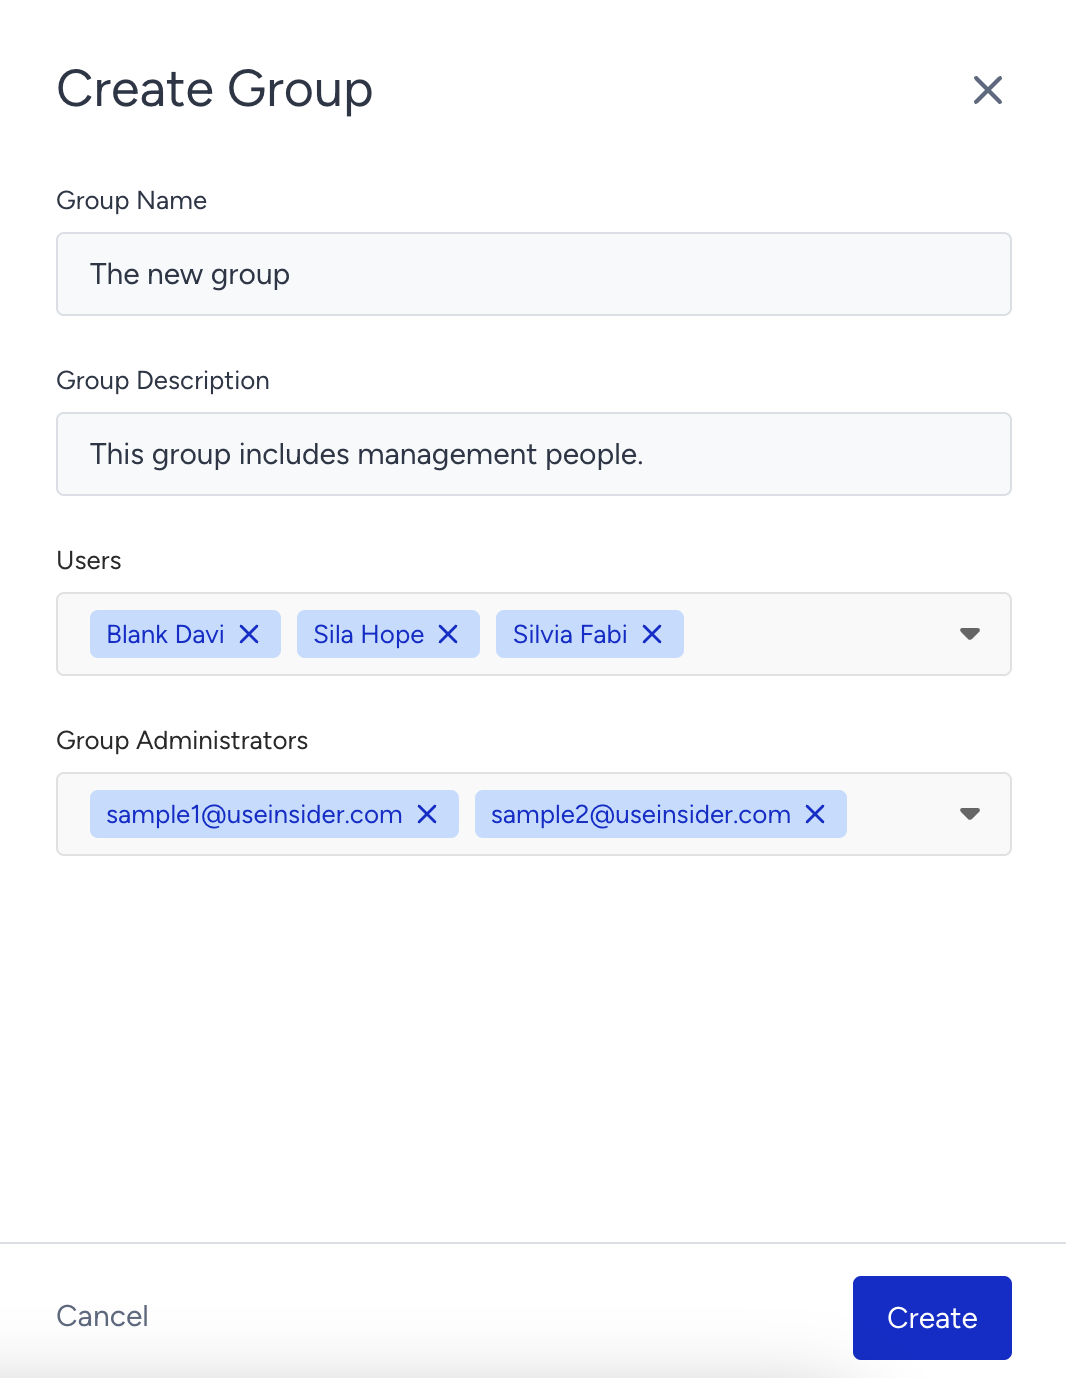
3. Click the Create button to finalize it, which will be listed on the Groups page.
Group Operations
To see the details of your group, click the Expand button. Then, you can view the users included.
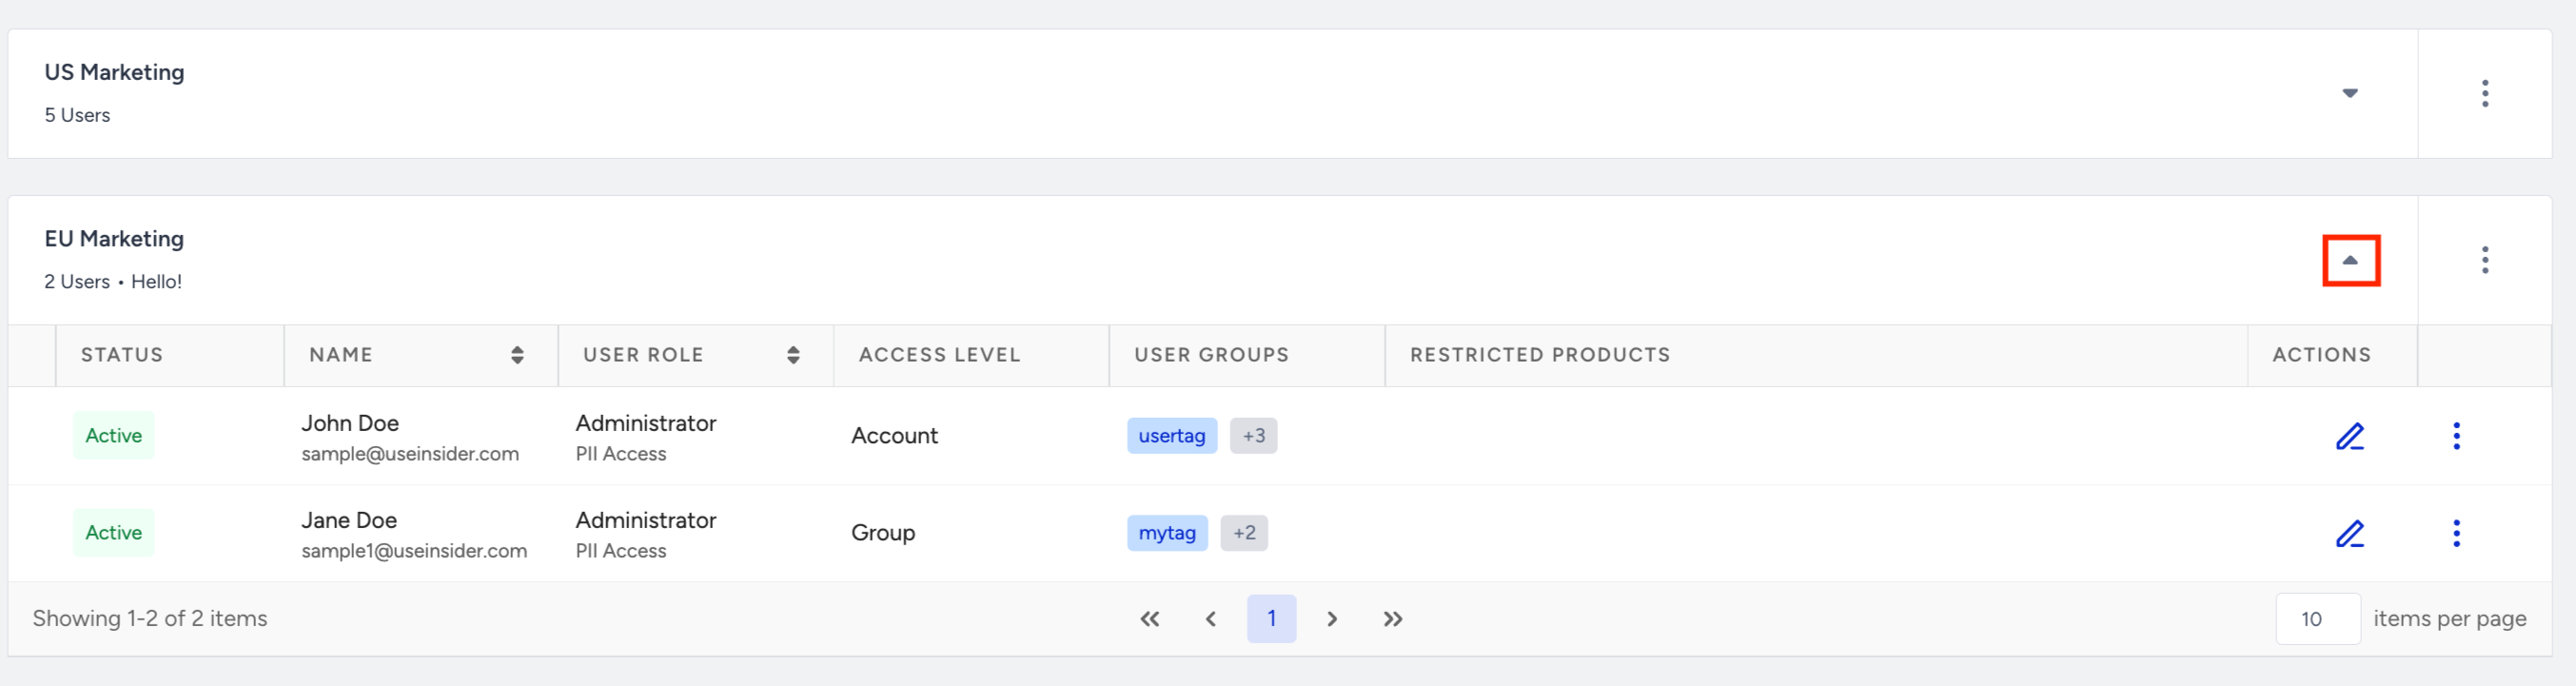
To edit a group, click the Edit Group button under the three-dot menu against the group.

If you have the account administrator role, you can change the group name and description, add or remove users from the group, and edit the group administrators. However, if you hold the group administrator role, you can only change users of the group(s) under your administration. To apply the changes, click the Edit button.
On the Users page, you can also add a user to a group and/or assign them as group administrators when you click the Edit button next to the user.
Only users with an Administrator role can be assigned as a Group Administrator. The checkbox will be disabled for other roles.

Click the Save button to save your configurations.
Campaign Group Access
After you create user groups and set up a campaign, you’ll see the Campaign Group Access section on the Launch step of the campaign setup process. (This section is hidden if the feature is disabled.)
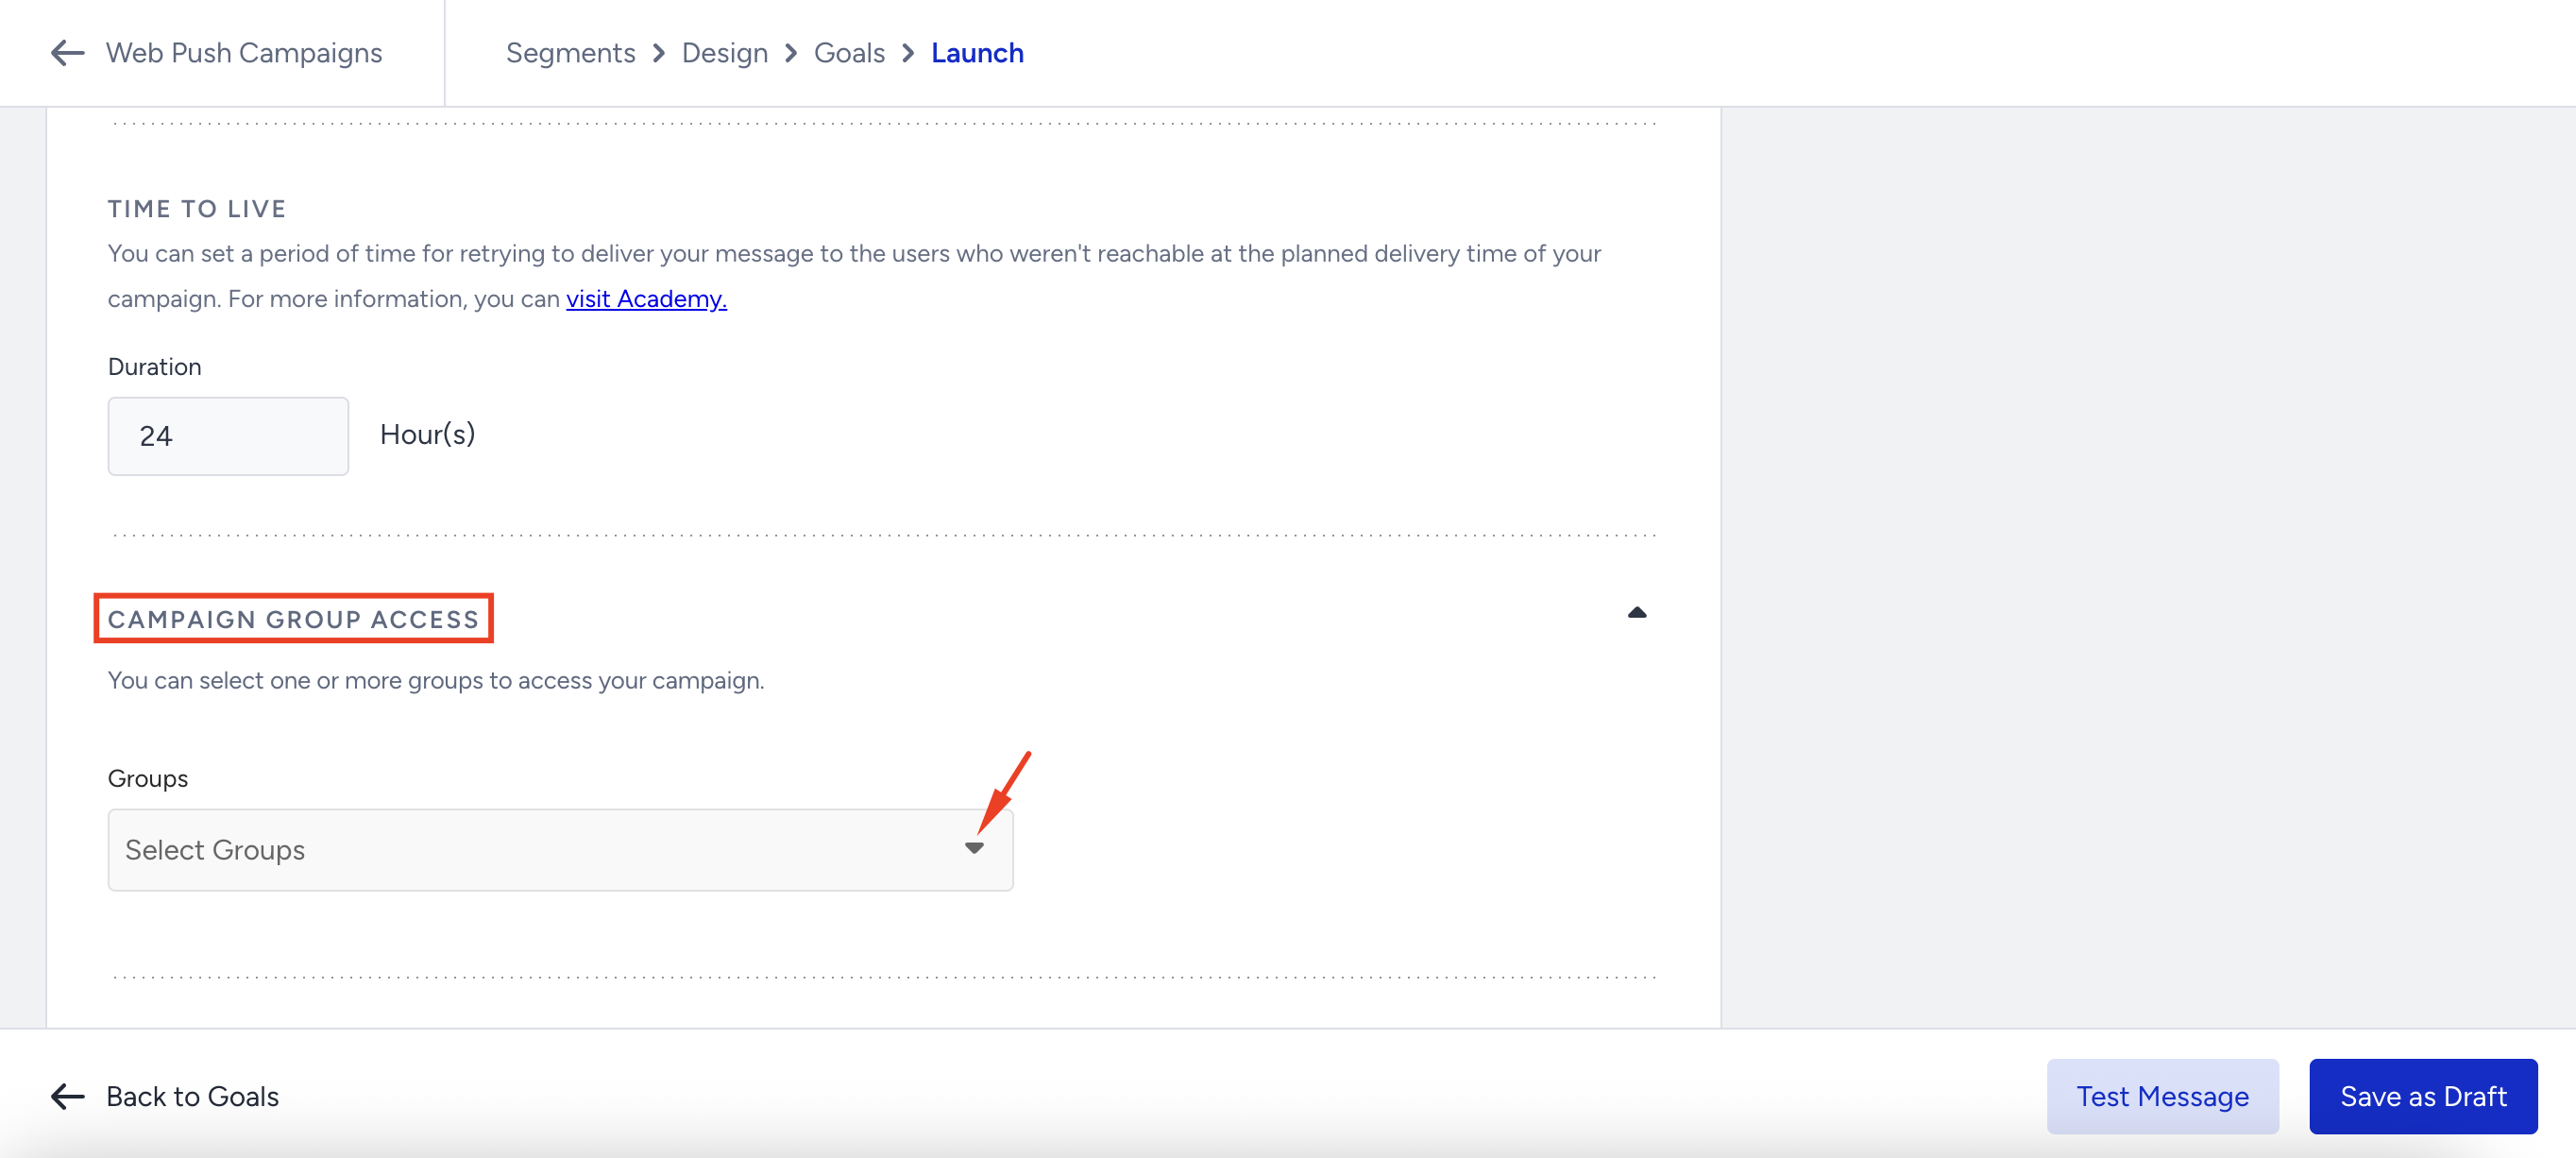
In this section, panel users will find a dropdown menu listing the groups they belong to. By selecting one or more groups and activating them, the visibility of that campaign on the listing page will be restricted to members of those groups.
Old campaigns remain global (visible to everyone). Admins can later assign them to groups if needed.
If a user clicks a link to a campaign outside their group, they’ll be redirected to the campaign list page instead of being able to access it.
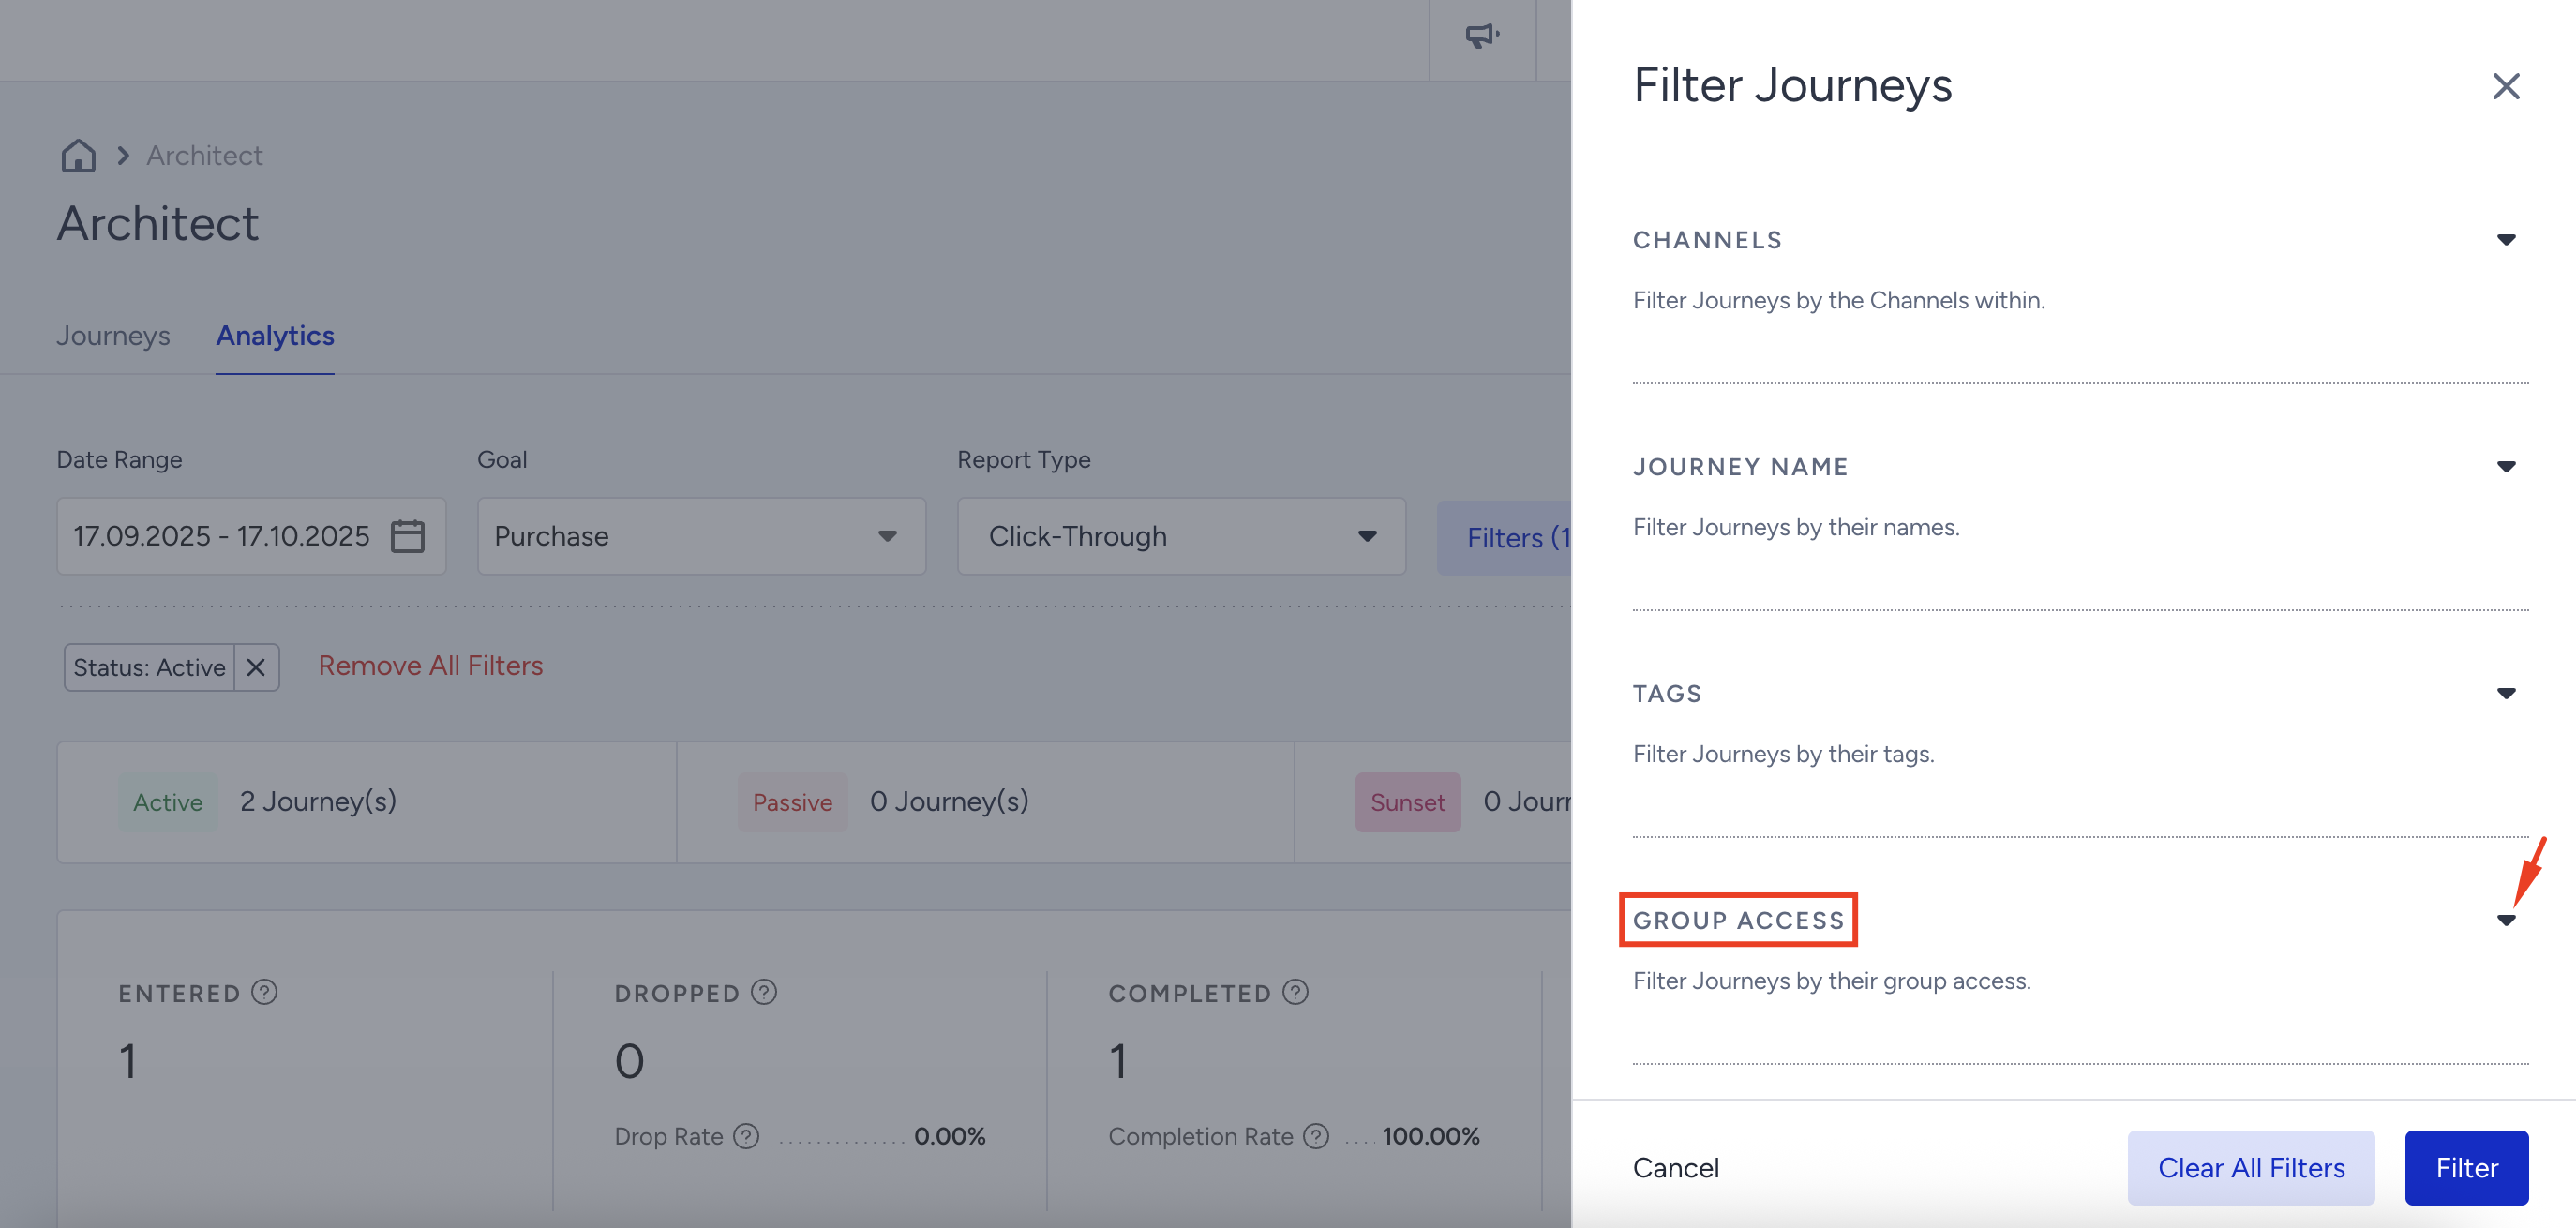
Analytics Group Access
Campaigns are also listed by group on the Analytics page.
Metrics and Listings: Both the key metrics at the top and the campaign listings at the bottom are displayed based on the user’s group membership.
Filter Option: A Group Access filter is available on the analytics pages. If you belong to multiple groups, you can filter results by the specific group(s) you want to view.