Suggested readings: The Importance of Email Testing, The Cost of Not Testing an Email
Before launching an email campaign, we strongly suggest you test your email design to see how your campaign will look, including how personalized and dynamic content will appear to your recipients.
Once you complete designing your email, you can send a test email and preview it in the Design and Launch steps.
Design Step
In the design step, you can test your email in different ways.
Preview and Test Message Modal
This modal allows you to preview the email as a specific user and send test emails directly from the design view.
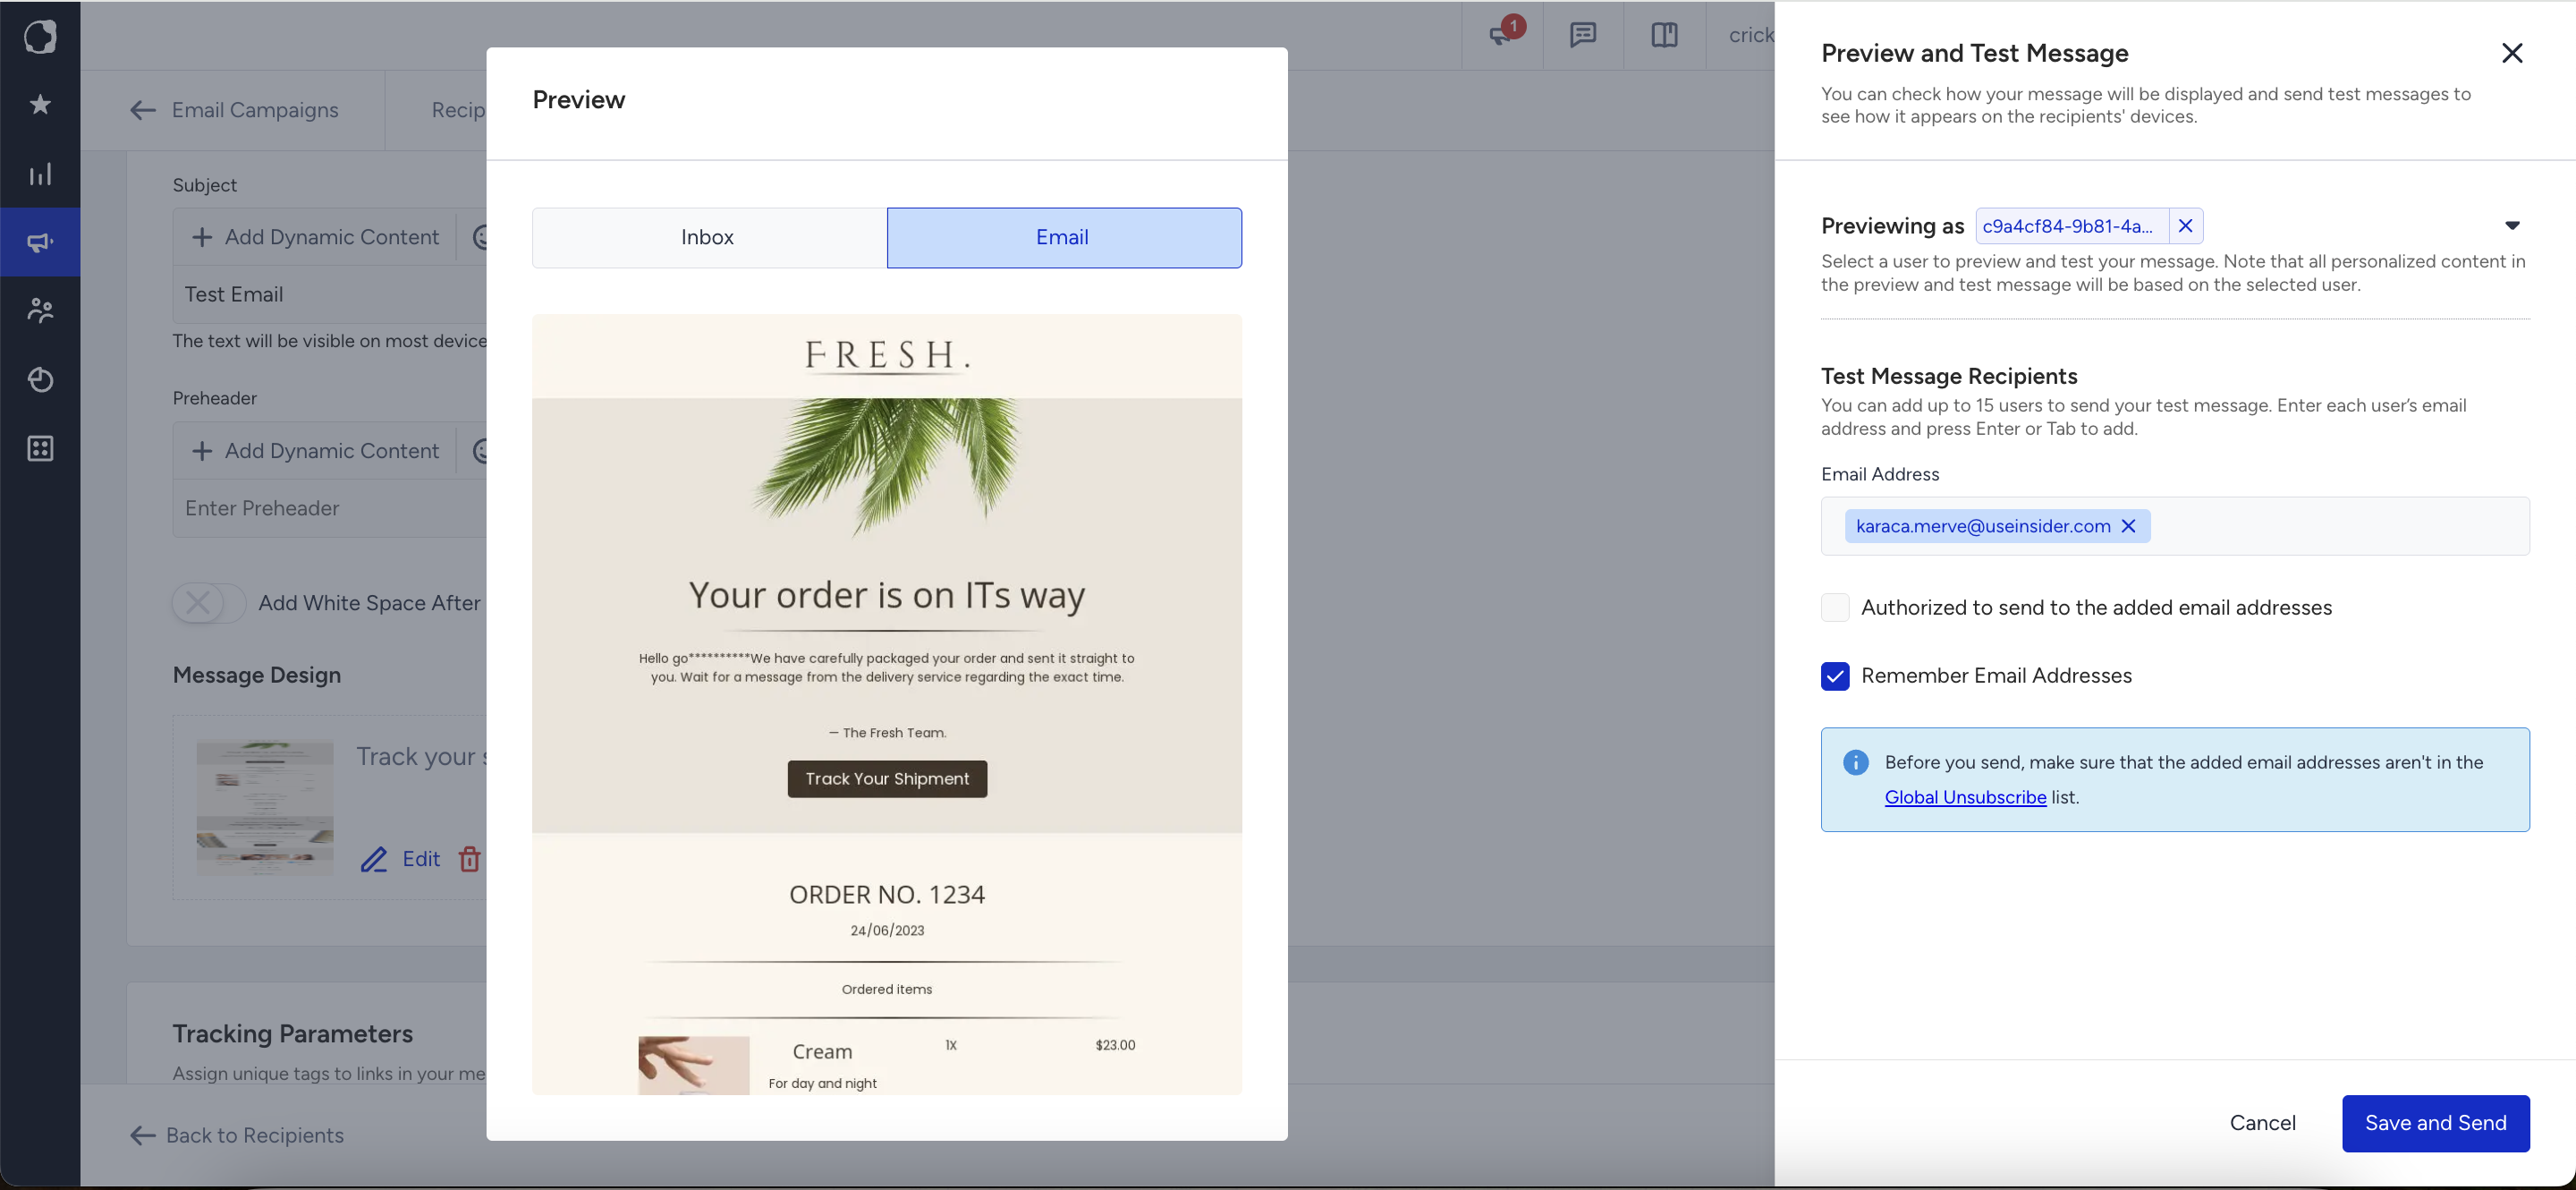
Click the Preview and Test Message button at the bottom of the Design step. The modal will open with two panels:
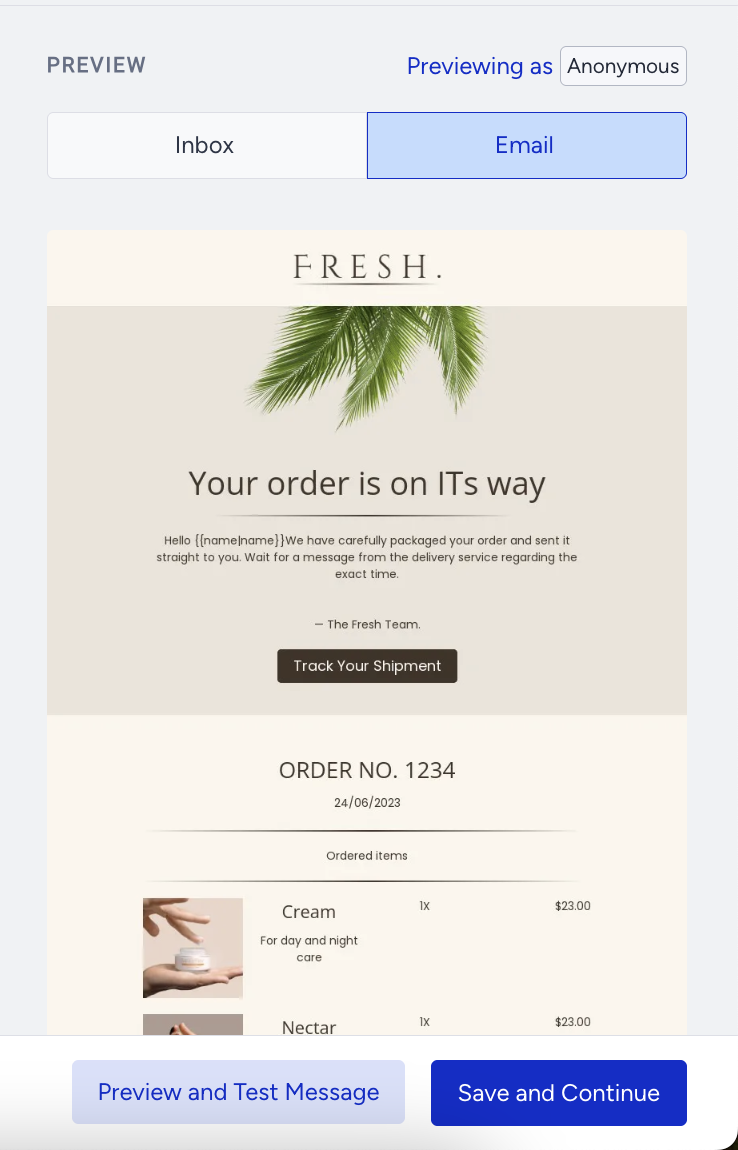
- Preview: Email preview with Email and Inbox tabs
- Preview and Test Message: A drawer with the Previewing As and Test Message sections.
Previewing As
The Previewing As section lets you preview your email as an Anonymous user or as a specific user from your audience. This is especially useful when your email contains dynamic content such as personalized attributes, coupon codes, or recommendation blocks.
Previewing as Anonymous
By default, the email is previewed in Anonymous mode. In this mode:
- Dynamic content placeholders are shown in human-readable format (e.g., {Attribute | fallback}).
- Coupon code placeholders appear as {@COUPON_CODE}.
- Recommendation blocks display a dummy/placeholder view.
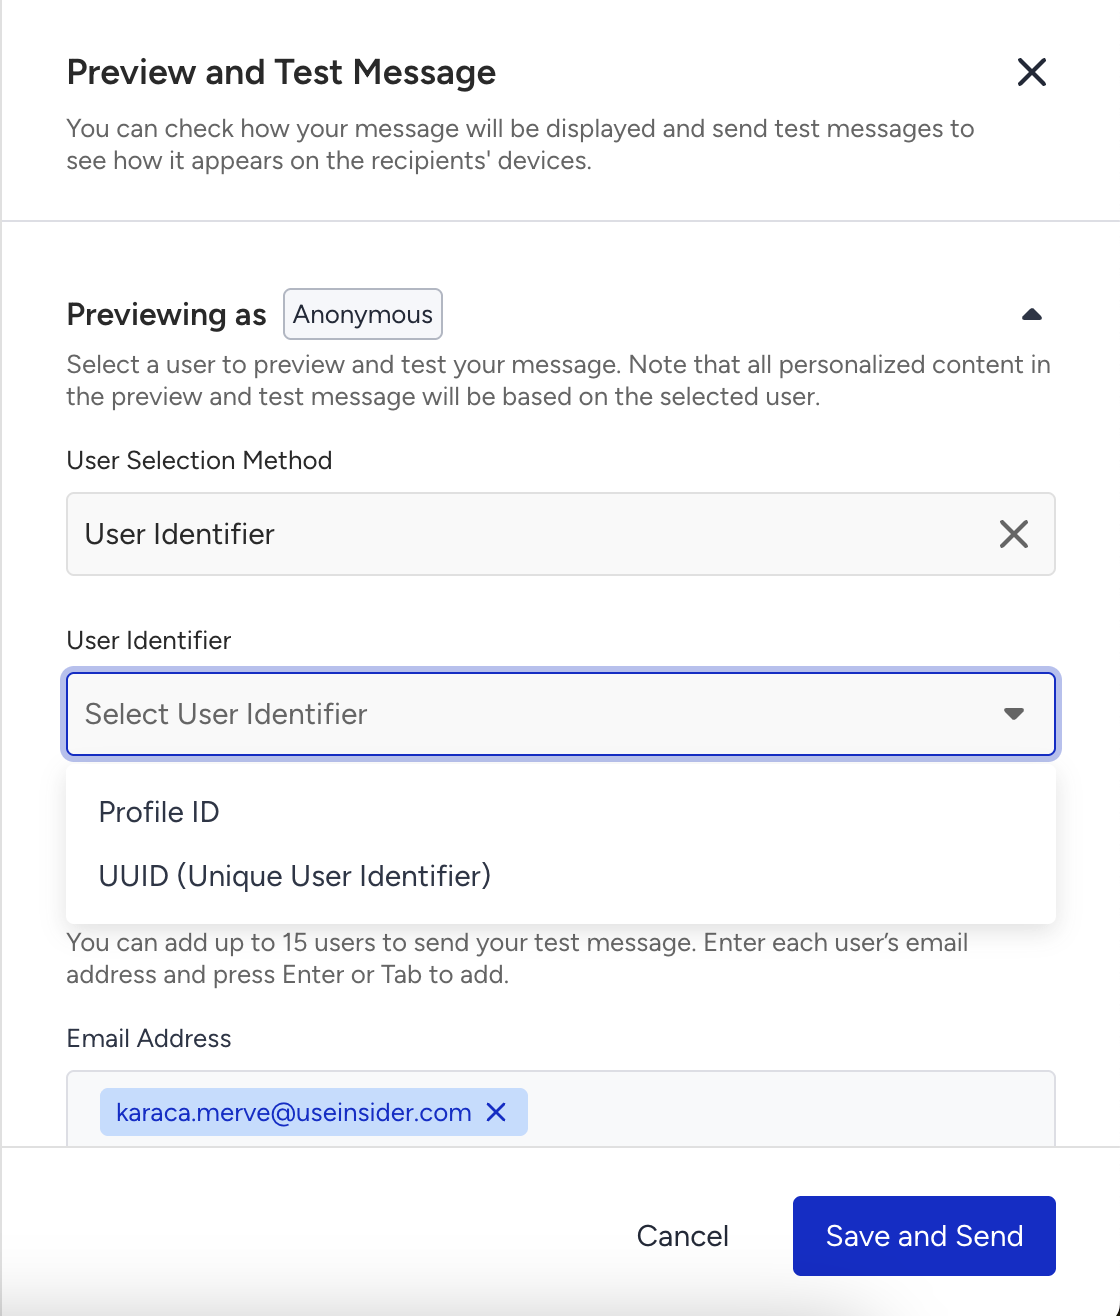
Previewing as a Specific User
To preview the email as a real user:
1. Select user mode in the Previewing As section.
2. Choose a selection method:
- User Identifier: Select an identifier type (Email, Phone Number, UUID, or Profile ID) and enter the corresponding value.
- Recent Users: Choose from a dropdown list of recently used users.
3. Click the Reload Preview button. The email preview will refresh to show the selected user's resolved content. The Previewing As chip in the Design step header will update to display the selected user's identifier.
How dynamic content behaves based on the selected user:
| Case | Behavior |
|---|---|
| User attribute found | The user's actual attribute value is displayed |
| No user attribute found | The fallback value is shown; if no fallback, the content is left empty |
| Coupon list not selected | {@COUPON_CODE} is displayed as a placeholder |
| Recommendation block | Hidden if no user data is available |
Auto-refresh: After selecting a preview user, any changes to the email design, subject, or preheader will automatically trigger a preview refresh after a short delay (~1 second). The Previewing As chip will remain visible during the refresh.
.png)
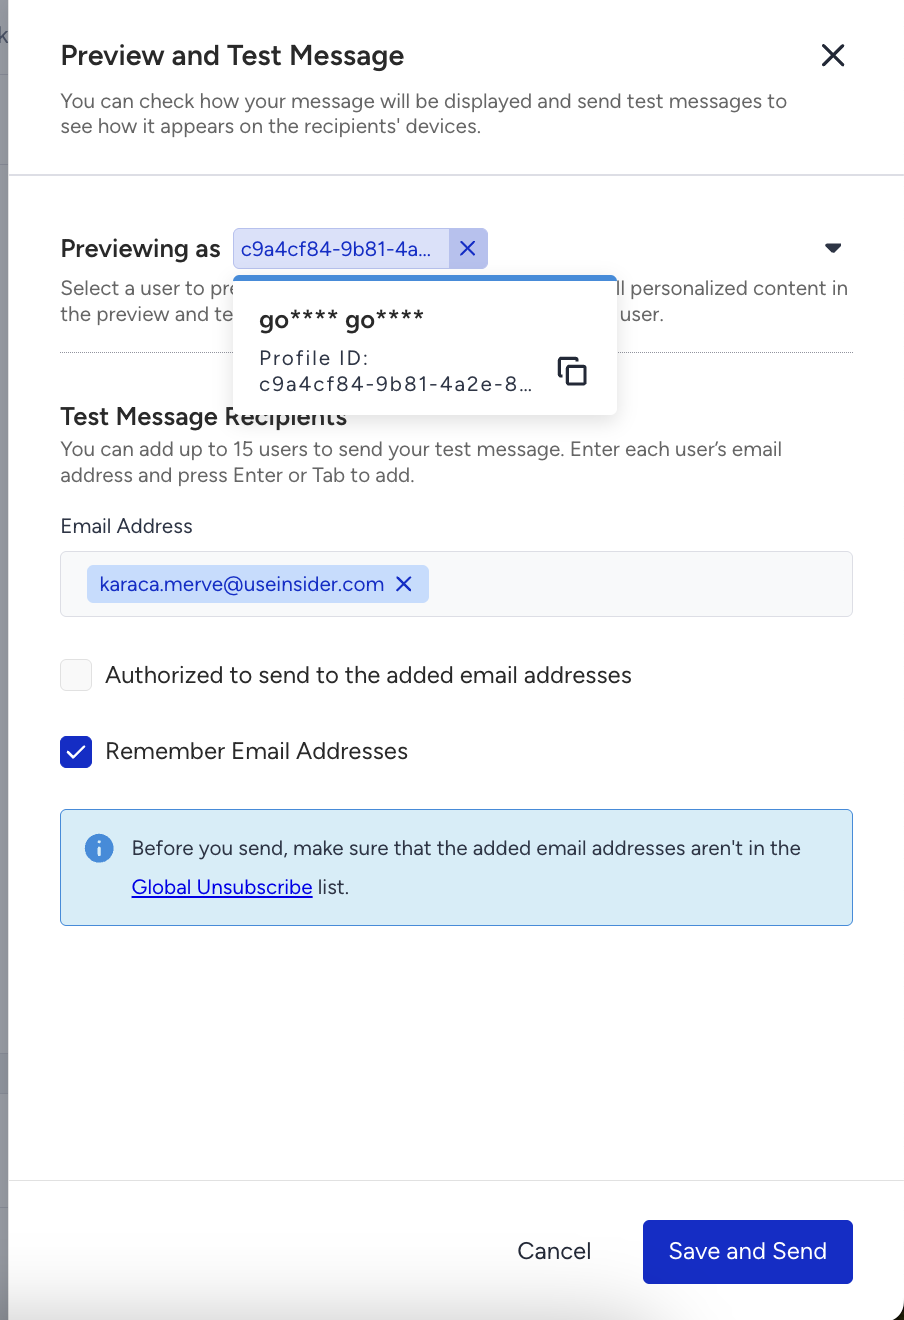
A Previewing As chip is displayed next to the Preview header in the Design step:
- Anonymous state: Hovering over the chip displays an info box with a Change User button that opens the modal.
- Selected user state: The chip shows the user's identifier (truncated if long). Hovering reveals the full identifier, a Copy button, and a Change User button. If you have PII (personally identifiable information) access, a See User Profile button will also appear.
- Clicking the close button clears the selected user and reverts the preview to Anonymous mode.
Test Message Recipients
You can send a test email to one or more recipients.
1. Enter the email address(es) you want to send the test to and press Enter after each to add it as a tag. Your own email address is auto-populated. You can add up to 15 email addresses.
2. Check the Authorized to send to the added email addresses box. You must check this box to confirm recipient consent. Optionally, check the Remember Email Addresses box to restore this list the next time you open the modal.
3. Click the Save and Send button.
Any unsaved changes to the subject or preheader are saved automatically before sending.
If a preview user is selected, the test email is sent using that user's resolved content. If in Anonymous mode, the email is sent with your own attributes.
Once the sending is completed, the modal closes automatically.
Email and Inbox Preview tabs
In this section:
- Email tab: Shows the rendered email template thumbnail. If a preview user is selected, the personalized version is displayed.
- Inbox tab: Shows how the email appears in an inbox view, including the subject line, preheader, and sender name.
If no template has been loaded, the Email tab shows a No Design Preview empty state.
In the experiment campaigns, the variant you are currently editing will be previewed and sent as the test message. An on-page message will appear if the campaign has a Variant B.
In the localization campaigns, the localized version you are currently editing will be previewed and sent as the test message. An on-page message will appear if the campaign has been localized.
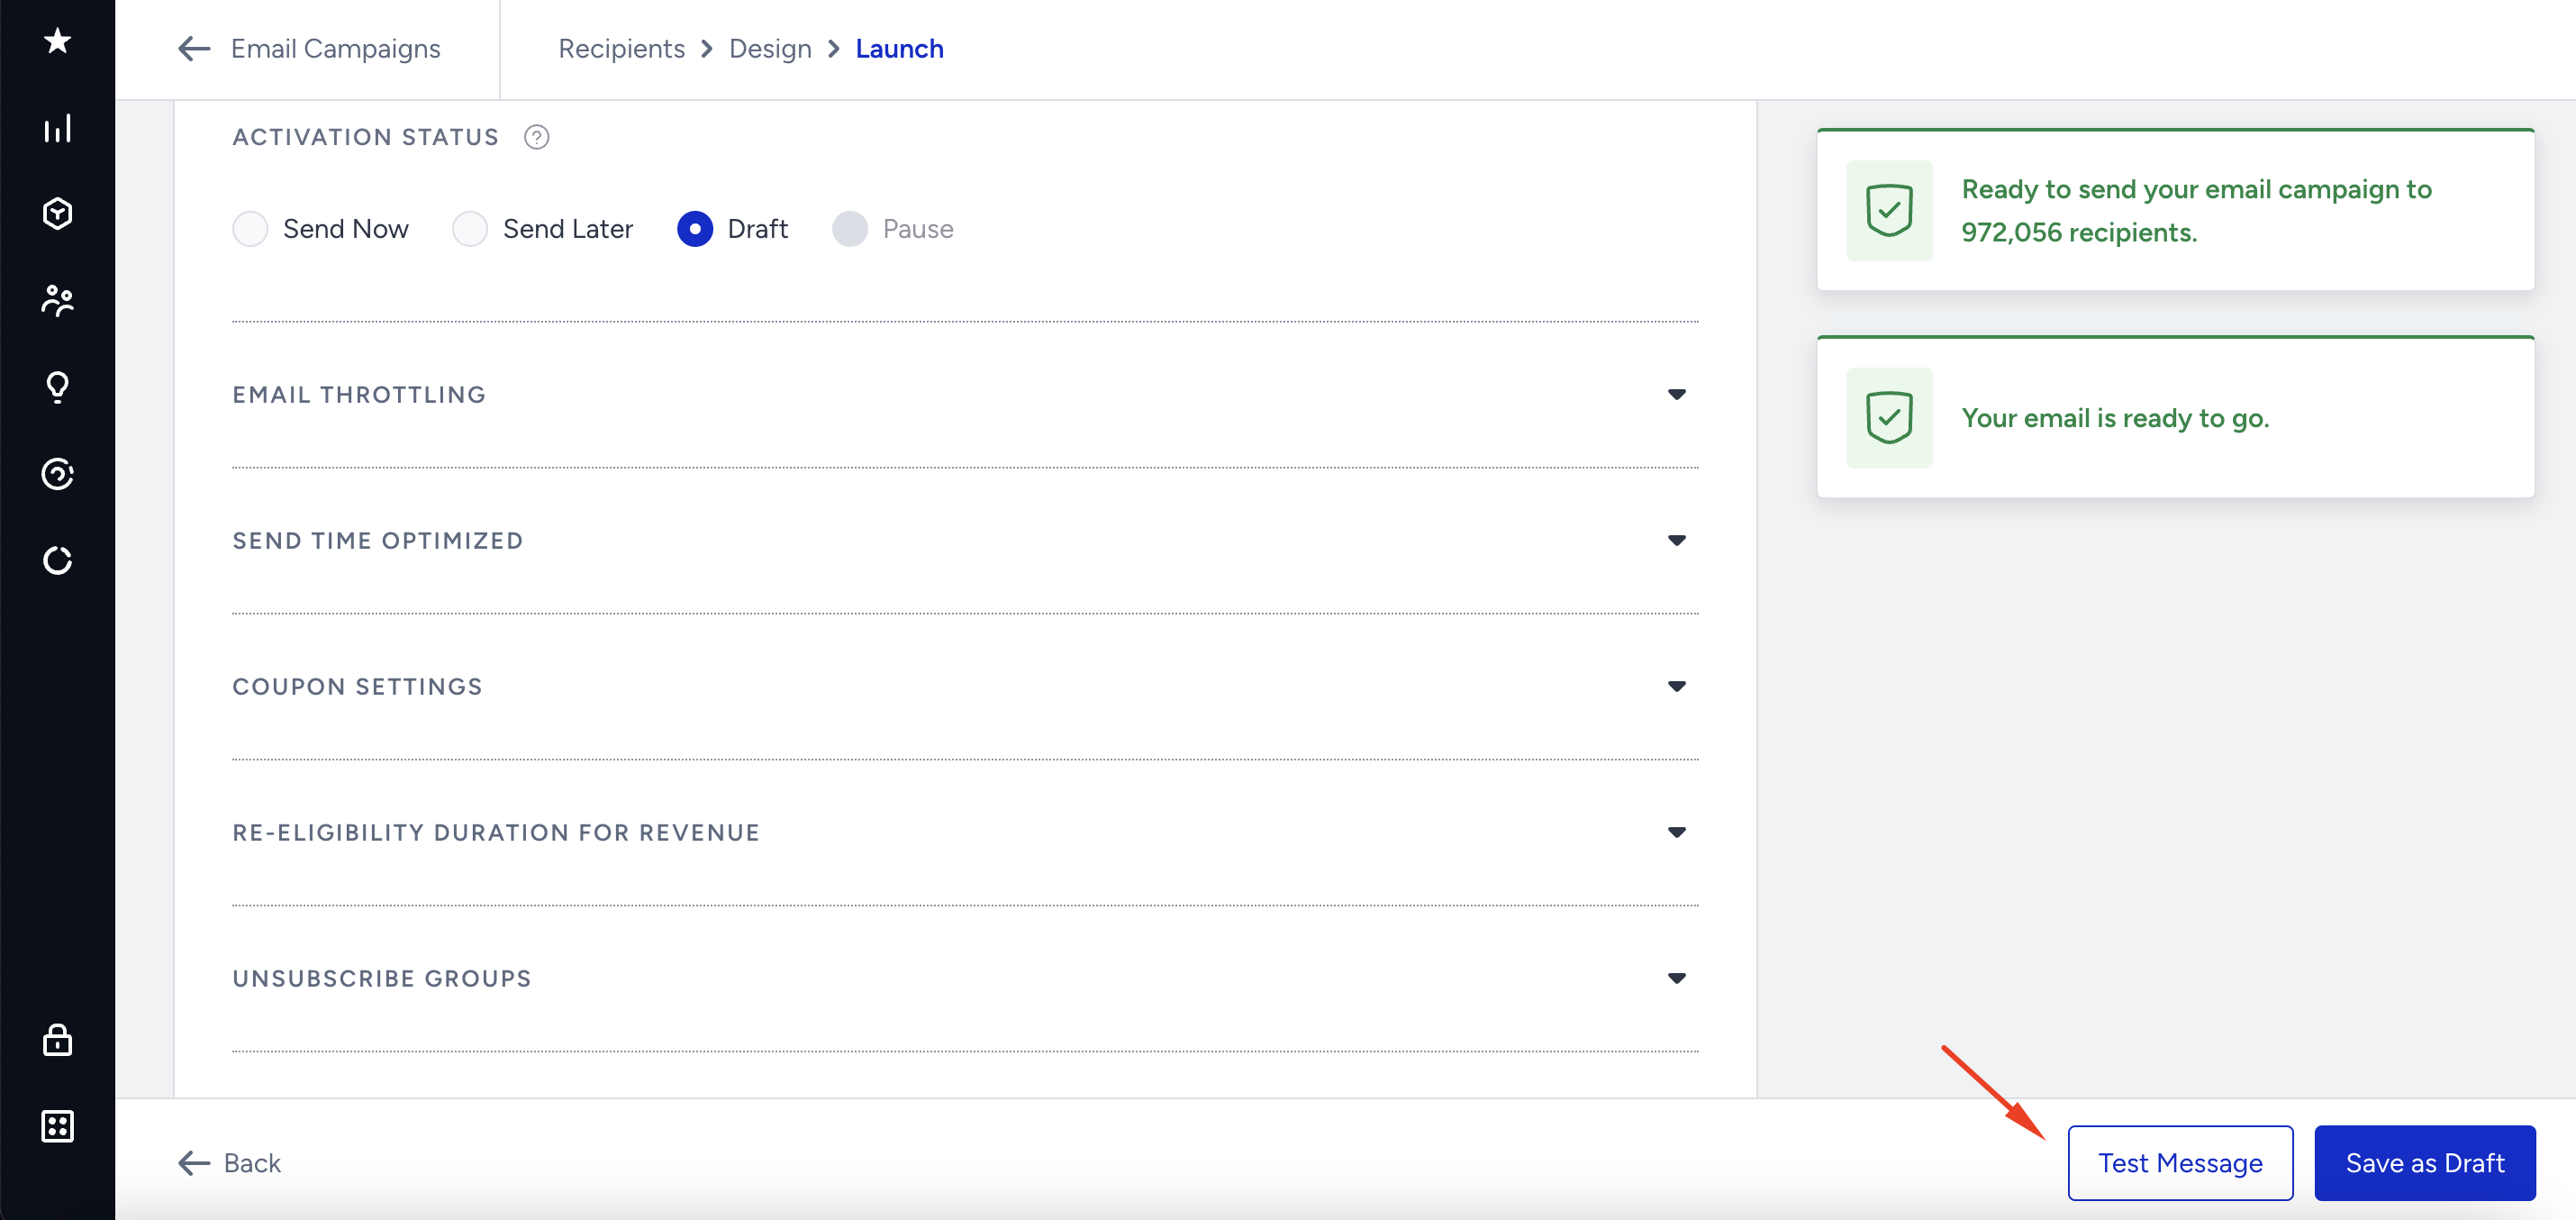
Launch Step
You can also send a test email while on the Launch step. This test email aims to test the tracking parameters inside the email, along with its design.
1. Click the Test Message at the bottom of the page.
2. Check the Authorized to send to the added email addresses box. If you want to use the email addresses later, check the Remember Email Addresses box.
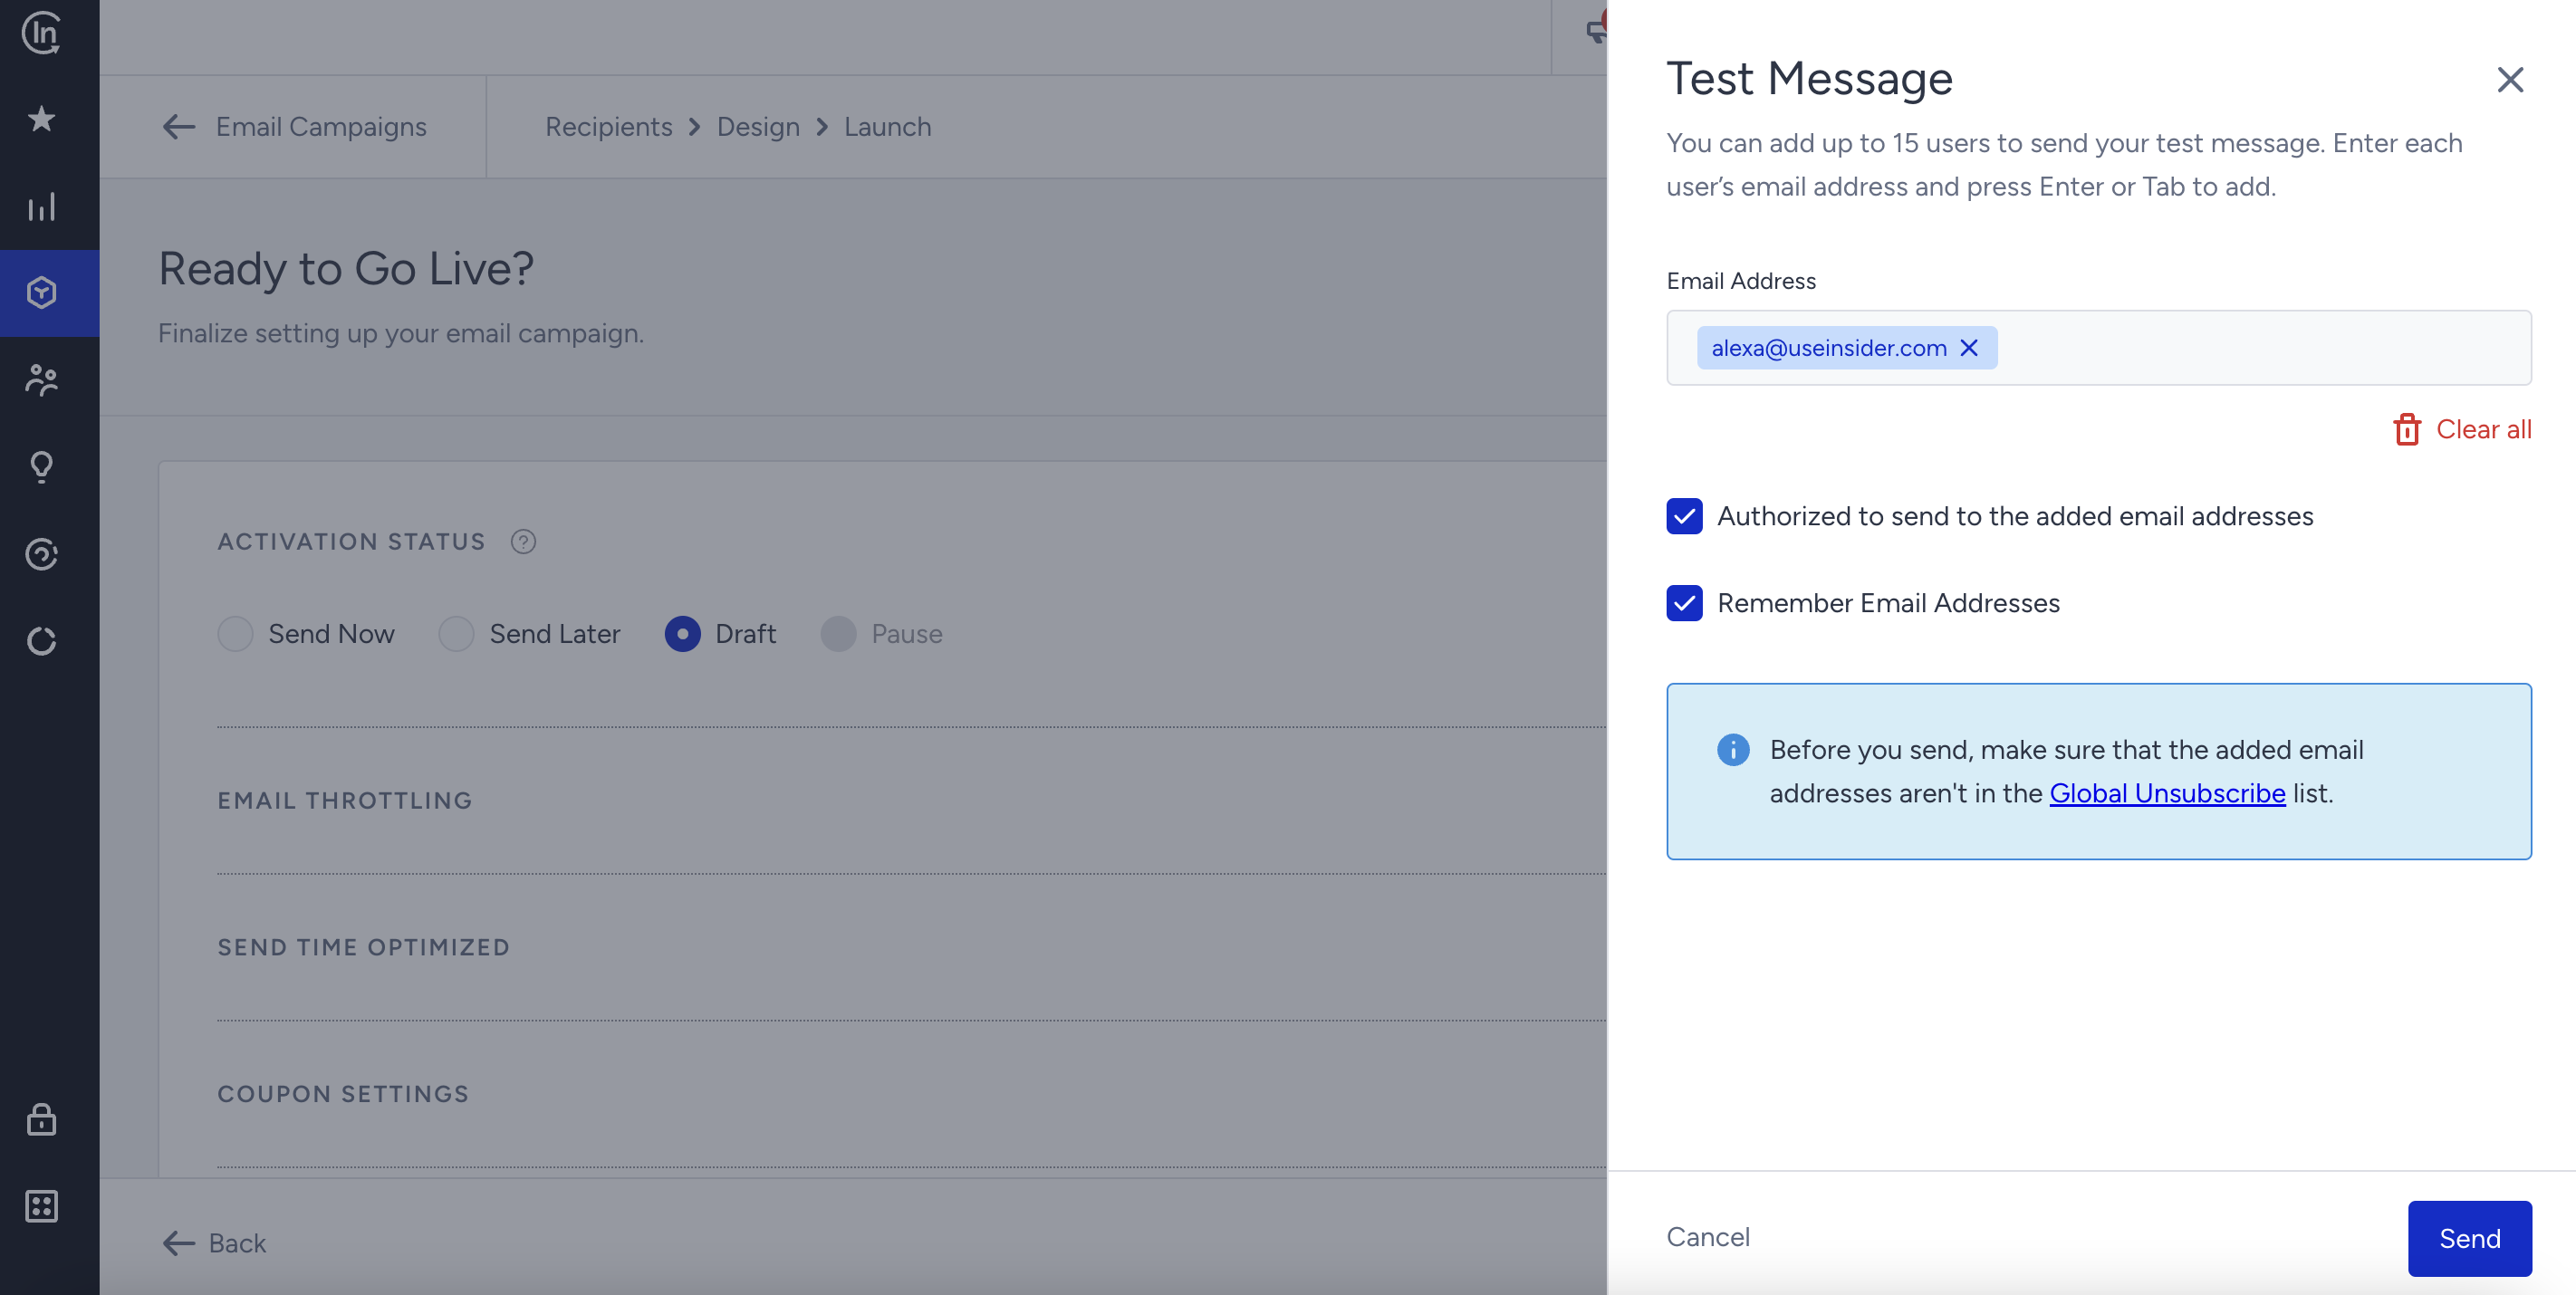
The test email you receive will include the tracking parameters configured in the campaign.